
Overview of Vcomp.dll Errors
Vcomp.dll is a dynamic link library file that is essential for running certain software programs on your Windows operating system. However, it is not uncommon to encounter errors related to the vcomp.dll file. These errors can prevent the affected programs from running properly or even cause them to crash.
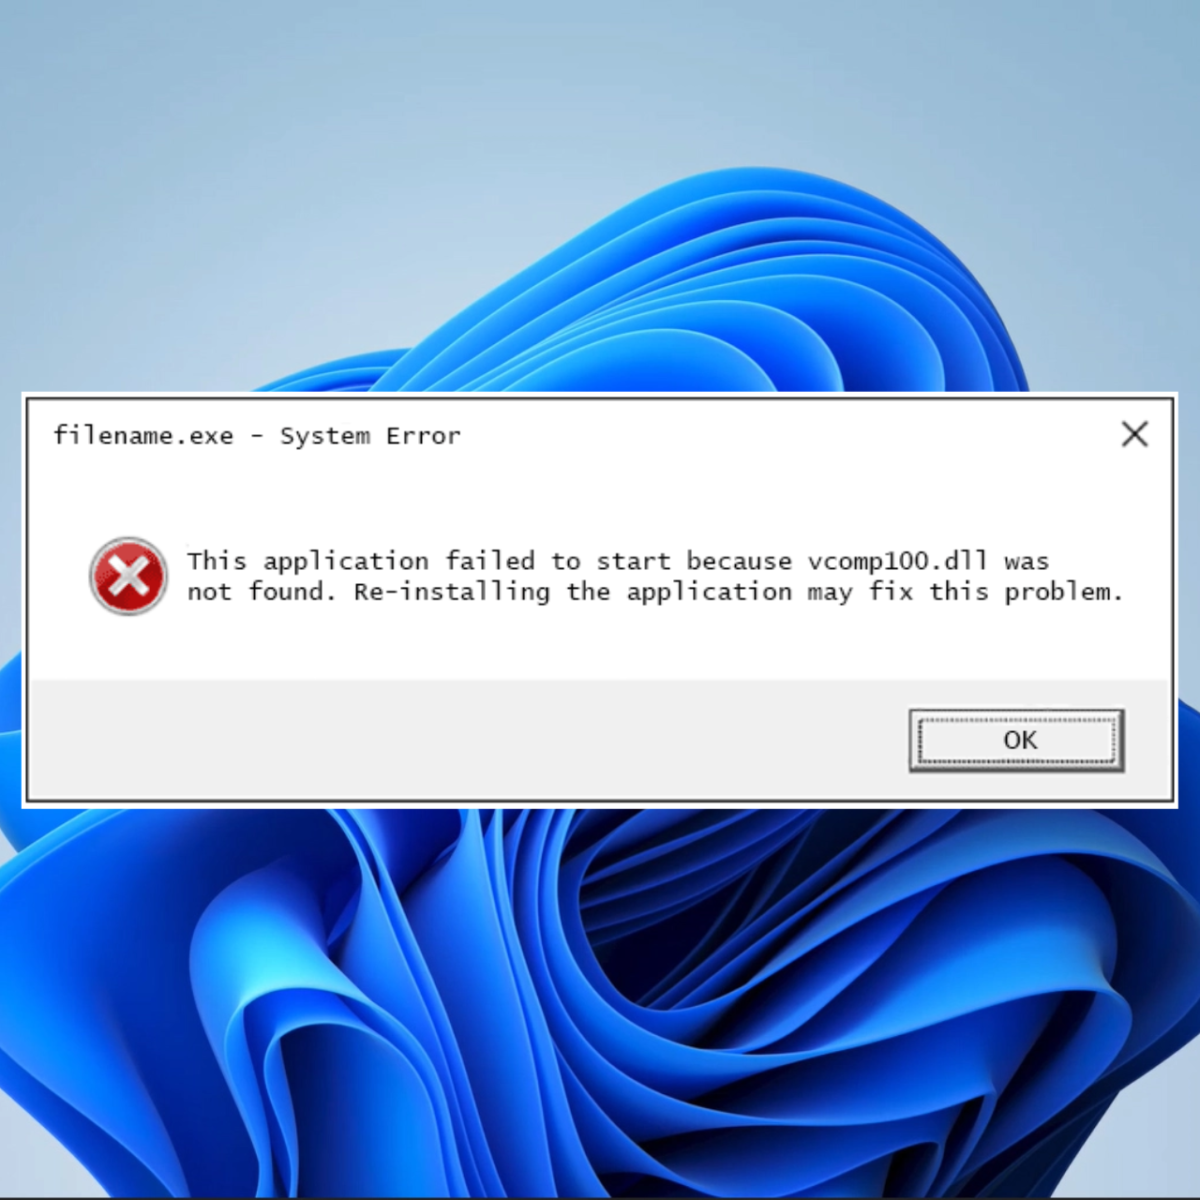
There are several common vcomp.dll errors that you may come across. One of the most common errors is the “vcomp.dll not found” error, which indicates that the file is missing from your computer. This can happen if the file has been accidentally deleted or if it has been moved to a different location.
Another error that you may encounter is the “vcomp.dll is missing” error. This error is similar to the “not found” error but usually occurs when the file is present but cannot be accessed or loaded properly. This can be caused by various factors such as file corruption, incorrect file permissions, or conflicts with other software on your system.
In addition to these errors, you may also encounter vcomp.dll errors that are specific to certain programs or applications. These errors can vary in nature and may include messages such as “vcomp.dll is not a valid Win32 application” or “vcomp.dll caused an invalid page fault.”
When you encounter any of these vcomp.dll errors, it is important to address them promptly to ensure the smooth functioning of your computer and the affected programs. In the following sections, we will discuss various methods to fix vcomp.dll errors and get your programs up and running again.
What is Vcomp.dll?
Vcomp.dll is a vital system file that is part of the Microsoft C/C++ OpenMP Runtime Library. It is responsible for providing support for parallel programming in Windows operating systems. The “Vcomp” in the file name stands for “Visual C++ OpenMP,” indicating its association with Microsoft’s Visual C++ development tools.
This dynamic link library file contains functions and resources that enable programs to utilize multiple threads for concurrent execution. In simpler terms, it allows software programs to divide their workload into smaller tasks and execute them simultaneously on different processor cores or threads, thereby improving performance and efficiency.
Various software applications, particularly those developed using the Visual C++ programming language, make use of the features provided by the vcomp.dll file. These programs rely on this file to handle the process of creating, managing, and synchronizing threads for parallel processing.
It is worth noting that the vcomp.dll file is not specific to a particular version of Windows. It exists in various versions, with each version being compatible with a specific edition of the Visual C++ software development environment. Therefore, you may find different versions of the vcomp.dll file on different systems based on the installed Visual C++ runtime libraries.
It is crucial to have the vcomp.dll file present and functioning correctly for any software that utilizes parallel programming. Without this file, programs that rely on parallelism may encounter various errors and malfunctions, leading to reduced performance or even program crashes.
Now that you understand the purpose of the vcomp.dll file let’s delve into the common causes of vcomp.dll errors and explore the methods to fix them.
Common Causes of Vcomp.dll Errors
Vcomp.dll errors can occur due to a variety of reasons. Understanding the common causes can help you troubleshoot and resolve these errors effectively. Here are some of the most frequently encountered causes of vcomp.dll errors:
- Missing or Corrupted File: One of the common causes of vcomp.dll errors is when the file is missing or becomes corrupted. This can happen due to accidental deletion, malware infections, or issues during software installation or uninstallation processes.
- Outdated or Incompatible Software: Another common cause is outdated or incompatible software. If you are running a program that requires a specific version of vcomp.dll, using an outdated or incompatible version can lead to errors.
- Hardware or Driver Issues: Hardware or driver problems can also result in vcomp.dll errors. If there are issues with your computer’s hardware components or if you have outdated or faulty device drivers, it can interfere with the proper functioning of vcomp.dll.
- Registry Issues: Problems with the Windows registry can also contribute to vcomp.dll errors. The registry is a database that stores important settings and information for your operating system and installed programs. If there are corrupt or invalid entries related to vcomp.dll, it can lead to errors.
- Conflicts with Other Programs: Sometimes, conflicts between different software programs can cause vcomp.dll errors. If two programs use different versions of vcomp.dll or if they have incompatible dependencies, it can result in errors when trying to run either program.
It is important to remember that these are just some of the common causes of vcomp.dll errors, and there can be other factors at play as well. As we move forward, we will explore various methods to fix vcomp.dll errors and address these underlying causes effectively.
How to Fix Vcomp.dll Not Found Errors
Encountering a “vcomp.dll not found” error can be frustrating, but there are several methods you can try to resolve it. Here are some effective solutions to fix vcomp.dll not found errors:
- Reinstall the Program: One of the simplest ways to fix the error is by reinstalling the program that is showing the vcomp.dll not found error. This will ensure that all the necessary files, including vcomp.dll, are properly installed.
- Update Your Drivers: Outdated or incompatible device drivers can often lead to vcomp.dll errors. Updating your drivers, especially those related to your graphics card and processor, can help resolve these issues. You can visit the manufacturer’s website or use third-party driver update software to update your drivers.
- Run a System File Checker Scan: The System File Checker (SFC) tool is a built-in Windows utility that scans for and restores corrupted system files. Running an SFC scan can help repair any damaged or missing system files, including vcomp.dll. To run an SFC scan, open the Command Prompt as an administrator and type “sfc /scannow” without the quotes, then press Enter.
- Restore Your System to a Previous State: If you recently installed a new program or made system changes before encountering the vcomp.dll not found error, you can try restoring your system to a previous restore point. This can roll back any problematic changes and restore the missing vcomp.dll file.
- Use System Restore Point: Another option is to utilize the System Restore feature in Windows. System Restore allows you to revert your computer’s state to a previous point in time when everything was functioning properly. Choose a restore point before the vcomp.dll error occurred, and let the system restore process complete.
- Perform a Clean Installation of Windows: If all else fails, you can opt for a clean installation of Windows. This will reinstall the operating system and replace any missing or corrupted system files, thus fixing the vcomp.dll not found error.
- Scan for Malware: Malware infections can also cause vcomp.dll errors. Run an antivirus or anti-malware scan on your system to detect and remove any malicious software that may be interfering with the proper functioning of vcomp.dll.
- Use a System Optimization Tool: It can be beneficial to use a reliable system optimization tool that can scan for and fix various issues on your computer, including vcomp.dll errors. These tools can automatically detect and repair any problems related to DLL files, registries, and more.
By following these methods, you should be able to fix vcomp.dll not found errors and ensure smooth operation of your programs. However, if the problem persists or if you are unsure about performing advanced troubleshooting, it is recommended to seek assistance from a professional technician or the software’s support team.
Option 1: Reinstall the Program
If you are encountering a “vcomp.dll not found” error, one of the simplest and most effective solutions is to reinstall the program that is displaying the error message. Reinstalling the program ensures that all the necessary files, including vcomp.dll, are properly installed and can resolve any issues related to missing or corrupted files.
To reinstall the program, follow these steps:
- Open the Control Panel on your Windows computer. You can access it by searching for “Control Panel” in the Start menu.
- In the Control Panel, look for the “Programs” or “Programs and Features” option and click on it.
- A list of installed programs will appear. Locate the program that is displaying the vcomp.dll not found error.
- Right-click on the program and select “Uninstall” to initiate the uninstallation process. Follow the on-screen prompts to complete the uninstallation.
- Once the program is uninstalled, restart your computer to ensure any remaining files or settings are cleared.
- After the restart, locate the installation file or setup package for the program. This may be a downloaded file or a physical installation disc.
- Run the installation file or insert the installation disc to initiate the program installation process.
- Follow the on-screen instructions to reinstall the program. Make sure to carefully review and select the appropriate installation options.
- Once the installation is complete, restart your computer once again to ensure that all changes take effect.
After reinstalling the program, try running it again and check if the vcomp.dll not found error persists. In most cases, this method resolves the issue by replacing any missing or corrupted files related to the program.
If the error still occurs, you can try other methods such as updating your drivers or performing a system file checker scan to further troubleshoot the issue. It is also recommended to contact the program’s support team for additional assistance if needed.
Option 2: Update Your Drivers
If you’re encountering a “vcomp.dll not found” error, it’s possible that outdated or incompatible drivers may be causing the issue. Updating your drivers, especially those related to your graphics card and processor, can often resolve vcomp.dll errors. Here’s how you can update your drivers:
- Identify the Drivers: Determine which drivers may be causing the vcomp.dll error. Graphics card drivers and processor-related drivers are commonly associated with this error. You can check the manufacturer’s website or use a driver utility software to identify the appropriate drivers.
- Visit the Manufacturer’s Website: Once you’ve identified the drivers, visit the manufacturer’s website. Locate the support or drivers section and search for the latest drivers specific to your hardware model and operating system version.
- Download and Install the Drivers: Download the latest drivers compatible with your hardware and operating system. Follow the instructions provided on the manufacturer’s website for proper installation.
- Restart Your Computer: After installing the updated drivers, it is essential to restart your computer. This allows the changes to take effect and ensures proper driver initialization.
Updating your drivers can resolve compatibility issues and ensure that the necessary components, such as vcomp.dll, are properly functioning. It’s worth noting that you can also use third-party driver update software to simplify the driver update process if you prefer a more automated approach.
Once your drivers are updated, try running the program that was previously displaying the vcomp.dll not found error. In most cases, updating the drivers resolves the issue and allows the program to run correctly.
If the error persists, you may need to explore other troubleshooting methods, such as running a system file checker scan or performing a clean installation of Windows. It’s also recommended to check for any available updates for the program displaying the error and reach out to the program’s support team for further assistance if necessary.
Option 3: Run a System File Checker Scan
If you’re experiencing a “vcomp.dll not found” error, running a System File Checker (SFC) scan can help identify and repair any corrupted or missing system files. The SFC tool is a built-in Windows utility designed to scan and restore integrity to system files. Follow these steps to run an SFC scan:
- Open the Command Prompt as an administrator. To do this, right-click on the Start button and select “Command Prompt (Admin)” from the menu.
- In the Command Prompt window, type the following command:
sfc /scannow - Press Enter to initiate the SFC scan. The process may take some time to complete, so be patient.
- Allow the scan to run until it finishes. The SFC tool will scan your system files, including vcomp.dll, and attempt to repair any issues detected.
- Once the scan is complete, restart your computer to apply any changes made by the SFC tool.
Running an SFC scan can help restore any missing or corrupted system files, which may be causing the vcomp.dll not found error. If the SFC scan successfully repairs the issue, you should be able to run the program without encountering the error.
If the SFC scan does not resolve the error or encounters difficulties in repairing corrupted files, you may want to consider other troubleshooting methods, such as reinstalling the program or performing a clean installation of Windows. It’s also a good idea to keep your system up to date with the latest Windows updates to ensure optimal performance and stability.
If you’re still experiencing the vcomp.dll error after trying multiple solutions, it may be beneficial to consult with a professional technician or seek assistance from the support team of the program displaying the error. They can provide further guidance and help resolve any underlying issues causing the vcomp.dll error.
Option 4: Restore Your System to a Previous State
If you’re faced with a “vcomp.dll not found” error, and you recently installed a new program or made system changes, restoring your system to a previous restore point can often resolve the issue. This allows you to revert your computer’s state to a previous point in time when everything was functioning correctly. Here’s how you can restore your system:
- Open the Start menu and type “System Restore” in the search bar. Select the “Create a restore point” option from the search results.
- In the System Properties window, click on the “System Restore” button. You may need administrator privileges to proceed.
- Click on “Next” to view a list of available restore points. Choose a restore point that was created before the vcomp.dll error started occurring.
- Review the details of the selected restore point and click on “Finish” to initiate the system restore process.
- Confirm the restoration by clicking on “Yes” or “OK” when prompted. Windows will then restore your system to the selected restore point.
- Allow the restoration process to complete. Your computer will restart during this process, and all changes made after the selected restore point will be undone.
After your system has been restored to the previous state, check if the vcomp.dll not found error is resolved. If the error is no longer present, you can continue using your computer as usual without encountering the issue.
It’s important to note that this method will undo any system changes or installations made after the restore point’s creation, so it’s recommended to create a backup of your important files before proceeding with system restoration.
If restoring your system to a previous state does not fix the vcomp.dll error, consider trying other solutions such as reinstalling the program or running a system file checker scan. Additionally, reaching out to the program’s support team or consulting a professional technician may provide further assistance in resolving the vcomp.dll error.
Option 5: Use System Restore Point
If you’re encountering a “vcomp.dll not found” error on your Windows computer, using a system restore point can help resolve the issue. System restore points are snapshots of your computer’s settings and system files taken at different points in time. By reverting your system to a previous restore point, you can undo any changes that may have caused the vcomp.dll error. Here’s how you can use a system restore point:
- Open the Start menu and type “System Restore” in the search bar. Select the “Create a restore point” option from the search results.
- In the System Properties window, click on the “System Restore” button. You may need administrator privileges to proceed.
- Click on “Next” to view the list of available restore points. Select a restore point that was created before the vcomp.dll error started occurring.
- Review the details of the selected restore point and click on “Next” to continue.
- Click on “Finish” to initiate the system restore process. Your computer will restart during this process.
- Allow the restoration process to complete. It may take some time, depending on the system restore point’s size and your computer’s performance.
- Once the system has been restored, check if the vcomp.dll not found error is resolved. If successful, the program should now be able to run without any issues.
Using a system restore point can revert your computer’s settings and system files to a previous state, effectively eliminating any changes that may have caused the vcomp.dll error. It’s important to note that system restore does not affect your personal files, but any software installations or system changes made after the selected restore point will be undone.
If the vcomp.dll error persists even after using a system restore point, you may need to consider other troubleshooting methods, such as reinstalling the program or performing a clean installation of Windows. Contacting the program’s support team or seeking assistance from a professional technician is also recommended for further guidance.
Option 6: Perform a Clean Installation of Windows
If all other options have failed to resolve the “vcomp.dll not found” error, performing a clean installation of Windows can provide a fresh start and potentially fix any underlying issues that may be causing the error. A clean installation involves wiping your computer’s hard drive and installing a fresh copy of Windows. Here’s how you can perform a clean installation:
- Backup Your Data: Before proceeding with a clean installation, it is crucial to back up all your important files and data to an external storage device. This will ensure that you don’t lose any valuable information during the installation process.
- Prepare Installation Media: Obtain a Windows installation disc or create a bootable USB drive with the Windows installation files. You can download the official Windows installation files from the Microsoft website and create a bootable USB using the Windows Media Creation Tool.
- Boot from Installation Media: Insert the installation disc or connect the bootable USB drive to your computer. Restart your computer and enter the BIOS or boot menu settings. Select the installation media as the primary boot device.
- Start the Installation: Follow the on-screen instructions to start the Windows installation. When prompted, select the desired language, time zone, and keyboard layout settings.
- Choose Custom Installation: During the installation process, select the “Custom” option when prompted to choose the installation type. This will allow you to perform a clean installation by formatting your computer’s hard drive.
- Format the Hard Drive: Select the hard drive where Windows is currently installed and choose the “Format” option. This will erase all existing data and prepare the disk for a clean installation.
- Complete the Installation: Continue following the on-screen instructions to complete the installation process. Enter your product key, create a new user account, and adjust any additional settings as needed.
- Install Updates and Drivers: After the installation is complete, connect to the internet and install the latest Windows updates. Additionally, update your device drivers to ensure optimal compatibility and performance.
- Restore Your Data: Once the necessary updates and drivers have been installed, restore your backed-up files and data to your computer.
A clean installation of Windows can eliminate any system issues causing the vcomp.dll not found error. By starting from scratch, you can ensure a fresh, stable operating system installation. Remember to reinstall any necessary programs and configure your settings as desired.
Performing a clean installation is a complex process that requires careful preparation and can result in data loss if not done correctly. It’s recommended to seek assistance from a professional technician or refer to official Microsoft documentation if you’re unsure about performing a clean installation on your own.
Option 7: Scan for Malware
If you’re experiencing a “vcomp.dll not found” error, it is possible that malware or viruses have infected your system and are causing the issue. Malware can corrupt or delete critical system files like vcomp.dll, leading to errors. Therefore, conducting a thorough malware scan is a crucial step in resolving the error. Here’s how you can scan for malware:
- Update Your Antivirus Software: Ensure that your antivirus software is up to date with the latest virus definitions. This ensures that it can effectively detect and remove the latest malware threats.
- Perform a Full System Scan: Open your antivirus software and run a full system scan. This scan will thoroughly examine your computer for any malicious files or programs, including malware that may be responsible for the vcomp.dll not found error.
- Follow the Prompted Actions: If the antivirus software detects any malware or viruses during the scan, follow the prompted actions to quarantine or remove them. It is essential to carefully review and verify the actions to prevent accidental deletion of important system files.
- Restart Your Computer: After completing the malware scan and removing any detected threats, restart your computer to ensure that all changes take effect. This will help in clearing any remnants of malware from memory and ensuring a clean system state.
Scanning for malware can help eliminate any malicious files or programs that may be interfering with the proper functioning of vcomp.dll. By removing the malware, you can restore the integrity of your system files and potentially resolve the vcomp.dll not found error.
Remember to keep your antivirus software updated and perform regular scans to maintain the security and stability of your system. It’s also recommended to exercise caution while browsing the internet, downloading files, and opening email attachments to minimize the risk of malware infections in the future.
If the vcomp.dll error persists after scanning for malware, you may need to try other solutions, such as reinstalling the program or performing a system file checker scan. Contacting a professional technician or seeking assistance from the program’s support team might also provide further guidance in resolving the vcomp.dll error.
Option 8: Use a System Optimization Tool
If you’re struggling with a “vcomp.dll not found” error, utilizing a system optimization tool can be a helpful solution. These tools specialize in scanning your system for various issues, including missing or corrupted DLL files like vcomp.dll. Here’s how you can use a system optimization tool to address the error:
- Research and Choose a Reliable Tool: Look for a reputable system optimization tool that suits your needs. Take time to read reviews, check its features, and ensure it has a proven track record of fixing DLL-related issues.
- Download and Install the Tool: Visit the official website of the system optimization tool and download the latest version. Follow the on-screen instructions to install the program on your computer.
- Launch the Optimization Tool: After installation, launch the optimization tool and allow it to initialize. Some tools may require you to run a scan, while others may automatically start analyzing your system.
- Perform an Analyze Scan: Initiate a scan of your system using the optimization tool. It will search for issues, including vcomp.dll errors, within your system files, registries, and other areas that may be causing the error.
- Review the Scan Results: Once the scan is complete, carefully review the scan results generated by the optimization tool. Look for any identified issues related to vcomp.dll.
- Repair or Fix the Issues: Depending on the optimization tool you’re using, it may offer options to automatically repair detected issues or provide manual troubleshooting steps. Follow the recommended actions provided by the tool to fix the vcomp.dll not found error.
- Restart Your Computer: After addressing the issues highlighted by the optimization tool, it’s recommended to restart your computer. This will allow the changes to take effect and ensure the vcomp.dll error is resolved.
System optimization tools can analyze and fix various system-related issues, including vcomp.dll errors. They can automatically identify and resolve problems by repairing or replacing the missing or corrupted file. However, it’s worth noting that these tools should be obtained from reputable sources to ensure their reliability and effectiveness.
If the vcomp.dll error persists after using a system optimization tool, you may need to consider alternative solutions such as reinstalling the program or performing a clean installation of Windows. Additionally, contacting a professional technician or reaching out to the program’s support team can provide further assistance in resolving the vcomp.dll error.