
Common Causes of Unidrv.dll Errors
Unidrv.dll is a dynamic link library file that is an integral part of the Windows operating system. It is responsible for providing the necessary functions for the printer driver to communicate with the hardware and software components of the computer. However, there are times when users encounter errors related to the unidrv.dll file. These errors can occur due to various reasons, and understanding the common causes can help in troubleshooting and resolving them effectively.
1. Corrupted or missing unidrv.dll file: One of the main reasons for encountering unidrv.dll errors is a corrupted or missing DLL file. This can happen due to a system crash, malware infection, or accidental deletion of the file.
2. Outdated printer drivers: If your printer drivers are outdated or incompatible with the version of Windows you are using, it can lead to unidrv.dll errors. It is important to keep your printer drivers up to date to ensure smooth functioning.
3. Malware or virus infection: Malware or virus infections can corrupt DLL files, including unidrv.dll. These infections can occur through downloading malicious files or visiting compromised websites.
4. Registry issues: The Windows registry is a central database that stores important settings and information for the operating system and installed programs. If the registry entries related to unidrv.dll are corrupted or invalid, it can result in errors.
5. Hardware issues: Sometimes, hardware issues like faulty printer connections, damaged cables, or incompatible hardware can trigger unidrv.dll errors. It’s worth checking the hardware components to ensure they are functioning correctly.
6. Software conflicts: Certain software programs or applications may conflict with the functioning of the unidrv.dll file. This can be caused by incompatible software versions or conflicting settings.
7. System file corruption: System files can get corrupted due to various reasons, such as sudden power outages, improper shutdowns, or hardware failures. Corrupted system files can lead to errors related to unidrv.dll.
8. Operating system updates: In some cases, after updating the operating system, users may encounter unidrv.dll errors. This can happen if the update process was not completed successfully or if there are compatibility issues with the updated components.
Overall, unidrv.dll errors can occur due to a multitude of factors, including corrupt files, outdated drivers, malware infections, registry issues, hardware problems, software conflicts, system file corruption, and operating system updates. By understanding the common causes, you can take appropriate steps to troubleshoot and resolve these errors effectively.
How to Identify Unidrv.dll Errors
Identifying unidrv.dll errors is the first step towards resolving them effectively. These errors can manifest in various ways and can cause disruptions in printer functionality and overall system performance. By being able to identify these errors, you can take the necessary steps to troubleshoot and fix them. Here are some key methods to help you identify unidrv.dll errors:
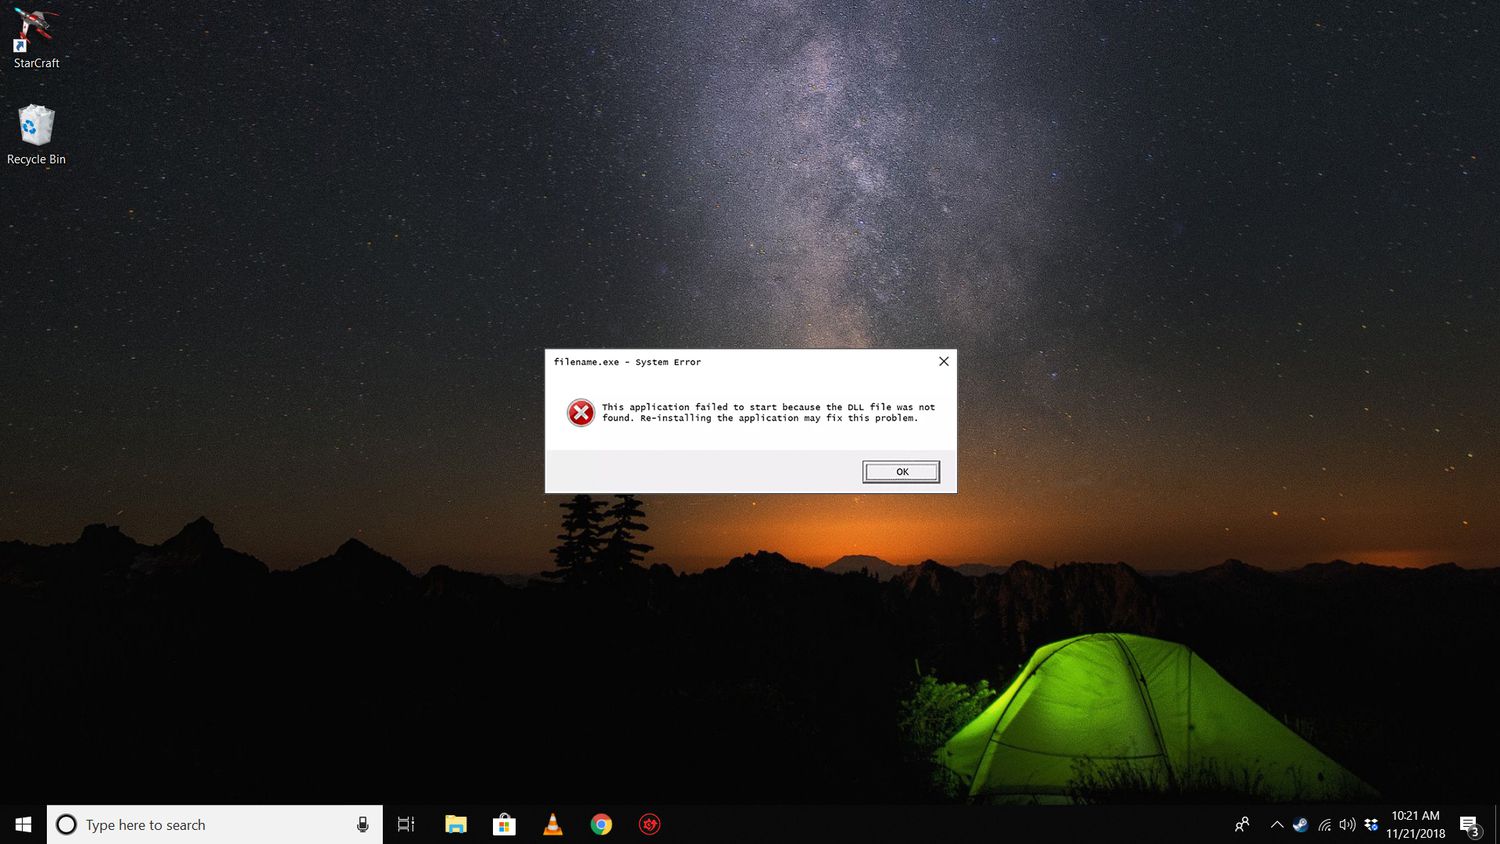
1. Error Messages: One of the most common ways to identify unidrv.dll errors is through error messages displayed on your screen. These error messages may indicate the specific problem with the unidrv.dll file or the printer driver. Take note of the error message details to gather information about the cause of the error.
2. Printer Malfunction: Unidrv.dll errors can lead to various printer malfunctions, such as print spooler errors, failure to print, or incomplete print jobs. If your printer is not functioning as expected or displaying unusual behavior, it is likely that unidrv.dll errors are at play.
3. System Performance Issues: Unidrv.dll errors can also impact the overall performance of your computer. If you experience sluggishness, frequent freezes, or crashes when performing printer-related tasks, it could be a sign of unidrv.dll errors.
4. Event Viewer Logs: The Event Viewer tool in Windows logs system events and errors. You can use this tool to identify any specific events or errors related to the unidrv.dll file. Look for any error codes or descriptions that indicate issues with the DLL file.
5. Compatibility Issues: In some cases, unidrv.dll errors may arise due to compatibility issues between the printer driver and the version of Windows you are using. If you recently installed a printer or updated your operating system, check for any compatibility issues that may be causing the errors.
6. System File Checker: The System File Checker (SFC) is a Windows utility that scans for and restores corrupted system files, including unidrv.dll. Running the SFC tool can help identify any issues with the unidrv.dll file and repair them automatically.
7. Online Resources: Online forums, support websites, and knowledge base articles can provide valuable insights and guidance in identifying specific unidrv.dll errors. These resources often contain troubleshooting steps and solutions shared by other users who have encountered similar issues.
8. Professional Assistance: If you are unable to identify the unidrv.dll errors or resolve them using the available resources, it may be necessary to seek professional assistance. IT experts or printer manufacturers’ support teams can provide expert advice and guidance tailored to your specific issue.
By being vigilant and observant of error messages, printer malfunctions, system performance issues, consulting event viewer logs, checking for compatibility issues, using system file checker, utilizing online resources, and seeking professional help when needed, you can effectively identify unidrv.dll errors and take appropriate steps to resolve them.
Method 1: Restart Your Computer
Restarting your computer may seem like a simple solution, but it can often resolve unidrv.dll errors. This method is effective in dealing with temporary software glitches or conflicts that may be causing the errors. Restarting your computer refreshes the system and can potentially resolve any issues related to the unidrv.dll file. Here’s how you can do it:
1. Close Programs: Before restarting your computer, close all open programs and save any unsaved work. This ensures that all programs are properly closed and any pending changes are saved.
2. Click on the “Start” Button: Click on the “Start” button located at the bottom left corner of your screen. This will open the Start menu.
3. Select “Restart”: From the Start menu, select the “Restart” option. This will initiate the restart process.
4. Wait for the Restart: Allow your computer to shut down and restart. This process may take a few minutes, so be patient.
5. Check for Error Resolution: After your computer has restarted, check if the unidrv.dll errors have been resolved. Try printing a document or performing any tasks that previously resulted in errors to see if the problem persists.
If restarting your computer does not resolve the unidrv.dll errors, you may need to try other methods to troubleshoot and fix the issue. However, restarting your computer is often a quick and effective way to clear temporary glitches or conflicts that may have been causing the errors.
Note: It is important to regularly restart your computer to keep the system running smoothly and avoid potential issues. Restarting your computer can help clear cache, release system resources, and refresh system settings.
Method 2: Update Windows
Updating your Windows operating system is an important step in resolving unidrv.dll errors. Microsoft regularly releases updates that include bug fixes, security patches, and performance improvements. By keeping your Windows up to date, you can ensure that any known issues related to the unidrv.dll file are addressed. Here’s how you can update Windows:
1. Open Windows Settings: Click on the “Start” button located at the bottom left corner of your screen. From the Start menu, select the “Settings” icon (gear-shaped).
2. Navigate to “Update & Security”: In the Windows Settings window, click on the “Update & Security” option. This will open the Windows Update settings.
3. Check for Updates: In the Windows Update settings, click on the “Check for updates” button. Windows will now search for available updates for your system.
4. Install Available Updates: If any updates are found, click on the “Install” button to start downloading and installing the updates. Depending on the size and number of updates, this process may take some time.
5. Restart Your Computer: After the updates are installed, you will be prompted to restart your computer. Click on the “Restart Now” button to complete the update process. It is important to restart your computer to ensure that all updates are applied properly.
6. Verify Error Resolution: After your computer has restarted, check if the unidrv.dll errors have been resolved. Print a document or perform any tasks that previously resulted in errors to see if the problem persists.
If updating Windows does not resolve the unidrv.dll errors, you may need to try other troubleshooting methods. However, updating your Windows is an essential step in maintaining system stability, security, and compatibility with various software components, including the unidrv.dll file.
Regularly checking for and installing Windows updates is recommended to ensure that your system is running the latest version and benefiting from the latest bug fixes and security enhancements provided by Microsoft.
Method 3: Run a Virus Scan
Running a virus scan is crucial in resolving unidrv.dll errors as malware or virus infections can corrupt DLL files, including unidrv.dll. These infections can occur through downloading malicious files or visiting compromised websites. By performing a thorough virus scan, you can identify and remove any infected files that may be causing the unidrv.dll errors. Here’s how you can run a virus scan:
1. Install an Antivirus Program: If you don’t already have an antivirus program installed on your computer, it is important to choose a reputable one and install it. There are numerous antivirus programs available, both free and paid, that can help protect your system against malware and viruses.
2. Update the Antivirus Definitions: Once the antivirus program is installed, ensure that the virus definitions are up to date. Virus definitions contain information on the latest malware and viruses, enabling the antivirus program to detect and remove them.
3. Perform a Full System Scan: Open the antivirus program and initiate a full system scan. This scan will thoroughly examine all files and folders on your computer for any signs of malware or viruses. Depending on your system’s size and the number of files, this process may take some time.
4. Follow the Instructions: If the antivirus program detects any infected files or malware, follow the instructions provided to quarantine or remove the threats. It is recommended to follow the recommended actions suggested by the antivirus program to ensure effective removal of malware.
5. Restart Your Computer: After performing the virus scan and removing any threats, restart your computer. This helps ensure that any potential remnants of malware are cleared from memory and that the system starts with a clean slate.
6. Verify Error Resolution: After your computer has restarted, check if the unidrv.dll errors have been resolved. Attempt to print a document or perform any tasks that previously resulted in errors to confirm if the problem persists.
Regularly running virus scans is essential in maintaining a secure and stable system. It helps protect your computer from malware infections that can corrupt important files, including the unidrv.dll file. Additionally, ensure that your antivirus program is kept up to date to provide optimal protection against the latest threats.
Method 4: Restore Unidrv.dll from the Recycle Bin
If you have accidentally deleted the unidrv.dll file, it is possible that it is still in the Recycle Bin. Restoring the file from the Recycle Bin can help resolve unidrv.dll errors and restore proper functionality. Here’s how you can restore unidrv.dll from the Recycle Bin:
1. Open the Recycle Bin: Locate the Recycle Bin icon on your desktop and double-click to open it. Alternatively, you can open the File Explorer and navigate to the Recycle Bin folder.
2. Search for Unidrv.dll: In the Recycle Bin, use the search box located in the top-right corner to search for “unidrv.dll”. This will filter the files and display any matches with the keyword.
3. Select Unidrv.dll: Once you locate the unidrv.dll file, select it by clicking on it or using the keyboard shortcut “Ctrl + Click” to select multiple files if necessary.
4. Restore the File: With the unidrv.dll file(s) selected, right-click and choose the “Restore” option from the context menu. This will restore the file(s) to their original location on your computer.
5. Verify File Restoration: After the file(s) have been restored, check if the unidrv.dll errors have been resolved. Perform printing tasks or any activities that previously resulted in errors to ensure that the problem is resolved.
If you cannot find the unidrv.dll file in the Recycle Bin, it is possible that it was permanently deleted or removed from the Recycle Bin. In such cases, you will need to consider other methods to restore or replace the unidrv.dll file, such as reinstalling the associated program or restoring from a backup if available.
Always be cautious when deleting files and ensure that you have identified the correct file to delete. You can avoid accidental deletions by double-checking the file name and purpose before removing it from your system.
Method 5: Reinstall the Associated Program
If you are experiencing unidrv.dll errors, reinstalling the associated program can help resolve the issue. Sometimes, the program that relies on the unidrv.dll file may have become corrupted or improperly installed, leading to DLL errors. Reinstalling the program ensures that all necessary files, including unidrv.dll, are restored and configured correctly. Here’s how you can reinstall the associated program:
1. Uninstall the Program: Open the “Control Panel” by clicking on the “Start” button and selecting the “Control Panel” option. From the Control Panel, navigate to the “Programs” or “Programs and Features” section. Locate the program associated with unidrv.dll errors and select it. Click on the “Uninstall” button to initiate the uninstallation process. Follow the on-screen instructions to complete the uninstallation.
2. Restart Your Computer: After uninstalling the program, restart your computer. This ensures that any remnants of the program or conflicting files are cleared from memory.
3. Obtain the Latest Version: Visit the official website of the program or download it from a trusted source. Make sure to download the latest version of the program that is compatible with your operating system.
4. Install the Program: Run the installation file for the program and follow the on-screen instructions to install it. Make sure to carefully review the installation options and choose the desired settings. During the installation process, the required files, including unidrv.dll, will be properly installed in their respective directories.
5. Verify Error Resolution: After the program is successfully installed, check if the unidrv.dll errors have been resolved. Use the program, perform relevant tasks, or attempt to print a document to ensure that the program functions without any issues.
If reinstalling the associated program does not resolve the unidrv.dll errors, you may need to consider other troubleshooting methods. However, reinstalling the program is a common and effective solution in cases where DLL errors are caused by program-related issues.
Keep in mind that before proceeding with the reinstall, it is advisable to create a backup of any important data associated with the program to prevent data loss during the uninstallation process.
Method 6: Update Device Drivers
Updating device drivers is an important step in troubleshooting unidrv.dll errors. Outdated or incompatible device drivers can cause conflicts and result in DLL errors. To resolve these errors, it is crucial to ensure that all device drivers are up to date. Here’s how you can update your device drivers:
1. Identify the Device: Determine the device associated with the unidrv.dll errors. This could be a printer, graphics card, or any other hardware device. Take note of the device’s name and model.
2. Visit the Manufacturer’s Website: Go to the official website of the device manufacturer. Look for the “Support” or “Downloads” section where you can find the latest driver updates.
3. Search for the Driver: Use the search function on the website to find the driver for your specific device model. Make sure to select the driver that is compatible with your operating system.
4. Download and Install the Driver: Download the driver file provided by the manufacturer. Once downloaded, run the driver installer and follow the on-screen instructions to install the updated driver. You may need to restart your computer after the installation is complete.
5. Repeat for Other Devices: If you have identified multiple devices causing unidrv.dll errors, repeat the process of visiting the manufacturer’s website and updating the drivers for each device.
6. Verify Error Resolution: After updating the device drivers, check if the unidrv.dll errors have been resolved. Use the device or perform relevant tasks to ensure that the device functions without any issues.
If updating device drivers does not resolve the unidrv.dll errors, you may need to consider other troubleshooting methods or seek professional assistance. However, keeping device drivers up to date is essential for proper system functioning and can help prevent various DLL errors.
Additionally, consider enabling automatic driver updates, if available, to ensure that your drivers are always up to date. This can be done through Windows Update settings or with the help of third-party driver update software.
Method 7: Perform a System Restore
If you are experiencing persistent unidrv.dll errors, performing a system restore can help revert your computer back to a previous state when the errors were not present. System Restore allows you to undo system changes that may have caused the unidrv.dll errors. Here’s how you can perform a system restore:
1. Open System Restore: Click on the “Start” button and type “System Restore” in the search bar. From the search results, select “Create a restore point” or “System Restore” to open the System Restore window.
2. Choose a Restore Point: In the System Restore window, click on the “System Restore” button. This will launch the System Restore wizard. Select a restore point from the list that corresponds to a date and time before you started experiencing unidrv.dll errors. If necessary, check the “Show more restore points” option to display additional restore points.
3. Start the Restoration: Once you have selected the desired restore point, click on the “Next” button to proceed. Review the details of the restore point and confirm your selection. Click on the “Finish” button to start the restoration process.
4. Wait for the Restoration: The system restore process may take some time to complete. Your computer will restart during the process, and you should not interrupt it. Be patient and wait for the restoration to finish.
5. Verify Error Resolution: After the system restore is complete, check if the unidrv.dll errors have been resolved. Perform printing tasks or any activities that previously resulted in errors to ensure that the problem is resolved.
It’s worth noting that performing a system restore will not affect your personal files, but it will remove programs and system settings installed after the selected restore point. Therefore, it is recommended to back up any important files and make a note of the programs that may need to be reinstalled after the restoration.
System restore should be used with caution, and it is advisable to manually create restore points at regular intervals to have a fallback option in case of any system issues or errors.
Method 8: Cleanly Install Windows
If all other methods fail to resolve unidrv.dll errors, performing a clean installation of Windows can be a last resort. This method involves reinstalling the Windows operating system from scratch, which can help eliminate any underlying system issues causing the DLL errors. Before proceeding with a clean installation, be sure to back up all important files and documents. Here’s how you can cleanly install Windows:
1. Backup: Create a backup of all your important files, documents, and settings. This ensures that you have copies of your data in case it gets erased during the installation process.
2. Create Installation Media: Obtain a Windows installation USB or DVD by downloading the official installation media from Microsoft’s website or using the Windows Media Creation Tool. Follow the instructions provided to create the installation media.
3. Boot from the Installation Media: Insert the installation USB or DVD into your computer and restart it. Boot your computer from the installation media by accessing the BIOS/UEFI settings and changing the boot order to prioritize the USB or DVD drive.
4. Install Windows: Follow the on-screen instructions to install Windows. When prompted, choose the option to perform a “Custom” or “Advanced” installation. This allows you to format the existing system drive and install a fresh copy of Windows.
5. Install Drivers and Programs: Once Windows is installed, you will need to reinstall device drivers and programs. Use the latest versions from the manufacturers’ websites to ensure compatibility and optimal performance.
6. Restore Backup: After reinstalling drivers and programs, restore your backed-up files and documents to their respective locations. Ensure that you scan any files for viruses or malware before restoring them.
Performing a clean installation of Windows is a drastic step that should be considered when other methods have failed and there are no other viable solutions. It provides a fresh start to the operating system, resolving any hidden system issues that may have been causing the unidrv.dll errors. However, it is important to note that this method will erase all existing data and applications, so be sure to back up everything that is important to you.