
Common Causes of the WHEA Uncorrectable Error
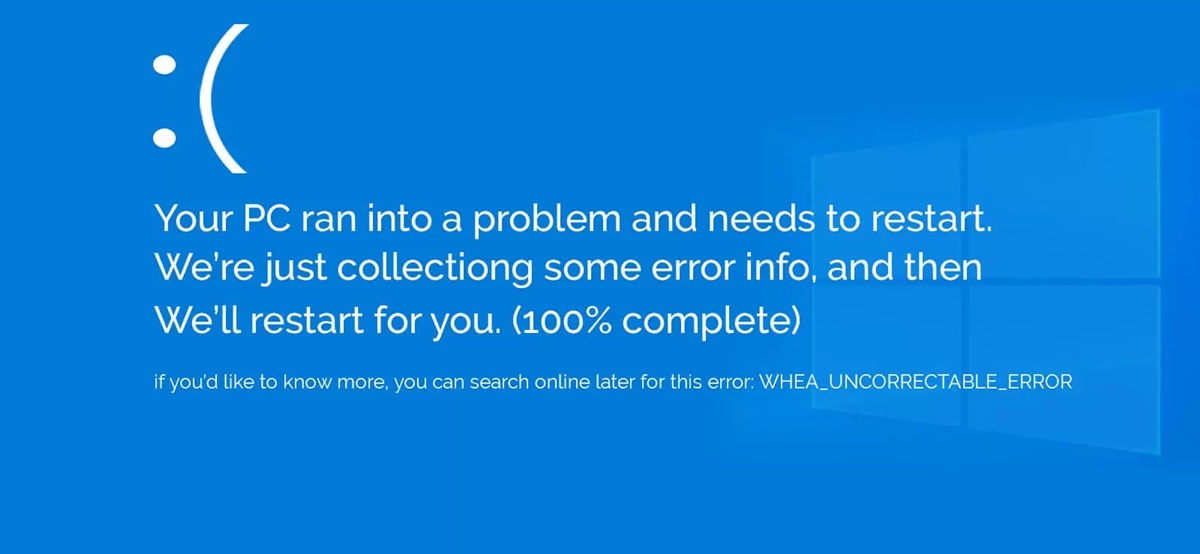
The WHEA Uncorrectable Error is a blue screen error that occurs on Windows-based systems and can be quite frustrating for users. It can cause the system to crash and may result in data loss if not addressed promptly. Understanding the common causes of this error can help in finding the appropriate solution. Here are some of the main culprits behind the WHEA Uncorrectable Error:
- Hardware Issues: In many cases, the WHEA Uncorrectable Error is caused by faulty hardware components. This can include problems with the CPU, memory modules, hard drive, or even the motherboard. A loose connection or a defective hardware component can trigger this error.
- Overheating: Overheating is a common cause of system instability and can lead to the WHEA Uncorrectable Error. When the CPU or other components become too hot, the system may crash to prevent damage. Proper cooling and regular cleaning of the system internals can help prevent overheating issues.
- Outdated or Incompatible Device Drivers: Device drivers act as a bridge between the hardware and the operating system. Outdated or incompatible drivers can cause conflicts and result in the WHEA Uncorrectable Error. It is important to keep all device drivers up-to-date to avoid such issues.
- Software or System File Corruption: Corruption in system files or software can cause the WHEA Uncorrectable Error. This can occur due to malware infections, abrupt system shutdowns, or software conflicts. Regular system scans and software updates can help prevent such issues.
- System Overclocking: Overclocking is a technique used to increase the performance of computer hardware beyond its designed limits. While it can enhance system performance, it can also lead to stability issues and trigger the WHEA Uncorrectable Error. Disabling overclocking settings in the BIOS can help resolve this problem.
Identifying the root cause of the WHEA Uncorrectable Error is crucial in successfully resolving it. In the following sections, we will discuss various solutions to fix this error and get your system back up and running smoothly. Remember to proceed with caution and always back up your important data before making any changes to your system.
Check for Overheating Issues
Overheating is a common cause of the WHEA Uncorrectable Error and can lead to system instability and crashes. When the internal components of a computer, especially the CPU, become too hot, the system may shut down to prevent damage. Here are some steps to help you check for and resolve overheating issues:
- Ensure Proper Airflow: Make sure that your computer has adequate airflow. Keep the vents and fans clean and free from dust and debris. Ensure that the computer is placed on a flat, hard surface to allow proper ventilation. Avoid using the laptop on surfaces that can block the airflow, such as beds or soft cushions.
- Monitor CPU Temperature: Install a temperature monitoring software to keep an eye on the CPU temperature. There are many free programs available that provide real-time monitoring and can alert you if the temperature exceeds safe levels. If you notice that the temperature is consistently high, it may indicate an issue with the cooling system.
- Clean the Cooling System: Over time, dust and debris can accumulate inside the computer, obstructing the airflow and causing the components to heat up. Use compressed air to carefully clean the fans, heatsinks, and vents. Be gentle to avoid damaging any delicate components. Regularly cleaning the cooling system can help prevent overheating issues.
- Check the Thermal Paste: The thermal paste is a heat-conductive material applied between the CPU and the heatsink to improve heat transfer. Over time, the thermal paste can dry out or become ineffective, leading to poor heat dissipation. If you have experience working with computer hardware, you can consider removing the CPU heatsink, cleaning off the old thermal paste, and applying a fresh layer.
- Consider Additional Cooling Solutions: If your system continues to run hot after performing the above steps, you may need to consider additional cooling solutions. This can include adding more case fans, upgrading the CPU cooler, or even installing a liquid cooling system for more efficient heat dissipation. Consult with a professional or refer to the manufacturer’s guidelines for compatible cooling solutions.
Checking and resolving overheating issues can go a long way in preventing the WHEA Uncorrectable Error and maintaining the overall stability and performance of your system. By ensuring proper airflow, monitoring temperatures, and cleaning the cooling system, you can mitigate the risk of overheating-related problems. If the issue persists after taking these steps, it’s recommended to seek professional assistance for a thorough diagnosis and potential hardware repairs or replacements.
Update Device Drivers
Outdated or incompatible device drivers are a common cause of the WHEA Uncorrectable Error. Device drivers serve as a communication bridge between your hardware and the operating system. When these drivers are outdated or incompatible, they can cause conflicts and instability in your system. Updating your device drivers can help resolve the WHEA Uncorrectable Error and improve the overall performance of your computer. Here’s how you can update your device drivers:
- Use Windows Update: Windows Update is a built-in feature in Windows that regularly provides updates for your system, including device driver updates. To access Windows Update, go to the Windows Settings, click on “Update & Security,” and select “Windows Update.” Click on “Check for updates” to see if any device driver updates are available. If updates are found, follow the on-screen instructions to install them.
- Visit the Manufacturer’s Website: Sometimes, Windows Update may not have the latest device driver updates. In such cases, you can visit the official website of the hardware manufacturer to download the latest drivers directly. Identify the hardware component that may be causing the WHEA Uncorrectable Error and navigate to the support or downloads section of the manufacturer’s website. Look for the specific driver for your operating system and download it.
- Use Device Manager: Device Manager is a Windows utility that allows you to manage and update your device drivers. To access it, right-click on the Start button and select “Device Manager” from the context menu. In the Device Manager window, expand the categories to find the device whose driver you want to update. Right-click on the device and select “Update driver.” Choose the option to search for drivers automatically online, or you can manually browse your computer for the downloaded driver file.
- Consider Driver Update Software: If you find it time-consuming or challenging to manually update your device drivers, you can consider using a reliable driver update software. These tools can scan your system, identify outdated drivers, and automatically download and install the latest versions. Be cautious when selecting a driver update software and ensure you choose a reputable one from a trusted source.
Regularly updating your device drivers is crucial for the stability and performance of your system. It helps ensure compatibility, fixes bugs, and enhances the overall functionality of your hardware. By keeping your device drivers up-to-date, you can minimize the risk of the WHEA Uncorrectable Error and enjoy a smoother computing experience. Remember to create a system restore point before updating drivers to have a backup in case any issues arise during the updating process.
Run Windows Memory Diagnostic Tool
The WHEA Uncorrectable Error can sometimes be caused by faulty memory modules or issues with the system’s memory. The Windows Memory Diagnostic Tool is a built-in utility that helps you identify and resolve memory-related problems. By running this tool, you can determine if faulty RAM is the cause of the error. Here’s how to use the Windows Memory Diagnostic Tool:
- Open the Windows Memory Diagnostic Tool: Press the Windows key + R to open the Run dialog box. Type “mdsched.exe” without the quotes and hit Enter. Another way to access the tool is by going to the Start menu, clicking on the Power button, and then selecting “Restart” while holding down the Shift key. This will initiate a restart and bring up the Windows Recovery Environment. From there, choose “Troubleshoot,” then “Advanced options,” and finally “Windows Memory Diagnostic.”
- Choose a Memory Test Option: The Windows Memory Diagnostic Tool offers two different options for running the test: “Restart now and check for problems” or “Check for problems the next time I start my computer.” Select the option that suits your preference.
- Wait for the Memory Test to Complete: Once you have chosen the test option, your computer will restart, and the Windows Memory Diagnostic Tool will start running. It will perform a comprehensive test on your system’s memory to check for any errors. Allow the test to complete, which can take some time depending on the size of your RAM.
- Review the Test Results: After the memory test is finished, your computer will automatically reboot. Once it starts up again, the Windows Memory Diagnostic Tool will display the test results. If any errors are detected, it indicates that there are issues with your RAM. You may need to replace the faulty memory module(s) to resolve the WHEA Uncorrectable Error.
Running the Windows Memory Diagnostic Tool is a straightforward way to determine if faulty RAM is the cause of the WHEA Uncorrectable Error. If errors are found, it’s recommended to consult with a hardware professional or refer to your computer’s manufacturer for further assistance. They can help you identify the specific faulty memory module and guide you on the steps to replace it. Keep in mind that handling hardware components requires caution, so if you’re unsure, it’s best to seek professional help.
Check for Hardware Issues
Hardware issues can often contribute to the occurrence of the WHEA Uncorrectable Error. It’s important to check your hardware components for any potential problems to ensure the stability and reliability of your system. Here are some steps you can take to check for hardware issues:
- Inspect Physical Connections: Start by checking the physical connections of your hardware components. Ensure that all cables, such as SATA cables, power cables, and data cables, are securely and properly plugged in. If any cables are loose or damaged, reseat or replace them accordingly.
- Run Hardware Diagnostic Tools: Many computer manufacturers provide hardware diagnostic tools that can help identify issues with specific components. These tools can perform comprehensive tests on your hardware, including the CPU, memory, hard drive, and motherboard. Run these diagnostics and follow any recommended actions to address any problems that arise.
- Test Hardware Components Individually: If you suspect a particular hardware component may be causing the WHEA Uncorrectable Error, you can try testing it individually. For example, you can use a stress testing tool to put your CPU under heavy load and monitor for any issues. Similarly, running a hard drive diagnostic tool can help identify any faults with your storage device.
- Check for Faulty Memory Modules: Faulty memory modules can lead to the WHEA Uncorrectable Error. Remove the memory modules from your computer and try using one module at a time. This can help isolate the faulty module if the error persists with one specific module. Replacing the faulty memory module should resolve the issue.
- Verify Power Supply Unit (PSU): A faulty power supply unit can cause instability and errors in your system. If you suspect the PSU may be the culprit, consider testing it with a power supply tester or replacing it with a known working unit. Ensure that the wattage and connectors of the replacement PSU are compatible with your system.
- Check the System BIOS: Outdated or incorrectly configured system BIOS settings can also contribute to hardware-related errors. Ensure that you have the latest BIOS version installed for your motherboard. You can visit the manufacturer’s website for instructions on updating the BIOS. Additionally, double-check that BIOS settings related to CPU, memory, and power management are configured correctly.
Checking for hardware issues requires thorough examination and troubleshooting. If you are unfamiliar or uncomfortable with handling hardware components, it’s recommended to seek assistance from a professional technician. They can help identify and resolve any hardware issues that may be contributing to the WHEA Uncorrectable Error, ensuring the proper functioning of your system.
Perform a Clean Boot
Performing a clean boot is a troubleshooting technique that can help identify software conflicts or issues causing the WHEA Uncorrectable Error. By temporarily disabling unnecessary startup programs and services, you can isolate the root cause and potentially resolve the error. Here’s how to perform a clean boot:
- Open the System Configuration Utility: Press the Windows key + R to open the Run dialog box. Type “msconfig” without the quotes and hit Enter. This will open the System Configuration utility.
- Select the Selective Startup Option: In the System Configuration window, select the “Selective startup” option. Then uncheck the box that says “Load startup items.” This will disable all the startup programs that usually load when you boot your computer.
- Disable Services: Switch to the “Services” tab in the System Configuration utility. Check the box that says “Hide all Microsoft services.” This will hide the essential Windows services, allowing you to focus on the third-party services. Click on the “Disable all” button to disable all non-Microsoft services running on your system.
- Save Changes and Restart: Click on the “Apply” button and then click “OK” to save the changes you made in the System Configuration utility. Restart your computer for the changes to take effect.
- Test for the Error: After the clean boot, observe if the WHEA Uncorrectable Error still occurs. If the error disappears, it indicates that one of the disabled startup programs or services was causing the issue. You can then narrow down the problematic software by enabling a few startup items or services at a time and restarting your computer until the error reappears. This way, you can identify the specific software causing the error.
- Resolve or Uninstall Problematic Software: Once you’ve identified the software causing the error, you can take appropriate action. Look for updates or patches for the software from the developer’s website. If updates are not available, consider uninstalling the problematic software. This should help resolve the WHEA Uncorrectable Error.
Performing a clean boot can help pinpoint software-related issues that may be triggering the WHEA Uncorrectable Error. By systematically enabling and disabling startup programs and services, you can identify the software causing the error and take the necessary steps to resolve it. Remember to re-enable the necessary startup items and services after troubleshooting to ensure the smooth functioning of your computer.
Disable Overclocking
Overclocking is the process of running computer hardware beyond its recommended specifications to achieve higher performance. While overclocking can boost system performance, it can also lead to instability and errors such as the WHEA Uncorrectable Error. If you have overclocked your system and are experiencing this error, it is recommended to disable overclocking. Here’s how you can do it:
- Access the BIOS: Restart your computer and access the BIOS or UEFI settings. This is typically done by pressing a specific key (such as Del, F2, or F10) during the initial boot process. Consult your computer’s manual or the manufacturer’s website for the exact key or combination of keys to access the BIOS.
- Locate the Overclocking Settings: Once you’re in the BIOS, navigate to the overclocking or CPU settings section. The location and terminology may vary depending on your motherboard and BIOS version. Look for options related to CPU frequency, voltage, and multiplier adjustments.
- Restore Default Settings: In the overclocking settings, you should find an option to restore default settings or load optimized defaults. Select this option to reset all overclocking adjustments to their default values.
- Save and Exit: After restoring default settings, save the changes and exit the BIOS. This will reboot your computer with the overclocking disabled.
- Monitor System Stability: After disabling overclocking, monitor your system’s stability to see if the WHEA Uncorrectable Error still occurs. If the error no longer persists, it indicates that overclocking was the cause of the problem.
Disabling overclocking can help resolve the WHEA Uncorrectable Error by restoring the system to its original specifications. It’s important to note that disabling overclocking may impact performance, as the system will now run at its default settings. If you still wish to achieve higher performance, consider seeking guidance from overclocking experts or utilizing software tools specifically designed for safe and optimized overclocking. Remember to always monitor system temperatures and stability when engaging in any overclocking activities to prevent potential issues and ensure the longevity of your hardware.
Check for System File Corruption
System file corruption can result in various errors, including the WHEA Uncorrectable Error. When system files become damaged or corrupted, it can cause instability and lead to crashes. To address this issue, it’s essential to check for system file corruption and take steps to repair any damaged files. Here’s how you can do it:
- Use System File Checker (SFC): The System File Checker is a built-in Windows utility that scans for and repairs corrupted system files. Open the Command Prompt as an administrator by right-clicking on the Start button and selecting “Command Prompt (Admin).” Type “sfc /scannow” without the quotes and hit Enter. The SFC will start scanning your system for corrupted files and automatically repair them if possible. Be patient, as the process may take some time.
- Run DISM Tool: The Deployment Image Servicing and Management (DISM) tool is another utility that can help fix system file corruption. Open the Command Prompt as an administrator and type “DISM /online /cleanup-image /restorehealth” without the quotes, and hit Enter. The DISM tool will scan the Windows image and repair any corrupted files. This process may also take some time to complete.
- Perform a System Restore: If the above methods don’t resolve the system file corruption, you can try performing a system restore. System Restore allows you to revert your computer’s settings to a previous known working state. Open the Start menu, search for “System Restore,” and open the utility. Follow the on-screen instructions to select a restore point before the occurrence of the WHEA Uncorrectable Error. This will restore your system files and settings to that specific point in time.
- Reinstall Windows: If none of the above steps work, a more drastic solution is to reinstall Windows. This will remove all files and programs from your computer, so it’s essential to back up your important data beforehand. To reinstall Windows, you can either use a Windows installation media or follow the instructions provided by your computer manufacturer.
Checking for system file corruption and repairing any damaged files can help resolve the WHEA Uncorrectable Error. The System File Checker, DISM tool, and System Restore are effective methods to fix corrupted system files. However, if these methods prove unsuccessful, reinstalling Windows may be necessary as a last resort. Remember to always create backups of your important data to avoid data loss during the reinstallation process.
Reset BIOS Settings
Resetting the BIOS (Basic Input/Output System) settings can help resolve the WHEA Uncorrectable Error by restoring the default configuration of your computer’s firmware. Incorrect BIOS settings or corrupted configurations can contribute to system instability and errors. Here’s how you can reset the BIOS settings:
- Access the BIOS: Restart your computer and access the BIOS or UEFI settings. This is typically done by pressing a specific key (such as Del, F2, or F10) during the initial boot process. Consult your computer’s manual or the manufacturer’s website for the exact key or combination of keys to access the BIOS.
- Locate the Reset or Load Defaults Option: Once you’re in the BIOS, navigate to the “Exit” or “Setup” section. Look for an option that allows you to “Reset to Default,” “Load Default Settings,” or similar wording. This option will reset all BIOS settings to their original default values.
- Confirm the Reset: Select the option to reset the BIOS settings and confirm your selection when prompted. Keep in mind that the specific option and confirmation process may vary depending on your motherboard and BIOS version.
- Save and Exit: After resetting the BIOS settings, save the changes and exit the BIOS. Typically, you can do this by selecting “Save and Exit” or a similar option in the BIOS interface. This will reboot your computer with the BIOS settings restored to their default values.
- Monitor System Stability: After resetting the BIOS settings, observe if the WHEA Uncorrectable Error still occurs. If the error persists, it indicates that the issue may lie elsewhere, and further troubleshooting steps may be required.
Resetting the BIOS settings can be an effective solution for resolving the WHEA Uncorrectable Error caused by incorrect or corrupted BIOS configurations. By restoring the default settings, you eliminate any potential conflicts or inconsistencies that may have occurred. However, keep in mind that resetting the BIOS will also revert any custom settings you had previously configured, such as boot order or overclocking settings. Make sure to document any important settings before performing the reset. If the error persists after the reset, it’s recommended to seek professional assistance or contact your computer’s manufacturer for further support.
Check for Disk Errors
Disk errors can contribute to the occurrence of the WHEA Uncorrectable Error and may lead to system instability. Issues with your hard drive, such as bad sectors or file system errors, can cause data corruption and trigger the error. Checking for disk errors is essential to maintain the health and reliability of your storage device. Here’s how you can do it:
- Run the Check Disk (CHKDSK) Command: CHKDSK is a built-in Windows utility that scans and repairs errors on your hard drive. Open the Command Prompt as an administrator by right-clicking on the Start button and selecting “Command Prompt (Admin).” Type “chkdsk C: /f /r” without the quotes and hit Enter. Replace the C: with the drive letter of the partition you want to check. The /f flag fixes any errors found, while the /r flag locates and repairs bad sectors on the hard drive.
- Schedule Disk Check at the Next Restart: If you encounter a message saying that the disk is in use and cannot be checked immediately, you can schedule the disk check for the next restart. Type “Y” and hit Enter when prompted and then restart your computer. During the restart process, CHKDSK will automatically scan and repair your hard drive.
- Use Disk Error Checking Tool: Alternatively, you can use the built-in Disk Error Checking tool. Open File Explorer and right-click on the drive you want to check. Select “Properties” and navigate to the “Tools” tab. Under the “Error checking” section, click on the “Check” button. Follow the on-screen instructions to scan and repair any disk errors found.
- Perform a SMART Test: Most modern hard drives have built-in Self-Monitoring, Analysis, and Reporting Technology (SMART) capabilities. SMART tests can identify potential hardware issues and provide essential information about the health of the drive. You can use third-party software or manufacturer-specific tools to perform a SMART test on your hard drive.
- Consider Replacing the Hard Drive: If disk errors persist or if the SMART test indicates severe issues with the hard drive, it may be necessary to replace the drive. Continuous disk errors can lead to data loss and system instability. Back up your important files and consider consulting a professional technician or contacting the manufacturer for further assistance in replacing the hard drive.
Regularly checking for disk errors is crucial to maintain the integrity and performance of your hard drive. By running CHKDSK, using the Disk Error Checking tool, performing SMART tests, and replacing the hard drive if necessary, you can mitigate the risk of disk-related issues and prevent the WHEA Uncorrectable Error. Remember to back up your important data before proceeding with any disk error checks or hardware replacements to avoid potential data loss.
Perform a System Restore
Performing a system restore can be an effective solution to resolve the WHEA Uncorrectable Error by reverting your computer’s settings to a previous known working state. System restore allows you to roll back your operating system to a specific point in time when your system was functioning properly. Here’s how you can perform a system restore:
- Access the System Restore Utility: Open the Start menu and search for “System Restore.” Select the “Create a restore point” or “System Restore” option to open the System Restore utility.
- Select a Restore Point: In the System Restore utility, click on “System Restore” to proceed with a restoration. You will be shown a list of available restore points. Choose a restore point that predates the occurrence of the WHEA Uncorrectable Error. It’s advisable to select a restore point created before any recent changes or installations that might have contributed to the error.
- Start the Restoration Process: After selecting a restore point, click on “Next” and then “Finish” to initiate the restoration process. Your computer will restart and begin the restoration procedure, which may take several minutes to complete.
- Monitor System Stability: After the restoration process is finished, observe if the WHEA Uncorrectable Error still occurs. If the error persists, it may indicate a deeper underlying issue that requires additional troubleshooting.
Performing a system restore can help resolve the WHEA Uncorrectable Error by undoing system changes that may have led to the error. It’s important to note that system restore will revert your computer’s settings, including installed programs and system configurations, to an earlier state. However, your personal files should remain intact. If the error continues after performing a system restore, consider seeking further assistance from a professional technician or contacting your computer’s manufacturer for support.
Reinstall Windows
If all other troubleshooting steps have failed to resolve the WHEA Uncorrectable Error, reinstalling Windows may be the best course of action to address the issue. Reinstalling Windows involves removing the current installation of the operating system and then performing a fresh installation. Here’s how you can reinstall Windows:
- Back up Your Data: Before proceeding with the reinstallation, it is crucial to back up all your important files and data. You can copy them to an external storage device or use cloud storage services to ensure they are safe and accessible after the reinstallation process.
- Create a Windows Installation Media: Obtain a Windows installation media, such as a bootable USB drive or DVD, that matches your version of Windows. You can download the installation files from the official Microsoft website or use the installation media provided with your computer.
- Boot from the Installation Media: Connect the installation media to your computer and restart it. Access the BIOS or UEFI settings by pressing the designated key during the boot process (such as Del, F2, or F12). Configure the boot order to prioritize the installation media, save the changes, and exit the BIOS or UEFI settings.
- Follow the Windows Installation Process: Once your computer boots from the installation media, you will be prompted to select your language, time zone, and keyboard layout. Click “Next” to proceed. Then, click on “Install Now” to start the installation process.
- Enter the Product Key: If prompted, enter the product key for your copy of Windows. You can usually find this key on a sticker attached to your computer or in the documentation that came with it. Follow the on-screen instructions to continue.
- Select the Installation Type: Choose the installation type that suits your needs. You can either perform a custom installation, which allows you to choose the partition where Windows will be installed, or an upgrade installation, which upgrades your current Windows installation. Select the custom installation option for a fresh installation.
- Format and Install: If you opted for a custom installation, select the partition on which you want to install Windows. You can choose to format the partition to remove the existing Windows files or create a new partition if needed. Follow the on-screen instructions to complete the installation process.
- Install Device Drivers and Updates: After the Windows installation is complete, you will need to install the necessary device drivers for your hardware components. Use the hardware manufacturer’s website or the driver installation media that came with your computer to install the drivers. Additionally, make sure to install the latest Windows updates to ensure your system is up-to-date.
Reinstalling Windows is a comprehensive solution that can resolve the WHEA Uncorrectable Error if other troubleshooting methods have been unsuccessful. However, it is a time-consuming process and will remove all the data and programs from your computer. Make sure to back up your important files and take note of any software licenses or serial numbers before proceeding. If you are uncomfortable or unsure about reinstalling Windows on your own, it is best to seek assistance from a professional technician or contact the manufacturer for support.