
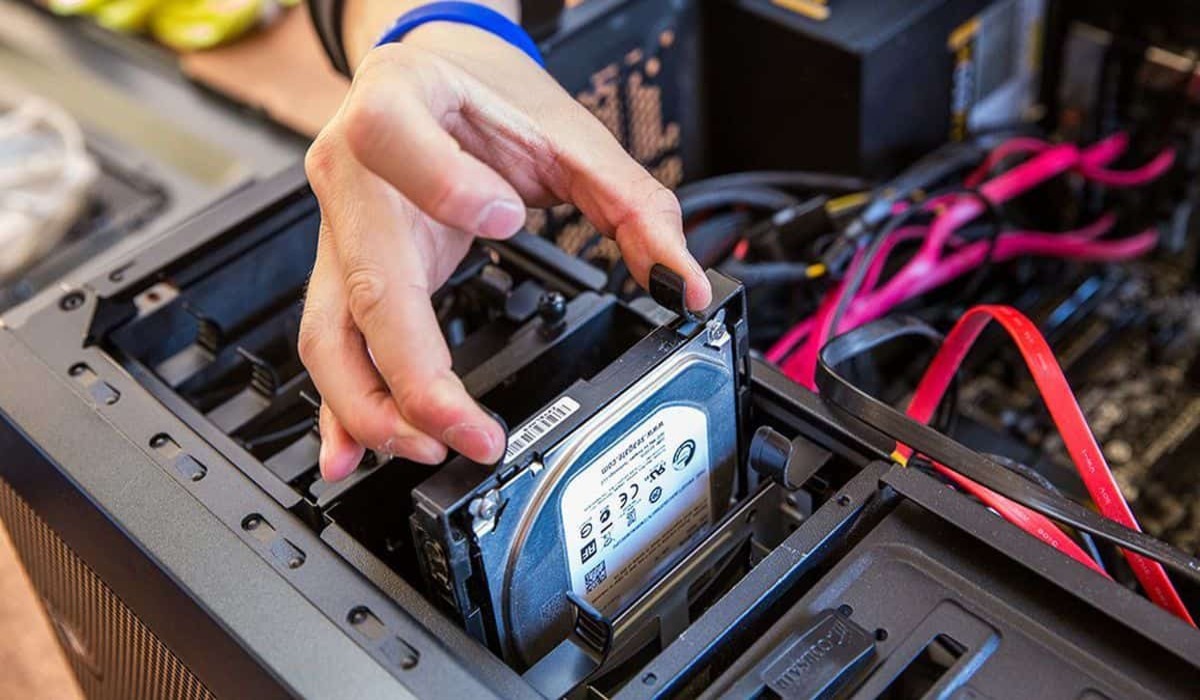
Check the Physical Connections
When a new hard drive is not showing up in Windows, the first step is to check the physical connections. Often, a loose or faulty connection can cause the drive to go unnoticed by the operating system. Follow these steps to ensure that the connections are secure:
- Power Connections: Check that the power cable is properly connected to both the hard drive and the power supply. If it is loose, firmly insert it into the power port.
- Data Connections: Ensure that the data cables, such as SATA or IDE cables, are securely connected to the hard drive and the motherboard. If necessary, disconnect and reconnect the cables to ensure a proper connection.
- USB Connections: If you are using an external hard drive, make sure that the USB cable is fully plugged into both the hard drive and the USB port on your computer. Try using a different USB port to eliminate the possibility of a faulty port.
- External Enclosures: If your hard drive is housed in an external enclosure, check that the enclosure is functioning correctly. Try connecting the drive directly to your computer to rule out any issues with the enclosure.
- Power Supply: If other drives are working fine in your system but the new hard drive isn’t, ensure that your power supply unit is providing enough power to all the connected devices. Consider upgrading your power supply if necessary.
It’s important to note that while checking the physical connections, it’s recommended to power off your computer and unplug it from the power source to avoid any potential damage to your system.
Once you have verified the physical connections, try restarting your computer and check if the new hard drive is now detected by Windows. If not, proceed to the next troubleshooting step.
Verify the Drive is Detected in BIOS
If a new hard drive is not showing up in Windows, it’s crucial to check if the drive is detected in the BIOS (Basic Input/Output System). BIOS is responsible for detecting and initializing hardware devices during the computer’s boot-up process. Here’s how to verify if the drive is detected:
- Restart your computer: Start by restarting your computer and entering the BIOS setup. The process may vary depending on your computer brand and model. Usually, pressing the Delete or F2 key during the boot-up process will take you to the BIOS setup.
- Check the drive presence: Once you’re in the BIOS setup, navigate to the “Storage” or “Drives” section. Look for the newly installed hard drive in the list of detected drives. A connected drive should be visible, indicating that it is properly recognized by the system.
- Ensure drive settings: While in the BIOS setup, verify that the drive settings are configured correctly. Ensure that the SATA mode is set to AHCI (Advanced Host Controller Interface) for modern hard drives. If your computer uses an older IDE interface, make sure the drive is set to Master, Slave, or Cable Select, depending on your system’s requirements.
- Save and exit: After confirming the drive’s presence and settings, save any changes made in the BIOS setup and exit. Your computer will then restart and proceed to boot into Windows.
If the new hard drive is not detected in the BIOS or if any settings need to be adjusted, refer to your computer’s user manual or manufacturer’s website for specific instructions on how to properly configure the BIOS for your system.
Remember to save your changes in the BIOS setup before exiting to ensure that the drive is properly recognized by the system. If the drive is still not visible in Windows after verifying the BIOS detection, proceed to the next troubleshooting step.
Initialize the Hard Drive in Disk Management
If a new hard drive is not showing up in Windows, it may require initialization in Disk Management. Disk Management is a built-in utility in Windows that allows you to manage and configure storage devices. Here’s how to initialize the hard drive:
- Open Disk Management: Press the Windows key + X and select “Disk Management” from the menu. Alternatively, you can right-click on the Start button and choose “Disk Management” from the list.
- Identify the new hard drive: In the Disk Management window, look for the newly installed hard drive. It should be labeled as “Unknown” or “Not Initialized.” Note the disk number associated with it.
- Initialize the hard drive: Right-click on the “Unknown” or “Not Initialized” hard drive and select “Initialize Disk” from the context menu.
- Select the partition style: Choose either MBR (Master Boot Record) or GPT (GUID Partition Table) as the partition style. The choice depends on your specific requirements and the capabilities of your system. If unsure, consult the user manual or manufacturer’s documentation.
- Initialize the disk: Click “OK” to initialize the disk.
- Create a new partition: Right-click on the unallocated space of the initialized disk and select “New Simple Volume” from the context menu. Follow the on-screen prompts to create a partition and assign a drive letter.
After completing these steps, the new hard drive should be initialized and accessible in Windows File Explorer. If the drive is still not showing up, proceed to the next troubleshooting step.
Assign a Drive Letter to the Hard Drive
If a new hard drive is not showing up in Windows, it may be due to the lack of a drive letter assignment. Drive letters allow the operating system to identify and access storage devices. Follow these steps to assign a drive letter to the hard drive:
- Open Disk Management: Press the Windows key + X and select “Disk Management” from the menu. Alternatively, right-click on the Start button and choose “Disk Management” from the list.
- Locate the new hard drive: In the Disk Management window, locate the newly installed hard drive. It should display a partition with the “Healthy (Primary Partition)” or “Healthy (Logical Drive)” status.
- Assign a drive letter: Right-click on the partition and select “Change Drive Letter and Paths” from the context menu.
- Click “Add”: In the “Change Drive Letter and Paths” window, click the “Add” button.
- Select a drive letter: Choose an available drive letter from the drop-down menu. It is recommended to assign a letter that is not already in use to avoid conflicts.
- Click “OK”: Click “OK” to assign the selected drive letter to the hard drive partition.
Once you have assigned a drive letter, the new hard drive should now appear in Windows File Explorer and be accessible for use. If the drive is still not showing up, proceed to the next troubleshooting step.
Update the Hard Drive Driver
If a new hard drive is not showing up in Windows, it’s possible that the driver for the hard drive is outdated or missing. Updating the hard drive driver can potentially resolve the issue. Here’s how to update the hard drive driver:
- Open Device Manager: Press the Windows key + X and select “Device Manager” from the menu. Alternatively, right-click on the Start button and choose “Device Manager” from the list.
- Locate the hard drive: In Device Manager, expand the “Disk drives” category. Look for the newly installed hard drive. It might be listed as “Unknown device” or with a generic name.
- Right-click and select “Update driver”: Right-click on the hard drive and choose “Update driver” from the context menu.
- Search automatically for updated driver software: In the Update Driver window, select the option to search automatically for updated driver software. Windows will then search for the latest driver for the hard drive online.
- Follow on-screen prompts: If Windows finds an updated driver, follow the on-screen prompts to install it. If no updated driver is found, you may need to manually download the latest driver from the manufacturer’s website and install it.
Once the hard drive driver is updated, restart your computer and check if the new hard drive is now showing up in Windows. If not, proceed to the next troubleshooting step.
Rescan for Hardware Changes
If a new hard drive is not showing up in Windows, performing a rescan for hardware changes can help detect the drive and make it visible. Here’s how to rescan for hardware changes:
- Open Device Manager: Press the Windows key + X and select “Device Manager” from the menu. Alternatively, right-click on the Start button and choose “Device Manager” from the list.
- Navigate to “Disk drives”: In Device Manager, locate and expand the “Disk drives” category.
- Right-click and select “Scan for hardware changes”: Right-click on any item within the “Disk drives” category and choose “Scan for hardware changes” from the context menu. This action triggers Windows to look for any connected but unrecognized hard drives.
- Wait for the scan to complete: Windows will automatically scan for hardware changes and try to detect the new hard drive. Be patient and wait for the process to finish.
- Check for the drive in Disk Management: After the scan, open Disk Management (press the Windows key + X and select “Disk Management”) and check if the new hard drive is now showing up. If it is, proceed with initializing and assigning a drive letter to the drive as mentioned in the previous sections.
Performing a rescan for hardware changes can often resolve issues where a new hard drive is not initially detected by Windows. However, if the drive is still not showing up after the scan, try the next troubleshooting step.
Enable the Drive in Device Manager
If a new hard drive is not showing up in Windows, it’s possible that the drive is disabled in Device Manager. Enabling the drive can help make it visible and accessible. Here’s how to enable the drive in Device Manager:
- Open Device Manager: Press the Windows key + X and select “Device Manager” from the menu. Alternatively, right-click on the Start button and choose “Device Manager” from the list.
- Expand the “Disk drives” category: In Device Manager, locate and expand the “Disk drives” category.
- Find the new hard drive: Look for the newly installed hard drive in the list. It might be listed as “Unknown device” or with a generic name.
- Right-click and select “Enable device”: Right-click on the hard drive and choose “Enable device” from the context menu.
Once the drive is enabled, it should become visible in the Windows File Explorer and accessible for use. If the drive still does not show up, proceed to the next troubleshooting step.
Disable Third-Party Disk Management Tools
If a new hard drive is not showing up in Windows, it’s possible that third-party disk management tools are conflicting with the system’s ability to detect the drive. Disabling these tools can help resolve the issue. Here’s how to disable third-party disk management tools:
- Open Task Manager: Press the Ctrl + Shift + Esc keys together to open Task Manager.
- Switch to the “Startup” tab: In Task Manager, switch to the “Startup” tab. This tab displays a list of programs and utilities that launch automatically when your computer starts.
- Identify third-party disk management tools: Look for any third-party disk management tools in the list of startup programs. These tools may have names like “Disk Management Utility” or “Drive Manager”.
- Select and disable the tools: Right-click on each third-party disk management tool and choose “Disable” from the context menu. This action prevents the tools from launching automatically during system startup.
- Restart your computer: Restart your computer to apply the changes.
By disabling third-party disk management tools, you allow Windows to have complete control over managing and detecting hard drives. After restarting, check if the new hard drive is now showing up in Windows File Explorer. If the drive still does not appear, proceed to the next troubleshooting step.
Run Hardware Troubleshooter
If a new hard drive is not showing up in Windows, running the built-in hardware troubleshooter can help identify and resolve any issues that might be preventing the drive from being detected. Here’s how to run the hardware troubleshooter:
- Open Settings: Press the Windows key + I to open the Settings app.
- Select “Update & Security”: In the Settings window, click on “Update & Security” to access the update and security settings.
- Choose “Troubleshoot”: In the left sidebar, click on “Troubleshoot” to view the available troubleshooters.
- Select “Hardware and Devices”: Scroll down and locate the “Hardware and Devices” troubleshooter. Click on it and select “Run the troubleshooter”.
- Follow the on-screen instructions: The troubleshooter will now scan and analyze your system for hardware-related issues. Follow any on-screen instructions provided by the troubleshooter.
- Apply recommended fixes: If the troubleshooter identifies any issues, it will offer recommendations or fixes. Apply the recommended fixes as prompted.
After running the hardware troubleshooter, restart your computer and check if the new hard drive is now showing up in Windows. If it is still not visible, proceed to the next troubleshooting step.
Perform a Clean Installation of Windows
If all previous troubleshooting steps have failed to resolve the issue of a new hard drive not showing up in Windows, performing a clean installation of the operating system may be necessary. This process will reinstall Windows from scratch and provide a fresh environment for detecting and utilizing the hard drive. Here’s how to perform a clean installation of Windows:
- Back up important data: Before proceeding with a clean installation, ensure that you have backed up all your important files and data to an external storage device.
- Create installation media: Obtain a Windows installation media, such as a USB drive or DVD, that matches your version of Windows. You can download the official installation files from the Microsoft website.
- Boot from the installation media: Connect the installation media to your computer and restart it. Enter the computer’s BIOS settings by pressing the designated key (such as F2 or Del) during startup. Configure the BIOS to boot from the installation media.
- Install Windows: Follow the on-screen instructions to start the installation process. Select the desired language, keyboard layout, and other preferences.
- Format the hard drive: During the installation, you will come across a screen that asks where you want to install Windows. Here, you can format the new hard drive to remove any previous configurations. Be cautious and ensure that you select the correct hard drive.
- Complete the installation: Once the hard drive has been formatted, continue with the installation process as prompted. Follow the instructions to set up Windows, create a user account, and personalize your settings.
- Install necessary drivers: After the clean installation of Windows is complete, install the required drivers for your computer’s hardware, including the new hard drive.
- Restore your files: Finally, restore your backed-up files and data to the newly installed Windows, ensuring that the new hard drive is recognized and accessible.
A clean installation of Windows provides a fresh start, which can often resolve issues related to hard drive detection. However, make sure to consult official Windows documentation or seek assistance if you are uncertain about the installation process.