
Why do you need to find your laptop serial number?
When it comes to troubleshooting, upgrading, or repairing your laptop, knowing its serial number is essential. The serial number is a unique identifier that can provide vital information about your device, such as its warranty status, manufacturing date, and specific model details. Here are three key reasons why finding your laptop serial number is important:
- Warranty Claims: If your laptop is still under warranty and experiencing hardware issues, the manufacturer may ask for the serial number to validate your coverage. Having this information readily available can help expedite the warranty claim process and save you time and hassle.
- Researching Upgrades: When planning to upgrade your laptop’s components, such as RAM or storage, it is crucial to have the correct serial number. This ensures that you purchase compatible parts that fit your specific model, preventing any compatibility issues and avoiding unnecessary expenditures.
- Lost or Stolen Laptop: In unfortunate instances of a lost or stolen laptop, providing the serial number to law enforcement agencies can assist in tracking and recovering your device. Additionally, knowing the serial number enables you to report the loss to the manufacturer, making it more challenging for thieves to sell or service the stolen laptop.
Finding your laptop serial number is not only beneficial for these specific scenarios but also helps in overall device management and maintenance. It allows you to access specific support resources, software updates, and driver downloads from the manufacturer’s website targeted to your model.
Now that you understand the importance of finding your laptop serial number, let’s explore how you can locate it on different operating systems such as Windows, macOS, Linux, and Chromebook.
Finding your laptop serial number on Windows
On Windows operating systems, there are several ways to find your laptop’s serial number. Here are three methods you can try:
- System Information: One of the easiest ways to find your laptop’s serial number is through the System Information utility. To access it, press the Windows key + R to open the Run dialog box, type “msinfo32”, and hit Enter. In the System Information window, look for the “System Model” or “Serial Number” field to find your laptop’s serial number.
- Command Prompt: Another way to retrieve your laptop’s serial number is by using the Command Prompt. Press the Windows key, type “cmd,” and open the Command Prompt. Once it’s open, type the command “wmic bios get serialnumber” and hit Enter. The Command Prompt will display your laptop’s serial number.
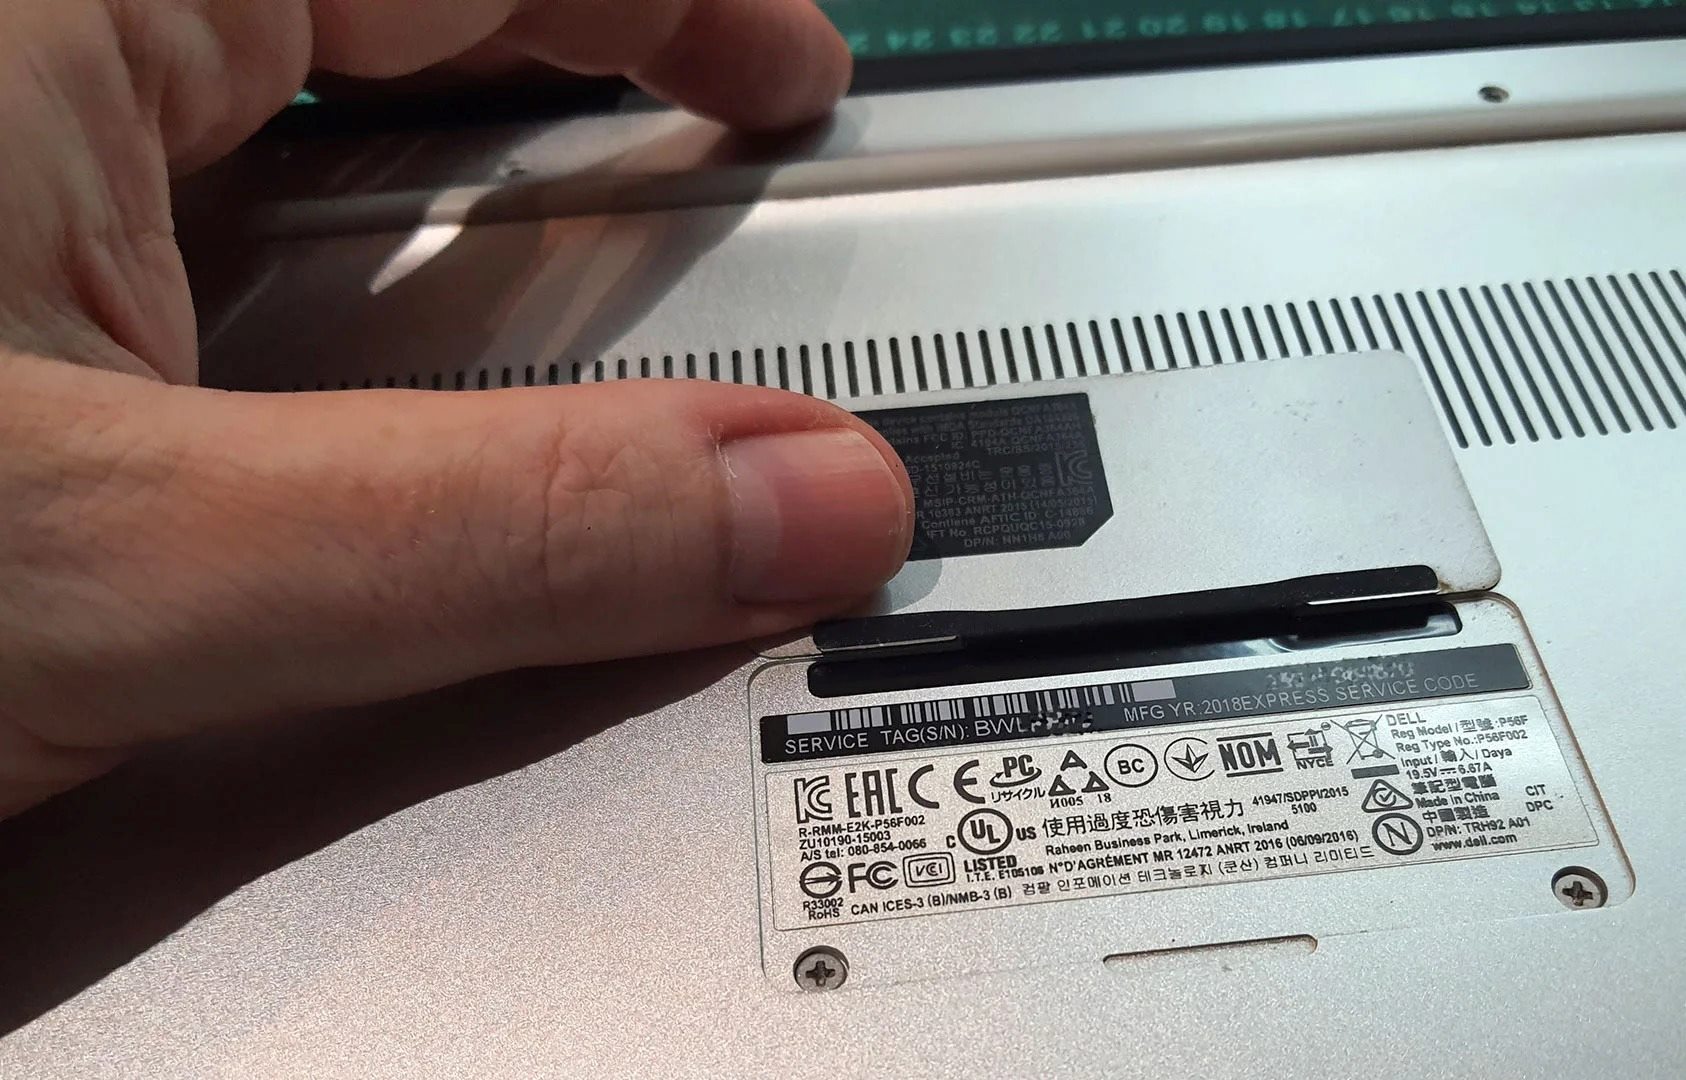
- Sticker on Laptop: Many laptops have a serial number sticker located on the bottom case or underneath the battery. Carefully flip over your laptop to check for any labels or stickers with information about the serial number. It may be labeled as “S/N,” “SN,” or “Serial Number.”
Remember, the steps may vary slightly depending on your specific laptop model and Windows version. If you’re having trouble locating the serial number using these methods, consult your laptop’s user manual or the manufacturer’s support website for further assistance.
Now that you know how to find your laptop’s serial number on Windows, let’s move on to discovering the process on macOS.
Finding your laptop serial number on macOS
If you’re using a MacBook or any other Apple laptop running macOS, here are a few ways to find the serial number:
- About This Mac: The easiest way to locate your laptop’s serial number on macOS is through the “About This Mac” option. Click on the Apple icon in the top left corner of your screen, then select “About This Mac.” In the window that appears, click on the “Overview” tab. You will find your laptop’s serial number listed here.
- System Information: Another way to access your laptop’s serial number is through the System Information utility. From the “About This Mac” window, click on the “System Report” button. In the System Information window, navigate to the “Hardware” section and look for the “Serial Number” field.
- Underneath your laptop: Some MacBook models have the serial number printed on the underside of the device. Flip over your laptop and check for any labels, stickers, or engravings that display the serial number. It may be labeled as “S/N,” “SN,” or “Serial Number.”
If you’re unable to find the serial number using these methods, you can also check the original packaging, receipt, or invoice that came with your laptop. Additionally, you can sign in to your Apple ID account on the Apple website and look for your registered devices, where the serial number should be listed.
Now that you know how to find your laptop’s serial number on macOS, let’s move on to discovering the process on Linux.
Finding your laptop serial number on Linux
On Linux operating systems, the process of finding your laptop’s serial number can vary depending on the distribution and desktop environment you are using. Here are a couple of common methods:
- dmidecode Command: The dmidecode command is a handy tool that can retrieve various system information, including the serial number. Open the terminal and enter the command “sudo dmidecode -s system-serial-number”. You may be prompted to enter your password. Once entered, the terminal will display your laptop’s serial number.
- Sticker on Laptop: Like other operating systems, many laptops have a serial number sticker located on the bottom case or underneath the battery. Flip over your laptop and look for any labels or stickers with information about the serial number. It may be labeled as “S/N,” “SN,” or “Serial Number.”
If the dmidecode command is not installed on your system, you can usually install it using your package manager. For example, on Ubuntu or Debian-based distributions, you can use the command “sudo apt install dmidecode” to install it.
Keep in mind that Linux is a highly customizable operating system, and specific distributions or desktop environments may have different methods to access system information. If you’re having difficulty finding your laptop’s serial number using these methods, refer to the documentation of your particular Linux distribution or seek assistance from the community support forums.
Now that you know how to find your laptop’s serial number on Linux, let’s move on to discovering the process on Chromebook.
Finding your laptop serial number on Chromebook
Chromebooks have a slightly different method for locating the serial number compared to other operating systems. Here’s how you can find the serial number on your Chromebook:
- About Chrome OS: Click on the clock in the bottom right corner of the screen to open the system tray. From there, click on the gear icon to open the Settings menu. In the Settings menu, scroll down and click on “About Chrome OS” or “About Chromebook.” You will find the serial number listed under the “Device” or “About” section.
- Underneath your Chromebook: Some Chromebook models have the serial number printed on a sticker underneath the device. Flip over your Chromebook and check for any labels, stickers, or engravings that display the serial number. It may be labeled as “S/N,” “SN,” or “Serial Number.”
- Original Packaging: If you still have the original packaging or box that your Chromebook came in, the serial number is often printed on the box itself. Check the label or the back of the box for any serial number information.
If you’re unable to find the serial number using these methods, consult the user manual or visit the manufacturer’s support website for further guidance. Additionally, if you have registered your Chromebook with your Google account, you may be able to find the serial number listed under your device’s information in your Google account settings.
Now that you know how to find your laptop’s serial number on a Chromebook, let’s explore some alternative ways to locate the serial number on different operating systems.
Alternative ways to find your laptop serial number
If the methods mentioned earlier don’t work for you or if you’re looking for additional ways to find your laptop’s serial number, here are some alternative methods you can try:
- BIOS/UEFI Settings: Restart your laptop and access the BIOS or UEFI settings by pressing a specific key during the boot process (such as F2, F10, or Del). Once in the settings, navigate to the System Information or System Configuration section. Look for the serial number listed in this section.
- Manufacturer’s Support Website: Visit the manufacturer’s support website and enter your laptop’s model number or product name. The website may provide a support section where you can enter your laptop’s serial number to retrieve specific information about your device.
- System Management Software: Some laptops come with system management software pre-installed, such as Dell Command | Update or HP Support Assistant. These software utilities often display detailed information about your laptop, including the serial number.
- Contacting Customer Support: If all else fails, you can contact the manufacturer’s customer support directly. Provide them with your laptop’s model number and any other relevant information, and they should be able to assist you in finding the serial number.
Remember, the exact steps to find the serial number may vary depending on your laptop’s brand, model, and operating system. It’s always a good idea to consult your laptop’s user manual or the manufacturer’s support resources for specific instructions tailored to your device.
By utilizing these alternative methods, you are more likely to find the serial number of your laptop, enabling you to take advantage of warranty coverage, make informed decisions about upgrades, and ensure device security.
Now that you have explored various methods to find your laptop’s serial number, what should you do if you cannot find it? Let’s find out in the next section.
What to do if you cannot find your laptop serial number
If you have tried all the methods mentioned earlier and still cannot locate your laptop’s serial number, don’t worry. Here are a few steps you can take:
- Check your documentation: Look through the user manual, warranty information, or any other paperwork that came with your laptop. The serial number may be printed on one of these documents.
- Check the box or receipt: If you still have the original box or receipt from your laptop purchase, check for any labels or stickers that display the serial number. It might be listed as part of the product information.
- Check your warranty email: If you registered your laptop for warranty coverage, search your email inbox for any confirmation or registration emails from the manufacturer. These emails may contain your laptop’s serial number.
- Consult manufacturer support: Reach out to the manufacturer’s customer support for assistance. Provide them with any information you have about your laptop, such as the model number, purchase date, and any unique identifiers. They may be able to help you locate the serial number or provide guidance on what to do next.
Remember, the serial number is a crucial piece of information for various purposes, so it’s important to try your best to locate it. Keeping it in a safe place, along with other essential documents related to your laptop, can save you time and frustration in the future.
In case you purchased a used laptop or received it as a gift without the serial number, and none of the above methods work, it may be difficult to determine the exact serial number. In such cases, you can still contact the manufacturer’s customer support and provide them with any information you have about the laptop. They may be able to assist you based on other identifiers or information you provide.
Remember that prevention is always better than cure. Make it a habit to record your laptop’s serial number as soon as you get it, and store it in a secure location for future reference.
With the knowledge and understanding of what to do if you cannot find your laptop’s serial number, you can now confidently navigate any issues or inquiries that may arise regarding your device.