
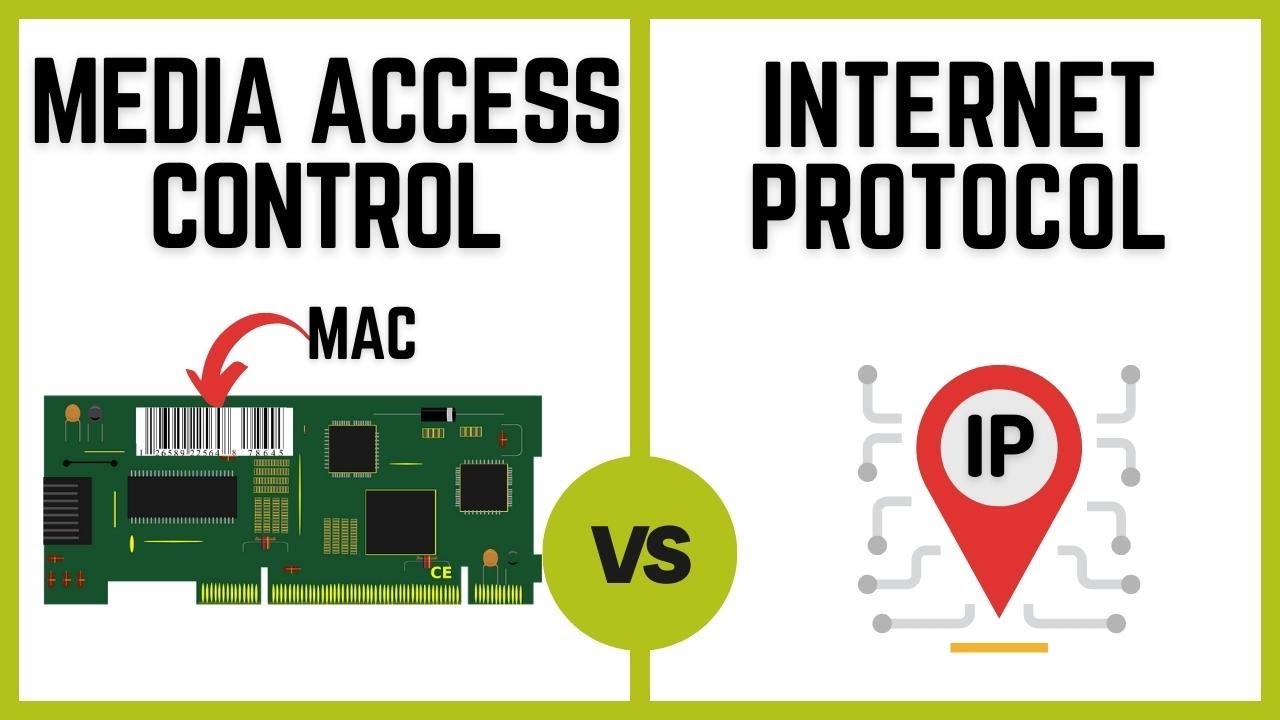
What is an IP Address?
An IP address, or Internet Protocol address, is a numerical label assigned to each device connected to a computer network that uses the Internet Protocol for communication. This unique identifier allows devices within a network to communicate with each other and with other networks.
IP addresses consist of a series of numbers, separated by periods, such as 192.168.0.1. They serve two primary functions: identifying the host or network interface, and providing the location of the device in the network. Just like how a physical address helps us locate a house or a building, an IP address allows data to be routed to the correct destination on the internet.
There are two types of IP addresses: IPv4 and IPv6. IPv4 addresses consist of four sets of numbers ranging from 0 to 255, while IPv6 addresses are longer and use alphanumeric characters. The transition from IPv4 to IPv6 is ongoing, as IPv4 addresses are becoming scarce due to the growth of internet-connected devices.
An IP address does not contain any personal information about the user or the device itself, but it can be used to determine the general geographical location of a device, as well as the internet service provider (ISP) used.
IP addresses are crucial for various internet protocols and services, including web browsing, email communication, online gaming, and voice over IP (VoIP) calls. Each time you connect to the internet, your device is assigned an IP address dynamically by your ISP or router, or it may have a static IP address assigned permanently.
Overall, IP addresses play a fundamental role in facilitating communication and enabling the internet to function as a global network of interconnected devices.
What is a MAC Address?
A MAC address, short for Media Access Control address, is a unique identifier assigned to the network interface card (NIC) of a device. Unlike an IP address, which can change, a MAC address is permanently assigned to a specific network interface and cannot be altered.
MAC addresses are 48-bit alphanumeric codes, typically displayed as six pairs of hexadecimal digits, separated by colons or hyphens. For example, 00:1A:2B:3C:4D:5E. The first half of the MAC address identifies the manufacturer or vendor of the network interface, while the second half is a unique identifier assigned by the manufacturer.
The primary purpose of a MAC address is to provide a unique identifier for devices on a local network. It enables data to be transmitted between devices within the same network by ensuring that each device has a unique address to send and receive information.
Every device with network capabilities, including computers, smartphones, tablets, and network-enabled devices, such as printers and routers, has a MAC address. The MAC address is used at the data link layer of the network protocol stack and is essential for the Ethernet protocol, which is commonly used in wired and wireless local area networks (LANs).
It’s important to note that MAC addresses are not visible outside the local network. They are used for internal network communication and are not directly associated with the internet. However, MAC addresses are used in network management and security measures, such as MAC address filtering, which allows or restricts network access based on specific MAC addresses.
MAC addresses are unique identifiers that ensure efficient and accurate communication within a local network. By providing a fixed address for each device’s network interface, MAC addresses play a vital role in enabling devices to connect and communicate with each other seamlessly.
Finding Your IP Address
Knowing your IP address is essential for various network-related tasks, such as troubleshooting network connectivity issues or setting up a local server. Here are three methods to find your IP address on a Windows computer:
Method 1: Using the Command Prompt
1. Press the Windows key + R to open the Run dialog box.
2. Type “cmd” and press Enter to open the Command Prompt.
3. In the Command Prompt window, type “ipconfig” and press Enter.
4. Look for the “IPv4 Address” under the network adapter you are currently using. This address is your IP address.
Method 2: Using the Windows Network Connections Menu
1. Right-click on the network icon in the system tray (usually located in the bottom right corner) and select “Open Network & Internet settings.”
2. In the Network & Internet settings window, click on “Change adapter options.”
3. Right-click on the network adapter you are currently using and select “Status.”
4. In the connection status window, click on “Details.”
5. Locate the “IPv4 Address” field. Your IP address will be displayed here.
Method 3: Using the Windows Settings Menu
1. Press the Windows key + I to open the Settings menu.
2. Click on “Network & Internet.”
3. In the Network & Internet settings, click on “View your network properties.”
4. Scroll down until you find the “Properties” section.
5. Look for the “IPv4 address” or “IPv6 address” depending on your network configuration. This will be your IP address.
By following these methods, you can easily find your IP address on a Windows computer. Remember that the IP address may change if you switch networks or if your internet connection is assigned a dynamic IP address. Therefore, it’s a good idea to verify your IP address whenever necessary.
Method 1: Using the Command Prompt
Using the Command Prompt is a quick and efficient way to find your IP address on a Windows computer. Follow these steps:
1. Press the Windows key + R to open the Run dialog box.
2. Type “cmd” and press Enter to open the Command Prompt.
3. In the Command Prompt window, type “ipconfig” and press Enter.
4. Look for the “IPv4 Address” listed under the network adapter you are currently using. This address will be displayed in the format of four sets of numbers separated by periods, such as 192.168.0.1.
The Command Prompt method provides detailed information about your network adapters, including their IP addresses. You will see multiple network adapters listed, such as Ethernet, Wi-Fi, or VirtualBox, if you have them installed on your computer. Make sure to locate the correct network adapter you are currently using to identify your IP address accurately.
If you are using both IPv4 and IPv6, you will find both addresses listed in the output. The IPv4 address is typically the one used for most network communication, but some networks may prioritize IPv6.
Using the Command Prompt method is particularly useful for troubleshooting network issues or verifying network configurations. It provides a comprehensive view of your network settings and can help you diagnose any networking problems you may encounter.
Remember that the IP address displayed using this method is specific to your local network. If you are connected to a larger network, such as a corporate network or a public Wi-Fi network, the IP address you see may not be your public IP address, which is assigned by your Internet Service Provider (ISP).
Keep in mind that IP addresses obtained through the Command Prompt method are dynamic and subject to change. If you disconnect and reconnect to the network, or if your ISP assigns you a new IP address, the IP address displayed using this method will be different. It’s always a good idea to check your IP address periodically if you need to provide it for network-related tasks.
Method 2: Using the Windows Network Connections Menu
The Windows Network Connections menu provides a user-friendly interface to find your IP address. Follow the steps below to locate your IP address using this method:
1. Right-click on the network icon in the system tray, typically located in the bottom right corner of the screen, and select “Open Network & Internet settings.”
2. In the Network & Internet settings window, click on “Change adapter options.”
3. You will see a list of network adapters on your computer. Right-click on the network adapter that you are currently using and select “Status.”
4. In the connection status window, click on the “Details” button.
5. A new window will open, displaying various information about your network connection. Look for the “IPv4 Address” or “IPv6 Address” field. The IP address associated with your network connection will be listed here.
The Windows Network Connections menu presents a simplified view of your network adapters, making it easier to identify the IP address associated with your current network connection. This method is particularly useful when you have multiple network adapters installed on your computer, such as Ethernet and Wi-Fi, and you want to check the IP address for a specific network interface.
If you are using both IPv4 and IPv6, you will find both addresses listed in the output. The IPv4 address is typically the one used for most network communication, but some networks may prioritize IPv6.
Using the Windows Network Connections menu allows you to quickly access network-related settings and view essential network information in a user-friendly manner. It eliminates the need to delve into technical details and provides an intuitive way to find your IP address.
Remember that the IP address displayed using this method is specific to your local network. If you are connected to a larger network, such as a corporate network or a public Wi-Fi network, the IP address you see may not be your public IP address, which is assigned by your Internet Service Provider (ISP).
Keep in mind that IP addresses obtained through this method are dynamic and subject to change. If you disconnect and reconnect to the network, or if your ISP assigns you a new IP address, the IP address displayed using this method will be different. Therefore, it’s a good idea to check your IP address periodically, especially when troubleshooting network connectivity issues or setting up network-related configurations.
Method 3: Using the Windows Settings Menu
The Windows Settings menu provides an alternative method to find your IP address on a Windows computer. Follow the steps below to locate your IP address using this method:
1. Press the Windows key + I to open the Settings menu.
2. Click on “Network & Internet.”
3. In the Network & Internet settings, click on “View your network properties.”
4. Scroll down until you find the “Properties” section.
5. Look for the “IPv4 address” or “IPv6 address” depending on your network configuration. Your IP address will be displayed here.
The Windows Settings menu offers a convenient way to access various network-related settings and view essential network information, including your IP address. This method eliminates the need to navigate through multiple windows and provides a straightforward interface to find your IP address.
If you are using both IPv4 and IPv6, you will find both addresses listed in the output. The IPv4 address is typically the one used for most network communication, but some networks may prioritize IPv6.
Using the Windows Settings menu is particularly useful when you are less familiar with command-line interfaces or prefer a more visually-oriented approach to managing your network settings. It offers an intuitive way to find important network information without requiring technical expertise.
Remember that the IP address displayed using this method is specific to your local network. If you are connected to a larger network, such as a corporate network or a public Wi-Fi network, the IP address you see may not be your public IP address, which is assigned by your Internet Service Provider (ISP).
Keep in mind that IP addresses obtained through this method are dynamic and subject to change. If you disconnect and reconnect to the network, or if your ISP assigns you a new IP address, the IP address displayed using this method will be different. Therefore, it’s a good idea to check your IP address periodically, especially when troubleshooting network connectivity issues or setting up network-related configurations.
Finding Your MAC Address
Locating your MAC address is necessary for various network-related tasks, such as configuring network access control and troubleshooting network connectivity. There are different methods to find your MAC address on a Windows computer:
Method 1: Using the Command Prompt
1. Press the Windows key + R to open the Run dialog box.
2. Type “cmd” and press Enter to open the Command Prompt.
3. In the Command Prompt window, type “ipconfig /all” and press Enter.
4. Scroll through the output and look for the “Physical Address” or “MAC Address.” The twelve-digit alphanumeric code listed under this section represents your MAC address.
Method 2: Using the Network and Sharing Center
1. Right-click on the network icon in the system tray and select “Open Network & Internet settings.”
2. In the Network & Internet settings window, click on “Network and Sharing Center.”
3. In the Network and Sharing Center, click on the connection type (such as “Wi-Fi” or “Ethernet”) that you are currently using.
4. In the new window that opens, click on “Details.”
5. Look for the “Physical Address” field. The twelve-digit alphanumeric code listed here is your MAC address.
Method 3: Using the Device Manager
1. Press the Windows key + X to open the Power User menu and select “Device Manager.”
2. In the Device Manager window, expand the “Network adapters” section.
3. Right-click on your network adapter and select “Properties.”
4. In the Properties window, click on the “Advanced” tab.
5. Locate the property labeled “Network Address” or “Locally Administered Address.” The value displayed next to this property is your MAC address.
By using these methods, you can easily find your MAC address on a Windows computer. The MAC address is a unique identifier associated with your network adapter and is used for communication within a local network. Knowing your MAC address is essential for network administration and troubleshooting purposes.
Method 1: Using the Command Prompt
Using the Command Prompt is an efficient way to find your MAC address on a Windows computer. Follow these steps:
1. Press the Windows key + R to open the Run dialog box.
2. Type “cmd” and press Enter to open the Command Prompt.
3. In the Command Prompt window, type “ipconfig /all” and press Enter.
4. Scroll through the output and locate the network adapter you are interested in. This can be labeled as “Ethernet adapter” or “Wireless adapter,” depending on your configuration.
5. Look for the line labeled “Physical Address” or “MAC Address” under the network adapter. The MAC address will be a twelve-digit alphanumeric code, usually formatted with colons or hyphens, such as “00:1A:2B:3C:4D:5E”.
The Command Prompt method provides detailed network information, including the MAC address, for all network adapters currently present on your computer. If you have multiple network adapters, make sure to identify the correct adapter you want to find the MAC address for.
The MAC address is a unique identifier assigned to the network adapter during manufacturing. It is used for communication within a local network, and each network adapter has its own MAC address. By finding your MAC address, you can differentiate your device from others on the same network.
Using the Command Prompt method is particularly useful for troubleshooting network-related issues or accessing network-specific settings. The extensive information provided allows you to examine various network parameters, including the MAC address, to diagnose and resolve connection problems.
Keep in mind that MAC addresses are permanent and cannot be changed. They are hardware-based identifiers and serve as a unique signature for your network adapter. However, note that some advanced network configurations, such as MAC address spoofing, can temporarily modify the MAC address for specific purposes.
By using the Command Prompt method, you can easily retrieve the MAC address of your network adapter. This information is essential for network management and security, allowing you to identify your device and regulate network access accordingly.
Method 2: Using the Network and Sharing Center
The Network and Sharing Center provides a user-friendly interface to find your MAC address on a Windows computer. Follow these steps to locate your MAC address using this method:
1. Right-click on the network icon in the system tray, usually located in the bottom right corner of the screen, and select “Open Network & Internet settings.”
2. In the Network & Internet settings window, click on “Network and Sharing Center.”
3. In the Network and Sharing Center, you will see an overview of your network connections. Under “View your active networks,” click on the name of the network you are currently connected to.
4. In the new window that opens, click on the “Details” button.
5. A window will appear, displaying various network information. Look for the line labeled “Physical Address” or “MAC Address”. The MAC address associated with your network connection will be displayed here, usually in the format of six pairs of alphanumeric characters separated by colons or hyphens.
The Network and Sharing Center method provides an accessible way to find your MAC address, especially for users who prefer a graphical interface. It simplifies the process of accessing network-related information and eliminates the need for using complex commands or delving into technical details.
It’s important to note that different network adapters may have different MAC addresses. For example, if you have both an Ethernet adapter and a Wi-Fi adapter, each of them will have a separate MAC address. Ensure that you are looking at the MAC address of the correct network connection.
The MAC address is a unique identifier assigned to the network adapter during manufacturing. It serves as a hardware-based identifier for your device on the network. By knowing your MAC address, you can effectively manage network access and configure network-specific settings.
Remember that MAC addresses are permanent and cannot be changed. They are tied to the hardware of your network adapter and act as a unique identifier. However, it’s worth noting that some advanced network configurations, such as MAC address spoofing, can temporarily modify the MAC address for specific purposes.
Using the Network and Sharing Center method, you can easily retrieve the MAC address associated with your network connection. This information is valuable for network administration and troubleshooting tasks, allowing you to identify your device on the network and maintain network security.
Method 3: Using the Device Manager
The Device Manager provides an alternative method to find your MAC address on a Windows computer. Follow these steps to locate your MAC address using this method:
1. Press the Windows key + X to open the Power User menu and select “Device Manager.”
2. In the Device Manager window, expand the “Network adapters” section.
3. You will see a list of network adapters installed on your computer. Right-click on the network adapter you want to find the MAC address for and select “Properties.”
4. In the Properties window, click on the “Advanced” tab.
5. Look for the property labeled “Network Address” or “Locally Administered Address.” The value displayed next to this property is your MAC address.
The Device Manager method provides a straightforward way to find the MAC address of your network adapter. It allows you to access advanced device properties and configure specific network-related settings.
It’s important to note that each network adapter has its own MAC address. If your computer has multiple network adapters, such as Ethernet and Wi-Fi, you will need to identify the correct network adapter from the list in Device Manager.
The MAC address, also known as the Physical Address, is a unique identifier assigned to the network adapter during manufacturing. It serves as a permanent hardware-based identifier for your device on the network. By knowing your MAC address, you can enforce network access control and troubleshoot network connectivity issues.
Remember that MAC addresses are fixed and cannot be changed. They are associated with the network adapter’s hardware and act as a unique signature for your device. However, in some cases, certain advanced network configurations may allow temporary modification of the MAC address for specific purposes, such as MAC address spoofing.
Using the Device Manager method, you can quickly find the MAC address of the specific network adapter you are interested in. This information is valuable for network administration, network security, and resolving network-related problems.
Troubleshooting Tips
Encountering network issues can be frustrating, but there are some troubleshooting tips you can follow to help resolve common problems. Here are a few suggestions:
1. Restart your device and networking equipment
Often, a simple restart can resolve connectivity issues. Start by restarting your computer or device. If the problem persists, try restarting your router or modem as well. Sometimes, a temporary glitch or configuration issue can be resolved by power cycling your devices.
2. Check physical connections
Ensure that all cables and connections are secure and properly plugged in. Loose or damaged cables can cause network disruptions. Double-check the Ethernet cables, power cables, and any other connections related to your network devices.
3. Disable and enable your network adapter
If you’re experiencing issues with a specific network adapter, such as Wi-Fi or Ethernet, you can try disabling and then re-enabling the adapter. To do this, go to the Device Manager, locate the network adapter, right-click on it, and select “Disable.” After a few seconds, right-click on it again and select “Enable.”
4. Update your network adapter drivers
Outdated or corrupted drivers can lead to network problems. Visit the website of your device manufacturer or the network adapter manufacturer to check for any available driver updates. Download and install the latest drivers for your network adapters to ensure they are compatible with your operating system.
5. Reset network settings
If you’re experiencing persistent network issues, you can try resetting your network settings. Go to the Network & Internet settings in the Windows settings menu and click on the “Network reset” option. This will reset all network-related settings to their default configuration. Note that this will remove any saved Wi-Fi passwords, so be prepared to reconnect to your networks.
6. Temporarily disable firewalls and security software
In some cases, firewalls or security software can interfere with network connections. Temporarily disable these applications and check if your network issues persist. If disabling the software resolves the problem, consider adjusting the settings or seeking assistance from the software provider to ensure network compatibility.
7. Contact your internet service provider (ISP)
If you have tried the above troubleshooting tips and are still experiencing network problems, it may be necessary to contact your ISP. They can help diagnose any issues with your internet connection or provide assistance with specific network configurations.
Remember, each network setup can have unique challenges, so if these general troubleshooting tips don’t resolve your issue, it may be beneficial to seek further assistance from a technical support professional or IT specialist.