
What is the Windows Registry?
The Windows Registry is a centralized database that stores important configuration settings and options for the Microsoft Windows operating system. It is essentially a hierarchical collection of keys, subkeys, and values that holds information about various system components, applications, and user preferences.
Think of the Registry as a giant library that houses all the settings and preferences that determine how your Windows operating system functions. It contains a vast array of data, ranging from system-specific information such as hardware configurations and device drivers, to user-specific settings like desktop backgrounds, application preferences, and email settings.
The Registry is crucial for the proper functioning of Windows as it serves as a repository of critical information that programs and processes consult to perform their tasks. When you install software, make system changes, or modify settings, Windows updates the Registry accordingly to reflect those updates. In other words, the Registry acts as a control center for your Windows system, helping it run smoothly and maintain the desired settings.
Within the Registry, keys and subkeys organize related settings and preferences into logical categories. Each key can contain values that define specific parameters related to various aspects of the operating system or applications. These values can be anything from simple binary data to more complex strings of text that define various settings.
Accessing and modifying the Windows Registry should be done with caution, as improper changes can lead to system instability or other issues. It is always recommended to create a backup of the Registry before making any modifications so that you can restore it if something goes wrong.
Why would you need to find email settings in the Windows Registry?
Configuring email accounts on your computer typically involves entering certain settings such as incoming and outgoing server addresses, port numbers, and authentication methods. While email clients usually provide a user-friendly interface for setting up accounts, there may be situations where you need to find and modify email settings directly in the Windows Registry.
One common scenario where accessing email settings in the Windows Registry is necessary is when troubleshooting email-related issues. If you’re experiencing problems with sending or receiving emails, a misconfiguration of the email settings could be the culprit. By finding and examining the email settings in the Registry, you can verify if they are correctly set or make the necessary changes to resolve the issue.
Another reason you might need to locate email settings in the Registry is when migrating email accounts or transferring them to a new computer. Rather than going through the process of manually configuring email accounts on the new machine, you can export the email settings from the Registry and import them onto the new system. This saves time and ensures that the email accounts are set up exactly as they were on the old computer.
In certain cases, email settings may not be available in the email client’s user interface or may be hidden due to specific configurations or restrictions. In such instances, navigating to the email settings in the Registry allows you to access and modify these settings directly, providing more flexibility and control over the email configuration.
Furthermore, advanced users or system administrators may need to customize email settings for specific purposes, such as integrating email functionality into custom applications or implementing specialized email configurations. By finding and modifying the email settings in the Registry, they can tailor the email setup to meet their specific requirements.
It’s important to note that modifying the Registry can have serious repercussions if done incorrectly. Therefore, it’s recommended to proceed with caution and make backups before making any changes. Moreover, it’s always a good practice to refer to official documentation or seek assistance from knowledgeable sources when working with the Windows Registry.
Step 1: Accessing the Windows Registry
To find email settings in the Windows Registry, you first need to access the Registry Editor tool, which allows you to view and modify the Registry. Follow these steps to access the Windows Registry:
- Open the Run dialog by pressing the Windows key + R on your keyboard.
- Type “regedit” in the Run dialog box and hit Enter or click on the OK button.
This will launch the Registry Editor. - A User Account Control (UAC) prompt may appear asking for permission to run the Registry Editor. Click on Yes to proceed.
Note: If you don’t have administrative privileges on your computer, you may not be able to access the Registry. - Once the Registry Editor opens, you will see a hierarchal structure on the left side, consisting of various folders called “keys.” These keys contain different settings and configurations for your Windows operating system.
Now that you have successfully accessed the Windows Registry, you can proceed to the next step to navigate to the email settings.
Step 2: Navigating to the email settings
After accessing the Windows Registry, the next step is to navigate to the location where the email settings are stored. Follow these steps to find the email settings:
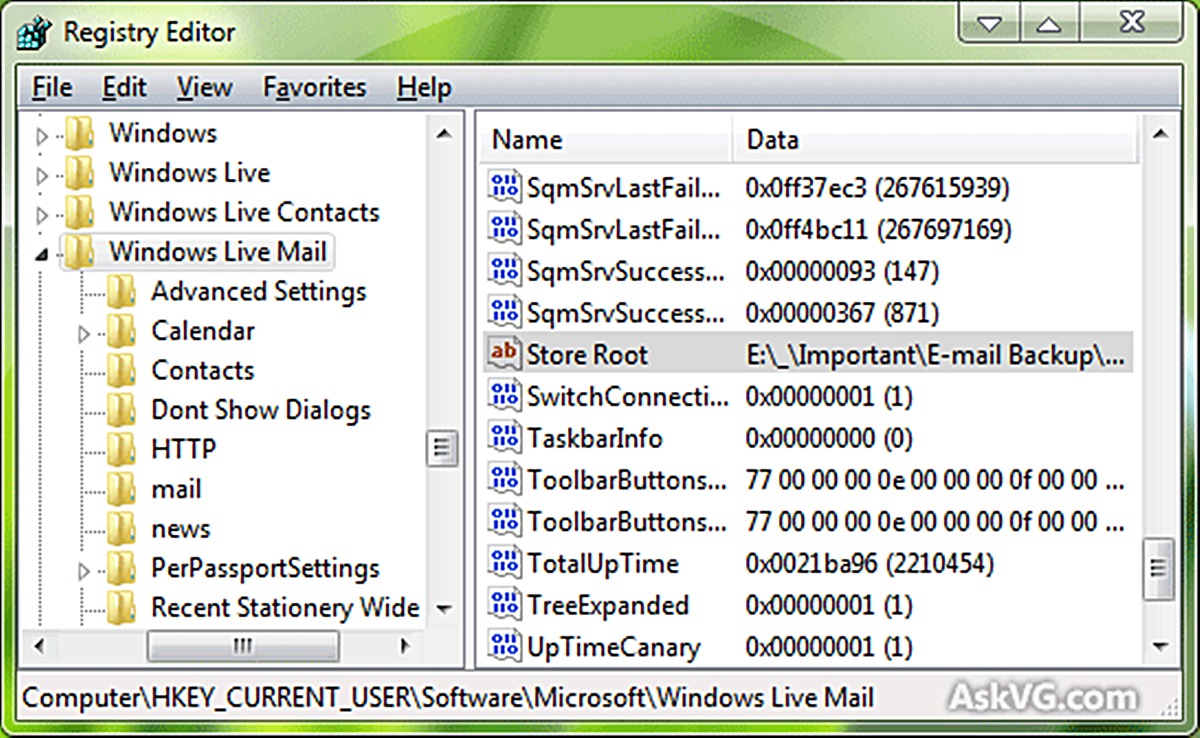
- In the Registry Editor window, you will see a left-pane navigation tree. Expand the folders in the following order: HKEY_CURRENT_USER, Software, [EmailClientName].
Note: Replace [EmailClientName] with the name of your email client, such as Microsoft Outlook or Mozilla Thunderbird. If you’re not sure about the specific email client, you can explore under the “Software” key to find the relevant folder. - Inside the [EmailClientName] folder, look for a subfolder named “Accounts” or a similar name that indicates email account settings. Click on this folder to access the email settings related to your account.
- Within the “Accounts” folder, you will find additional subfolders for each configured email account. These subfolders are usually named with numbers or unique identifiers. Open the appropriate subfolder corresponding to the email account you want to modify.
By following these steps, you will navigate to the specific location in the Registry where the email settings for your account are stored. In the next step, we will explore how to locate the email settings key within this subfolder.
Step 3: Locating the email settings key
Once you have reached the subfolder corresponding to your email account, the next step is to locate the specific key that contains the email settings. Follow these steps to find the email settings key:
- Within the email account subfolder, look for a key named “Settings” or a similar name that indicates email settings. This key typically stores all the configuration details for your email account.
- Click on the “Settings” key to select it. In the right-pane of the Registry Editor window, you will see a list of values associated with this key.
- Each value represents a specific email setting, such as the server address, port number, authentication method, or other account preferences.
- You can double-click on a value to view its data and make any necessary modifications to the settings.
By locating the email settings key within the Registry, you can access and modify the specific email configuration parameters. In the next step, we will explore how to understand and modify these email settings values.
Step 4: Understanding the email settings values
Once you have located the email settings key in the Windows Registry, it’s essential to understand the values associated with each setting. These values store the specific configuration details for your email account. Follow these steps to understand the email settings values:
- In the right-pane of the Registry Editor window, you will see a list of values associated with the email settings key. Each value represents a specific email configuration parameter.
- Double-click on a value to view its data. The data may vary depending on the type of setting, but it typically consists of strings of text or numeric values.
- For example, you may find values that store the incoming and outgoing server addresses, port numbers, secure connection settings, authentication methods, or other account preferences.
- Make note of the values and their current data. This will help you understand the existing configuration and make any necessary modifications later.
- If you need to modify an email setting, double-click on the corresponding value, update the data as required, and click OK to save the changes.
By understanding the email settings values within the Registry, you gain insight into the specific configuration parameters for your email account. This knowledge allows you to make informed modifications to the email settings. In the next step, we will explore how to modify the email settings in the Registry.
Step 5: Modifying email settings
Once you have located and understood the email settings values in the Windows Registry, you can proceed to modify them according to your requirements. Follow these steps to modify the email settings:
- In the Registry Editor window, navigate to the email settings subfolder corresponding to the account you want to modify, as discussed in the previous steps.
- Review the values associated with the email settings key to identify the specific setting you want to modify, such as the server address or port number.
- Double-click on the value you wish to modify. This will open the “Edit String” dialog box.
- In the “Value data” field, update the existing information with the desired configuration. For example, you might change the server address to a different value or modify the port number.
- Click OK to save the changes. The modified value will be updated in the Registry.
- If you need to modify multiple settings, repeat this process for each value you want to change.
It’s important to note that modifying the email settings in the Windows Registry should be done with caution, as incorrect changes can cause issues with your email functionality. Make sure to double-check the changes and ensure they align with the correct configurations provided by your email service provider.
Once you have made the necessary modifications to the email settings, you can close the Registry Editor. The changes will take effect the next time you open your email client.
Remember, it’s always a good practice to back up the Registry before making any modifications, as this gives you the option to restore the original settings if needed.
Step 6: Exporting email settings
If you want to transfer your email settings from one computer to another or create a backup of your current email settings, you can export the email settings from the Windows Registry. Follow these steps to export your email settings:
- Open the Registry Editor by pressing the Windows key + R, typing “regedit” in the Run dialog, and hitting Enter or clicking OK.
- Navigate to the email settings subfolder in the Registry that corresponds to the email account you want to export, as discussed in the previous steps.
- Right-click on the subfolder and select “Export” from the context menu. Choose a location to save the exported file (typically a .reg file) on your computer.
- Provide a name for the exported file and click Save. This will create a backup of the email settings associated with the selected account.
By exporting the email settings, you create a portable backup file that contains all the necessary information to restore the email settings on another computer or in case you need to revert back to the original settings. This is particularly useful if you are migrating to a new computer or need to reinstall your email client.
When you need to import the email settings onto another computer, you can simply transfer the exported .reg file and import it into the Windows Registry on the new machine using the steps described in the next section.
Step 7: Importing email settings
If you have previously exported your email settings and want to import them onto another computer or restore them after a reinstall, you can do so by following these steps to import the email settings:
- Copy the exported .reg file containing the email settings backup to the computer where you want to import the settings.
- Double-click on the .reg file to open it. A User Account Control (UAC) prompt may appear asking for permission to make changes to the Registry. Click Yes to proceed.
- A warning message will appear, indicating that the Registry Editor will make changes to the Registry. Click on Yes to continue with the import process.
- The imported email settings will be merged into the Windows Registry, and a confirmation message will appear once the import is complete.
- Close the Registry Editor and open your email client. The imported email settings should now be in effect, and your email account should be configured according to the imported settings.
By importing the .reg file containing the email settings backup, you can quickly and easily restore your email configuration on another computer or after reinstalling your email client. This eliminates the need to manually configure each setting, saving time and ensuring consistency in your email setup.
It’s important to note that importing email settings from the Registry should be done with caution, as incorrect imports or conflicts with existing settings can cause issues. Make sure to have a backup of the current Registry settings before performing an import, enabling you to revert back if necessary.
With these steps, you can successfully import the email settings into the Windows Registry and have your email client configured with the desired settings.