
What is Trash on an Android Device?
Trash on an Android device refers to files and folders that have been marked for deletion but are still stored on the device. These files can include deleted photos, videos, documents, and other types of data that have not yet been permanently removed from the device’s storage.
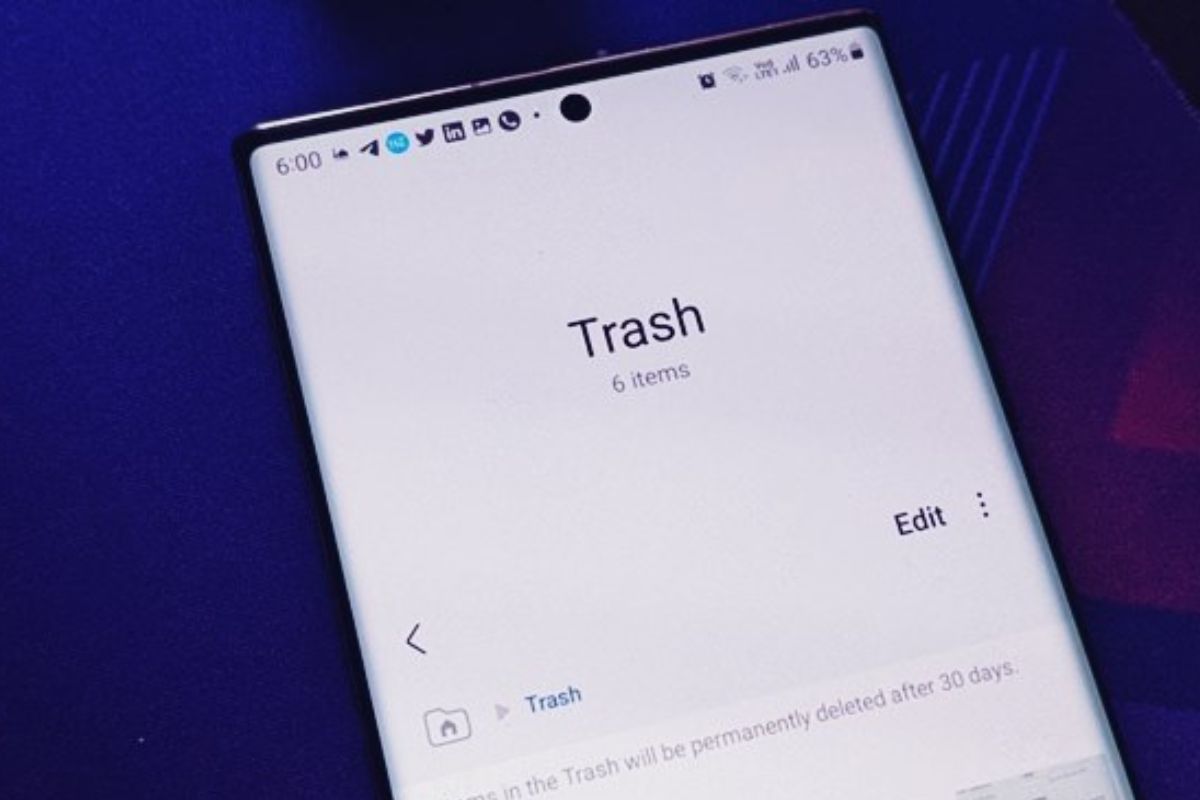
When you delete a file on your Android device, it is not immediately erased from the storage. Instead, it is moved to a special folder known as the Trash, Recycle Bin, or Deleted Items folder, depending on the device and operating system version. This allows users to recover accidentally deleted files or restore content that they may have second thoughts about deleting.
The trash acts as a temporary storage space for deleted files, allowing users to easily retrieve them if needed. It serves as a safety net, preventing users from permanently losing important data due to accidental deletions or other mistakes.
It is important to note that trash on an Android device is not limited to files deleted by the user. Some apps, such as photo editors or document scanners, may create their own temporary files that are stored in the trash folder. These files are typically used for cache purposes or temporary storage and can be safely deleted without affecting the app’s performance or the integrity of the user’s data.
The trash folder is not accessible through the default file manager or gallery app on most Android devices. However, there are methods to access and recover files from the trash, which will be discussed further in this article.
Now that we have an understanding of what trash on an Android device is, let’s explore where to look for trash and how to effectively manage it to keep your device clean and organized.
Where to Look for Trash on an Android Device
When it comes to locating the trash on an Android device, it can vary depending on the device manufacturer and operating system version. However, there are some common places where you can look for the trash folder or deleted items. Here are a few areas to check:
1. Gallery App: Many Android devices have a dedicated “Trash” or “Recycle Bin” section in the gallery app. Open the gallery app and look for any options or folders labeled as “Trash” or “Deleted Items.” This is where deleted photos and videos may be stored.
2. File Manager: Some Android devices have a built-in file manager that allows you to browse the internal storage and external SD card. Look for a “Trash” or “Deleted Items” folder within the file manager app. This is where deleted files and folders may be located.
3. Third-Party File Manager Apps: If your device’s default file manager does not have a trash folder, you can try installing third-party file manager apps from the Google Play Store. Popular file manager apps like ES File Explorer or Solid Explorer often have a “Trash” or “Recycle Bin” section where deleted files can be found.
4. Cloud Storage Services: If you use cloud storage services like Google Drive or Dropbox, check the respective trash folders within these apps. Deleted files from your device may be synced to the cloud and stored in the trash or recycle bin of these services.
5. App-Specific Trash Folders: Some apps, especially those related to photo editing, document scanning, or note-taking, may have their own trash folders. These apps often store deleted files temporarily before permanently erasing them. Check the settings or options within these apps to locate the trash folder.
Remember that the location of the trash on an Android device may differ, and it’s essential to explore different areas and settings within your device to find deleted files or folders. If you are still unable to locate the trash, consult the user manual or support resources provided by the device manufacturer for more specific instructions.
Now that you know where to look for trash on an Android device, the next section will discuss the files and folders you should check for trash.
Files and Folders to Check for Trash
When searching for trash on an Android device, it’s important to thoroughly check specific files and folders where deleted items may reside. While the exact location of the trash folder may vary, here are some common files and folders to explore:
1. DCIM Folder: The DCIM (Digital Camera Images) folder is where the default camera app stores photos and videos. Look for any subfolders or hidden folders within DCIM that may contain deleted media files.
2. Downloads Folder: The Downloads folder is where files downloaded from the internet are typically stored. Deleted files may still be present in this folder, especially if they were recently deleted or not cleared from the trash.
3. App Data and Cache: Some apps create their own cache files or temporary data folders. These files can take up substantial storage space and may include deleted data. Check the storage settings of individual apps to locate and clear their cache or data folders.
4. Internal Storage: Explore the internal storage directory using a file manager app. Look for any folders or files that may contain deleted items. Pay attention to media folders such as Music, Videos, and Documents.
5. SD Card: If your Android device has an external SD card, check the folders within it for any deleted files or folders. Look for common media directories such as DCIM, Downloads, or app-specific folders.
6. Trash or Recycle Bin Folders: As mentioned earlier, some Android devices may have a dedicated trash or recycle bin folder. Look for these folders within the file manager, gallery app, or cloud storage apps.
7. Recently Deleted: Some devices or file management apps have a “Recently Deleted” section where deleted files are temporarily stored before being permanently removed. Check for this section and restore any files you wish to keep.
It’s important to note that the names of these folders may differ slightly based on the device and operating system version. Additionally, hidden files and folders may contain deleted items, so make sure to enable the display of hidden files if needed.
By thoroughly checking these files and folders, you increase the chances of locating and recovering any deleted items on your Android device.
Now that we’ve explored where to look for trash and the files and folders to check, let’s delve into hidden trash folders and files on Android.
Hidden Trash Folders and Files on Android
In addition to the visible trash folders and files, there may be hidden trash folders and files on your Android device. These hidden items can accumulate over time and take up valuable storage space. Here are some common examples of hidden trash on Android:
1. .thumbnails Folder: The .thumbnails folder is a hidden folder that stores thumbnail images for photos and videos. Deleted media files may still have their thumbnails stored in this folder, taking up storage space. You can safely delete the contents of this folder without affecting the original files.
2. .temp or .tmp Files: Some apps or processes create temporary files with the .temp or .tmp extension. These files are often small in size but can accumulate over time and clutter your device’s storage. Use a file manager app to search for and delete these temporary files.
3. Android Data Folder: The Android Data folder contains data related to various apps installed on your device. Within this folder, some apps may create hidden cache or temporary files that are no longer needed. Clearing these files can free up storage space and remove hidden trash.
4. System Cache Files: The system cache is a collection of temporary files created by the Android operating system. Over time, these cache files can become bloated and require clearing. Use the built-in storage settings or a cache cleaning app to remove system cache files, reducing hidden trash.
5. App-Specific Hidden Folders: Certain apps may store hidden data or trash folders within their respective directories. For example, chat apps may keep hidden media files or backups, while note-taking apps may store hidden drafts or deleted notes. Explore the settings or preferences of individual apps to find and clear hidden trash folders.
It’s important to exercise caution when deleting hidden folders or files. While most hidden items can be safely removed, some may contain data essential to the functioning of certain apps or the device itself. Always double-check the contents of hidden folders and ensure that you are only removing unnecessary trash.
By locating and clearing hidden trash folders and files on your Android device, you can optimize storage space and improve overall performance.
Now that we’ve discussed hidden trash folders and files, let’s explore how to access and recover trash on Android.
How to Access and Recover Trash on Android
Accessing and recovering trash on Android devices may vary depending on the device model and the apps installed. Here are some methods you can try to retrieve deleted files:
1. Built-in Gallery App: Open the gallery app on your Android device and look for a dedicated “Trash” or “Recently Deleted” section. Deleted photos and videos may be temporarily stored here before being permanently removed. Simply select the files you want to recover and hit the restore button.
2. File Manager App: If your device has a built-in file manager or if you’ve installed a third-party file manager app, use it to explore the internal storage and SD card. Look for a “Trash” or “Recycle Bin” folder where deleted files may be stored. You can then select and restore the files you wish to recover.
3. Cloud Storage Services: If you have connected your Android device to a cloud storage service like Google Drive or Dropbox, deleted files may be synced to the cloud and stored in the respective trash or recycle bin folders. Open the cloud storage app, locate the trash folder, and restore the files you want to recover.
4. Data Recovery Apps: There are several data recovery apps available on the Google Play Store that can help you recover deleted files. These apps scan your device’s storage and SD card for recoverable files and allow you to restore them. Keep in mind that the success rate may vary, and it’s best to use such apps immediately after the deletion to increase the chances of successful recovery.
5. Backup and Restore: If you regularly back up your Android device, you can access and recover deleted files from your latest backup. This method requires that you have a recent backup available for restoration. Use the backup and restore feature in your device settings to initiate the recovery process.
Remember to act quickly when attempting to recover deleted files, as the longer you wait, the higher the chance that the files may be overwritten by new data. Additionally, it’s recommended to regularly back up your Android device to preserve important files and reduce the risk of permanent data loss.
Now that you know how to access and recover trash on Android, the next section will discuss using file manager apps to find and manage trash.
Using File Manager Apps to Find Trash on Android
File manager apps are a powerful tool when it comes to managing and organizing files on your Android device. They can also be helpful in finding and managing trash. Here’s how you can use file manager apps to locate trash on your Android device:
1. Install a File Manager App: If your device doesn’t have a built-in file manager, or if you prefer a more feature-rich option, head to the Google Play Store and install a file manager app of your choice. Popular file manager apps include ES File Explorer, Solid Explorer, and Astro File Manager.
2. Open the File Manager App: Launch the file manager app on your Android device by tapping on its icon in the app drawer or home screen. Once the app is open, you will be presented with a file and folder directory.
3. Navigate to Internal Storage or SD Card: Use the file manager app to navigate to either the device’s internal storage or the external SD card, depending on where you suspect the trash may be located.
4. Explore Folders: Open different folders within the internal storage or SD card to search for trash. Look for folder names like “Trash,” “Deleted Items,” or “Recycle Bin.” Deleted files and folders may be stored in these locations.
5. Check Hidden Files and Folders: Enable the option to display hidden files and folders within the file manager app. This will allow you to see any hidden trash that might be stored on your Android device.
6. Select and Manage Trash: Once you’ve located the trash folders or files, you can select them and choose to either restore, permanently delete, or move them to another location. Be careful not to delete any files or folders that you still need or those that are essential for the functioning of your device or apps.
7. Use Filtering Options: Some file manager apps offer filtering options that allow you to search specifically for deleted or recently modified files. These filtering options can be helpful in finding and managing trash more efficiently.
By using a file manager app, you can gain more control and visibility over the files and folders on your Android device, including the location and management of trash files.
Now that we’ve explored using file manager apps to find trash, the next section will cover clearing and managing trash on Android devices.
Clearing and Managing Trash on Android
Clearing and managing the trash on your Android device is essential to keep your storage space clean and organized. Here are some tips and techniques for effectively managing trash on Android:
1. Regularly Empty the Trash: Make it a habit to regularly empty the trash on your Android device. This prevents deleted files from occupying unnecessary space and avoids potential clutter. Take a few minutes every week or month to delete files permanently from the trash folders.
2. Utilize “Delete Immediately” Option: Some file manager apps offer a “Delete Immediately” option, which bypasses the trash folder and permanently deletes files. This can be useful for files you are sure you no longer need and want to remove immediately.
3. Use Disk Cleanup Apps: Disk cleanup apps like CCleaner or Files by Google can help you identify and remove unnecessary files, including trash and cache items. These apps often have features that let you clear out junk files with a few taps, freeing up valuable storage space.
4. Enable Automatic Trash Emptying: Some apps and devices have options to automatically empty the trash after a certain period of time. Enable this feature if available to ensure that deleted files are permanently removed without manual intervention.
5. Be Selective About Retrieving Deleted Files: Before restoring deleted files from the trash, consider whether you really need them. Some files may only be taking up space and might not hold any significant value. Only restore files that are necessary and relevant to avoid cluttering your device further.
6. Back Up Important Files: To protect your files from accidental deletion or loss, create regular backups. This way, even if you mistakenly delete a file, you can easily restore it from the backup instead of relying solely on the trash folder.
7. Optimize App Settings: Some apps allow you to customize their trash or cache settings. Review the settings of various apps and adjust them to your preferences. For example, you can limit the size or lifespan of the trash or cache files created by specific apps.
By actively managing the trash on your Android device, you can free up storage space, improve device performance, and maintain a clutter-free digital environment.
Now that we’ve discussed clearing and managing trash on Android, let’s move on to the importance of periodically emptying the trash.
Preventing Trash Buildup on Android
Preventing the buildup of trash on your Android device is crucial to maintaining a clean and efficient storage system. Here are some tips to help you prevent trash accumulation:
1. Be Mindful of Deleting Files: Before deleting any files, double-check to ensure you don’t need them anymore. Being cautious and deliberate when deleting files will reduce the chances of mistakenly sending important files to the trash.
2. Regularly Clean Out Unwanted Media: Periodically review and delete unnecessary photos, videos, and other media files. This practice not only prevents clutter in your gallery but also minimizes the amount of trash generated.
3. Manage App Cache: Cache files are temporary data stored by apps to improve performance. However, they can accumulate over time and take up considerable space. Use the storage settings of individual apps or a cache cleaning app to clear app cache regularly.
4. Avoid Installing Unnecessary Apps: Be selective when installing apps on your Android device. Each app brings its own set of temporary files and cache. Installing fewer apps reduces the potential buildup of trash.
5. Utilize Cloud Storage or External Storage: Storing files in cloud services like Google Drive or using external storage options like SD cards can offload some of the burden on your device’s internal storage. This reduces the likelihood of generating excessive trash.
6. Practice Regular Data Backup: Regularly backing up your Android device not only safeguards your files but also minimizes the impact of accidentally deleting important data. Having a backup ensures that even if files are sent to the trash, you can easily restore them from a separate storage location.
7. Employ File Management Practices: Maintain a systematic approach to file management. Create specific folders to categorize and organize files so that you can easily locate and manage them, reducing the likelihood of accidental deletions and misplaced files.
By implementing these preventive measures, you can significantly reduce the amount of trash that accumulates on your Android device, keeping it running smoothly and efficiently.
Now that we’ve explored methods to prevent trash buildup on Android, let’s delve into the importance of periodically emptying the trash to optimize device performance.
Importance of Periodically Emptying Trash on Android
Periodically emptying the trash on your Android device is vital for several reasons. Here are the key reasons why it is important to regularly empty the trash:
1. Reclaim Storage Space: Deleting files from your Android device doesn’t immediately free up storage space unless you empty the trash. By emptying the trash regularly, you can reclaim valuable storage space and prevent it from being unnecessarily occupied by deleted files.
2. Optimize Device Performance: As your trash folder accumulates deleted files, it can have an impact on your device’s overall performance. Excessive trash can slow down operations, such as searching for files or accessing folders. By emptying the trash, you help your device run more smoothly and efficiently.
3. Avoid Storage Overflow: If your device reaches its storage capacity, it can result in various issues, including sluggish performance, app crashes, and difficulty in saving new files. By regularly emptying the trash, you ensure that your device has sufficient space for new data and prevents potential storage overflow problems.
4. Eliminate Unwanted Clutter: The presence of unnecessary files in the trash can create visual clutter when browsing through your folders or galleries. By deleting these files permanently, you maintain a cleaner and more organized environment, making it easier to navigate and locate the files you truly need.
5. Enhance Data Security: Leaving sensitive or confidential files in the trash folder increases the risk of data breaches or unauthorized access. By emptying the trash and permanently deleting these files, you reduce the potential security vulnerabilities and ensure that your sensitive information is properly disposed of.
6. Prevent Accidental Restorations: If you accidentally restore files from the trash without carefully reviewing them, it can lead to the reintroduction of unwanted or unnecessary files on your device. Regularly emptying the trash reduces the likelihood of accidental file restorations, maintaining a clutter-free environment.
7. Maintain System Efficiency: By regularly clearing the trash, you help maintain the overall efficiency of your device’s file management system. This prevents potential conflicts or inconsistencies that can arise from old or unused files, providing a smoother user experience.
Overall, periodically emptying the trash on your Android device is crucial for optimizing storage space, enhancing performance, ensuring data security, and maintaining a clutter-free environment. Make it a part of your routine to regularly empty the trash and reap the benefits of a well-managed device.
Now that we’ve explored the importance of emptying the trash, let’s address some common misconceptions about trash on Android devices.
Common Misconceptions about Trash on Android Devices
There are several misconceptions surrounding the concept of trash on Android devices. Let’s debunk some of these misconceptions and clarify the truth:
1. Files in the Trash are Gone Forever: One common misconception is that once files are sent to the trash, they are permanently deleted. However, on Android devices, the trash acts as a temporary storage space, allowing for easy recovery of deleted files. Only when you empty the trash are the files permanently removed from your device.
2. The Trash Folder is Visible and Accessible: Many Android devices do not have a visible or accessible trash folder through the default file manager or gallery app. The trash folder is often hidden or accessible only through certain file manager apps or specific settings. Users need to navigate different areas of their device to find and manage the trash.
3. Trash Automatically Clears Itself: Another misconception is that the trash folder on Android devices automatically clears itself after a certain period. While some devices or apps may have settings to automatically empty the trash, this feature is not universal. It’s important to manually empty the trash periodically to ensure the removal of deleted files.
4. All Deleted Files Go to the Trash: Not all deleted files on an Android device are sent to the trash. Some files, particularly those deleted through certain apps or processes, may bypass the trash and be permanently deleted. Additionally, files deleted from external storage or cloud services may not necessarily have a corresponding trash folder on the device.
5. The Trash Folder Contains Only Recent Deletions: The misconception that the trash folder only contains recently deleted files is not always accurate. Depending on the device and settings, the trash folder may store deleted files for a longer period, allowing for greater flexibility in file restoration. It’s important to check the trash thoroughly to see if it contains older deleted files that can be restored.
6. All Deleted Files Can Be Recovered: While the trash folder provides an opportunity to recover deleted files, it doesn’t guarantee successful recovery in every situation. If files have been permanently deleted from the trash or if they have been overwritten by new data, recovery becomes difficult or impossible. Prompt action and the absence of file overwriting increase the chances of successful recovery.
7. Deleting from the Trash Erases Files Permanently: Deleting files from the trash may give the impression that they are permanently erased. However, similar to emptying the trash, this action typically only removes the files’ reference, making them inaccessible. It is still possible to recover some deleted files using specialized data recovery tools. Erasing files permanently often requires additional steps such as secure file deletion or formatting.
By dispelling these misconceptions, you can better understand how the trash works on Android devices and make informed decisions regarding file management and data recovery.
Now that we’ve addressed common misconceptions about trash, we can wrap up this article with a summary or key takeaways.