
Creating a New Document
When it comes to creating a new document in Google Docs, the process is simple and streamlined. Follow these steps to get started:
- Open your web browser and go to docs.google.com.
- Sign in to your Google account if you haven’t already.
- On the Google Docs homepage, click on the “Blank” option to start a new document.
- A blank document will open, ready for you to start typing.
Now that you have created a new document, you can begin adding content, formatting text, and customizing it to your liking. Google Docs provides a wide range of features and tools to help you create professional-looking documents.
It’s important to note that Google Docs automatically saves your work as you type, so you don’t have to worry about manually saving your document. This saves you time and gives you peace of mind, knowing that your work is always backed up.
Additionally, Google Docs offers the ability to collaborate with others in real-time. You can share your document with colleagues, friends, or family members, and allow them to view, edit, or comment on the document. This makes it easy to work on projects together, no matter where you are located.
Whether you’re writing a report, creating a presentation, or drafting a letter, Google Docs provides a user-friendly and efficient platform for all your document needs. With its seamless integration with other Google services, such as Google Drive, you can easily access and manage your documents from any device.
Now that you know how to create a new document in Google Docs, it’s time to explore the various editing tools, formatting options, and collaboration features available to further enhance your document.
Opening a Document
Opening an existing document in Google Docs is a breeze. Whether it’s a document you’ve recently worked on or one that has been shared with you, here’s how you can easily access it:
- Go to docs.google.com in your web browser.
- Sign in to your Google account, if you’re not already signed in.
- On the Google Docs homepage, you will see a list of all your recent documents. Click on the one you want to open.
If the document you’re looking for isn’t on the homepage, you have a few options to find it:
- Click on the “Documents” tab on the left-hand side of the screen. This will show you all the documents you have in Google Docs.
- Use the search bar at the top of the page to search for a specific document by name or keywords.
- Click on the “Shared with me” tab to view documents that have been shared with you.
Once you’ve found the document you want to open, simply click on it, and it will open in the Google Docs editor. From there, you can view and edit the document as needed.
Google Docs also supports different file formats, such as Microsoft Word documents (.docx), so you can easily open and work on documents created in other applications. Simply upload the file to your Google Drive, and it will automatically convert to a Google Docs format.
Furthermore, Google Docs provides offline access, allowing you to open and edit your documents even when you don’t have an internet connection. To enable offline access, go to your Google Docs settings and toggle the “Offline” option. This feature can be extremely helpful when you’re on the go or in areas with limited internet connectivity.
That’s how simple it is to open a document in Google Docs. Now you can start editing, collaborating, and leveraging the full range of features available to enhance your document.
Basic Editing Tools
Google Docs provides a variety of basic editing tools to help you create and modify your documents with ease. These tools allow you to format text, insert images, change fonts, and more. Here are some of the essential editing features in Google Docs:
1. Text Formatting: Google Docs offers a range of formatting options to make your text stand out. You can modify the font style, size, and color, as well as apply bold, italic, underline, and strikethrough formatting. Additionally, you can create headings, add bullet points, and create numbered lists.
2. Copy, Cut, and Paste: The copy, cut, and paste functions work similarly to other text editors. You can select a portion of text or an entire document and use the right-click menu or keyboard shortcuts (Ctrl+C for copy, Ctrl+X for cut, and Ctrl+V for paste) to duplicate or move content.
3. Undo and Redo: Made a mistake? Google Docs has got you covered. The undo and redo buttons, as well as the keyboard shortcuts (Ctrl+Z for undo and Ctrl+Shift+Z for redo), allow you to easily revert or redo changes you’ve made to your document.
4. Find and Replace: If you need to locate specific words or phrases in your document, you can use the find and replace tool. Simply press Ctrl+F (or Command+F on Mac) to bring up the search bar, where you can enter the text you’re looking for and choose to replace it with something else if desired.
5. Spelling and Grammar Check: Google Docs features a built-in spell checker that helps you identify and correct spelling errors as you type. It will underline words that may be misspelled and suggest alternative corrections. You can also turn on grammar suggestions to improve the overall quality of your writing.
6. Comments and Suggestions: Collaborating on a document? You can use the comments and suggestions features to communicate with others. You can leave comments to provide feedback or ask questions, and you can suggest edits that can be accepted or rejected by the document owner.
7. Revision History: Google Docs automatically saves versions of your document, allowing you to access previous edits. The revision history feature lets you view the changes made over time and restore an earlier version if necessary.
By familiarizing yourself with these basic editing tools, you can efficiently create, edit, and polish your documents in Google Docs. Now that you know the essentials, let’s explore the various formatting options available to make your document visually appealing and professional.
Formatting Text
In Google Docs, you have a plethora of formatting options at your fingertips to make your text visually appealing and easy to read. Here are some of the key text formatting features:
1. Font Styles: Google Docs provides a wide range of font styles to choose from. You can select different fonts for your text to give it a unique look and feel. Simply highlight the text you want to change and use the font menu in the toolbar to select a new font.
2. Font Size: Adjusting the font size is essential for making text more readable or emphasizing important points. You can easily change the font size by using the font size drop-down menu in the toolbar to increase or decrease the size of your selected text.
3. Bold, Italic, and Underline: These formatting options help draw attention to specific words or phrases. By selecting the desired text and using the bold (Ctrl+B), italic (Ctrl+I), or underline (Ctrl+U) buttons in the toolbar, you can quickly apply these formatting styles.
4. Text Color: To add a pop of color to your text, you can change the font color. Simply select the text and choose a color from the font color drop-down menu in the toolbar. This is a great way to highlight important information or create visual hierarchy.
5. Alignment: Google Docs allows you to align your text in different ways. The alignment options, including left, center, right, and justified alignment, can be found in the toolbar. Experiment with different alignments to achieve the desired visual effect.
6. Bulleted and Numbered Lists: Organize your content using bulleted or numbered lists. Click on the bulleted list or numbered list button in the toolbar to apply these formats to your selected text. You can also use the Increase Indent and Decrease Indent buttons to create nested lists for better organization.
7. Heading Styles: Heading styles are useful for creating a hierarchy in your document and separating different sections. Google Docs offers a range of heading styles, from Heading 1 to Heading 6. Select the text and choose a heading style from the styles drop-down menu in the toolbar.
8. Line and Paragraph Spacing: Adjusting the spacing between lines and paragraphs can make your text easier to read. Use the line spacing and paragraph spacing options in the toolbar to increase or decrease the spacing as needed.
By utilizing these text formatting tools, you can enhance the readability and visual aesthetics of your document in Google Docs. Now that you have mastered text formatting, let’s move on to inserting images and links to further enhance your document.
Inserting Images and Links
Google Docs allows you to enrich your documents by inserting images and hyperlinks, making your content more engaging and interactive. Here’s how you can insert images and links in your document:
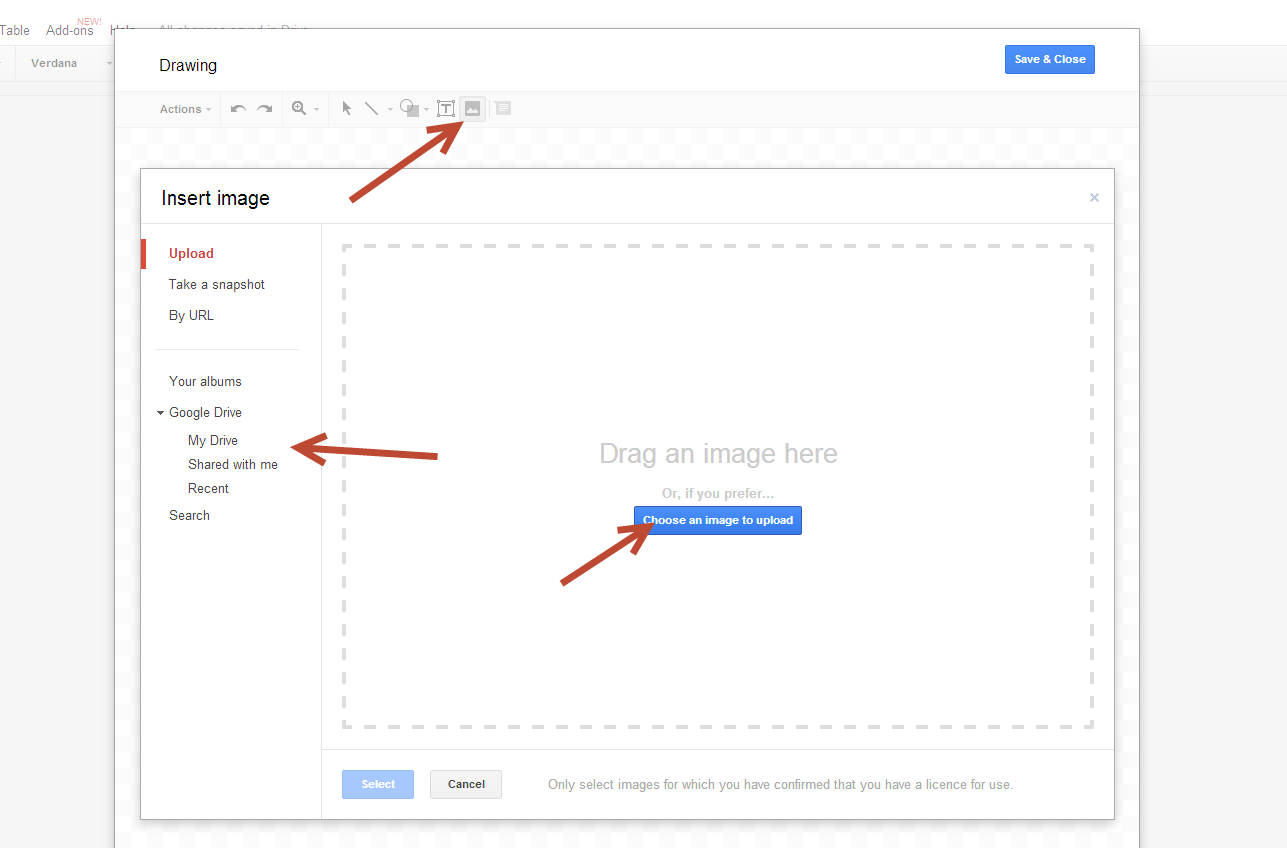
1. Inserting Images: To add an image to your document, place the cursor where you want the image to appear, and then go to the “Insert” menu. Click on “Image” and choose the source of the image—whether it’s from your computer, Google Drive, or the web. Select the image file and click “Insert.” You can resize and adjust the position of the image by dragging the corners or using the alignment options in the toolbar.
2. Inserting Links: Adding hyperlinks to your document allows you to reference external content or provide additional resources. Select the text or image that you want to turn into a hyperlink. Then, go to the “Insert” menu and click on “Link” or use the keyboard shortcut Ctrl+K. Enter the URL you want to link to or search for a related page on the web. You can also link to other sections within the same document or to an email address.
3. Editing and Removing Links: To edit or remove a hyperlink, select the linked text or image and click on the “Link” icon in the toolbar or right-click and choose “Edit link” or “Remove link.” You can modify the URL, adjust the formatting of the link, or completely remove the hyperlink.
4. Image Captions: If you want to provide context or additional information about an image, you can add a caption. Select the image, go to the “Insert” menu, and click on “Caption.” A text box will appear below the image where you can enter the caption. You can then reposition the caption and adjust its formatting as needed.
5. Image Options: Google Docs offers a few options to customize the appearance of your images. Right-click on the image and select “Image options” to access the image settings. Here, you can adjust brightness and contrast, apply a recoloring effect, add a border, or crop the image to a specific shape.
By inserting images and links into your Google Docs document, you can enhance its visual appeal, provide additional context, and direct readers to relevant resources. These features come in handy when creating reports, presentations, or any other type of document that benefits from multimedia and external references.
Adding Tables
Tables are a powerful tool in Google Docs that allow you to organize and present data in a structured and visually appealing manner. Here’s how you can add tables to your document:
1. Inserting a Table: To insert a table, place the cursor in the document where you want the table to appear. Then, go to the “Insert” menu, hover over “Table,” and select the desired number of rows and columns for your table. You can also click and drag on the grid to specify the exact dimensions of the table.
2. Editing the Table: Once the table is inserted, you can customize its appearance and content. Click inside a cell to add text or data. You can also use the table selection handle to resize the table, add or remove rows and columns, merge or split cells, and change the alignment of text within cells.
3. Formatting the Table: Google Docs provides several formatting options to enhance the look of your table. You can change the background color of cells, add borders and shading, apply different text styles to headers or specific cells, and adjust the width of columns. These formatting options can be found in the toolbar or by right-clicking on the table and selecting “Table properties.”
4. Importing and Exporting Tables: If you have data in a spreadsheet or another document, you can import it into Google Docs as a table. Simply copy the data from its source, place the cursor in your Google Docs document, right-click, and select “Paste special.” Choose the option to “Paste table,” and your data will be inserted as a table. You can also export tables from Google Docs as CSV files or copy and paste them into other applications.
5. Collaborating on Tables: Like the rest of Google Docs, tables support real-time collaboration. Multiple users can work on the table simultaneously, making edits, adding data, and formatting cells. You can leave comments on specific cells or use the “Insert” menu to add notes or formulas to your table.
Tables are a versatile tool that allows you to organize data, create comparison charts, or even design layouts. Whether you’re working on a project proposal, a budget plan, or a research report, tables in Google Docs can help you present information in a clear and structured way.
Using Comments and Suggestions
Google Docs offers powerful collaboration features that enable users to provide feedback, ask questions, and suggest edits through comments and suggestions. Here’s how you can use these features to enhance your document collaboration:
1. Adding Comments: Comments are a great way to provide feedback or ask for clarification on specific parts of a document. To add a comment, select the text or area you want to comment on, right-click, and choose “Comment” from the menu. Alternatively, you can click on the “Insert” menu and select “Comment.” Type your comment in the comment box, and it will be associated with the selected text. You can mention collaborators by typing “+” followed by their name or email address.
2. Resolving and Replying to Comments: Once a comment is added, collaborators can view and reply to it. To resolve a comment, click on the “Resolve” button within the comment box. Resolved comments are still visible but no longer actively discussed. To reply to a comment, click on the “Reply” button or simply type your response within the comment box. All replies are nested under the original comment, allowing for organized discussions.
3. Suggesting Edits: If you want to propose changes to the document without directly editing the text, you can use the “Suggesting” mode. Click on the “Editing” mode dropdown in the top-right corner and select “Suggesting.” Now, any edits you make will be displayed as suggestions rather than direct modifications. Collaborators can review and accept or reject these suggestions, allowing for transparent and controlled editing.
4. Accepting and Rejecting Suggestions: When someone suggests an edit, you will see a comment or highlight indicating the suggested change. To review and accept or reject a suggestion, click on the comment or highlighted text. A menu will appear, allowing you to accept or reject the suggestion. Accepted suggestions will be implemented into the document, while rejected suggestions will be disregarded.
5. Version History: Google Docs automatically saves every change made to a document, including comments and suggestions. To view the version history, click on “Version history” in the top menu, and select “See version history.” This will open a sidebar showing a timeline of document revisions. You can revert to an earlier version or compare different versions to track changes made throughout the editing process.
Comments and suggestions greatly enhance the collaboration process, allowing for clear communication, constructive feedback, and a streamlined editing workflow. By actively using these features, you can foster efficient collaboration and produce high-quality documents that incorporate multiple perspectives.
Collaborating with Others
Collaboration is at the core of Google Docs, making it easy to work with others in real-time on the same document. This feature is especially useful when multiple individuals need to contribute to a project or provide input. Here’s how you can collaborate effectively in Google Docs:
1. Sharing a Document: To collaborate with others, you need to share your document. Click on the “Share” button in the top-right corner of the Google Docs interface. Enter the email addresses of the people you want to collaborate with or select “Get shareable link” for more flexibility. You can provide view or edit access and even set specific permissions for each collaborator.
2. Real-Time Editing: Once you’ve shared a document, all collaborators can access and edit it simultaneously. You can see others’ cursors, changes, and selections in real-time, fostering a dynamic editing environment. Collaboration is not limited to simple text-editing; it extends to formatting, adding images and tables, leaving comments, and suggesting edits.
3. Communicating with Comments: Google Docs allows collaborators to leave comments on specific parts of a document. They can ask questions, provide feedback, or offer suggestions. You can reply to comments, engaging in threaded discussions to address queries or clarify information. Comment notifications ensure that collaborators stay updated on ongoing discussions.
4. Making Suggestions: Instead of making direct edits, collaborators can use the “Suggesting” mode to propose changes. Suggestions are visually distinguishable from the original text, making it easy for the document owner and others to review and accept or reject them. This allows for a controlled editing process while preserving the integrity of the original content.
5. Version History and Revision Comparison: Google Docs automatically saves revisions of your document, enabling you to access previous versions. The version history feature provides a detailed timeline of changes made, documenting who made the changes and when. You can revert to an earlier version if needed. Moreover, the ability to compare different versions side by side helps track and understand the evolution of the document.
6. Presence and Collaboration Tools: Google Docs incorporates presence indicators that show which collaborators are currently active in the document. You can see where others are working and their selections, facilitating collaboration and minimizing conflicts. Additionally, you can utilize integrated chat and video conferencing tools, such as Google Meet, to communicate in real-time with collaborators.
Collaborating with others in Google Docs fosters efficiency, transparency, and teamwork. Through real-time editing, commenting, suggesting changes, and utilizing version history, you can harness the collective knowledge and expertise of your collaborators, making the collaborative process seamless and productive.
Version History and Revision Comparison
Google Docs provides a powerful version history feature, allowing you to track changes made to your document over time and compare different revisions. This feature ensures that you can easily review past edits, revert to previous versions if needed, and collaborate more effectively. Here’s how you can utilize the version history and revision comparison in Google Docs:
1. Accessing Version History: To access the version history of your document, click on “Version history” in the top menu, and select “See version history.” A sidebar will appear on the right-hand side of the screen, displaying a timeline of all revisions made to the document.
2. Viewing and Restoring Previous Versions: In the version history sidebar, you can browse through the different versions of the document by scrolling through the timeline or using the arrows. Each revision is labeled with the date and time it was saved. Click on a specific version to view it in a read-only mode. If you want to revert to a previous version, select it and click on “Restore this version.”
3. Commenting and Collaborating on Previous Versions: Even when viewing a previous version of the document, you can leave comments and engage in discussions with collaborators. This ensures that all feedback and discussions associated with each version are preserved and can be referred back to when necessary.
4. Comparing Revisions: Google Docs allows you to compare any two versions of the document side by side. Select the versions you want to compare in the version history sidebar, and click on the “Compare” button. The selected revisions will open in separate tabs, highlighting the differences between them. This makes it easy to pinpoint specific changes made, helping you understand the evolution of the document.
5. Accepting or Rejecting Changes: When reviewing the comparison between two revisions, you can choose to accept or reject the changes. This allows you to selectively incorporate modifications from one version into the current document. By accepting or rejecting changes, you can maintain a balance between preserving the original content and incorporating the most recent edits.
Version history and revision comparison in Google Docs are invaluable tools for collaboration and document management. They provide a detailed record of the document’s evolution, facilitate transparent editing, and ensure that important changes are not lost or overwritten. By utilizing these features, you can confidently collaborate and make informed decisions about the content of your document.
Working Offline
While Google Docs is a cloud-based platform, it offers the convenience of working offline, allowing you to create, view, and edit your documents even without an internet connection. Here’s how you can work offline in Google Docs:
1. Enabling Offline Access: Before you can work offline, you need to enable offline access in your Google account settings. Go to the Google Docs homepage (docs.google.com) and click on the menu icon in the top-left corner. Select “Settings” and then toggle the “Offline” option to turn it on. This will sync your documents to your device, allowing you to access them offline.
2. Accessing Offline Documents: Once offline access is enabled, you can access your synced documents by opening Google Docs in your web browser while you’re offline. The documents available for offline editing will be displayed in the “Offline” section of the homepage. Simply click on a document, and it will open in the Google Docs editor, allowing you to make changes just like you would online.
3. Editing Offline: When working offline in Google Docs, you have access to many of the same editing capabilities as you would online. You can create new documents, edit existing documents, format text, add images, and collaborate with others who also have offline access enabled. Any changes you make while offline will be synced back to your account once you’re back online.
4. Collaborating Offline: While working offline, you can still collaborate on documents with others who also have offline access enabled. Any changes or comments added by collaborators will be synced to your document once you’re online again. However, real-time collaboration is not available while working offline, as it requires an internet connection.
5. Managing Offline Documents: Google Docs automatically syncs your changes when you’re back online. It also takes care of file conflict resolution in case you made changes both online and offline. If there are conflicts, you can review and choose the version of the document you want to keep. Additionally, you can control the amount of storage used by your offline documents by adjusting the offline settings in your Google account.
Working offline in Google Docs provides flexibility and peace of mind, knowing that you can continue working on your documents regardless of your internet connection. Whether you’re on a plane, in a remote area, or experiencing an internet outage, offline access ensures uninterrupted productivity. Utilize this feature to stay productive no matter where you are.
Keyboard Shortcuts
Keyboard shortcuts are an efficient way to navigate and perform various actions quickly in Google Docs. By memorizing and incorporating these shortcuts into your workflow, you can save time and improve productivity. Here are some essential keyboard shortcuts for Google Docs:
1. Navigation Shortcuts:
- Move the cursor: Use the arrow keys.
- Page up/down: Press PageUp or PageDown.
- Beginning/end of line: Press Home or End.
- Beginning/end of document: Press Ctrl+Home or Ctrl+End (or Command+Home or Command+End on macOS).
2. Text Formatting Shortcuts:
- Bold: Press Ctrl+B (or Command+B on macOS).
- Italic: Press Ctrl+I (or Command+I on macOS).
- Underline: Press Ctrl+U (or Command+U on macOS).
- Strikethrough: Press Alt+Shift+5 (or Option+Shift+5 on macOS).
3. Document Navigation Shortcuts:
- Go to the next heading: Press Ctrl+Alt+N (or Command+Option+N on macOS).
- Go to the previous heading: Press Ctrl+Alt+P (or Command+Option+P on macOS).
- Go to the next comment: Press Ctrl+Alt+M (or Command+Option+M on macOS).
- Go to the previous comment: Press Ctrl+Alt+Shift+M (or Command+Option+Shift+M on macOS).
4. Editing Shortcuts:
- Undo: Press Ctrl+Z (or Command+Z on macOS).
- Redo: Press Ctrl+Y (or Command+Y on macOS).
- Cut: Press Ctrl+X (or Command+X on macOS).
- Copy: Press Ctrl+C (or Command+C on macOS).
- Paste: Press Ctrl+V (or Command+V on macOS).
5. Collaboration Shortcuts:
- Add comment: Press Ctrl+Alt+M (or Command+Option+M on macOS).
- Edit comment: Press Ctrl+Alt+E (or Command+Option+E on macOS).
- Resolve comment: Press Ctrl+Alt+R (or Command+Option+R on macOS).
- Add suggestion: Press Ctrl+Alt+Shift+S (or Command+Option+Shift+S on macOS).
6. Miscellaneous Shortcuts:
- Open Explore panel: Press Ctrl+Alt+Shift+I (or Command+Option+Shift+I on macOS).
- Show/hide rulers: Press Ctrl+Shift+R (or Command+Shift+R on macOS).
- Insert link: Press Ctrl+K (or Command+K on macOS).
These are just a few examples of the keyboard shortcuts available in Google Docs. By using these shortcuts, you can navigate your documents, format text, edit content, and collaborate with greater speed and efficiency. Take the time to familiarize yourself with these shortcuts, and consider customizing your own shortcuts to suit your workflow preferences.
Printing and Exporting the Document
In Google Docs, you have the ability to print or export your document in various formats, allowing you to share or preserve your work outside of the digital realm. Here’s how you can print and export your document:
1. Printing the Document: To print your document, go to the “File” menu and select “Print” (or use the keyboard shortcut Ctrl+P). This will open the print settings where you can choose the printer, set the page range, adjust the number of copies, and modify other printing options. Once you’ve configured the settings, click “Print” to send the document to the printer.
2. Exporting to Different Formats: Google Docs provides several export options to save your document in different formats. To export your document, go to the “File” menu and select “Download.” From the dropdown menu, you’ll see various file formats you can choose, including:
- Microsoft Word (.docx): This allows you to save your document in a format compatible with Microsoft Word.
- PDF Document (.pdf): Exporting as a PDF retains the formatting and ensures that the document appears the same on any device.
- Plain Text (.txt): Saving as plain text removes formatting and converts the document to a plain text file.
- Web Page (.html): Exporting as an HTML file allows you to view your document as a web page.
- EPUB Publication (.epub): This format is suitable for creating e-books and can be read on various e-readers.
- OpenDocument Format (.odt): This format is compatible with open-source office suites like LibreOffice.
3. Printing and Exporting options for Collaborators: If you’re collaborating on a document with others, you can control whether they can print or export the document by adjusting their access permissions. When sharing the document, you can choose to provide them with “Can view,” “Can comment,” or “Can edit” access. Collaborators with “Can view” and “Can comment” access will not be able to print or export the document, while those with “Can edit” access will have the ability to print or export.
4. Page Setup: Before printing or exporting, you may want to adjust the page setup of your document. You can access the page setup options by going to the “File” menu, selecting “Page setup,” and configuring settings such as page orientation (portrait or landscape), paper size, margins, and headers/footers.
By utilizing the printing and exporting capabilities of Google Docs, you can easily share your work in different formats and preserve its content outside of the online environment. Whether you need a physical copy or a digital file, these options provide flexibility and accessibility for your document.