
Overview
Managing and organizing your conversations in Outlook is essential for staying efficient and focused. Whether you want to declutter your inbox or temporarily silence a noisy conversation, Outlook offers two practical options: deleting and muting conversations. Knowing when and how to use these features can greatly enhance your email experience.
Deleting a conversation permanently removes it from your inbox, while muting a conversation allows you to temporarily silence notifications and move the conversation to your “Muted” folder. Both options have their advantages and are suitable for different scenarios.
Deleting a conversation is ideal when you no longer need to reference or keep any information from it. By removing conversations you no longer need, you can declutter your inbox and improve your overall productivity. On the other hand, muting a conversation is beneficial when you simply want to minimize distractions and temporarily suppress notifications.
Understanding the differences between deleting and muting conversations is crucial. Deleting a conversation removes it permanently, while muting provides a temporary solution. If you delete a conversation, it cannot be retrieved, so make sure you no longer need the information. On the other hand, if you mute a conversation, you can always un-mute it later and resume receiving notifications.
In this guide, we will walk you through the process of deleting and muting conversations in Outlook. Whether you’re looking to clear up your inbox or create a quiet workspace, these features will help you stay organized and focused on what matters most.
Deleting a Conversation
Deleting a conversation in Outlook permanently removes it from your inbox and other folders. This is a useful feature when you no longer need the conversation and want to declutter your mailbox. However, it’s important to note that once a conversation is deleted, it cannot be recovered.
Deleting a conversation is a straightforward process in Outlook. Here are the steps to delete a conversation:
- Step 1: Open Outlook and Go to the Conversation: Launch Outlook and navigate to the inbox or folder where the conversation is located.
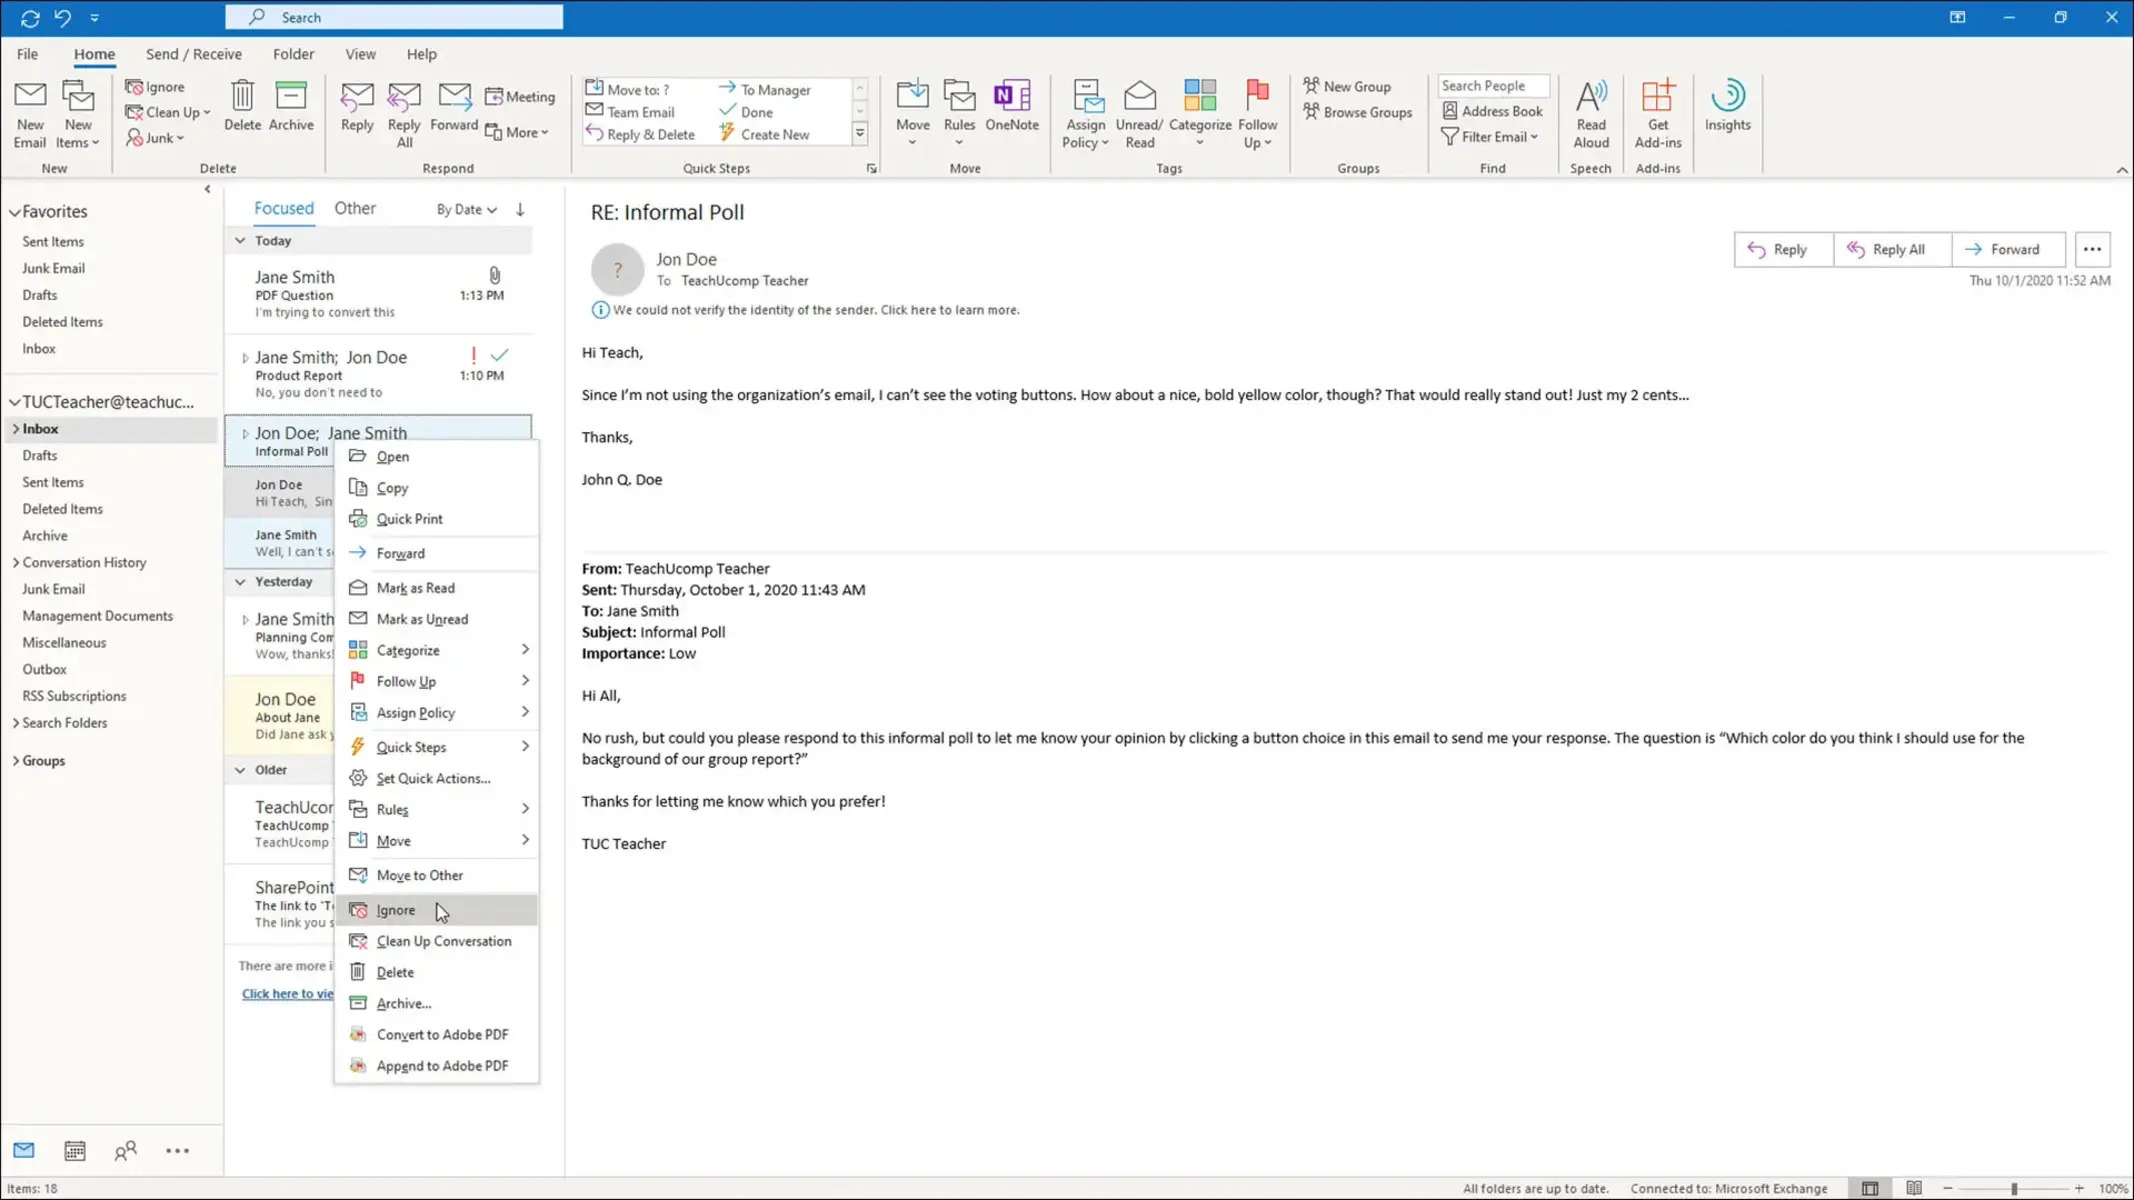
- Step 2: Delete the Conversation: Select the conversation you want to delete by clicking on it. You can also select multiple conversations by holding down the Ctrl key (Command key on Mac) and clicking on each one. Right-click on the selected conversation(s) and choose the “Delete” option from the context menu. Alternatively, you can use the “Delete” button on the toolbar.
- Step 3: Confirm the Deletion: A confirmation prompt will appear asking if you want to permanently delete the conversation. Review the prompt and click “Yes” to proceed with the deletion. The conversation will be moved to the “Deleted Items” folder.
It’s important to note that deleting a conversation also deletes any associated replies or sub-conversations. Make sure you have reviewed the conversation and don’t need any information from it before deleting it.
Deleting a conversation is a permanent action, so exercise caution when using this feature. If you accidentally delete a conversation, you may need to rely on backups or request the conversation from the sender.
By deleting conversations you no longer need, you can keep your inbox organized and focus on the important emails. Just remember to think twice before deleting a conversation, as once it’s gone, it’s gone for good.
Muting a Conversation
Muting a conversation in Outlook allows you to temporarily silence notifications and move the conversation to your “Muted” folder. This feature is beneficial when you want to minimize distractions and reduce the influx of unnecessary email notifications without permanently deleting the conversation.
Muting a conversation is a simple process in Outlook. Here are the steps to mute a conversation:
- Step 1: Open Outlook and Go to the Conversation: Launch Outlook and navigate to the inbox or folder containing the conversation you want to mute.
- Step 2: Mute the Conversation: Select the conversation by clicking on it. Right-click on the selected conversation(s) and choose the “Mute” option from the context menu. Alternatively, you can find the “Mute” button in the toolbar and click on it.
- Step 3: Confirm the Muting: A confirmation prompt will appear asking if you want to mute the conversation. Review the prompt and click “Yes” to proceed. The conversation will be moved to your “Muted” folder, and you will no longer receive notifications for new messages in that conversation.
When you mute a conversation, it doesn’t delete any emails or replies. It simply stops notifications from that particular conversation. The conversation will still be accessible in your “Muted” folder, allowing you to refer back to it whenever needed.
It’s worth noting that muting a conversation is reversible. If you decide that you need to start receiving notifications for the muted conversation again, you can easily un-mute it. Simply navigate to your “Muted” folder, select the conversation, and choose the “Unmute” option from the context menu or toolbar.
Muting conversations in Outlook helps you maintain a clutter-free inbox and focus on important emails. By silencing non-essential conversations, you can avoid distractions and stay productive. Just remember to periodically review your “Muted” folder to check if any important updates or information have been shared in those conversations.
Deleting vs Muting a Conversation
When managing your conversations in Outlook, it’s important to understand the differences between deleting and muting a conversation. Both options serve different purposes and have their advantages. Let’s compare deleting and muting to help you decide which option is best for your needs.
Deleting a Conversation:
Deleting a conversation in Outlook permanently removes it from your inbox and other folders. It is suitable when you no longer need the conversation and want to declutter your mailbox. By deleting conversations, you can keep your inbox organized and focus on the important emails. However, it’s important to note that once a conversation is deleted, it cannot be recovered. Make sure you don’t need any information from the conversation before deleting it.
Muting a Conversation:
Muting a conversation in Outlook allows you to temporarily silence notifications and move the conversation to your “Muted” folder. This is useful when you want to minimize distractions and reduce the influx of unnecessary email notifications without permanently deleting the conversation. Muted conversations are still accessible in the “Muted” folder, allowing you to refer back to them if needed. Muting is a reversible action, meaning you can unmute a conversation and start receiving notifications again whenever you want.
When to Delete a Conversation:
Deleting a conversation is ideal when you no longer need to reference or keep any information from it. If the conversation has fulfilled its purpose and you’re confident you won’t need it in the future, deleting it will help keep your inbox streamlined and organized. Just be cautious as deletion is permanent, and you won’t be able to recover the conversation once it’s deleted.
When to Mute a Conversation:
Muting a conversation is beneficial when you want to temporarily suppress notifications and reduce email distractions. If you’re part of a conversation that is ongoing or receiving frequent updates, muting can help you focus on other tasks without being constantly interrupted by notifications. Muting lets you maintain a record of the conversation and allows you to catch up on updates at your convenience.
Understanding the differences between deleting and muting conversations in Outlook allows you to make informed decisions about how to manage your inbox effectively. Consider your specific circumstances and the importance of the conversation before deciding whether to delete or mute it.
How to Delete a Conversation in Outlook
Deleting a conversation in Outlook is a simple process that allows you to permanently remove it from your inbox and other folders. Follow the steps below to delete a conversation:
- Step 1: Open Outlook and Go to the Conversation: Launch Outlook and navigate to the inbox or folder where the conversation you want to delete is located.
- Step 2: Delete the Conversation: Select the conversation by clicking on it. You can also select multiple conversations by holding down the Ctrl key (Command key on Mac) and clicking on each one. Right-click on the selected conversation(s) and choose the “Delete” option from the context menu. Alternatively, you can use the “Delete” button on the toolbar.
- Step 3: Confirm the Deletion: A confirmation prompt will appear asking if you want to permanently delete the conversation. Review the prompt and click “Yes” to proceed. The conversation will be moved to the “Deleted Items” folder and will no longer be visible in your inbox or folders.
It’s important to note that when you delete a conversation, any associated replies or sub-conversations are also permanently deleted. Take a moment to review the conversation and make sure you don’t need any information from it before proceeding with the deletion.
Deleted conversations are moved to the “Deleted Items” folder, where they will remain until you empty the folder or manually restore the conversation. To permanently delete conversations in the “Deleted Items” folder, you can right-click on the folder and select the “Empty Folder” option, or you can individually select conversations and click the “Delete” button or choose the “Delete” option from the context menu.
Keep in mind that once a conversation is deleted, it cannot be retrieved unless you have a backup or request the conversation from the sender. Exercise caution when deleting conversations and ensure that you no longer need them before proceeding.
Deleting conversations in Outlook helps you declutter your inbox and focus on the important emails. By removing unnecessary conversations, you can maintain an organized email environment and improve your productivity. Just remember to think twice before deleting a conversation, as the action is irreversible.
Step 1: Open Outlook and Go to the Conversation
The first step in deleting a conversation in Outlook is to open the application and navigate to the inbox or folder where the conversation is located. Here’s how to do it:
- Launch Outlook: Locate and open the Outlook application on your computer or access it through your web browser by logging into your Outlook account.
- Navigate to Inbox or Folder: Once you have opened Outlook, navigate to the inbox or folder that contains the conversation you want to delete. You can do this by clicking on the appropriate folder in the navigation pane on the left side of the Outlook window.
- Find the Conversation: Look for the specific conversation you wish to delete within the selected inbox or folder. Scan through your emails until you locate the conversation or use the search feature in Outlook to find it quickly.
It’s important to ensure that you have selected the correct inbox or folder before proceeding to delete the conversation. If the conversation is located in a specific folder, make sure to navigate to that folder to find and delete it.
If you’re unsure which folder the conversation is in, you can use the search bar at the top of the Outlook window to search for keywords related to the conversation. Outlook will display the search results, and you can click on the relevant message to access the conversation. Once you have located the conversation you want to delete, you’re ready to proceed to the next step.
By following this first step, you will be able to open Outlook and find the specific conversation you wish to delete. It’s important to correctly navigate to the inbox or folder that contains the conversation to ensure that you delete the intended conversation and not other emails. With Outlook open and the conversation located, you’re ready to move on to the next step of deleting the conversation.
Step 2: Delete the Conversation
Once you have located the conversation you want to delete in Outlook, you can proceed to delete it. Follow these steps to delete the conversation:
- Select the Conversation: Click on the conversation you wish to delete. If you want to delete multiple conversations, hold down the Ctrl key (Command key on Mac) and click on each conversation to select them simultaneously.
- Right-Click or Use the Toolbar: Once you have selected the conversation(s), you can either right-click on the selected conversation(s) to bring up a context menu or use the “Delete” button in the toolbar.
- Choose the Delete Option: In the context menu, select the “Delete” option to proceed with the deletion. If using the toolbar, simply click on the “Delete” button.
After selecting the delete option, Outlook will initiate the deletion process for the conversation(s) you have selected. The conversation(s) will be removed from your inbox and any other folders they may have been placed in.
Alternatively, you can also use the keyboard shortcut to delete a conversation in Outlook. With the conversation(s) selected, press the Delete key on your keyboard to delete them immediately.
It’s worth noting that deleting a conversation not only removes the selected conversation(s) but also any associated replies or sub-conversations. Ensure that you have reviewed the conversation and don’t need any information from it before proceeding with the deletion.
By following these steps, you can easily delete a conversation in Outlook. This helps you declutter your inbox and remove conversations that are no longer needed. It’s important to exercise caution when deleting conversations, as the action is permanent and cannot be undone. Ensure that you have selected the correct conversation(s) to delete, and double-check that you don’t need any information from them before confirming the deletion.
Step 3: Confirm the Deletion
After selecting the conversation(s) you want to delete in Outlook and initiating the deletion process, you will be prompted to confirm the deletion. Follow these steps to confirm the deletion of the conversation:
- Review the Confirmation Prompt: Once you have chosen the “Delete” option, a confirmation prompt will appear on the screen. This prompt is designed to ensure that you intend to permanently delete the selected conversation(s).
- Read the Prompt Carefully: Take the time to carefully read the confirmation prompt before proceeding. Make sure that it accurately indicates the action you are about to take.
- Confirm the Deletion: If you are certain that you want to proceed with the deletion, click “Yes” or “OK” in the confirmation prompt to confirm the deletion of the conversation(s).
- Monitor the Changes: After confirming the deletion, Outlook will immediately remove the selected conversation(s) from your inbox and any other folders. Pay attention to the changes in your inbox to ensure that the conversation(s) have been successfully deleted.
It’s important to note that once you confirm the deletion, the conversation(s) will be permanently removed from your mailbox. They cannot be recovered unless you have a backup or request the conversation(s) from the sender.
Take extra care when confirming the deletion, especially if you have selected multiple conversations for deletion. Ensure that you have selected the correct conversation(s) and that you no longer need the information contained within them.
By following this final step, you can successfully confirm the deletion of the conversation(s) in Outlook. Deleting conversations allows you to declutter your inbox and keep it organized. Remember to exercise caution and review the confirmation prompt before confirming the deletion.
How to Mute a Conversation in Outlook
Muting a conversation in Outlook allows you to temporarily silence notifications and move the conversation to your “Muted” folder. This feature is useful when you want to minimize distractions without permanently deleting the conversation. Follow these steps to mute a conversation in Outlook:
- Step 1: Open Outlook and Go to the Conversation: Launch Outlook and navigate to the inbox or folder where the conversation you want to mute is located.
- Step 2: Mute the Conversation: Select the conversation by clicking on it. Right-click on the selected conversation(s) to bring up a context menu.
- Step 3: Confirm the Muting: In the context menu, choose the “Mute” option to proceed with muting the conversation. The conversation will be moved to your “Muted” folder, and you will no longer receive notifications for new messages in that conversation.
Alternatively, you can find the “Mute” button in the toolbar and click on it to mute the selected conversation(s).
Muting a conversation does not delete any emails or replies. It simply stops notifications from that particular conversation. The conversation will still be accessible in your “Muted” folder, allowing you to refer back to it whenever needed.
It’s worth noting that muting a conversation is reversible. If you decide that you need to start receiving notifications for the muted conversation again, you can easily un-mute it. Simply navigate to your “Muted” folder, select the conversation, and choose the “Unmute” option from the context menu or toolbar.
Muting conversations in Outlook helps you create a quiet workspace, especially when you’re part of ongoing discussions that may generate numerous updates. By temporarily suppressing notifications, you can concentrate on other tasks without being disturbed by constant email alerts.
Remember to periodically review your “Muted” folder to ensure you don’t miss any important updates or information shared in the conversations you’ve muted. Muting is a valuable feature that allows you to stay focused while maintaining the flexibility to unmute conversations as needed.
Step 1: Open Outlook and Go to the Conversation
To mute a conversation in Outlook, you first need to open the application and navigate to the inbox or folder where the conversation is located. Here’s how to proceed:
- Launch Outlook: Locate and open the Outlook application on your computer or access it through your web browser by logging into your Outlook account.
- Navigate to Inbox or Folder: Once Outlook is open, navigate to the inbox or folder that contains the conversation you want to mute. You can do this by clicking on the appropriate folder in the navigation pane on the left side of the Outlook window.
- Find the Conversation: Look for the specific conversation you wish to mute within the selected inbox or folder. Scan through your emails until you locate the conversation, or use the search feature in Outlook to find it quickly.
Ensuring that you have selected the correct inbox or folder is crucial before proceeding to mute the conversation. If the conversation is located in a specific folder, make sure to navigate to that folder to find and mute it.
In case you are not sure which folder the conversation is in, you can utilize the search bar at the top of the Outlook window to search for keywords related to the conversation. Outlook will display the search results, and you can click on the relevant message to access the conversation. Once you have located the conversation you want to mute, this step is complete, and you can move on to the next step.
By correctly opening Outlook and finding the desired conversation, you are now prepared to proceed with muting it. It is important to navigate to the correct inbox or folder to guarantee that you are muting the intended conversation. Having completed this step, you are ready to move on to the next stage of muting the conversation in Outlook.
Step 2: Mute the Conversation
After locating the conversation you want to mute in Outlook, you can proceed to mute it. Follow these steps to mute the conversation:
- Select the Conversation: Click on the conversation you wish to mute. If you want to mute multiple conversations, hold down the Ctrl key (Command key on Mac) and click on each conversation to select them simultaneously.
- Right-Click or Use the Toolbar: Once you have selected the conversation(s), right-click on the selected conversation(s) to bring up a context menu. Alternatively, you can find the “Mute” button in the toolbar and click on it to mute the selected conversation(s).
- Choose the Mute Option: In the context menu, select the “Mute” option to proceed with muting the conversation. By choosing the “Mute” option, the conversation will be moved to your “Muted” folder, and you will no longer receive notifications for new messages in that conversation.
When you mute a conversation, emails and replies within it remain intact. Muting only stops the notifications for that particular conversation. The conversation can still be accessed in your “Muted” folder when needed.
If you prefer to use the keyboard, you can select the conversation(s) and press the M key to quickly mute them.
It’s important to note that muting a conversation is not a permanent action. Should you decide to start receiving notifications again for the muted conversation, you can easily unmute it. Simply navigate to your “Muted” folder, select the conversation, and choose the “Unmute” option from the context menu or toolbar.
Muting conversations in Outlook allows you to create a quieter workspace, especially when you’re part of ongoing discussions that generate frequent updates. By temporarily suppressing notifications, you can focus on other tasks without constant email distractions.
Remember to periodically check your “Muted” folder to ensure that you don’t miss any important updates or information shared within the conversations you have muted. Muting is a valuable feature that allows you to stay focused while still having the flexibility to unmute conversations as needed.
Step 3: Confirm the Muting
After selecting and muting the conversation(s) in Outlook, you will be prompted to confirm the muting action. Follow these steps to complete the muting process:
- Review the Confirmation Prompt: Once you choose the “Mute” option for the conversation(s), a confirmation prompt will appear on the screen. This prompt is designed to ensure that you intended to mute the selected conversation(s).
- Read the Prompt Carefully: Take a moment to carefully read the confirmation prompt before proceeding. Make sure that it accurately indicates the action you are about to take.
- Confirm the Muting: If you are certain that you want to proceed with muting the conversation(s), click “Yes” or “OK” in the confirmation prompt to confirm the muting action. The conversation(s) will be moved to your “Muted” folder, and you will no longer receive notifications for new messages within those conversations.
- Monitor the Changes: After confirming the muting action, Outlook will immediately move the selected conversation(s) to your “Muted” folder. Pay attention to the changes in your inbox to ensure that the conversation(s) have been successfully muted.
It’s important to note that muting a conversation does not delete any emails or replies within it. The muting action solely stops the notifications for that particular conversation. You can still access the muted conversation(s) in your “Muted” folder whenever you need to refer back to them.
Take care when confirming the muting action, especially if you have selected multiple conversations for muting. Ensure that you have selected the correct conversation(s) to mute and that you no longer wish to receive notifications for new messages in those conversations.
By following this final step, you can successfully confirm the muting of the conversation(s) in Outlook. Muting conversations helps create a more peaceful workspace by temporarily suppressing distractions. Remember to periodically review your “Muted” folder to ensure that you are not missing any important updates or information shared within the conversations you’ve muted.
How to Delete vs Mute a Conversation in Outlook
When managing conversations in Outlook, it’s important to understand the differences between deleting and muting a conversation. Both options have distinct purposes and benefits. Let’s explore how to delete and mute conversations in Outlook:
Deleting a Conversation:
Deleting a conversation in Outlook permanently removes it from your inbox and other folders. This action is suitable when you no longer need the conversation and want to keep your mailbox organized. To delete a conversation, select it and use the delete function. It’s important to note that deleting a conversation removes not only the conversation but also any associated replies or sub-conversations. Deleted items can be found in the “Deleted Items” folder.
Muting a Conversation:
Muting a conversation allows you to temporarily silence notifications and move the conversation to your “Muted” folder in Outlook. This feature is beneficial when you want to minimize distractions without permanently deleting the conversation. To mute a conversation, select it and use the mute function. Muted conversations can still be accessed in the “Muted” folder, and you can unmute them at any time to resume receiving notifications.
Differences between Deleting and Muting:
The primary difference between deleting and muting a conversation in Outlook lies in the permanence of the action. Deleting a conversation is irreversible, while muting is a temporary action. Deleting a conversation permanently removes it from your mailbox, whereas muting allows you to temporarily suppress notifications.
When to Delete a Conversation:
Delete a conversation when you no longer need it or want to keep your mailbox decluttered. Only choose this option when you are certain you don’t need the information in the conversation anymore.
When to Mute a Conversation:
Mute a conversation when you want to reduce distractions without deleting it permanently. This is useful when you are part of an ongoing discussion that generates frequent updates, but you want to focus on other tasks.
Understanding the differences between deleting and muting conversations in Outlook allows you to effectively manage your mailbox. Whether you need to permanently remove a conversation or temporarily silence its notifications, Outlook provides the tools you need. Choose the option that best suits your needs and helps you stay organized and focused on what matters most.