
How to Delete a Post on Facebook
Facebook is a popular social media platform that allows users to share their thoughts, photos, and videos with friends and family. However, there may come a time when you want to delete a post that you’ve made. Whether it’s a simple typo or a post you regret, removing it from your profile can be done easily on both mobile and desktop versions of Facebook. Here’s a step-by-step guide on how to delete a post on Facebook:
Deleting a Post on Facebook Mobile:
- Open the Facebook app on your mobile device and log into your account.
- Navigate to the post that you want to delete by scrolling through your timeline or using the search bar.
- Tap on the three-dot menu icon in the top right corner of the post.
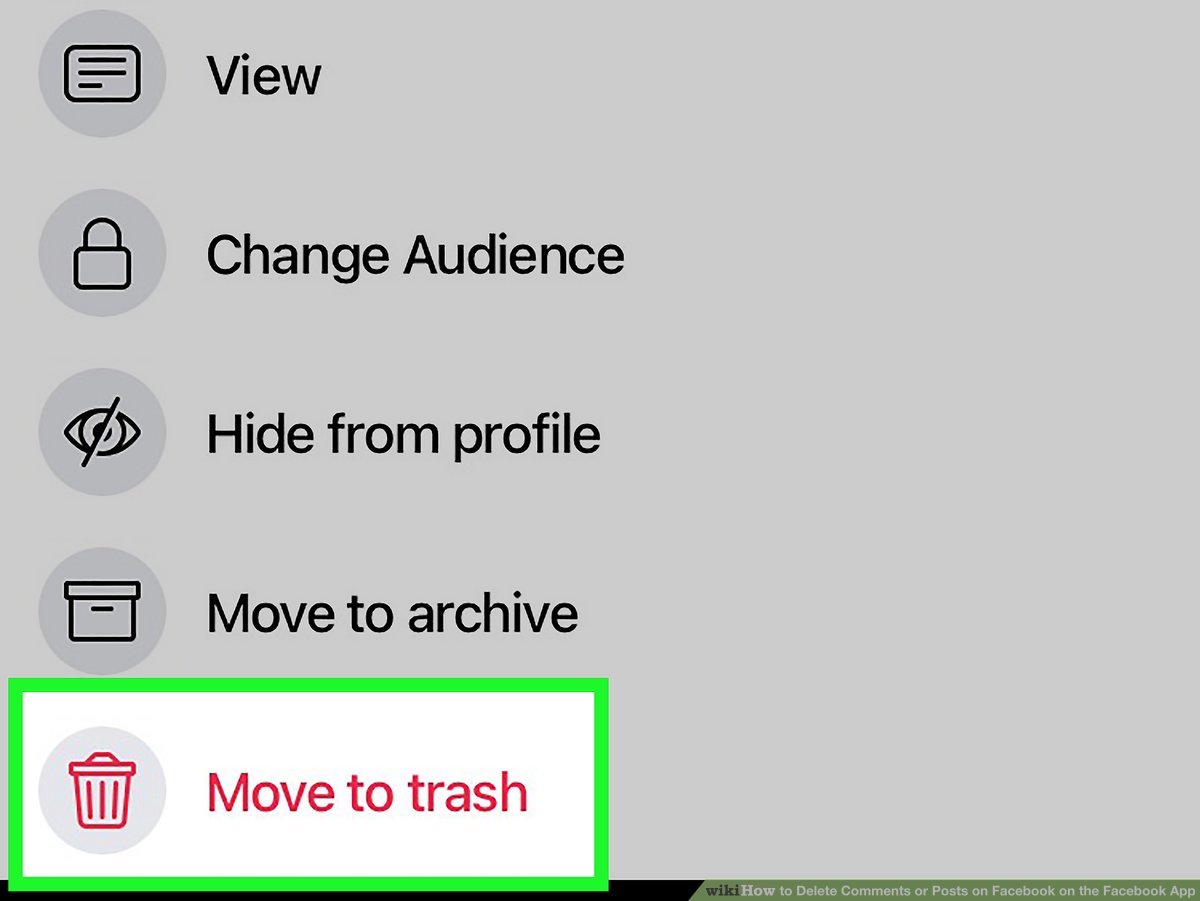
- A menu will appear with various options. Select “Delete” from the list.
- Confirm your decision by tapping “Delete” again in the pop-up box that appears.
Note: Deleted posts cannot be recovered, so make sure you really want to delete it before confirming.
Deleting a Post on Facebook Desktop:
- Open a web browser and visit www.facebook.com. Log into your account if you haven’t already.
- Navigate to your profile page by clicking on your profile picture in the top left corner of the screen.
- Scroll through your timeline or use the search bar to find the post that you want to delete.
- Hover over the post until you see a three-dot menu icon in the top right corner. Click on it.
- In the menu that appears, click on “Delete” and confirm your decision by clicking “Delete” again.
Deleting Multiple Posts on Facebook:
If you have multiple posts that you want to delete, you can use the “Activity Log” feature on Facebook:
- On the Facebook app, go to your profile page and tap on the three-line menu button in the top right corner.
- Scroll down and tap on “Activity Log.”
- You will see a list of all your posts. Tap on the one you want to delete, and then follow the steps mentioned above to delete it.
Recovering Deleted Posts on Facebook:
Once you delete a post on Facebook, it cannot be recovered. Make sure to double-check your decision before confirming the deletion.
Hiding a Post Instead of Deleting It:
If you don’t want a post to be visible on your timeline, but you don’t want to delete it permanently, you can hide it:
- Locate the post you want to hide on either Facebook mobile or desktop.
- Tap on the three-dot menu icon or hover over the post and click on the three-dot menu icon.
- Select “Hide from timeline” or “Hide post” from the menu.
The post will be removed from your timeline but will still be visible to those who have a direct link to it.
Understanding the Privacy Settings for Posts on Facebook:
Facebook allows you to control who can see your posts. Before making a post, you can adjust the privacy settings by selecting from options such as “Public,” “Friends,” “Friends except,” or “Only me.”
Deleting a Post from a Facebook Page:
If you’re an admin of a Facebook page, you can delete posts from the page using the same steps mentioned above for deleting posts on Facebook desktop or mobile.
Now that you know how to delete a post on Facebook, you can confidently remove any unwanted or inappropriate posts from your profile or page.
Deleting a Post on Facebook Mobile
Deleting a post on Facebook mobile is a straightforward process that can be done in just a few simple steps. Whether you want to remove a post due to a mistake, a change of mind, or for any other reason, here’s a step-by-step guide on how to delete a post on Facebook Mobile:
- Open the Facebook app on your mobile device and log into your account if you haven’t already.
- Navigate to the post that you want to delete. You can do this by scrolling through your timeline or using the search bar at the top of the screen.
- Once you have located the post, tap on the three-dot menu icon in the top right corner of the post. This will open a drop-down menu with various options.
- From the menu, select “Delete.” This will prompt a confirmation message asking if you really want to delete the post.
- To confirm the deletion, tap on “Delete” again in the pop-up box that appears.
It’s important to note that once you delete a post on Facebook mobile, it cannot be recovered. Therefore, it’s crucial to double-check your decision before confirming the deletion.
Deleting a post on Facebook mobile is an effective way to maintain the content on your profile and ensure that only the posts you want to be visible remain. Whether it’s a personal post, a photo, or a video, the process to delete it is the same.
Additionally, if you have multiple posts that you want to delete, you can use the “Activity Log” feature on Facebook mobile. To access this feature, go to your profile page and tap on the three-line menu button in the top right corner. Scroll down and tap on “Activity Log.” From there, you can see a list of all your posts and select the ones you want to delete. Follow the same steps mentioned above to delete them.
Deleting a Post on Facebook Desktop
If you prefer using Facebook on your desktop or laptop, deleting a post is just as simple as it is on mobile. Whether you want to remove a post you no longer want on your profile or need to delete a post on a Facebook page you manage, here’s how to delete a post on Facebook desktop:
- Open a web browser and visit www.facebook.com. Log into your account if you haven’t already.
- Navigate to your profile page by clicking on your profile picture in the top left corner of the screen. Alternatively, if you want to delete a post from a page you manage, go to the page by clicking on the page name in the left sidebar.
- Scroll through your timeline or use the search bar at the top of the screen to find the post you want to delete.
- Hover over the post until you see a three-dot menu icon appear in the top right corner. Click on this icon to open a drop-down menu with various options.
- In the drop-down menu, click on “Delete.” A confirmation message will appear, asking if you are sure you want to delete the post.
- To confirm the deletion, click on “Delete” again in the pop-up box that appears.
Just like on mobile, it’s important to note that once you delete a post on Facebook desktop, it cannot be recovered. Therefore, it’s essential to review your decision before confirming the deletion.
If you manage a Facebook page and want to delete a post from the page, the process is the same as deleting a post from your personal profile. Simply navigate to the page, find the post, and follow the steps mentioned above to delete it.
Deleting a post on Facebook desktop allows you to maintain control over the content on your profile or page. You can easily remove posts that are no longer relevant or that you no longer want visible to others.
Lastly, if you have multiple posts you want to delete, you can also utilize the “Activity Log” feature on Facebook desktop. To access this feature, click on the arrow icon in the top right corner of the screen and select “Activity Log.” From there, you can see a chronological list of your posts and delete them individually using the same steps mentioned earlier.
Deleting Multiple Posts on Facebook
If you have multiple posts on Facebook that you want to delete, you don’t have to go through the process of deleting each one individually. Facebook provides an “Activity Log” feature that allows you to manage and delete multiple posts at once. Here’s how to delete multiple posts on Facebook:
- On the Facebook app, go to your profile page and tap on the three-line menu button in the top right corner.
- Scroll down and tap on “Activity Log.” This will open a chronological list of all your posts, including photos, videos, and text posts.
- Scroll through the activity log to find the posts you want to delete. You can use the filter options at the top to narrow down the search by year, month, or post types.
- Once you’ve located a post you wish to delete, tap on the three-dot menu icon next to it.
- From the menu that appears, select “Delete” to remove the post. Repeat this step for each post you want to delete.
- Confirm the deletion by tapping on “Delete” again in the pop-up box that appears.
The “Activity Log” feature on Facebook mobile allows for efficient management of your posts, especially when you want to delete multiple posts. However, it’s important to note that deleted posts cannot be recovered, so it’s crucial to review your decision before confirming the deletion.
On Facebook desktop, you can access the “Activity Log” by clicking on the arrow icon in the top-right corner of the screen and selecting “Activity Log” from the drop-down menu. From there, you can follow the same steps mentioned above to delete multiple posts.
Deleting multiple posts on Facebook not only helps you declutter your profile but also saves you time and effort. Instead of deleting each post individually, you can efficiently remove several posts at once using the “Activity Log” feature.
Remember to be mindful of the posts you choose to delete and ensure they align with your desired online presence. Regularly reviewing and managing your posts can help maintain a clean and organized Facebook profile.
Recovering Deleted Posts on Facebook
Once you delete a post on Facebook, it cannot be recovered. Therefore, it’s essential to be cautious and consider your decision before confirming the deletion. However, if you accidentally delete a post or change your mind about deleting it, there are a few options available to try and recover it:
1. Check the “Recently Deleted” Folder:
Facebook now has a “Recently Deleted” folder for posts, photos, and videos that have been deleted within the past 30 days. Here’s how to check this folder:
- On the Facebook app, tap on the three-line menu button and scroll down to find “Settings & Privacy,” then tap on it.
- Select “Settings” and then choose “Account Settings.”
- Tap on “Recently Deleted.”
- In the “Recently Deleted” folder, you will find all the posts, photos, or videos you have deleted within the past 30 days.
- Select the post you want to recover and tap on the “Restore” button to have it reinstated.
2. Reach out to Facebook Support:
If you are unable to find your deleted post in the “Recently Deleted” folder, you might want to contact Facebook support for assistance. Visit the Facebook Help Center and navigate to the “Help Community” section. Explain the situation and provide any relevant details. The support team may be able to assist you in recovering the deleted post.
While Facebook has provided these options for recovering deleted posts, it’s important to note that they may not guarantee successful retrieval. It’s always a good practice to double-check your posts and think carefully before deleting them.
Remember, prevention is key. Taking extra caution when deleting posts can save you the trouble of trying to recover them later. Be sure of your decision before confirming the deletion and consider archiving or saving important posts externally if you want to preserve them.
Hiding a Post Instead of Deleting It
Sometimes, you may have a post on Facebook that you don’t want to delete permanently but prefer to keep it hidden from your timeline. Facebook provides the option to hide posts instead of deleting them, allowing you to control its visibility while keeping it saved. Here’s how to hide a post on Facebook:
- Locate the post you want to hide on either Facebook mobile or desktop.
- Tap on the three-dot menu icon (on mobile) or hover over the post and click on the three-dot menu icon (on desktop).
- From the menu that appears, select “Hide from timeline” or “Hide post.”
By choosing to hide a post, it will be removed from your timeline, and only you will be able to see it. However, it’s important to note that the post may still be visible to others who have a direct link to it or if they are tagged in it.
If you change your mind and want to unhide a hidden post, you can do so by following these steps:
- On Facebook mobile, go to your profile and tap on the three-line menu button. Scroll down and tap on “Activity Log.”
- Find the hidden post in the activity log.
- Tap on the post, and you will see the option to unhide it. Tap on “Show on timeline” or “Unhide post.”
On Facebook desktop, you can access the activity log by clicking on the arrow icon in the top-right corner of the screen and selecting “Activity Log.” From there, find the hidden post and click on the “Hidden from timeline” label to unhide it.
Hiding a post on Facebook gives you the flexibility to preserve the content while controlling its visibility on your timeline. It’s a useful feature when you want to keep certain posts private without deleting them entirely.
Remember, hiding a post is different from deleting it. If you have posts that you want to permanently remove from Facebook, it’s best to follow the steps for deletion rather than just hiding them.
Understanding the Privacy Settings for Posts on Facebook
When making a post on Facebook, it’s important to understand the privacy settings available to you. Facebook allows you to control who can see your posts, ensuring that they are shared with the intended audience. Here’s an overview of the privacy settings for posts on Facebook:
1. Public:
When a post is set to “Public,” it means that anyone, whether they are your friends or not, can see the post. This setting is ideal for sharing information with a wide audience, such as public announcements or posts intended to reach a broader community.
2. Friends:
Setting a post to “Friends” means that only your Facebook friends can view the post. This option is useful when sharing personal updates, photos, or any content you want to keep within your social circle.
3. Friends except:
The “Friends except” setting gives you control over which friends can see a particular post. You can exclude specific individuals or groups from viewing the post while making it visible to your other friends. This option can be used when you want to share a post with most of your friends but exclude a select few.
4. Only me:
The “Only me” setting restricts the post’s visibility to you alone. This is useful when you want to create private notes, save articles or links for personal reference, or store information that you don’t want to share with others.
5. Custom:
The “Custom” privacy setting allows you to fine-tune who can view your post. With this option, you can specify which friends or groups can see the content while excluding others. You can even choose to share the post with specific individuals by entering their names in the “Specific Friends” field.
It’s important to note that individual privacy settings can override the general privacy settings on Facebook. If you have specific preferences for certain posts, you can adjust the settings when making the post itself.
By understanding the privacy settings available on Facebook, you can have better control over who can see your posts. Ensuring that you choose the appropriate setting for each post allows you to maintain your desired level of privacy and share content with the intended audience.
Deleting a Post from a Facebook Page
If you manage a Facebook page, whether it’s for a business, organization, or a personal brand, you have the ability to delete posts from the page. Deleting a post from a Facebook page is similar to deleting a post from your personal profile. Here’s how to do it:
- Open a web browser and visit www.facebook.com. Log into your account if you haven’t already.
- Navigate to the Facebook page from which you want to delete a post. You can do this by searching for the page in the search bar at the top of the screen or by clicking on the page name if it appears in your News Feed.
- Once you are on the page, scroll through the posts to find the one you want to delete.
- Hover over the post until you see a three-dot menu icon appear in the top right corner of the post. Click on the icon to open a drop-down menu.
- In the drop-down menu, click on “Delete.” Confirm the deletion by clicking on “Delete” again when prompted.
Deleting a post from a Facebook page removes the post from the page and the News Feeds of the people who have liked the page. However, keep in mind that if others have shared the post, it may still be visible on their profiles or pages.
It’s important to review the posts on your Facebook page regularly and delete any content that is outdated, irrelevant, or no longer aligns with your page’s objectives. By doing so, you can ensure that your page remains up-to-date and presents the desired image to your followers.
Additionally, if you need to delete multiple posts from a Facebook page, you can follow the same method mentioned above for deleting a single post. Repeat the steps for each post you want to delete.
Remember to be careful when deleting posts from a Facebook page, especially if they contain important information or engagement from your followers. Make sure to double-check your decision before confirming the deletion to avoid any unintended consequences.