
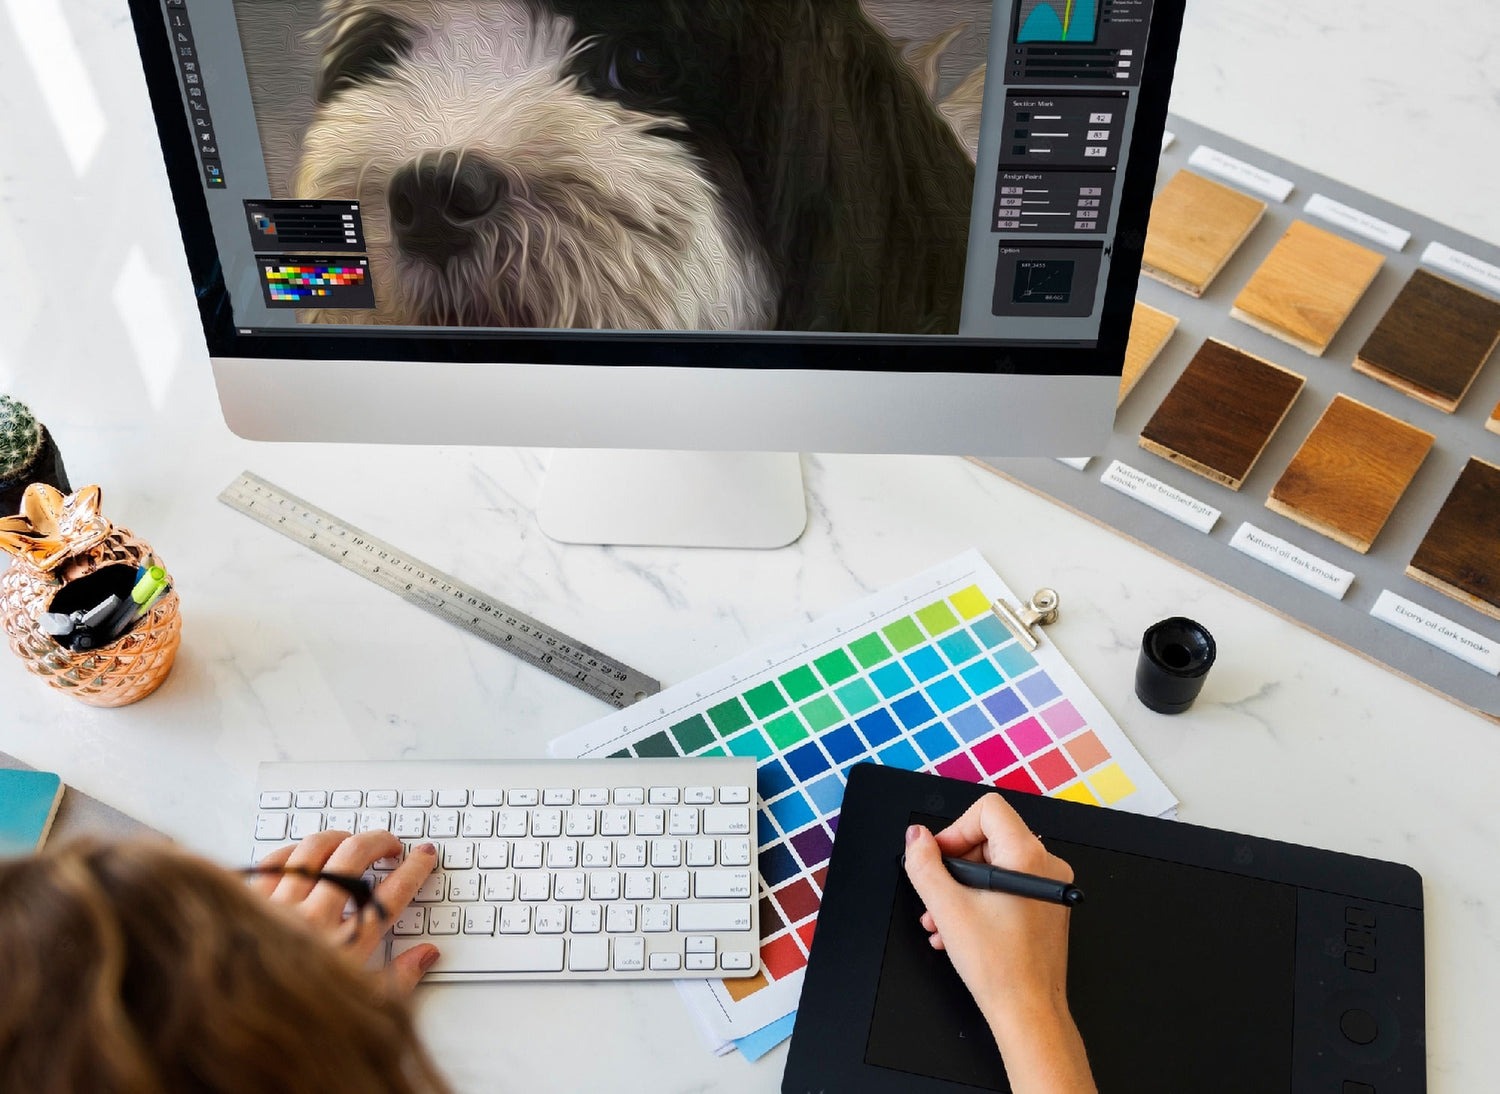
Choosing the Right Tools
When it comes to creating digital art, having the right tools is crucial. The software and hardware you use can greatly impact the quality and efficiency of your work. Here are some important considerations when choosing the tools for your digital art journey.
1. Digital Drawing Software: There are various digital drawing software options available, each with its own unique features and compatibility. Popular choices include Adobe Photoshop, Corel Painter, and Procreate. Research and experiment with different programs to find the one that best suits your needs and artistic style.
2. Graphic Tablet or Stylus: While you can technically create digital art with just a mouse or trackpad, using a graphic tablet or stylus provides much greater precision and control. Look for a tablet that offers pressure sensitivity and customizable buttons for a more immersive drawing experience.
3. Display Monitor: Investing in a high-quality display monitor is essential for accurately observing the colors, details, and textures of your artwork. Look for a monitor with wide color gamut and good resolution to ensure accurate representation of your digital creations.
4. Brushes and Textures: Digital art software offers a wide variety of brushes and textures to choose from. Experiment with different brush styles and textures to add depth and interest to your artwork. Many software programs also allow you to import additional brushes and textures created by other artists.
5. Online Resources: Take advantage of the vast online resources available for digital artists. Online communities, tutorials, and forums can provide inspiration, guidance, and support throughout your artistic journey. Engage with other artists to learn new techniques and gain valuable feedback on your work.
6. Regular Updates: Digital art software is constantly evolving, with new features and improvements being released regularly. Stay updated with the latest versions of your chosen software to benefit from bug fixes, performance enhancements, and new creative tools.
Remember, the tools you choose are a personal preference and may vary depending on your specific artistic style and goals. Take the time to research and try different options until you find the tools that feel most comfortable and enable you to create the best digital art possible.
Understanding Digital Art Techniques
Creating digital art involves utilizing specific techniques that are unique to the digital medium. Understanding these techniques allows artists to fully explore the possibilities and unleash their creativity. Here are some key techniques to familiarize yourself with:
1. Layers: Layers are a fundamental aspect of digital art, allowing you to work on different elements of your artwork separately. By organizing your artwork into layers, you can make adjustments and modifications without affecting the rest of the composition.
2. Opacity and Blending Modes: Adjusting the opacity of a layer can create intriguing effects by allowing underlying layers to show through. Blending modes, on the other hand, determine how layers interact with each other, such as blending colors or creating overlays.
3. Custom Brushes: Digital art software often provides a range of customizable brushes. Experimenting with brush settings, such as size, hardness, and opacity, allows you to create unique brush strokes and textures that enhance the overall look and feel of your artwork.
4. Selection Tools: Selection tools enable you to isolate specific areas of your artwork for editing. Whether it’s a simple rectangular selection or a complex freehand selection, these tools give you precision and control over what you’re working on.
5. Transformations: Digital art software offers various transformation tools, such as scaling, rotating, and distorting. These tools allow you to manipulate elements of your artwork, giving you the flexibility to experiment and create dynamic compositions.
6. Filters and Effects: Applying filters and effects can dramatically alter the appearance of your artwork. From adjusting colors and adding textures to creating artistic effects like watercolor or oil painting, filters and effects can help you achieve your desired aesthetic.
7. Digital Brushes and Textures: Digital art software often includes a wide array of preset brushes and textures. These can emulate traditional media or offer unique digital effects. Exploring different brushes and textures can add depth and visual interest to your artwork.
8. File Formats: Understand the importance of choosing the appropriate file format when saving or exporting your digital art. Different formats have specific advantages, such as preserving layers or maintaining high image quality.
By mastering these digital art techniques, you can fully unleash your creative potential and create stunning artworks. Experimentation and practice will help you develop your own style and discover new ways to express your ideas on a digital canvas.
Sketching and Creating a Composition
Before diving into the detailed execution of your digital artwork, it’s important to start with a strong foundation. Sketching and creating a composition provides a roadmap for your artwork and helps you determine the overall layout and design. Here’s how to approach the sketching and composition process:
1. Initial Sketch: Begin by sketching out your ideas and concepts on a separate layer. This initial sketch doesn’t need to be perfect, but it should capture the main elements and proportions of your composition. Use simple shapes and lines to visualize the overall layout.
2. Thumbnail Sketches: Create multiple thumbnail sketches to explore different compositions and arrangements. This allows you to quickly experiment with various ideas and determine the most visually appealing layout. Focus on the placement of key elements and the balance of negative space.
3. Establishing the Focal Point: Determine the focal point of your artwork – the main subject or element that draws the viewer’s attention. Consider using the rule of thirds or other composition techniques to guide the placement of your focal point and create visual interest.
4. Composition Techniques: Explore composition techniques such as leading lines, symmetry, asymmetry, and the rule of thirds. These techniques help create visual harmony, balance, and flow within your artwork. Experiment with different techniques to see what works best for your composition.
5. Balance and Negative Space: Pay attention to the balance of your composition, ensuring that the elements are evenly distributed and that there’s a pleasing visual weight. Don’t forget to consider negative space – the empty areas that give your artwork breathing room and add to the overall composition.
6. Refining the Sketch: Once you’ve finalized your composition, refine your sketch by adding more details and defining the shapes and forms. Use a new layer to trace over the initial sketch, working on the specific elements and refining the proportions and contours.
7. Value and Contrast: Consider the values and contrast in your composition, using light and shadow to enhance the depth and three-dimensionality of your artwork. Experiment with different shading techniques and values to create a sense of volume and realism.
8. Planning Color Scheme: Decide on a color scheme that complements your composition and the mood you want to convey. Consider the emotions associated with different colors and use them strategically to convey the desired atmosphere in your artwork.
By focusing on sketching and creating a strong composition, you lay the groundwork for a visually captivating and well-structured digital artwork. Spend ample time exploring different ideas and compositions, and don’t be afraid to iterate and make adjustments as needed. Remember, the sketching process is where you establish the foundation for your masterpiece.
Using Layers and Opacity
Layers and opacity are essential features in digital art software that allow artists to work flexibly, make adjustments, and create depth in their artwork. Understanding how to effectively use layers and manipulate opacity can greatly enhance your digital art creations. Here’s how to leverage these tools:
1. Organizing Your Artwork: Layers act as virtual transparent sheets, allowing you to work on different elements of your artwork separately. Start by creating a new layer for each major element or component of your artwork, such as the background, foreground objects, and characters. This way, you can make edits or changes to specific elements without affecting the rest of the composition.
2. Adjustment Layers: Utilize adjustment layers to make non-destructive changes to your artwork. Adjustment layers allow you to modify aspects such as brightness, contrast, color balance, and saturation without altering the original image. This provides flexibility and allows for easy experimentation with different effects.
3. Blending Modes: Explore different blending modes to determine how layers interact with each other. Blending modes control how colors and tones from one layer blend with the layers below, creating unique visual effects. Experiment with blending modes such as Overlay, Soft Light, and Multiply to achieve desired results and create interesting compositions.
4. Opacity and Transparency: Adjusting the opacity of a layer can enhance the overall look of your artwork. Lowering the opacity of a layer allows underlying layers to show through, creating softer edges and subtle layering effects. This technique is particularly useful when adding shadows, highlights, or overlaying textures.
5. Layer Masks: Layer masks enable you to selectively reveal or conceal parts of a layer. By using a layer mask, you can apply adjustments or effects to specific areas of your artwork without permanently altering the original layer. This technique is useful for creating precise and seamless transitions or for correcting small areas of your artwork.
6. Grouping Layers: Grouping layers can help keep your workspace organized, especially when working on complex artwork with many layers. Grouping layers together allows you to collapse and expand them as needed, giving you better control over your composition and making it easier to make adjustments.
7. Layer Opacity and Brush Opacity: Understanding the difference between layer opacity and brush opacity is crucial. Layer opacity determines the overall transparency of the entire layer, while brush opacity controls the transparency of individual brush strokes within a layer. Adjusting brush opacity allows you to create gradual transitions, blend colors, or add subtle details to your artwork.
By utilizing layers and manipulating opacity, you can experiment more freely, make non-destructive changes, and create depth in your digital artwork. Through practice and exploration, you’ll find new and creative ways to combine, adjust, and blend layers to bring your artistic vision to life.
Adding Colors and Textures
Adding colors and textures is a crucial step in bringing vibrancy and dimension to your digital artwork. The right color scheme and texture choices can greatly enhance the mood, atmosphere, and overall visual impact of your piece. Here’s how you can effectively utilize colors and textures in your digital art:
1. Color Theory: Familiarize yourself with the fundamentals of color theory. Understand how colors interact, their psychological effects, and how they can convey different emotions and messages. Experiment with different color combinations to find the palette that best suits your vision and the atmosphere you want to create.
2. Color Harmony: Create color harmony in your artwork by applying color schemes that work well together. Use complementary colors, analogous colors, or monochromatic color schemes to achieve a visually pleasing and balanced result. Consider the mood and message of your artwork when selecting the color palette.
3. Custom Color Swatches: Create custom color swatches in your digital art software to have easy access to your chosen colors. Organize your swatches based on color groups or specific projects, making it convenient to select and apply colors consistently throughout your artwork.
4. Adding Textures: Incorporate textures to add depth and visual interest to your digital art. Textures can simulate the look of traditional art mediums, such as canvas or paper, or they can add unique and distinct visual elements. Import textures or create your own to give your artwork a tactile feel.
5. Layer Blending Modes: Experiment with layer blending modes to blend colors and textures, creating interesting and dynamic effects. Different blending modes can interact with underlying layers in various ways, allowing you to achieve desired results and merge colors and textures seamlessly.
6. Gradient Maps and Color Adjustments: Utilize gradient maps and color adjustment layers to fine-tune the color scheme of your artwork. Adjust the hue, saturation, and brightness to enhance certain elements or create a consistent color mood throughout your piece.
7. Applying Highlights and Shadows: Use color variations, gradients, or additional layers of light and shadow to add depth and dimension to your artwork. Consider the light source in your composition and how it would naturally interact with the objects or characters in your piece.
8. Custom Brushes and Patterns: Explore custom brushes and patterns that add unique textures and details to your art. Many digital art software applications offer a range of brush options, allowing you to mimic realistic paint strokes or experiment with abstract and unconventional styles.
Incorporating the right colors and textures into your digital art can elevate your work to new heights. Experiment with different color schemes, textures, and blending options to unlock the full potential of your artistic vision. Remember, it’s not just about adding colors and textures but using them purposefully to convey the emotions and messages that resonate with your viewers.
Mastering Different Brushes and Brush Settings
The brush tool is one of the most versatile and powerful features in digital art software. Mastering different brushes and their settings allows you to create a wide range of strokes, textures, and effects, giving your artwork depth and personality. Here’s how you can make the most of the brushes and brush settings available to you:
1. Experiment with Brush Types: Take the time to explore different brush types, including round brushes, textured brushes, and specialty brushes. Each brush type has its own unique characteristics, such as hardness, opacity, and texture, allowing you to achieve different visual effects and emulate various traditional art techniques.
2. Customize Brush Settings: Digital art software often provides the option to customize brush settings like size, opacity, flow, and hardness. Experiment with different settings to find the balance and behavior that fits your artistic style and the desired effect you want to achieve.
3. Vary Pressure Sensitivity: If you’re using a graphics tablet or stylus, take advantage of pressure sensitivity. Adjusting the pressure sensitivity settings allows you to control the thickness, opacity, or size of your brush stroke based on the pressure applied. This adds a natural and nuanced feel to your artwork.
4. Utilize Brush Smoothing: Brush smoothing helps to create smoother and more precise brush strokes by automatically adjusting for shaky or hesitant hand movements. Experiment with different levels of brush smoothing to find the setting that works best for you and your preferred artistic style.
5. Texture and Scatter Brushes: Texture brushes add depth and realism to your artwork by applying textures or patterns to your brush strokes. Scatter brushes can create unique effects by randomly scattering individual marks or shapes. Experiment with these specialty brushes to enhance your artwork with interesting and organic-looking textures and effects.
6. Multiple Brushes in Combination: Combine different brushes within the same artwork to add variety and complexity. Use different brushes for different elements, such as foliage, hair, or different surfaces. This allows you to create visually interesting and diverse textures that make your artwork stand out.
7. Save and Organize Custom Brushes: As you experiment and create custom brushes or modify existing ones, save and organize them for easy access in future projects. Having a library of customized brushes can save time and allow for consistent styles across your artwork.
8. Practice and Experiment: Mastery of brushes and brush settings comes with practice and experimentation. Dedicate time to explore different brushes, adjust settings, and see how they interact with your artwork. This hands-on approach will help you understand the capabilities of your digital art software and develop your own unique style.
Mastering different brushes and their settings opens up a world of creative possibilities for your digital art. With practice and a willingness to try new techniques, you’ll be able to create stunning and dynamic artwork that showcases your skills and artistic vision.
Exploring Filters and Effects
Filters and effects are powerful tools in digital art software that allow you to transform and enhance your artwork in a variety of ways. Whether you want to add unique visual elements or create specific moods and atmospheres, exploring filters and effects can take your digital art to the next level. Here’s how to dive into the world of filters and effects:
1. Filter Gallery: Many digital art software applications offer a filter gallery, which is a collection of preset filters that can be applied to your artwork with a simple click. Experiment with different filters such as blur, sharpen, distort, or stylize to see how they can transform your artwork.
2. Adjustment Layers: Use adjustment layers to apply non-destructive filters and effects to your artwork. Adjustment layers allow you to fine-tune properties such as brightness, contrast, levels, and saturation, ensuring that the original image remains intact while achieving the desired enhancements.
3. Lighting and Atmosphere: Filters and effects can help you create realistic lighting and atmospheric effects. Explore options like gradient overlays, lens flare, or fog to add depth, ambience, and visual interest to your artwork. These effects can dramatically enhance the overall atmosphere and convey certain emotions or moods.
4. Textural Enhancements: Filters and effects can add interesting textures and patterns to your artwork. Experiment with grain, noise, or pixelation effects to introduce a unique aesthetic or mimic traditional art styles. These textural enhancements can bring a sense of realism or visual interest to your artwork.
5. Artistic Filters: Some filters can turn your digital artworks into stunning pieces of art that mimic traditional mediums. Experiment with filters such as watercolor, oil painting, or sketch to achieve the desired artistic effect. These filters can give your artwork a unique and expressive quality.
6. Layer Effects: Apply layer effects such as drop shadows, bevels, or glows to individual layers within your artwork. These effects can add dimension and depth, creating a more realistic appearance or emphasizing certain elements within your composition.
7. Customization and Combination: Don’t be afraid to customize filters and effects by tweaking their settings or combining multiple filters together. This allows you to create unique looks and experiment with different styles, making your artwork visually distinct and personalized.
8. Save and Compare: As you experiment with different filters and effects, consider saving the settings or presets that you find particularly appealing. This way, you can easily apply those effects to future projects or compare different options to see which works best for a specific artwork.
Exploring filters and effects opens up a world of possibilities in digital art. Whether you want to add a touch of realism, create a specific mood, or infuse your artwork with unique textures, filters and effects can help you achieve your desired results. Embrace experimentation, try new combinations, and let your creativity guide you in discovering the perfect filters and effects for your digital art.
Incorporating Text and Typography
Text and typography can add an additional layer of meaning and visual interest to your digital artwork. Whether you want to include titles, quotes, or other textual elements, incorporating text and typography in a thoughtful and creative way can enhance the overall impact of your work. Here’s how you can effectively integrate text into your digital art:
1. Choose Appropriate Fonts: Select fonts that align with the style and mood of your artwork. Consider the message or emotion you want to convey and choose fonts that complement and enhance that message. Experiment with different typefaces such as serif, sans-serif, script, or display fonts to find the best fit.
2. Placement and Hierarchy: Placement and hierarchy play a key role in guiding the viewer’s attention and organizing the information. Consider the composition and balance of your artwork, and make intentional decisions about where to place your text. Establish a hierarchy by varying font sizes, weights, or colors to prioritize important information or create a visual flow.
3. Text Effects and Styles: Explore text effects and styles to add visual interest and make your text stand out. Incorporate techniques like shadows, bevels, gradients, or overlays to create depth and dimension. However, ensure that these effects do not overwhelm or distract from the overall composition of your artwork.
4. Texturing and Masking: Apply textures or masks to your text to integrate it more seamlessly into your artwork. Experiment with blending text into the background or overlaying it with textures that complement the overall aesthetic. This can help create a cohesive and visually engaging composition.
5. Typography as Art: Treat typography as an art form in itself by experimenting with letterforms, ligatures, or custom lettering. Use typography to create shapes, patterns, or illustrations that add an artistic and unique element to your artwork. This allows your text to become more than just words, but a visual element that enhances the overall piece.
6. Readability and Contrast: Ensure that your text is readable and stands out from the background. Pay attention to the contrast between your text color and background color to ensure legibility. Adjusting font size, tracking, or kerning can also improve readability, particularly when dealing with longer passages of text.
7. Balance Between Text and Visuals: Achieve a balance between your textual elements and visual elements. Avoid overpowering your artwork with excessive text, but also ensure that the text is meaningful and adds value to the overall composition. Consider how the text interacts with the visual elements and supports the intended message or theme.
8. Keep it Simple: While it’s important to be creative with text and typography, it’s equally important to keep it simple and avoid overcrowding your artwork. Clean and minimalistic designs can often have a strong impact. Remember that the primary focus should be on your artwork, and the text should enhance and complement it rather than overshadowing it.
Incorporating text and typography into your digital artwork allows you to convey additional layers of meaning and enhance the visual storytelling. Experiment with fonts, placement, effects, and styles to find the right balance and create a harmonious integration of text and visuals. Let your text become an essential part of your art, guiding the viewer and adding depth to your creative expression.
Utilizing Masks and Clipping Layers
Masks and clipping layers are powerful techniques in digital art that allow you to selectively control the visibility and manipulation of your artwork. With masks, you can hide or reveal specific parts of a layer, while clipping layers enable you to apply effects or adjustments to specific areas. Here’s how you can effectively utilize masks and clipping layers in your digital art:
1. Layer Masks: Layer masks allow you to hide or reveal portions of a layer without permanently deleting any pixels. Use layer masks to create smooth transitions, blend different elements together, or selectively apply adjustments. Paint with black on the mask to hide parts of the layer, and white to reveal them.
2. Refining Edges: Use layer masks to refine the edges of your artwork and achieve a seamless blend with the background. Painting with a soft brush on the layer mask can help create smooth and natural transitions, eliminating any harsh edges in your composition.
3. Non-Destructive Editing: Masks enable non-destructive editing, allowing you to make changes to your artwork without permanently altering the original layer. If you make a mistake, you can simply paint on the mask with the opposite color to correct it, preserving the integrity of your artwork.
4. Clipping Layers: Clipping layers are layers that are bound or linked to another layer below, limiting their visibility to the boundaries of the layer below. Apply adjustment layers or additional effects to a clipping layer, and they will only affect the areas within the bounds of the layer below. This is particularly useful for applying adjustments or effects to specific objects or areas within your artwork.
5. Grouping Layers with Masks: Grouping layers and applying a mask to the group allows you to apply the mask’s visibility to multiple layers simultaneously. This technique is beneficial when you want to hide or reveal multiple layers in the same way, such as creating a spotlight effect or applying a gradient to a group of layers.
6. Combining Masks and Blending Modes: Experiment with different blending modes when using layer masks to create unique effects and layer interactions. Blending modes can alter the way the masked layer interacts with the layers below, resulting in interesting and visually appealing compositions.
7. Fine-Tuning Adjustments: Use masks to fine-tune adjustments and effects applied to your artwork. Apply adjustment layers, such as curves or levels, and use masks to control where those adjustments are visible, ensuring that they only affect specific areas and create the desired visual impact.
8. Layer Masking Workflow: Develop a workflow that includes using masks from the beginning of your art creation process. Start with rough blocking and sketching, then use layer masks to refine details and add depth. This allows for more flexibility and control as you move forward with your artwork.
By utilizing masks and clipping layers, you gain greater control over the visibility and manipulation of your digital artwork. Incorporate these techniques into your workflow to achieve precise adjustments, seamless blending, and non-destructive editing, providing endless possibilities for creative expression.
Enhancing Details and Highlights
Enhancing details and highlights in your digital artwork can make a significant difference by adding depth, realism, and visual interest. Paying attention to the finer details and effectively highlighting important elements can elevate your artwork to a whole new level. Here’s how you can enhance details and highlights in your digital art:
1. Refining Lines and Edges: Sharpen lines and edges to create crisp and defined shapes. Use tools like the brush, eraser, or smudge tool to refine and clean up any rough or blurry edges. This will add precision and clarity to the details in your artwork.
2. Adding Texture and Details: Incorporate texture to add depth and realism to your artwork. Experiment with brushes or overlay textured layers to bring out specific details such as skin texture, fabric patterns, or surface textures. Use brush strokes or texture overlays strategically to enhance the visual impact of your artwork.
3. Adjusting Contrast and Highlights: Adjust the contrast and highlights in your artwork to create balance and emphasize important elements. Increase the contrast to make colors pop and enhance the overall visual impact. Adjust highlight levels to draw attention to specific areas and add dimensionality.
4. Creating Depth with Shadows: Shadows play a crucial role in creating depth and adding a three-dimensional quality to your artwork. Experiment with different shadow placements and opacity settings to add realism and bring out details. Consider the direction and intensity of the light source to ensure shadows are consistent throughout your artwork.
5. Highlighting Key Elements: Determine the focal points of your artwork and apply highlights to draw attention to these key elements. Use a soft brush with a light color to paint gentle highlights, applying them strategically to create depth, shine, or emphasis. Be mindful not to overpower the rest of the composition with excessive highlights.
6. Using Dodge and Burn Tools: The dodge and burn tools can be effective for fine-tuning details and highlights. The dodge tool enables you to lighten specific areas, while the burn tool darkens them. Use these tools subtly and selectively to enhance shadows, add highlights, or accentuate details in your artwork.
7. Contrast Adjustment Layers: Apply contrast adjustment layers to specific areas that require a boost in detail and highlights. Adjust the brightness and contrast within these layers to selectively enhance the desired elements, such as specific objects or characters, while maintaining the overall balance in your artwork.
8. Observing Real-Life References: Observe real-life references or study photographs to gain inspiration and insight into how details and highlights naturally appear. Pay attention to the interplay of light and shadow, the subtle variations in texture, and the way the highlights define forms. Apply this knowledge to enhance the realism and visual impact of your digital artwork.
By focusing on enhancing details and highlights, you can bring your digital artwork to life, adding depth, realism, and visual impact. Experiment with techniques, tools, and adjustments to find the right balance that elevates the details while maintaining the overall coherence of your artwork.
Applying Different Blending Modes
Blending modes are a powerful feature in digital art software that allow you to apply unique effects, blend colors and textures, and create interesting compositions. Understanding and applying different blending modes can greatly enhance the visual impact and overall aesthetics of your artwork. Here’s how you can explore and utilize blending modes in your digital art:
1. Normal: The normal blending mode is the default mode and maintains the original colors and values of the layers. Use this mode when you want layers to stack on top of each other without any blending or transparency effect.
2. Multiply: The multiply blending mode multiplies the colors of the top layer with the colors of the layers below. It darkens the underlying colors, creating a deepening effect. Experiment with this mode to add shadows, depth, and richness to your artwork.
3. Screen: The screen blending mode lightens the underlying colors by multiplying the inverse of the top layer’s colors. It has the opposite effect of the multiply mode and is useful for adding highlights, glow, or a brightening effect to your artwork.
4. Overlay: The overlay blending mode combines the effects of both multiply and screen modes. It enhances contrast, saturation, and adds a subtle texture to the layers. Overlay is commonly used to intensify colors or apply a soft contrast effect.
5. Soft Light: The soft light blending mode is similar to overlay, but with a softer, more subtle effect. It creates a gentle glow, boosts contrast, and enhances colors. Experiment with this mode to add a touch of softness and warmth to your artwork.
6. Hard Light: The hard light blending mode has a more pronounced effect than soft light. It intensifies contrast and color saturation. Use this mode when you want to add drama or vividness to your artwork.
7. Difference: The difference blending mode subtracts the colors of the top layer from the colors of the layers below, resulting in a high-contrast, inverted effect. This mode can create interesting and unique visual effects and is useful for experimentation and creating abstract or futuristic artwork.
8. Customizing Blending Modes: Get creative and customize blending modes by adjusting opacity, fill, or layer styles. Lowering the opacity or fill of a layer with a specific blending mode allows you to control the overall intensity and subtlety of the effect, giving you more control over the final result.
Experimentation is key when it comes to blending modes. Try different modes and layer combinations to discover unique effects and compositions. Take advantage of the versatility of blending modes to create bold and distinctive artwork that showcases your artistic vision.
Experimenting with Digital Art Styles
One of the exciting aspects of digital art is the ability to explore and experiment with various artistic styles. The wide range of tools, techniques, and effects available in digital art software gives artists the freedom to push boundaries and discover new creative directions. Here’s how you can embrace experimentation and delve into different digital art styles:
1. Research and Inspiration: Start by researching different art styles and studying the works of artists who specialize in those styles. Look for inspiration in various art movements, such as Impressionism, Cubism, Surrealism, or Pop Art. Explore how different artists interpret these styles and adapt them to digital mediums.
2. Emulating Traditional Mediums: Digital art provides the opportunity to replicate the texture and appearance of traditional art mediums like oil painting, watercolor, or pastels. Experiment with brushes, textures, and blending modes to mimic the characteristics of these mediums and explore how they can be incorporated into your own style.
3. Abstract and Surreal Art: Dive into the realm of abstract and surreal art, where you can experiment with unconventional shapes, colors, and compositions. Allow your imagination to roam freely and let the abstract forms and dreamlike images express your thoughts and emotions.
4. Minimalism and Simplicity: Explore the power of minimalism by simplifying your compositions and focusing on essential elements. Experiment with negative space, clean lines, and limited color palettes to create visually striking and intellectually engaging artwork.
5. Photorealism and Hyperrealism: Challenge yourself to achieve the highest level of detail and precision by creating artwork that closely resembles photographs. Experiment with layering, blending, and meticulous attention to shading and highlights to create hyperrealistic digital art pieces.
6. Collage and Mixed Media: Combine different elements, images, and textures to create digital collages and mixed media art. Experiment with layering techniques, blending modes, and transparency to create visually dynamic and eclectic compositions that push the boundaries of traditional art forms.
7. Graphic Design and Typography: Explore the world of digital graphic design by incorporating typography, shapes, and graphics into your artwork. Experiment with different fonts, layouts, and color schemes to create visually impactful designs that convey specific messages and ideas.
8. Personal Style Exploration: Ultimately, the most valuable experimentation comes from exploring and developing your own unique artistic style. Allow yourself the freedom to blend different techniques, methods, and influences to create an artwork that represents your artistic voice and vision.
Remember, experimentation is about pushing boundaries, challenging conventions, and stepping outside your comfort zone. Embrace trial and error, learn from your experiments, and enjoy the journey of discovering your own artistic style and voice in the vast world of digital art.
Exporting and Saving Digital Art
Once you’ve created a digital art masterpiece, it’s essential to know how to export and save your work properly. This ensures that your artwork retains its quality and can be shared, printed, or displayed in the desired format. Here are some key considerations when exporting and saving your digital art:
1. Saving in the Original Format: Save your artwork in the original format of your digital art software (.PSD, .AI, .Procreate, etc.) This allows you to preserve all the layers, adjustments, and effects intact, giving you the flexibility to make future edits or modifications if needed.
2. Creating High-Quality Copies: Export copies of your artwork in high-quality image formats such as JPEG, PNG, or TIFF. These formats ensure that your artwork retains its colors, details, and resolution. Consider the purpose and usage of your artwork when selecting the appropriate file format.
3. Resolution Considerations: If you intend to print your artwork, ensure that the resolution is suitable for the intended size and printing method. Generally, 300 DPI (dots per inch) is the standard resolution for high-quality prints. For digital display, consider the pixel dimensions required for optimal viewing on different devices or platforms.
4. Compression Settings: When saving in formats like JPEG, be mindful of the compression settings. Higher compression can reduce file size but may result in a loss of image quality. Find the right balance between file size and image integrity, especially when sharing or displaying your artwork online.
5. Cropping and Aspect Ratio: Consider cropping your artwork if necessary to remove any irrelevant or distracting elements. Ensure that the resulting aspect ratio suits your intended print or display format. Use guides or cropping tools to maintain a consistent and balanced composition.
6. Metadata and Copyright: Embed metadata into your exported files to include information about your artwork, such as titles, descriptions, and copyright details. This helps protect your work and provides useful context when it’s shared or viewed by others. Consider adding a watermark or signature to further establish your ownership.
7. Cloud Storage and Backups: Make it a habit to back up your digital art files regularly. Utilize cloud storage services or external hard drives to ensure your artwork is safely stored and accessible even if your computer experiences technical issues or loss of data.
8. Adhering to Submission Guidelines: If you plan to submit your artwork to online platforms, galleries, or contests, familiarize yourself with their specific submission guidelines. Each platform may have specific requirements for file formats, sizes, and preparatory steps like including artist statements or descriptions.
By following these guidelines, you can effectively export and save your digital art, ensuring that it remains of the highest quality and ready for sharing, printing, or showcasing. Properly archiving your artwork allows you to share your creative vision with others and preserve your artistic legacy for years to come.