
Choosing the right tools and software
When it comes to turning your drawings into digital art, having the right tools and software is essential. Not only will they make the process easier, but they will also enable you to unleash your creativity and achieve the desired results. Here are some factors to consider when choosing the tools and software for your digitalization journey:
- Graphic tablet: Investing in a high-quality graphics tablet can greatly enhance your digital art experience. They come in various sizes and offer features such as pressure sensitivity and tilt recognition, allowing for precise and natural drawing movements.
- Digital pen: A digital pen is an indispensable tool as it provides a seamless connection between your hand and the digital medium. Look for a pen that is comfortable to hold and offers customizable buttons for easy access to essential functions.
- Image editing software: To bring your drawings to life, you’ll need software that allows for image editing and manipulation. Popular choices include Adobe Photoshop, Corel Painter, and GIMP. Consider the user interface, features, and compatibility with your operating system when making your selection.
- Digital art software: While image editing software can handle basic tasks, consider investing in dedicated digital art software for a more artist-friendly experience. Programs such as Adobe Illustrator, Procreate, and Clip Studio Paint offer a range of tools and features specifically tailored to digital artists.
- Reference material: Don’t forget to gather reference material that inspires and informs your art. Whether it’s photographs, sketches, or concept art, having references at hand can help you achieve more accurate and detailed digital representations.
Remember to do comprehensive research and read user reviews to find the tools and software that best align with your artistic style and goals. It’s also worth considering your budget as some software can be quite expensive, while others offer free or more affordable alternatives.
Preparing your drawings for digitalization
Before you begin the process of turning your drawings into digital art, it’s crucial to properly prepare and optimize your physical artwork. This preparation not only ensures better results but also makes the digitalization process smoother. Here are some steps to follow:
- Clean your artwork: Start by removing any dirt, smudges, or stains from your drawings. Use a soft cloth or eraser to gently clean the surface without damaging the paper or image.
- Fix any flaws: If your drawing has any noticeable imperfections, such as creases or tears, consider repairing them before proceeding. Use acid-free tape or adhesive to secure loose elements, but be cautious not to damage the original artwork.
- Create a clean scan: To obtain a high-quality digital image, you’ll need to scan your drawings. Use a flatbed scanner for best results. Place your artwork facing down on the scanner bed and ensure it’s aligned properly. Adjust the scanner settings for optimal brightness, contrast, and resolution.
- Consider file formats: When saving the scanned images, choose a file format that supports high resolution and preserves the quality of your artwork. TIFF and PNG are good choices for lossless compression, while JPEG can offer smaller file sizes but with slight loss in quality.
- Organize your files: Create a dedicated folder on your computer to store your digital artwork. Use clear and consistent naming conventions to easily locate specific files in the future. Consider adding subfolders to categorize your work by project or theme.
By following these steps, you’ll ensure that your physical drawings are clean, intact, and ready for the digitalization process. This preparation not only helps maintain the integrity of your original artwork but also sets a solid foundation for transforming them into stunning digital creations.
Scanning your drawings
Scanning your drawings is a crucial step in the process of turning them into digital art. It allows you to create a high-quality digital image that serves as the foundation for further digitalization and editing. Follow these guidelines to ensure optimal scanning results:
- Choosing the right scanner: Invest in a flatbed scanner for the best results. These scanners provide even lighting and maintain the integrity of the original artwork. Make sure the scanner is compatible with your computer and offers sufficient scanning resolution.
- Preparing the scanner bed: Clean the scanner bed with a soft cloth to remove any dust or debris. Place your drawing face down on the scanner bed, ensuring it is aligned correctly and lies flat without any wrinkles or folds.
- Adjusting the scanner settings: Configure the scanner settings to achieve the desired results. Set the scanning resolution to a minimum of 300 DPI (dots per inch) to capture the details of your drawing accurately. Adjust the brightness, contrast, and color settings if necessary.
- Selecting the file format: Choose a file format that supports high-quality image preservation. TIFF and PNG formats are popular choices as they offer lossless compression, maintaining the original quality. However, if file size is a concern, JPEG format can provide smaller file sizes but with a slight loss in quality.
- Scanning multiple drawings: If you have several drawings to scan, consider scanning them individually rather than in bulk. This allows you to have more control over each scanned image and ensures better image quality.
- Naming and organizing scanned files: Assign clear and descriptive names to your scanned files to easily identify and locate them later. Organize your scanned files into specific folders or subfolders based on project, theme, or date, making it easier to manage and locate your digital artwork.
Remember to save your scanned files in a safe location, preferably on an external hard drive or cloud storage, to avoid losing your digital artwork. By following these scanning guidelines, you can ensure that your drawings are accurately captured and ready for the next stages of digitalization.
Cleaning up the scanned images
Once you have scanned your drawings, the next step in turning them into digital art is cleaning up the scanned images. Cleaning up involves removing any imperfections, adjusting levels, and preparing the images for further digitalization and editing. Follow these steps to ensure your scanned images are clean and ready for enhancement:
- Eliminating dust and scratches: Use image editing software like Adobe Photoshop or GIMP to eliminate dust particles and minor scratches that may have appeared during the scanning process. Use the healing brush or clone stamp tool to carefully remove these imperfections.
- Adjusting brightness and contrast: Sometimes, scanned images may appear too bright or too dark. Adjust the brightness and contrast levels to ensure that the artwork is accurately represented. Use the levels or curves adjustment tool in your image editing software to fine-tune the overall tonal range.
- Straightening and cropping: If your scanned images are not perfectly aligned or include unwanted borders, use the crop tool to remove them. Additionally, straighten any skewed or tilted artwork using the rotate or transform tools to ensure a clean and professional look.
- Removing paper textures: Scanned drawings may retain the texture of the paper, which can affect the final digital artwork’s appearance. Use the noise reduction or blurring tools to reduce paper grain or texture, achieving a smoother and more refined digital image.
- Adjusting color balance: If the colors in your scanned images appear inaccurate or washed out, you can use the color balance or hue/saturation tools to make appropriate adjustments. Enhancing the colors will bring your digital artwork closer to the original drawing’s vibrancy and intended color scheme.
- Saving the cleaned images: Once you have completed the necessary cleanup, save your cleaned images in a lossless format like TIFF or PNG, preserving the highest quality possible. This ensures that you have a clean and viable digital base for further digitalization and editing.
By following these steps, you can effectively clean up the scanned images of your drawings and prepare them for the next stages of digital art creation. Taking the time to refine the scanned images will ultimately result in a more polished and professional-looking digital artwork.
Adjusting the image resolution and size
After scanning your drawings and cleaning up the images, it’s important to adjust the image resolution and size to meet your specific needs. The image resolution and size have a significant impact on the quality and compatibility of your digital art. Follow these guidelines to ensure your artwork is optimized for different mediums and purposes:
- Understanding image resolution: Image resolution refers to the number of pixels contained within an image. Higher resolution images have more detail and clarity, but they also result in larger file sizes. Lower resolution images have less detail but smaller file sizes. Consider the purpose and medium of your digital art when determining the appropriate resolution.
- Print resolution: If you plan to print your digital art, it’s important to set the resolution to a suitable level. For high-quality prints, aim for a resolution of 300 DPI (dots per inch) or higher. This ensures that the details of your artwork are accurately represented when printed.
- Web resolution: When creating digital art for online platforms or websites, you can reduce the resolution to a web-friendly level. A resolution of around 72 DPI is commonly used for web images, as it balances image quality and file size, allowing for faster loading times.
- Aspect ratio: Consider the aspect ratio of your digital art, which is the proportional relationship between the width and height of the image. Different mediums, such as social media posts, digital displays, or print layouts, may require specific aspect ratios. Adjust the size of your artwork while maintaining the original aspect ratio or cropping it to fit the required dimensions.
- Scaling up or down: If you need to resize your digital art, be cautious when scaling up. Increasing the size of a low-resolution image can result in pixelation and loss of detail. Conversely, scaling down a high-resolution image may decrease file size but retain more detail. Use interpolation methods, such as bicubic or lanczos, to preserve image quality when resizing.
- File formats: When saving your adjusted images, consider the appropriate file format for the purpose and medium. JPEG is commonly used for web images due to its smaller file size, while TIFF or PNG formats are preferred for high-quality prints. Balance the need for image quality and file size when choosing the file format.
By carefully adjusting the image resolution and size, you can ensure that your digital artwork is suitable for its intended use. Whether it’s printing, online sharing, or digital display, optimizing these factors will help you achieve the best results and preserve the quality of your artwork.
Tracing your drawings using digital tools
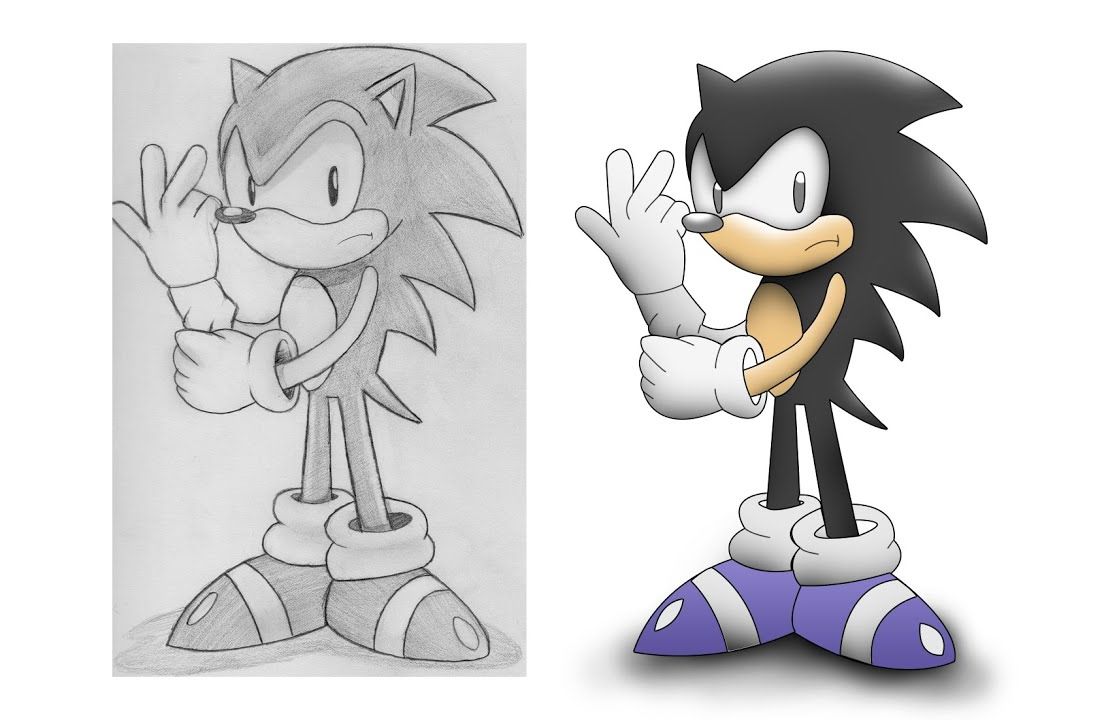
Tracing your drawings using digital tools is a popular method to convert hand-drawn artwork into digital form while retaining the original aesthetics. This technique allows you to create clean and precise digital lines that can be further edited, colored, and manipulated. Follow these steps to effectively trace your drawings using digital tools:
- Select the appropriate software: Choose a digital art software that offers a pen or brush tool with adjustable settings, such as pressure sensitivity and brush size. Popular options include Adobe Illustrator, Procreate, and Clip Studio Paint. Familiarize yourself with the tools and options available in the software.
- Create a new digital canvas: Open the software and create a new document, setting the dimensions and resolution according to your requirements. Use a resolution that allows for a detailed and accurate tracing of your drawing.
- Import your scanned drawing: Import the cleaned scanned image of your drawing into the digital canvas. Ensure that the drawing is properly aligned and fits within the canvas. Adjust the opacity of the drawing layer to make it semi-transparent, allowing you to trace over it easily.
- Choose the pen or brush tool: Select the pen or brush tool in the software. Adjust the brush size and hardness to achieve the desired digital line thickness and smoothness. Experiment with different settings to find the style that matches your original drawing.
- Start tracing: Begin tracing over the lines of your drawing using the digital tool. Start with the main outlines and gradually work your way into the finer details. Use short, controlled strokes to replicate the original drawing’s strokes as accurately as possible.
- Define separate layers: Create separate layers for different elements of your drawing, such as foreground, background, or individual objects. This allows for easier manipulation and editing later on.
- Refine and adjust as needed: Once you’ve completed the initial tracing, go back and refine any areas that need improvement. Adjust the lines, curves, and details to ensure they match the original drawing’s intention. Use erasers or editing tools to correct any mistakes or inconsistencies.
- Add additional details: After you’ve traced the main outlines, you can add extra details, such as textures, shading, or highlights, to enhance the overall look of your digital artwork. Experiment with different brush settings and techniques to achieve the desired effects.
- Save your traced digital art: Once you are satisfied with the traced digital version of your drawing, save it in a suitable file format, such as PSD, AI, or PNG. This will preserve all the layers and allow for further editing and manipulation if needed.
By using digital tools to trace your drawings, you can convert your hand-drawn artwork into a versatile and editable digital format. This technique offers endless possibilities for further editing, coloring, and experimenting, while keeping the essence and character of your original drawings intact.
Adding color to your digital art
Adding color to your digital art can breathe life into your creations, enhancing their visual appeal and conveying the intended mood and atmosphere. With the limitless possibilities offered by digital tools, you can explore various color palettes and techniques to make your art truly vibrant and captivating. Follow these steps to effectively add color to your digital art:
- Choose your color palette: Start by selecting a color palette that aligns with the theme or mood you want to convey. Consider using color theory principles, such as complementary colors or analogous colors, to create harmonious and visually pleasing combinations. Many digital art software offers color picker tools to help you easily select and save colors.
- Create a new layer: Begin by creating a new layer dedicated to adding color. This allows for easy adjustments and experimentation without affecting the original traced lines of your artwork. Ensure that the color layer is placed beneath the line layer to maintain a clean and organized digital art file.
- Color blocking: Use a larger brush or selection tool to block in the base colors for different areas of your artwork. This step helps establish the overall color scheme and separates different elements within the composition. You can fill entire regions with solid colors or use gradient tools for smoother transitions.
- Layer blending modes: Experiment with different layer blending modes to achieve interesting color effects and interactions. Multiply, Overlay, and Color Dodge are popular blending options that can add depth and richness to your digital art. Don’t be afraid to try different combinations to see what works best for your specific artwork.
- Color variations and shading: To add dimension and depth, incorporate color variations and shading. Use lighter and darker shades of the base colors to simulate lighting conditions and create highlights and shadows. Pay attention to light sources and how they affect different objects or areas in your digital artwork.
- Texture and pattern overlays: Apply texture or pattern overlays to add visual interest to your digital art. Experiment with different textures, such as watercolor or grain, to give your artwork a unique and tactile feel. Adjust the opacity or blending mode of the texture layer to achieve the desired effect.
- Refine details and accents: Pay attention to smaller details and accents that can enhance your digital art. Add fine lines, highlights, or textures to specific areas to give them more depth and realism. This level of attention to detail can make your artwork more engaging and visually appealing.
- Color adjustments and experimentation: Once you’ve added color to your digital art, take the time to refine and tweak as needed. Adjust the saturation, hue, or brightness of certain colors to achieve the desired overall look. Experiment with different color schemes or try out different color variations to see what works best for your artwork.
- Save and export: Finally, save your completed digital art in a suitable file format, such as JPEG or PNG, for sharing or printing. Consider saving an additional copy in a lossless format like PSD or TIFF to preserve all the layers and allow for future editing.
By adding color to your digital art, you can elevate your artwork, evoke emotions, and showcase your artistic vision. Embrace the creative possibilities that digital tools offer, experiment with different techniques, and let your imagination guide you to create captivating and vibrant digital masterpieces.
Applying shading and highlights
To bring depth and dimension to your digital art, applying shading and highlights is essential. Shading adds realistic shadows and depth, while highlights create areas of brightness and reflection. These techniques can transform a flat illustration into a visually dynamic and captivating piece. Here’s how you can effectively apply shading and highlights to your digital art:
- Study light and shadow: Before you begin shading and adding highlights, it’s crucial to understand how light interacts with different surfaces. Study real-life references and observe how light falls on objects, creating shadows and highlights. Take note of light direction, intensity, and the materials’ properties to create realistic shading in your digital art.
- Choose your light source: Decide on the direction and angle of your light source. Consistency in the light source throughout your artwork creates a more cohesive and believable result. Keep in mind that different light sources can produce different shadows and highlights.
- Create a new layer for shading: To maintain flexibility, create a new layer specifically for shading. Set the layer blending mode to Multiply, which allows the shading to interact with the underlying colors without altering them. This technique enables you to adjust the shading later without affecting the original artwork.
- Block in basic shadows: Start by blocking in the basic shadows using a darker shade of the base color. Identify areas where light is obstructed or objects cast shadows on each other. Apply the shadows with a soft brush, gradually building up the intensity as needed.
- Consider mid-tones: In addition to shadows, add mid-tones to create a smooth transition between the highlights and shadows. Blend the mid-tones with the base colors using a soft brush or blending tool to achieve a more realistic and natural appearance.
- Focus on light and highlights: After establishing the shading, shift your attention to the areas where light hits the objects directly. Use a lighter shade of the base color or even a complementary color to create highlights. Apply these highlights to surfaces that catch the most light, such as curved or reflective surfaces.
- Experiment with light intensity: Vary the intensity of the shading and highlights based on the material and the desired effect. Some areas may require subtle shading and soft highlights, while others may benefit from more prominent contrast and defined edges. Continuously assess and adjust to achieve the desired visual impact.
- Pay attention to detail: Refine the shading and highlights by adding more intricate details. Use smaller brushes or tools to emphasize specific areas such as wrinkles, texture, or fine lines. This attention to detail enhances the realism and adds depth to your digital art.
- Observe overall balance: Step back and observe how the shading and highlights interact with the rest of the artwork. Ensure that they are consistent throughout the piece and contribute to the overall composition. Adjust accordingly to maintain a balanced and cohesive visual impression.
- Save and export: Once you are satisfied with the shading and highlights, save your digital art in an appropriate file format such as JPEG or PNG. Consider preserving all layers by saving a copy in a format like PSD or TIFF for future editing or adjustments.
Applying shading and highlights to your digital art brings depth, realism, and visual interest. Mastering these techniques allows you to accentuate form, create realistic lighting, and elevate your artwork to new levels of artistic expression.
Adding texture and details
Adding texture and details to your digital art can take your artwork to the next level, giving it a richer, more tactile feel. Texture and details add depth, realism, and visual interest, making your artwork stand out and engaging to the viewer. Here are some steps to effectively add texture and details to your digital art:
- Select texture brushes: Choose texture brushes or brush presets in your digital art software that emulate various textures such as brush strokes, paper grain, or natural textures like watercolor or canvas. Experiment with different brush options to find the ones that complement your artistic style.
- Apply texture to specific areas: Determine which areas of your artwork would benefit from texture and apply it selectively. It can be used to simulate rough surfaces, add depth to backgrounds, or create interesting visual effects. Use texture brushes with varying opacity and size to achieve the desired effect.
- Blend textures with existing colors: To ensure a cohesive look, blend the textures with the existing colors in your artwork. Lower the opacity of the texture brush or use blending modes to merge the texture with the base colors. This blending creates a harmonious integration between the textures and the overall composition.
- Add details and accents: Pay attention to smaller details and accents that can enhance your artwork. Use smaller brushes or tools to add fine lines, intricate patterns, or intricate texture effects to specific areas. These details can bring out important features, add visual interest, and elevate the overall quality of your digital art.
- Consider different layer modes: Experiment with layer modes, such as Overlay, Soft Light, or Multiply, to achieve unique texture effects and blend them seamlessly with your base colors. Adjust the opacity of the textured layers to strike the right balance between texture and the overall look of your artwork.
- Use image overlays: Incorporate image overlays to introduce texture or additional visual elements to your digital art. This can be achieved by importing textures or scanned images of actual materials into your digital canvas. Adjust the opacity, position, and blending mode of these image overlays to create the desired effect.
- Consider depth of field: To create a sense of depth and focus, vary your use of texture and details. Add more pronounced texture and details to objects or areas in the foreground, while reducing their intensity or scale in the background. This technique imitates the natural behavior of the human eye, directing attention to specific parts of your artwork.
- Experiment with layer masks: Use layer masks to control where the texture and details appear in your artwork. They allow you to hide or reveal specific areas without permanently erasing or modifying the underlying layers. This flexibility enables you to refine and adjust the applied textures and details as needed.
- Step back and assess: Regularly step back from your artwork to observe the overall effect of the added texture and details. Check whether the textures enhance the intended mood or atmosphere and complement the subject matter. Make adjustments as necessary to maintain a harmonious balance throughout your digital art.
- Save and export: Once you are satisfied with the added texture and details, save your digital art in a suitable file format such as JPEG or PNG. Consider preserving all layers by saving a copy in a format like PSD or TIFF, allowing for future editing or adjustments.
By adding texture and details to your digital art, you enhance its visual impact, create a more immersive experience, and showcase your artistic craftsmanship. Embrace experimentation and creativity to make your artwork unique and captivating.
Enhancing your digital art with effects and filters
Enhancing your digital art with effects and filters can add a touch of uniqueness, create striking visual effects, and elevate the overall impact of your artwork. These effects can transform the mood, atmosphere, and style of your digital art, making it more captivating and immersive. Here’s how you can effectively enhance your digital art with effects and filters:
- Explore software capabilities: Familiarize yourself with the effects and filters available in your digital art software. Experiment with different options to understand their capabilities and how they can enhance your artwork. Popular software like Adobe Photoshop, Procreate, and GIMP offer a wide range of effects and filters to choose from.
- Adjustment layers: Utilize adjustment layers to make non-destructive edits to your digital art. Adjustments like levels, curves, hue/saturation, and color balance can significantly alter the overall look and feel of your artwork. Experiment with different adjustments to achieve the desired effect and enhance specific elements or color tones.
- Layer blending modes: Blend your layers using different blending modes to create unique visual effects. Popular blending modes include Overlay, Soft Light, Multiply, and Screen. Each blending mode interacts with the underlying layers differently, offering various lighting, texturing, and color effects.
- Filters and effects: Apply filters and effects to your digital art to add depth, texture, and visual interest. Some common effects include blur, sharpen, noise, and distortion filters. Filters such as Gaussian blur can create a sense of depth and focus, while texture filters can add interesting surface effects to your artwork.
- Experiment with brush effects: Use the brush tool in your software to incorporate brush effects for added impact. Brushes with special textures, gradients, or custom patterns allow you to create unique and artistic effects. Apply brush effects to specific areas or use them for overall texturing to achieve the desired artistic style.
- Overlay textures: Import texture images or overlays into your digital art to add depth and visual interest. Textures like grunge, paper, or fabric can give your artwork a tactile quality. Experiment with blending modes, opacity adjustments, and layer masks to seamlessly integrate the textures with your digital art.
- Add lighting effects: Mimic realistic lighting effects, such as lens flares or glow, to enhance the atmosphere and drama in your artwork. These effects can add focus, depth, and an ethereal quality to specific elements. Use them sparingly and strategically for a more impactful result.
- Experiment with color effects: Apply color effects to your digital art to evoke specific moods or create a unique ambiance. Color grading, selective color adjustments, or color overlays can dramatically transform the overall appearance and mood of your artwork.
- Combine effects and filters: Don’t be afraid to layer multiple effects and filters together to create a distinctive look that is uniquely yours. Experiment with different combinations and settings to achieve the desired visual impact.
- Regularly assess the effect: Step back and assess how the applied effects and filters affect the overall impact of your artwork. Ensure that they enhance the intended mood, atmosphere, and style. Make adjustments and fine-tuning as necessary to maintain a cohesive and captivating composition.
- Save and export: Once you are satisfied with the enhanced effects and filters, save your digital art in a suitable file format such as JPEG or PNG. Consider preserving all layers by saving a copy in a format like PSD or TIFF for future editing or adjustments.
By enhancing your digital art with effects and filters, you can add a touch of creativity, uniqueness, and impact to your artwork. Embrace experimentation and utilize the tools available in your software to create visually captivating and artistically expressive digital masterpieces.
Saving and exporting your digital art
Once you have completed your digital art masterpiece, it’s important to save and export it correctly to ensure it maintains its quality and can be easily shared or used in various mediums. Properly saving and exporting your digital art will allow you to preserve the integrity of your artwork while ensuring compatibility with different platforms and devices. Follow these guidelines to effectively save and export your digital art:
- Choose the appropriate file format: Select a file format that best suits your intended use and requirements. Common file formats for digital art include JPEG, PNG, and TIFF. JPEG is commonly used for web sharing due to its smaller file size, while PNG provides higher quality and supports transparency. TIFF is ideal for archiving or printing as it maintains the highest quality.
- Consider the resolution: Determine the appropriate resolution for saving and exporting your digital art. If your artwork is intended for online sharing or display, a resolution of 72 DPI (dots per inch) is typically sufficient. However, for high-quality prints, it’s recommended to use a resolution of 300 DPI or higher to ensure crisp details and clarity.
- Organize your files: Create a dedicated folder on your computer to store and organize your digital art files. Use clear and consistent naming conventions to easily identify and locate specific files in the future. Consider creating subfolders for different projects, themes, or variations of your artwork.
- Quality settings for JPEG: If you decide to save your digital art as a JPEG file, adjust the quality settings to reach a balance between file size and image quality. Higher quality settings yield better image fidelity but result in larger file sizes, while lower quality settings reduce file size but might sacrifice some details and introduce compression artifacts.
- Layer preservation: If you want to preserve the layers and editability of your digital art, consider saving a copy in a format that supports layers, such as PSD (Photoshop) or AI (Illustrator). This allows you to make future edits, adjustments, or additions to your artwork without losing any of the layered information.
- Save and export for specific mediums: If you plan to use your digital art for specific mediums such as social media, websites, or print, take into account the recommended specifications for each platform. Different platforms may have specific requirements for file size, dimensions, or color profiles. Adjust your settings accordingly to ensure optimal display and compatibility.
- Metadata and copyright information: Consider adding metadata and copyright information to your digital art file. Include details such as your name, contact information, creation date, and any relevant copyright notices. This helps protect your work and provides attribution if your art is shared or used by others.
- Backup your files: As a precautionary measure, regularly create backups of your digital art files. Store them on external hard drives, cloud storage, or other secure backup solutions to prevent loss or damage to your valuable artwork. Having backups ensures that you have a safe copy in case of any unforeseen circumstances.
- Regularly review and update: Periodically review and update your saved and exported digital art files. As technology evolves, new file formats and techniques may emerge that can better preserve the quality and compatibility of your artwork. Stay informed and make the necessary updates to ensure your digital art remains accessible and in optimal condition.
By adhering to proper saving and exporting practices, you can safeguard the quality and integrity of your digital art while ensuring it can easily be shared, displayed, or printed. Take the time to choose the appropriate file formats, resolutions, and settings, and regularly backup your files to protect your valuable creations.