
Choosing the Right Printer
When it comes to making prints of your digital art, choosing the right printer is essential. The printer you select will have a significant impact on the final quality and color accuracy of your prints. Here are a few key factors to consider when choosing a printer:
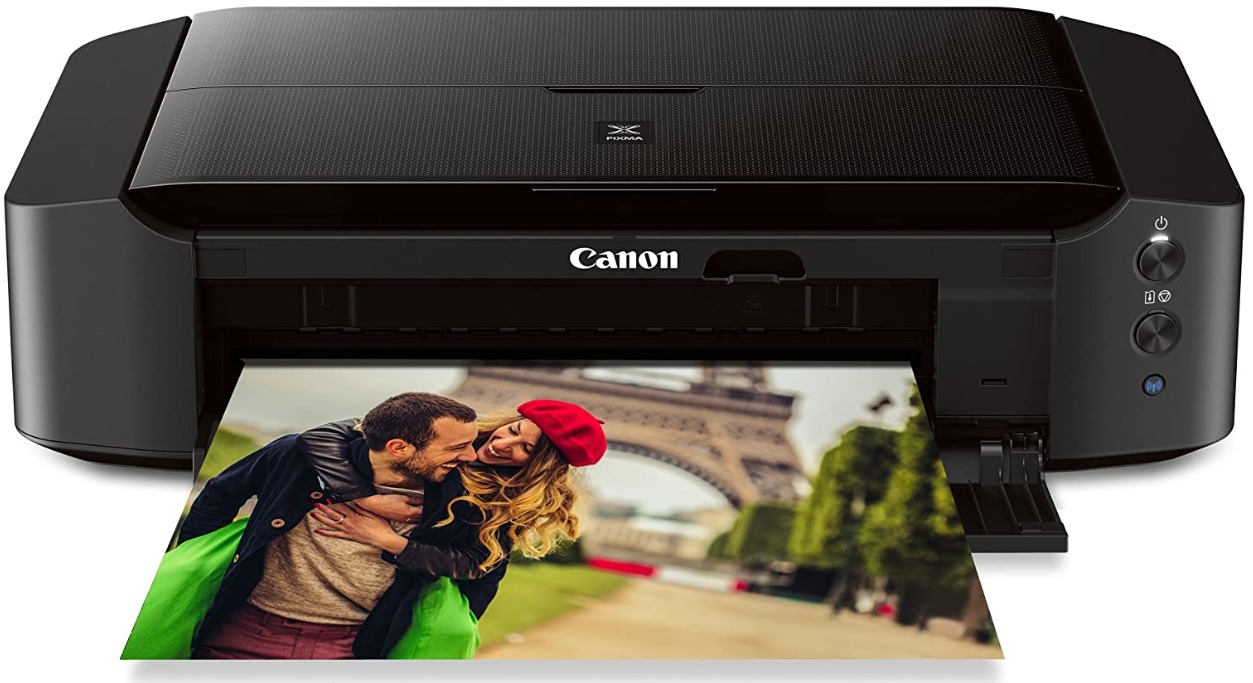
- Type of Printer: There are various types of printers available, such as inkjet, laser, and dye-sublimation. Inkjet printers, particularly those with multiple color cartridges, are popular for their ability to produce vibrant and detailed prints.
- Resolution: Look for a printer with a high resolution, measured in dots per inch (dpi). The higher the resolution, the more detail your prints will have. Aim for a printer with a minimum resolution of 300 dpi for crisp and clear prints.
- Color Gamut: Consider the printer’s color gamut, which refers to the range of colors it can reproduce. Look for a printer with a wide color gamut, as it will accurately reproduce the colors in your digital art.
- Print Size: Determine the maximum print size that the printer can handle. If you plan on creating large prints, ensure that the printer can accommodate your desired size.
- Connectivity: Consider the connectivity options offered by the printer. Most modern printers offer USB and wireless connectivity, allowing you to conveniently print from your computer or mobile devices.
- Printer Reviews: Take the time to read reviews and compare different printer models. This will help you make an informed decision based on the experiences of other users and the overall performance and reliability of the printer.
By carefully considering these factors, you can choose a printer that meets your specific needs and provides excellent quality prints of your digital art.
Understanding Resolution and File Formats
When preparing your digital art for printing, it is crucial to have a clear understanding of resolution and file formats. These factors will impact the quality and clarity of your prints. Let’s explore them in more detail:
Resolution: Resolution refers to the number of dots per inch (dpi) that an image contains. A higher resolution allows for more detail and sharpness in your prints. For most print projects, a resolution of 300 dpi is ideal. This ensures that the printed image will have a high-quality appearance without any pixelation.
File Formats: Different file formats offer varying levels of compression and compatibility. The most commonly used file formats for printing digital art are JPEG, TIFF, and PNG.
- JPEG: JPEG is a widely used file format that offers good compression for images while maintaining decent quality. However, repeated saving and compression can result in a loss of image quality over time.
- TIFF: TIFF is a lossless file format that preserves all the details and colors of your digital art. It is ideal for professional printing and archival purposes, but the file sizes can be larger compared to JPEG.
- PNG: PNG is another lossless file format that supports transparent backgrounds. It is commonly used for web graphics, but it can also be suitable for printing, especially if you need to preserve transparency.
When saving your digital art for printing, it is recommended to save a copy in a high-resolution format, such as TIFF. This ensures that you retain the best possible quality for printing purposes.
Understanding resolution and choosing the appropriate file format for your digital art is crucial to achieving optimal print quality. By keeping these factors in mind, you can ensure that your prints accurately represent your artwork and showcase all the intricate details.
Calibrating your Monitor
When working with digital art, it is essential to calibrate your monitor to ensure accurate color representation. A properly calibrated monitor will help you make informed decisions about color adjustments and ensure that the final prints match your artistic vision. Here are some steps to calibrate your monitor:
- Invest in a Calibration Device: Consider purchasing a hardware calibration device, such as a colorimeter or spectrophotometer. These devices measure the color and brightness of your monitor and create a profile to ensure accurate color representation.
- Software Calibration: If you don’t have access to a calibration device, software calibration can be an alternative. Operating systems like Windows and macOS offer built-in calibration tools. These tools guide you through the process of adjusting color temperature, gamma, and brightness settings to achieve more accurate colors.
- Ambient Lighting: Maintain consistent ambient lighting conditions in your workspace. Avoid bright sunlight or harsh artificial lighting, as they can affect how you perceive colors on your monitor. Consider using neutral-colored walls and diffused lighting to create a controlled environment.
- Regular Calibration: Remember to calibrate your monitor regularly. Over time, monitor settings may drift, resulting in inaccurate color representation. Aim to calibrate your monitor at least once every few months, or whenever you notice significant changes in color accuracy.
- Compare Prints: To ensure the accuracy of your monitor calibration, compare the prints of your digital art to the image displayed on your monitor. If the colors of the prints differ significantly from what you see on the screen, it may indicate the need for recalibration.
Calibrating your monitor is a crucial step in the digital art printing process. It helps you make accurate color adjustments and ensures that the final prints reflect your artistic intent. By following these calibration steps, you can have confidence that the colors in your digital art will be faithful and consistent across different devices and print mediums.
Choosing the Right Paper
When it comes to printing your digital art, selecting the right paper is just as important as choosing the right printer. The paper you choose can greatly impact the overall look and feel of your prints. Here are some factors to consider when choosing the right paper:
- Surface Finish: Different paper finishes, such as glossy, matte, or satin, can significantly alter the appearance of your prints. Glossy paper offers a shiny, reflective finish, while matte paper provides a non-reflective, smooth surface. Satin paper falls between the two, offering a semi-gloss finish. Consider the desired aesthetic and desired level of reflectivity for your digital art.
- Weight and Thickness: Paper weight is usually measured in grams per square meter (gsm). A higher gsm indicates a thicker and more durable paper. Thicker papers are often perceived as higher quality and can withstand handling and framing better. Consider the weight and thickness that suits your artistic vision and the intended use of your prints.
- Color Accuracy: Look for papers specifically designed for color accuracy and print longevity. These papers are often referred to as archival or acid-free papers, as they are made to resist fading and yellowing over time. They can help ensure that your prints retain their vibrant colors and clarity for years to come.
- Texture: Consider the texture of the paper surface. Smooth papers are ideal for capturing intricate details, while textured papers can add depth and visual interest to your prints. Experiment with different textures to find one that complements your digital art and adds an extra dimension to your prints.
- Printer Compatibility: Check the compatibility of the paper with your printer. Some printers may have specific paper size or thickness limitations. Make sure the paper you choose is compatible with your printer model and can be fed through without any issues.
By considering these factors, you can choose the right paper that enhances the visual impact of your digital art. Experiment with different paper types and finishes to find the one that best suits your artistic style and brings your prints to life.
Editing and Enhancing your Digital Art
Before printing your digital art, it’s important to edit and enhance it to perfection. This involves making adjustments to colors, contrast, sharpness, and other aspects to ensure the best possible outcome in print. Here are some tips for editing and enhancing your digital art:
- Color Correction: Use photo editing software to adjust the colors of your digital art. You can modify brightness, contrast, saturation, and hue to achieve the desired look. Keep in mind that the appearance of colors on your screen may differ from the printed output, so it’s helpful to compare with printed proofs or calibrated color swatches.
- Sharpening: Apply sharpening techniques sparingly to enhance the clarity and definition of your digital art. Be cautious not to over-sharpen, as it can result in a loss of detail and introduce artifacts. Zoom in closely while sharpening to examine the effect and make adjustments accordingly.
- Cropping and Composition: Consider cropping your digital art to improve its composition. Focus on the main subject or elements, removing any distracting objects or empty space. Experiment with different aspect ratios to create a visually appealing composition that draws the viewer’s attention.
- Retouching and Removing Imperfections: Use retouching techniques to remove blemishes, dust spots, or any other imperfections that may distract from the overall quality of your digital art. Clone stamp, healing brush, and spot healing tools can be useful for this purpose.
- Adding Filters or Effects: Explore the use of filters or effects to give your digital art a unique and artistic touch. Be mindful of not overdoing it, as excessive filters can detract from the originality and craftsmanship of your artwork.
- Working in Layers: Utilize layers in your editing software to work non-destructively. This allows you to make adjustments without permanently altering the original image. Working with layers also enables you to make targeted edits to specific areas or elements of your digital art.
Take the time to carefully edit and enhance your digital art. Pay close attention to details, colors, and overall composition to ensure that your prints accurately represent your artistic vision. Regularly review and re-edit your artwork, seeking feedback from fellow artists or trusted individuals to gain fresh perspectives.
Ensuring Proper Color Management
Proper color management is crucial for achieving accurate and consistent colors in your printed digital art. Without it, the colors may appear vastly different from what you see on your monitor. Here are some key steps to ensure proper color management:
- Color Profiles: Use color profiles consistently throughout your workflow. A color profile is a standardized way of defining the colors in an image, ensuring consistent reproduction across different devices. Use software that supports color management and embed color profiles in your digital art.
- Monitor Calibration: As mentioned earlier, calibrating your monitor is essential to ensure accurate color representation. A properly calibrated monitor helps you make informed decisions about color adjustments and ensures that the final prints match your artistic vision.
- Soft Proofing: Before printing, use the soft proofing feature in your photo editing software to simulate how your digital art will look on different output devices. Soft proofing allows you to see how colors and tones may shift when printed on a particular printer or paper type.
- Printer Profiles: Install and use the appropriate printer profiles for your printer and paper combination. Printer profiles provide instructions to optimize color output, compensating for the characteristics of the specific printer and paper combination you are using.
- RGB vs. CMYK: Understand the difference between RGB and CMYK color spaces. RGB is used for digital displays, while CMYK is used for printing. Convert your digital art to CMYK color mode before printing to ensure that the colors will be accurately represented on the printed output.
- Print Proofs: It’s beneficial to create print proofs before finalizing the printing of your digital art. Print a small sample of your artwork to verify that the colors and overall appearance match your expectations. Make any necessary adjustments based on the printed proof.
By following these steps and implementing proper color management practices, you can ensure that your printed digital art accurately reflects your artistic intentions. Consistent color management throughout your workflow will help you achieve the desired colors and tones in your final prints, providing a cohesive and professional result.
Preparing your Artwork for Printing
Preparing your artwork for printing is a crucial step to ensure that your digital art translates well into physical prints. Proper preparation helps avoid any unexpected issues or discrepancies between the digital file and the final printed output. Here are some important steps to follow when preparing your artwork for printing:
- Image Size and Resolution: Determine the desired print size and set the appropriate image size and resolution in your photo editing software. Ensure that the resolution is at least 300 dpi to maintain image quality and clarity in the printed output.
- Bleed and Safe Zone: If your artwork requires trimming, add a bleed area to ensure no white edges appear after cutting. Additionally, leave a safe zone within your artwork, keeping critical elements away from the edges to avoid potential cropping during the printing process.
- Color Mode: Convert your digital art to the appropriate color mode for printing. If printing professionally, convert your artwork to CMYK color mode. If printing at home or using an inkjet printer, the RGB color mode may still be suitable, but it’s essential to check your printer’s specifications and recommendations.
- Embed Fonts: If your artwork contains text, ensure that the fonts used are embedded within the file. This ensures that the fonts will display correctly when printing, even if the printer does not have those specific fonts installed.
- Trim Marks: If you are printing professionally or creating artwork with a specific trim size, include trim marks in your file. Trim marks help guide the printer in accurately trimming the printed piece to the desired size.
- Test Prints: Before printing the final artwork, consider creating test prints to evaluate the colors, saturation, and overall appearance. This allows you to make any necessary adjustments before committing to the final print.
- File Format: Save your artwork in a high-quality, print-ready file format, such as TIFF or high-quality JPEG. Ensure that the file is saved with maximum quality and minimal compression to retain the integrity of the image.
Taking the time to properly prepare your artwork for printing is essential to achieving accurate and high-quality results. By following these steps, you can ensure that your digital art is well-suited for the printing process, providing a seamless transition from the screen to print.
Testing your Print Settings
Before finalizing the printing of your digital art, it’s essential to test your print settings to ensure optimal results. Testing allows you to fine-tune your settings, evaluate the color accuracy, and make any necessary adjustments. Here are some key steps to follow when testing your print settings:
- Print Samples: Start by printing small samples of your artwork using different print settings. This will allow you to compare the output and identify the settings that yield the most desirable results.
- Color Calibration: Ensure that your printer is calibrated with the appropriate color profile for the paper and ink you are using. Use color management software or built-in printer tools to calibrate and profile the printer for accurate color reproduction.
- Color Consistency: Print multiple samples of the same artwork over time to evaluate color consistency. This is particularly important if you print in batches or over an extended period. Consistency ensures that subsequent prints have consistent colors and match the original artwork.
- Paper Selection: Test your print settings on different types of paper to evaluate the impact on color reproduction, saturation, and overall image quality. Different papers can yield different results due to variations in texture, coating, and absorbency.
- Print Resolution: Experiment with different print resolutions to find the balance between print quality and print time. Higher resolutions generally result in sharper details but can be more time-consuming.
- Color Gamut: Evaluate the color gamut of your prints by comparing them to the original digital file. Ensure that the colors in the prints closely match what appears on your monitor. Adjust color settings as necessary to achieve accurate color representation.
- Gray Balance: Pay attention to the reproduction of gray tones in your prints. Use test images that include various shades of gray to evaluate the printer’s ability to render smooth gradients without unwanted color casts.
- Fine-tuning: If necessary, make incremental adjustments to the print settings based on the results of your test prints. This may include tweaks to saturation, brightness, contrast, or other printer-specific settings to achieve the desired print output.
Testing your print settings allows you to ensure that your digital art is printed accurately and meets your expectations. By assessing color consistency, print quality, and other factors, you can make adjustments to obtain optimal results before finalizing the printing process.
Printing your Digital Art
Once you have tested and optimized your print settings, it’s time to print your digital art. Follow these guidelines to ensure a successful and satisfying printing process:
- Choose the Right Paper and Ink: Select the appropriate paper type that complements your artwork and meets your desired look and feel. Make sure you have sufficient ink cartridges or toner to complete the printing job without interruption.
- Load the Paper Correctly: Make sure to load the paper into the printer tray according to the manufacturer’s instructions. Improper paper loading can lead to misalignments and printing errors.
- Print in the Correct Orientation: Ensure that your digital art is oriented correctly on the page before printing. Double-check that the print settings reflect the desired print orientation (e.g., landscape or portrait).
- Check Printer Preferences: Verify the printer preferences or settings before printing. Confirm that the print quality, paper type, and color management options are set correctly for the specific print job.
- Print a Test Page: Before printing the entire batch of prints, consider printing a test page to review the colors, saturation, and overall quality. This allows you to make any last-minute adjustments if needed.
- Monitor the Printing Process: Keep an eye on the printing process, especially if you are printing a large number of prints. Ensure that the prints are coming out as expected and that there are no paper jams or other technical issues occurring.
- Allow for Drying Time: Once the prints are completed, allow them to dry fully before handling or stacking them. The drying time can vary depending on the type of ink, paper, and environmental conditions.
- Inspect the Prints: After the prints have dried, carefully examine them for any defects, smudges, or other issues. Ensure that the colors and details are accurate and as desired. Make note of any errors or imperfections for future reference and improvement.
- Store and Display your Prints: Properly store your prints in archival-quality sleeves, folders, or portfolios to protect them from dust, moisture, and light. If you plan on displaying your prints, use acid-free matting and framing materials to preserve their longevity and quality.
- Document and Catalogue: Keep a record of the printing settings, paper choices, and any specific details or adjustments made for each print. This documentation will be invaluable for future reference and reproducing prints with consistent quality.
Printing your digital art is an exciting and rewarding step in the creative process. By following these guidelines, you can ensure a smooth printing experience and produce prints that truly showcase the beauty and intricacy of your digital artwork.
Post-Printing Care and Finishing Touches
After printing your digital art, it’s important to give proper attention to post-printing care and add finishing touches to enhance the presentation and longevity of your prints. Here are some essential tips to consider:
- Drying Time: Allow your prints to fully dry before handling or applying any finishing touches. The drying time can vary depending on the type of ink and paper used.
- Protective Coating: Consider applying a protective coating to your prints to guard against fingerprints, scratches, and fading. There are various options available, such as clear sprays or laminates, which can improve the durability and longevity of your prints.
- Trimming and Mounting: If desired, carefully trim your prints to achieve a clean and professional look. Consider mounting them on backing boards or mats to add stability and create an appealing presentation.
- Signing and Numbering: If you wish to add a personal touch or make your prints more valuable, sign and number each one. This can increase their collectability and authenticity, especially if you are creating limited edition prints.
- Labeling and Documentation: Attach labels or tags to the back of your prints with details such as the title, date, and your contact information. This provides important information for potential buyers or viewers and adds a professional touch.
- Proper Storage: Store your prints in archival-quality sleeves, folders, or portfolios to protect them from dust, sunlight, and moisture. Avoid exposing them to extreme temperatures or humidity, as these conditions can damage the paper and ink over time.
- Display Options: Consider different display options for your prints, such as framing them with acid-free matting and UV-protective glass. Displaying your prints in a suitable environment helps showcase their beauty and protect them from potential damage.
- Marketing and Promotion: If you plan to sell or exhibit your prints, use social media platforms, your website, and art marketplaces to market and promote your work. Share high-quality images of your prints to attract potential buyers and art enthusiasts.
- Continual Evaluation: Continually assess the quality of your prints and monitor for any signs of fading, discoloration, or other issues. Regularly update your printing process and materials to ensure that your prints maintain their vibrancy and longevity over time.
By giving proper care and attention to your prints and adding finishing touches, you can enhance their aesthetics, protect them from damage, and create a professional presentation. These post-printing efforts contribute to the overall value and appeal of your digital art prints.