
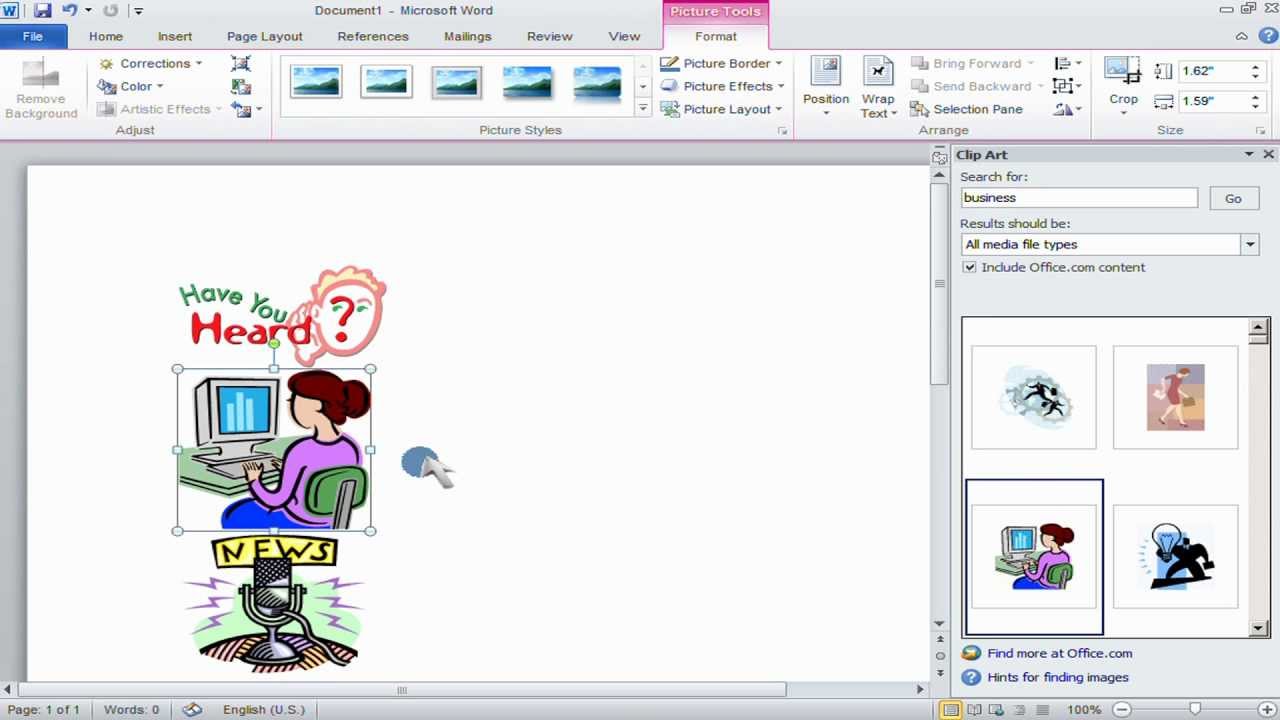
Finding Clip Art Online
Clip art is a great resource for adding visual elements to your projects, presentations, and designs. With the abundance of online platforms and websites, finding the perfect clip art has become easier than ever. Here are some easy ways to find clip art online:
1. Search Engines: Start your hunt by using popular search engines like Google, Bing, or Yahoo. Simply type in keywords related to the clip art you’re looking for, such as “flower clip art” or “cartoon clip art.” Explore the image results and visit the websites that offer free clip art.
2. Clip Art Websites: There are various specialized websites that host an extensive collection of clip art. Some popular ones include OpenClipart, Vecteezy, and Pixabay. These platforms often categorize clip art into different themes, making it easier for you to browse and find exactly what you need.
3. Stock Image Websites: Stock image websites like Shutterstock and Adobe Stock also offer a wide range of clip art options. Although these sites usually require a subscription or payment for high-quality clip art, they offer professional-looking illustrations and graphics that can elevate your projects.
4. Social Media: Social media platforms can be a surprising source of clip art. Many artists and designers share their work on platforms like Pinterest, Instagram, and DeviantArt. Use the search function on these platforms or follow specific artists and designers to discover unique clip art.
5. Online Design Tools: Websites like Canva and Crello provide pre-designed templates and graphics that include clip art elements. These platforms often have built-in libraries of clip art which you can customize and use for your projects.
When searching for clip art online, it’s important to keep in mind the licensing terms. Some clip art may require attribution or have specific usage restrictions, so make sure to read and comply with the terms of use.
Don’t limit yourself to just one source. Explore multiple platforms to find a diverse range of clip art that suits your needs. Remember to credit the artists if required and respect their terms of use.
Choosing the Right Clip Art
When it comes to selecting clip art for your projects, it’s essential to choose the right images that effectively convey your message and enhance the overall design. Here are some tips to help you choose the perfect clip art:
1. Relevance: The clip art you choose should be relevant to the topic or theme of your project. For example, if you’re creating a presentation on technology, opt for clip art that features gadgets or computer-related visuals. This ensures that the clip art seamlessly integrates with your content and reinforces your message.
2. Style: Consider the style or aesthetic of your project when choosing clip art. Whether you prefer a minimalist, cartoonish, or realistic look, select clip art that aligns with the overall design. Consistency in style creates a cohesive and polished visual presentation.
3. Quality: Pay attention to the quality of the clip art images. Look for high-resolution graphics that appear crisp and clear, even when scaled or enlarged. Blurry or pixelated clip art can detract from the visual appeal of your project.
4. Emotion and Tone: Think about the emotional impact you want to convey through your project. Choose clip art that evokes the desired emotion or sets the appropriate tone. For instance, if you’re creating a cheerful birthday card, opt for clip art with bright colors and joyful expressions.
5. Uniqueness: To make your project stand out, try to find clip art that is less commonly used. This adds a touch of originality and helps differentiate your work from others. Avoid overused or clichéd clip art to maintain a fresh and unique visual experience.
6. Consider the Context: Keep in mind where you’ll be using the clip art. If it’s for a printed document, ensure that the colors and image resolution are suitable for printing. On the other hand, if it’s for online use, ensure that the file size is optimized for quick loading and smooth browsing experiences.
7. Accessibility and Inclusivity: Consider inclusivity when choosing clip art. Look for images that represent a diverse range of people, cultures, and backgrounds. This ensures that your project is inclusive and caters to a wider audience.
Remember, the goal of clip art is to enhance your project and communicate your message effectively. By choosing the right clip art, you can bring life and visual interest to your work, making it more engaging and memorable for your audience.
Basic Modifications in Microsoft Word
If you’re looking to make simple modifications to your clip art without the need for specialized software, Microsoft Word provides several built-in features that can help you customize and personalize your clip art. Here are some basic modifications you can make in Microsoft Word:
1. Resize: To adjust the size of your clip art, select the image and click on the corner handles to drag and resize it as desired. Alternatively, you can right-click on the image and select “Size and Position” to set precise dimensions.
2. Rotate and Flip: To rotate your clip art, select the image and click on the rotation handle above the image. You can rotate it left or right to the desired angle. Additionally, you can right-click on the image and choose “Flip Horizontal” or “Flip Vertical” to mirror the clip art.
3. Color and Contrast: Microsoft Word allows you to change the color or adjust the contrast of your clip art. Select the image, navigate to the “Picture Tools” tab, and explore the options in the “Adjust” group. Experiment with different settings to achieve the desired effect.
4. Borders and Lines: Add borders or lines to your clip art to make it stand out. Select the image, go to the “Picture Tools” tab, and click on the “Picture Border” or “Picture Effects” option. You can customize the color, style, and thickness of the border or line.
5. Cropping: If you want to focus on a specific part of the clip art, you can crop it. Select the image, go to the “Picture Tools” tab, and click on the “Crop” option. Drag the cropping handles to remove unwanted portions of the image.
6. Transparency: Adjust the transparency of your clip art to create interesting overlays or blend it with other elements. Select the image, go to the “Picture Tools” tab, and click on the “Format” tab. From there, choose “Transparency” and adjust the slider as needed.
7. Wrapping Text: If you want to position your clip art in line with your text, you can use the text wrapping feature. Right-click on the image, choose “Wrap Text,” and select an option that suits your layout preferences.
Microsoft Word provides a range of basic modification options that can help you customize your clip art without the need for additional software. Experiment with these features to bring your creative vision to life and make your clip art unique and tailored for your specific project.
Advanced Modifications Using Software Tools
If you’re looking to take your clip art modifications to the next level, dedicated graphics editing software provides more advanced features and flexibility. Here are some software tools you can use for advanced clip art modifications:
1. Adobe Photoshop: Photoshop is a powerful and widely-used software for graphic design and photo editing. With Photoshop, you can apply complex adjustments, create custom effects, and manipulate clip art in various ways. From changing colors and adding textures to applying filters and creating intricate compositions, Photoshop offers endless possibilities for advanced clip art modifications.
2. GIMP: GIMP (GNU Image Manipulation Program) is a free and open-source alternative to Photoshop that offers similar features and functionalities. It provides advanced tools for editing, manipulating, and enhancing clip art. Whether you want to retouch images, add special effects, or create multi-layered compositions, GIMP is a versatile software for advanced modifications.
3. Inkscape: Inkscape is a vector graphics editor ideal for modifying and creating clip art. It allows you to scale clip art without losing quality, change colors and gradients, and apply complex transformations and effects. Inkscape supports various file formats, making it easy to import and export clip art to other software or projects.
4. CorelDRAW: CorelDRAW is a comprehensive graphic design software that offers a wide range of tools for clip art modifications. From precise shape manipulation to advanced color adjustments, CorelDRAW enables you to create intricate and professional-looking clip art. It also provides features for working with vector graphics, allowing for scalability and sharpness of your modifications.
5. Canva: Canva is an online design tool that simplifies graphic design for users without extensive experience. It offers a user-friendly interface and a vast library of templates and clip art elements. Canva allows you to customize clip art by resizing, changing colors, applying filters, and adding text, making it an accessible option for modifying clip art quickly.
Each software tool has its own learning curve and unique set of features, so it’s worth exploring multiple options to find the most suitable one for your needs. Tutorials, online courses, and communities dedicated to these software tools can provide guidance and inspiration for advanced clip art modifications.
Remember, advanced modifications require more time and practice to master, but the results can significantly enhance your clip art and give it a personalized touch that stands out.
Applying Filters and Effects
Filters and effects are a great way to transform the look and feel of your clip art, adding visual interest and enhancing its overall impact. Whether you want to create a vintage effect, add a dramatic flair, or make your clip art look like a watercolor painting, applying filters and effects can take your modifications to the next level. Here’s how you can apply filters and effects to your clip art:
1. Photo Editing Software: Most photo editing software, such as Adobe Photoshop or GIMP, offers a wide range of filters and effects that you can apply to your clip art. These include options like blur, sharpen, noise, sepia, and more. Experiment with different filters to find the desired look and feel.
2. Artistic Filters: Some software tools provide artistic filters that can transform your clip art into different styles, such as oil painting, pencil sketch, or watercolor. These filters mimic various artistic techniques and can give your clip art a unique and creative touch.
3. Color Adjustment: Changing the color scheme or adjusting the color balance of your clip art can dramatically alter its appearance. With software tools, you can modify the saturation, hue, brightness, and contrast of your clip art to achieve the desired effect.
4. Textures: Applying textures to your clip art can add depth and visual interest. Software tools allow you to overlay textures, such as wood grain, fabric, or grunge, onto your clip art. This technique can give your clip art a tactile and textured appearance.
5. Lighting and Shadows: Software tools enable you to manipulate the lighting and shadow effects of your clip art, adding depth and dimension to its design. You can adjust the intensity, direction, and color of lighting to create a realistic or stylized effect.
6. Filters for Special Effects: Many software tools offer filters specifically designed for special effects, such as adding a glow, creating a motion blur, or simulating a 3D perspective. These filters can make your clip art more dynamic and eye-catching.
7. Layer Effects: If you’re working with software that supports layers, you can apply various effects to individual layers of your clip art. This allows for greater control and flexibility in modifying different elements separately.
Remember, when applying filters and effects, it’s important to strike a balance and avoid overdoing it. Be intentional with your choices and consider the overall aesthetic and message you want to convey through your clip art. When used appropriately, filters and effects can elevate your clip art and make it more visually appealing and engaging.
Adding Text to Clip Art
Adding text to clip art can help convey a specific message, provide context, or enhance the design of your project. Whether you’re creating a poster, a social media graphic, or a presentation slide, here are some tips for effectively incorporating text into your clip art:
1. Optimal Placement: Consider the placement of your text within the clip art. Find a space that allows the text to be easily readable without obstructing or overwhelming the visual elements. Avoid placing text over intricate details or areas with low contrast to ensure clarity.
2. Font Selection: Choose a font that complements the style and theme of your clip art. Consider the mood you want to convey – bold and modern, elegant and script-like, playful and whimsical – and select a font accordingly. Ensure that the font is legible and appropriate for the size of the text.
3. Text Color: Select a text color that contrasts well with the background and does not blend into the clip art. If necessary, adjust the color of the clip art or add a background box behind the text to ensure readability. Experiment with different color combinations to find the most visually appealing and readable option.
4. Text Effects: Depending on the software tools you’re using, you may have options to apply various effects to your text. This can include adding a drop shadow, applying a gradient, or creating a 3D effect. Use these effects sparingly to avoid overwhelming the clip art and distracting from the main message.
5. Text Alignment: Align the text in a way that complements the overall composition of the clip art. Consider the visual flow and balance, placing the text in a position where it naturally guides the viewer’s eye through the design. Experiment with center alignment, left or right alignment, or asymmetrical placement for a dynamic composition.
6. Text Hierarchy: If your text includes multiple elements, such as a heading and a subheading, establish a visual hierarchy. Use different font sizes, weights, or colors to differentiate between the different levels of information. This helps guide the reader’s attention and makes the text more scannable.
7. Content Considerations: Keep the length of your text in mind, ensuring that it fits well within the clip art without overcrowding the space. Be concise and use clear language to convey your message effectively. Consider the size and resolution of your final output, as small text may become illegible when scaled down.
Remember, the purpose of adding text to clip art is to enhance the message and the visual impact of your project. It should complement the overall design and create a harmonious composition. With careful consideration of text placement, fonts, colors, and effects, you can create engaging and visually appealing clip art projects.
Grouping and Blending Clip Art
Grouping and blending clip art elements can help you create more complex and visually interesting compositions. Whether you’re combining multiple clip art pieces to create a cohesive design or blending different elements together for a seamless appearance, here are some techniques you can use:
1. Grouping: Grouping clip art elements allows you to treat multiple objects as a single unit. This makes it easier to move, resize, and apply modifications to the entire group. In most graphic design software tools, you can select multiple clip art elements and group them together. This is particularly useful when you want to maintain the relative positions and arrangements of different elements.
2. Arrangement: Once you’ve grouped clip art elements, you can arrange them in different ways to create an organized and visually pleasing composition. Experiment with the placement and overlapping of elements to find the most balanced and aesthetically pleasing arrangement. Rearrange the order of layers if necessary to create depth or emphasize certain elements.
3. Blending Modes: Blending modes allow you to blend different clip art elements together to create a unified look. Depending on the software tool you’re using, you may have various blending modes to choose from, including options like overlay, multiply, screen, and more. These modes can alter the appearance of the clip art, creating unique and interesting visual effects.
4. Transparency and Opacity: Adjusting the transparency or opacity of clip art elements can help create seamless and blended compositions. By reducing the opacity of certain elements, you can make them appear as if they are merging or interacting with other elements. This technique is useful when you want to create a layered or ethereal effect.
5. Masking: Masking allows you to hide parts of clip art elements or reveal only specific areas. By applying a mask to a clip art element, you can blend it into the background or other elements seamlessly. This technique is particularly useful when you want to blend textures, patterns, or colors together for a cohesive design.
6. Clipping Masks: Clipping masks enable you to show only certain parts of one clip art element within the boundaries of another clip art element. This technique is often used to create interesting compositions or combine multiple elements into a single cohesive shape. Clip art elements can be masked to fit within specific outlines or shapes.
7. Blend Modes for Text: If you’re adding text to your clip art, you can experiment with different blending modes to integrate the text into the design. Apply blending modes to the text layer to make it interact with the background elements. This can create visually interesting effects and make the text feel more integrated into the overall composition.
By grouping and blending clip art elements, you can create more dynamic and visually appealing compositions. Experiment with different arrangements, blending modes, and techniques to achieve the desired effect and make your clip art standout.
Using Clip Art in Presentations
Clip art can be a valuable tool for enhancing presentations and making them visually engaging. Whether you’re creating a professional slideshow or an educational presentation, here are some tips on how to effectively use clip art:
1. Supporting Visuals: Use clip art to visually support your content and reinforce key messages. Select clip art that is relevant to your topic and helps to illustrate ideas or concepts. For example, if you’re discussing teamwork, choose clip art that depicts people working together or collaborating.
2. Highlighting Key Points: Use clip art to draw attention to important information or key points in your presentation. This can be done by placing clip art next to text or using arrows or other visual elements to point out specific details. This technique can make your information more memorable and engaging for your audience.
3. Breaking up Text: Clip art can be used to break up long paragraphs or blocks of text. Instead of overwhelming your audience with text-heavy slides, incorporate clip art to visually divide and lighten the content. This allows your audience to focus on visual cues while still receiving the necessary information.
4. Creating Visual Metaphors: Clip art can be used creatively to create visual metaphors that enhance your presentation. For instance, you can use a puzzle piece clip art to represent problem-solving or a target clip art to symbolize goals and objectives. Visual metaphors can make complex concepts more relatable and easier to understand.
5. Customizing Clip Art: Tailor clip art to suit your specific presentation needs. Adjust colors, sizes, or other visual elements to match your branding or the overall design of your presentation. Customizing clip art can make it feel more cohesive and integrated into the overall visual theme.
6. Animating Clip Art: If your presentation software supports animations, you can add subtle animations to your clip art to bring them to life. Simple animations, like fade-ins or motion effects, can add visual interest and make your presentation more dynamic. However, use animations sparingly and ensure they enhance rather than distract from your content.
7. Using Clip Art as Backgrounds: Instead of using solid colors or generic backgrounds, consider using clip art as backgrounds for your slides. This can add visual interest and make your presentation more visually appealing. However, make sure the clip art background does not overshadow the content or make it difficult to read.
Remember to use clip art judiciously, ensuring that it enhances your presentation rather than detracts from it. Use high-quality clip art that is clear and visually appealing. Also, check the copyright and licensing restrictions for the clip art you use to avoid any infringement issues.
By utilizing clip art effectively, you can create visually compelling presentations that capture and maintain the attention of your audience.
Using Clip Art in Social Media Graphics
Clip art can play a significant role in creating eye-catching and engaging social media graphics. Whether you’re designing posts for Instagram, Facebook, Twitter, or any other platform, here are some tips on how to effectively use clip art in your social media graphics:
1. Attention-Grabbing Thumbnails: Use clip art as part of the thumbnail or main image of your social media post to capture the attention of your audience as they scroll through their feeds. Choose clip art that represents the content of your post or evokes curiosity to encourage users to click or engage with your post.
2. Illustrating Concepts: Clip art can be used to visually depict concepts or ideas that you’re discussing in your social media posts. Whether it’s a complex topic or a simple how-to guide, clip art can help simplify information and make it more accessible to your audience.
3. Creating Customized Icons: Design your own custom icons using clip art to illustrate various features or actions within your social media posts. These icons can serve as visual cues to guide users and make the content more user-friendly. Ensure that the icons align with your brand’s visual identity for consistency.
4. Adding Personality: Clip art can add personality and a touch of whimsy to your social media graphics. Use clip art to bring character into your posts, inject humor, or evoke emotions that align with your brand’s tone and values. This can help make your content more relatable and engaging.
5. Supporting Text Content: Combine clip art with text to create visually appealing graphics that convey your message effectively. Use clip art to emphasize keywords, create visual hierarchy, or add decorative elements that enhance the visual appeal of your text content.
6. Seasonal and Holiday Themes: Clip art provides a great opportunity to incorporate seasonal and holiday-themed elements into your social media graphics. Whether it’s a festive border, icon, or background, clip art can help convey the mood and spirit of various events throughout the year.
7. Animated Graphics: Utilize animated clip art to capture attention in social media feeds. These animated elements can be subtle movements, looping sequences, or more complex animations that bring your social media graphics to life. However, ensure that the animation does not overpower the main message or distract from the content.
Remember to choose high-quality clip art that aligns with your brand aesthetic and target audience. Also, consider the platform’s guidelines and formatting requirements for social media graphics, such as dimensions and image sizes, to ensure optimal display quality.
By incorporating clip art strategically into your social media graphics, you can create visually appealing and attention-grabbing posts that drive engagement and effectively communicate your message.
Creating Custom Clip Art from Scratch
If you want to have unique and personalized clip art that perfectly aligns with your vision, creating custom clip art from scratch is a great option. Here are some steps to help you create your own custom clip art:
1. Concept and Sketch: Start by brainstorming and sketching out your ideas for the clip art. Consider the theme, style, and purpose of your clip art. Think about the shapes, lines, and colors you want to incorporate. Sketching allows you to visualize your ideas and refine them before moving to digital creation.
2. Digital Tools: Depending on your preferred method, choose the appropriate digital tools for creating your custom clip art. You can use graphic design software like Adobe Illustrator, vector-based software like Inkscape, or even tablet-based drawing apps like Procreate. These tools offer a wide range of drawing and shaping tools to bring your design to life.
3. Outline and Detail: Use the digital tools to create the outline of your clip art. Start with simple shapes and lines, gradually adding more intricate details. Pay attention to clean lines and smooth curves for a polished look. Play around with different colors and shading techniques to add depth and dimension.
4. Experiment with Composition: Consider the composition and arrangement of your clip art elements. Play with the placement, size, and proportions to create a visually appealing design. Keep in mind the balance, symmetry, and negative space to ensure the composition is pleasing to the eye.
5. Color and Style: Experiment with different color palettes to find the perfect combination for your clip art. Consider the style you want to achieve – whether it’s bold and vibrant, soft and pastel, or monochromatic. Use the digital tools to apply colors effectively and make your clip art visually appealing.
6. Refine and Polish: Take the time to refine and polish your custom clip art. Pay attention to the details, clean up any rough edges, and ensure the overall design is cohesive. Zoom in and review your clip art carefully to make any necessary adjustments.
7. Save and Export: Once you’re satisfied with your custom clip art, save it in a file format that supports transparency, such as PNG or SVG. This allows you to use the clip art in various projects while maintaining high image quality.
Remember, creating custom clip art from scratch may require practice and patience. Don’t be afraid to experiment and iterate on your designs until you achieve the desired results. With time and dedication, you can create custom clip art that truly reflects your unique style and vision.
Tips for Printing Clip Art
When it comes to printing clip art, there are certain considerations to keep in mind to ensure optimal print quality. Here are some tips to help you get the best results when printing your clip art:
1. DPI and Resolution: Ensure that your clip art has a high enough resolution for printing. The standard guideline is to have a minimum resolution of 300 dots per inch (DPI) for sharp and clear prints. This ensures that the details in your clip art are preserved and do not appear blurry or pixelated when printed.
2. Print Size: Consider the desired print size of your clip art before printing. Be aware that enlarging your clip art significantly can result in a loss of image quality. If you need to print your clip art at a larger size, make sure that the resolution is sufficient to maintain a sharp and crisp print.
3. Color Mode: Check that your clip art is in the appropriate color mode for your printing needs. If you’re printing in CMYK (Cyan, Magenta, Yellow, Black), ensure that your clip art is in CMYK color mode. If you’re printing in RGB (Red, Green, Blue), make sure your clip art is in RGB color mode. Using the correct color mode helps ensure accurate color reproduction.
4. Color Calibration: Calibrate your monitor and printer to ensure consistency in color reproduction. Use color calibration tools or software to adjust your monitor settings and printer profiles. This helps ensure that the colors in your clip art appear as intended when printed.
5. Paper Selection: Choose the appropriate paper type for your print project. Consider factors such as paper weight, finish (glossy, matte, or satin), and texture. Different types of paper can affect the overall appearance and durability of your printed clip art. Experiment with different paper options to find the one that best suits your desired outcome.
6. Print Preview: Before proceeding with the final print, always review a print preview of your clip art to check for any potential issues. Ensure that the colors, positioning, and overall composition appear as intended. Pay attention to any potential cropping or formatting issues that may arise when printing.
7. Quality Printing: Opt for professional printing services or use a high-quality printer to achieve the best results. Professional printing services typically provide a wider range of paper options, top-notch print quality, and the ability to handle different sizes and formats. If you’re printing at home, invest in a printer that is known for its print quality and compatibility with your desired paper type.
Remember, different printers and printing methods may yield slightly different results, so it’s a good practice to do test prints before committing to a large print run. Make adjustments if necessary to achieve the desired outcome.
By following these tips, you can ensure that your printed clip art looks vibrant, sharp, and visually appealing.