
Benefits of Using Templates in Microsoft Word
Microsoft Word templates offer numerous advantages for users, making them an essential tool in any writing or document creation process. Whether you are a professional, a student, or an individual managing personal documents, templates can streamline your work and enhance your productivity. Let’s explore some of the key benefits of using templates in Microsoft Word.
1. Time-saving: Templates save significant amounts of time by eliminating the need to start from scratch for every new document. Instead, you can simply select a template that matches your needs and customize it as necessary. This is especially valuable for documents with similar formatting requirements, such as resumes, cover letters, or meeting agendas.
2. Consistency: Templates ensure consistency in formatting, styling, and branding across multiple documents. By using a template, you establish a standardized look and feel, making your documents more professional and cohesive. This is particularly important when creating business reports, proposals, or company letterheads.
3. Efficiency: Templates allow you to automate repetitive tasks and processes. You can predefine headers, footers, page layouts, and other elements, enabling you to focus on the content rather than spending time on manual formatting. This increases efficiency, especially when creating documents with complex structures, such as manuals or legal contracts.
4. Accessible design: Microsoft Word templates come with well-designed layouts and design elements, ensuring visually appealing and professional-looking documents. You don’t have to be a design expert to create polished and visually appealing reports, presentations, or newsletters. Templates provide a range of design options to choose from, making your documents visually engaging and impactful.
5. Customizability: Templates offer flexibility and customization options to suit your specific needs. You can modify fonts, colors, styles, and other formatting aspects to align with your preferences or branding requirements. This allows you to create personalized documents while maintaining a consistent overall design.
6. Error reduction: Templates minimize the risk of errors by providing predefined structure and formatting guidelines. They ensure that important sections and information are not overlooked, reducing the chances of omissions or mistakes. This is especially useful for documents with complex structures, such as research papers or business plans.
7. Collaboration: Templates facilitate collaboration and document sharing among team members. By using templates, everyone can work on a standardized document format, making it easier to integrate contributions and maintain a unified presentation. This is beneficial for projects involving multiple stakeholders or for creating company-wide documents, such as employee handbooks or training manuals.
8. Cost-effective: Microsoft Word templates are readily available and free to use without the need for additional software or subscriptions. This makes them a cost-effective solution for individuals and businesses looking to enhance their document creation process without incurring additional expenses.
How to Create a Custom Template in Microsoft Word
Creating a custom template in Microsoft Word allows you to design documents with your preferred layout, styles, and formatting. This can save you time and effort when creating new documents that require a consistent design. Follow the steps below to create your own custom template in Microsoft Word.
1. Open Microsoft Word: Launch Microsoft Word on your computer to begin creating your custom template.
2. Choose a blank document: Select “Blank Document” from the available options to start with a clean slate.
3. Customize your document: Apply the desired formatting, styles, and layout to your document. This includes setting the font, font size, margins, headers, footers, and any other elements you want to include in your template. Consider incorporating your company logo or branding elements to maintain consistency with your organization’s identity.
4. Save your document as a template: Once you are satisfied with the customization, go to the “File” menu and select “Save As.” Choose the location where you want to save your template and give it a descriptive name. In the “Save as type” field, select “Word Template (*.dotx)” from the dropdown menu. This will ensure that your document is saved as a template file.
5. Add template information: To provide additional details about your template, click on the “File” menu and select “Info.” In the right-hand pane, fill in the relevant information such as the template title, author name, subject, and any other details you wish to include.
6. Set custom properties: Under the “Info” section, click on “Properties” and choose “Advanced Properties.” Here, you can set custom properties such as keywords and tags that will help in searching and organizing your template.
7. Test your template: To ensure your template is functioning as intended, close and reopen Microsoft Word. Go to “File” and select “New.” In the “Custom” tab, you should see your newly created template listed. Select it, and a new document based on your template will open. Verify that all the formatting and styles from your template are correctly applied.
8. Modify and update your template: If you need to make changes to your template in the future, open the template file, make your modifications, and save it again. This will ensure that any new documents created from the template will have the updated design and formatting.
Creating a custom template in Microsoft Word provides you with a versatile and reusable starting point for various document types. By designing templates that reflect your preferences and branding, you can consistently produce professional-looking documents while optimizing your workflow.
Customizing Your Template with Styles and Formatting Options
When creating a custom template in Microsoft Word, it is important to customize it with styles and formatting options that align with your preferences and the purpose of your documents. This allows you to create a cohesive and visually appealing template that is easy to use. Follow these steps to customize your template effectively.
1. Define and apply styles: Styles help maintain consistency and simplify the formatting process in your documents. Determine the styles you want to include in your template, such as headings, body text, quotes, and captions. Apply these styles consistently throughout your template by selecting the text and choosing the appropriate style from the “Styles” gallery or ribbon.
2. Modify existing styles: Customize the default styles in your template to match your desired look and feel. Right-click on a style in the “Styles” pane or ribbon and choose “Modify.” Adjust the font, font size, color, alignment, and other formatting options to suit your preferences. Click “OK” to save the changes and apply them to the selected style.
3. Create new styles: If the default styles do not meet your requirements, you can create new ones. Click on the “Styles” pane or ribbon and select “New Style” or “Modify Style.” Specify the formatting options for your new style, such as font, size, color, and paragraph settings. Give it a descriptive name and click “OK” to add the style to your template.
4. Customize headers and footers: Headers and footers provide additional information or branding elements at the top and bottom of each page. Customize these sections in your template by inserting relevant text, logos, or graphics. Use the “Header & Footer” tools in the “Insert” tab to add and format these elements. Make sure to link the headers and footers to the corresponding content in the body of the document, so they are consistent throughout.
5. Incorporate tables and graphics: If your template requires tables or graphics, customize their appearance to match your overall design. Adjust the table borders, cell shading, alignment, and other formatting options. Insert and format images, charts, or diagrams as needed. Use the “Table Tools” and “Picture Tools” tabs to make modifications and achieve the desired visual result.
6. Set up bullet and numbering styles: If your template includes lists, customize the bullet or numbering styles to match your desired look. Select the list items and use the “Bullets” or “Numbering” options in the “Paragraph” group on the “Home” tab to modify the appearance. You can choose from a variety of predefined bullet styles or create your own custom bullets.
7. Apply theme colors and fonts: Themes in Microsoft Word provide a consistent set of colors and fonts that can be applied to your template. Use the “Themes” dropdown in the “Design” tab to select a predefined theme or create a custom theme by modifying the colors and fonts. Applying theme elements ensures a consistent and professional look across your documents.
By taking the time to customize your template with styles, formatting options, and visual elements, you can create a tailored and visually appealing template that reflects your branding and enhances the readability and overall impact of your documents.
Adding Placeholders and Variables to Your Template
When creating a custom template in Microsoft Word, you have the option to add placeholders and variables that allow for dynamic content insertion. These placeholders and variables act as prompts or placeholders for information that will be filled in when a new document based on the template is created. Here’s how you can incorporate placeholders and variables into your template.
1. Identify areas for dynamic content: Determine the sections in your template that will require dynamic information. This can include names, dates, addresses, titles, or any other details that may vary from document to document.
2. Insert text placeholders: Placeholders can be added by simply typing the desired text within {curly brackets}. For example, if you want to include a placeholder for the document recipient’s name, you can type {Recipient Name} in the appropriate location within your template.
3. Utilize document properties: Microsoft Word allows you to use document properties as variables in your template. These properties can be inserted by going to the “Insert” tab, clicking on “Quick Parts,” and selecting “Document Property.” Choose the appropriate property, such as “Author” or “Company,” and it will automatically insert the corresponding value into your template.
4. Create custom variables with form fields: Form fields provide an interactive way to collect specific information when a new document is created based on the template. To insert a form field, go to the “Developer” tab (enable it if it is not already shown), click on “Legacy Tools,” and choose the form field type you need, such as a text field or a drop-down list. Configure the form field properties, including the name, default value, and any formatting options.
5. Add content control placeholders: Content controls are similar to form fields but offer more flexibility in terms of formatting and functionality. To insert a content control, go to the “Developer” tab, click on “Legacy Tools,” and choose from various content control types, such as a plain text control or a date picker control. Place the content control at the desired location in your template and customize its properties as needed.
6. Use conditional placeholders: Conditional placeholders allow you to insert different content based on specific conditions. This is useful when certain information only needs to be displayed under certain circumstances. You can achieve conditional placeholders using IF fields or with the help of custom macros or add-ins.
7. Test your placeholders: Before finalizing your template, test the placeholders and variables by creating a new document based on the template. Make sure the dynamic content areas are appropriately populated and function as intended. It’s crucial to ensure that the placeholders and variables are aligned with your desired document structure and layout.
By incorporating placeholders and variables into your template, you can create customizable and dynamic documents that streamline the process of content creation. These placeholders and variables make it easy to personalize and populate template-based documents with specific information, saving time and effort while maintaining a consistent template structure.
Saving and Organizing Your Templates for Future Use
Once you have created a custom template in Microsoft Word, it’s important to save and organize it properly to ensure easy accessibility and efficient future use. Follow these guidelines to effectively save and organize your templates.
1. Choose the appropriate file format: When saving your template, select the appropriate file format to ensure compatibility and ease of use with Microsoft Word. The recommended format for templates is “.dotx” (Word Template), as it allows for easy identification and differentiation from regular documents.
2. Select a recognizable file name: Give your template a descriptive and recognizable file name. This will make it easier to locate and identify the template when browsing your file directory or when searching for it within Microsoft Word.
3. Save in the correct location: Save your template in the appropriate folder to ensure easy access. You can save it in the default templates folder provided by Microsoft Word, or create a separate folder specifically for your custom templates. This allows you to keep your custom templates organized and separate from other files.
4. Organize templates by category: If you have multiple templates, consider organizing them into categories based on their purpose or document type. This can be particularly helpful when you have a large collection of templates and want to quickly locate a specific one.
5. Utilize subfolders: Within your templates folder, create subfolders to further organize your templates. For example, you can create subfolders based on projects, clients, or departments. This hierarchical structure can simplify the process of locating and managing your templates.
6. Create a centralized template repository: If you are working in a team or organization, consider creating a centralized template repository that can be accessed by all team members. This ensures consistency and reduces the chances of using outdated or inappropriate templates.
7. Backup your templates: Regularly backup your template files to ensure that they are not lost due to unforeseen circumstances. Use external storage devices or cloud storage solutions to create backups and prevent any potential data loss.
8. Document template details: It can be helpful to maintain a separate document or spreadsheet that lists and describes each of your custom templates. Include details such as the template name, purpose, file location, and any special instructions related to its usage or customization.
9. Update and prune templates: Regularly review and update your templates to ensure they remain current and relevant. Remove any templates that are no longer needed or outdated. This makes it easier to navigate and locate the templates you actually use.
By following these steps, you can ensure that your custom templates are organized, accessible, and ready for use whenever you need them. Properly saving and organizing your templates streamlines your document creation process and saves you valuable time and effort in the long run.
How to Use a Template to Create a New Document
Using a template in Microsoft Word allows you to quickly create new documents with a pre-designed format and layout. This saves you time and effort, especially when you need to create multiple documents with a consistent design. Follow these steps to effectively use a template to create a new document.
1. Open Microsoft Word: Launch Microsoft Word on your computer to begin creating a new document based on a template.
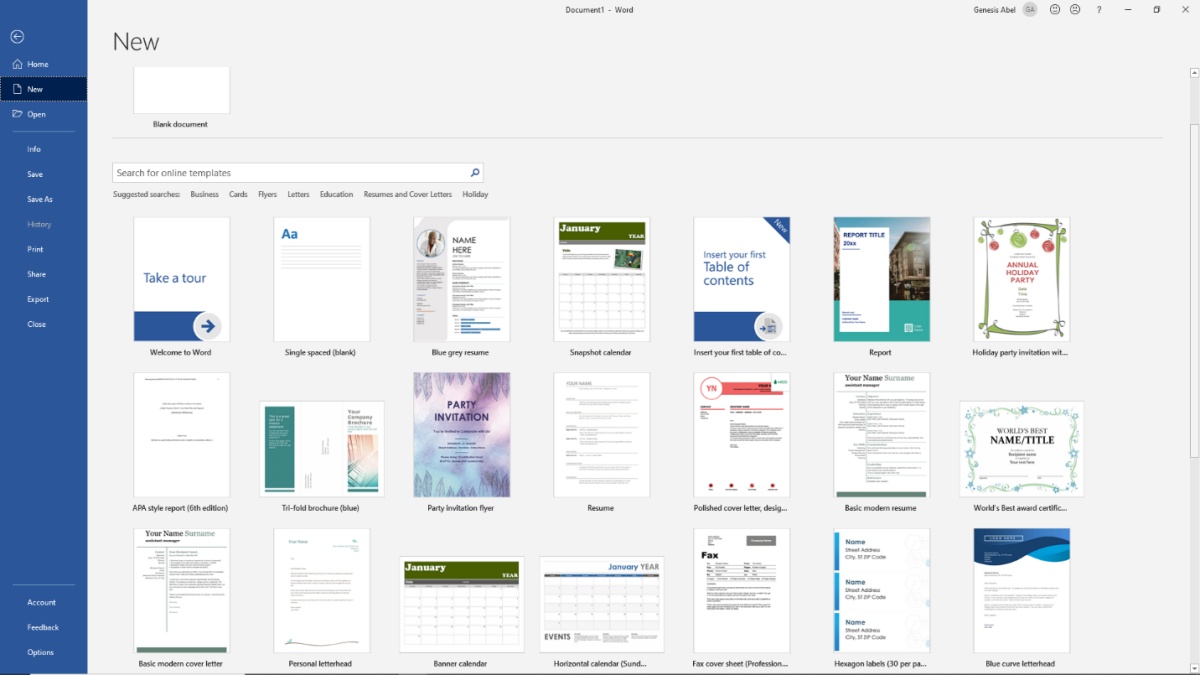
2. Access the template: Go to the “File” menu and select “New.” In the “New” pane, you’ll find a variety of templates available. Browse through the template categories or use the search bar to find a specific template.
3. Select a template: Click on the template you want to use to create your new document. A preview of the template will be displayed, allowing you to assess its suitability for your needs.
4. Create a new document: After selecting the template, click on the “Create” or “Download” button, depending on your version of Microsoft Word. This will generate a new document based on the selected template.
5. Customize the document: Once the new document opens, you can start customizing it with your specific content. Replace the placeholder text, images, or other elements with your own information. Add, delete, or modify sections as needed to tailor the template to your requirements.
6. Save your document: Once you have finished customizing the template, go to the “File” menu and select “Save As.” Choose the location where you want to save your new document and give it a descriptive name.
7. Continue working on the document: From this point on, you can continue working on your document, making any additional changes or additions as necessary. The template served as a starting point, but you have the freedom to further personalize and refine your document.
8. Reuse the template: If you need to create similar documents in the future, you can reuse the template by going to the “File” menu, selecting “New,” and accessing your custom templates in the “Custom” tab. This allows you to save time and maintain consistency across multiple documents.
By using templates in Microsoft Word, you can expedite the document creation process and ensure a consistent design and formatting. Templates provide a reliable starting point for creating new documents, whether for business reports, resumes, invitations, or any other document type you frequently create.
Editing and Modifying a Template for Specific Purposes
While templates in Microsoft Word provide a convenient starting point, you may find the need to edit and modify the template to suit your specific purposes. Perhaps you want to add or remove sections, change the formatting, or incorporate branding elements. Here’s how you can effectively edit and modify a template to meet your specific needs.
1. Open the template: Launch Microsoft Word and open the template you wish to edit. If the template is saved in your custom templates folder, navigate to the “File” menu, select “New,” and access the template from the “Custom” tab.
2. Modify the content: Make any necessary changes to the existing content of the template. Edit the text, update images, and remove or add sections as required. Customize the content to align with your specific purposes, whether it’s a business proposal, a project plan, or any other document type.
3. Adjust the formatting: Modify the formatting of the template to match your desired style. Change fonts, font sizes, and colors to reflect your branding or personal preference. Adjust the spacing, margins, and alignment to enhance readability and visual appeal.
4. Incorporate branded elements: If you want to add your organization’s logo, colors, or other branding elements, insert them into the template. This helps maintain consistency with your company’s identity and creates a professional look and feel.
5. Customize headers and footers: Edit the headers and footers to include specific information, such as document titles, page numbers, or important references. Modify these sections to align with your desired layout and design.
6. Create or modify styles: Adjust existing styles or create new ones to align with your formatting requirements. Edit the font, size, color, and other formatting attributes to achieve the desired look. Apply these styles consistently throughout the template to maintain a cohesive appearance.
7. Test and refine: After making modifications, review the template to ensure that all changes are properly implemented. Test the template by creating a new document based on it to verify that the formatting and content appear as intended.
8. Save the modified template: Once you are satisfied with the edits and modifications, save the modified template under a new file name. This ensures that the original template remains unchanged, allowing you to reuse it in its original form if necessary.
By editing and modifying a template to fit your specific purposes, you can create a tailored document that meets your exact needs. Customizing a template allows you to leverage the benefits of a pre-designed format while adding your unique touch to achieve the desired outcome.
Sharing and Collaborating with Others Using Templates in Microsoft Word
Microsoft Word templates not only streamline your individual document creation but also facilitate collaboration and sharing with others. Whether you are working in a team or seeking input from external collaborators, here’s how you can effectively share and collaborate using templates in Microsoft Word.
1. Share templates via email or file sharing platforms: To share a template with others, you can simply attach it to an email or upload it to a file sharing platform, such as Microsoft OneDrive or Google Drive. Include clear instructions and guidelines for using the template to ensure consistency and understanding among all collaborators.
2. Collaborate in real-time using cloud-based platforms: Taking advantage of cloud-based collaboration platforms, such as Microsoft 365 or Google Workspace, allows multiple individuals to work on a template simultaneously. Users can access and edit the shared template in real-time, track changes, and communicate through comments or chat features.
3. Set permissions and access levels: When sharing a template with others, it is essential to consider the level of access each collaborator requires. Set appropriate permissions to ensure that only authorized individuals can make changes to the template. This helps maintain the integrity of the template and avoids unauthorized modifications.
4. Use version control: When collaborating, version control is crucial to manage different iterations of the template. With version control enabled, you can track changes, revert to previous versions, and maintain a history of modifications. This helps prevent confusion and ensures everyone is working on the most up-to-date version of the template.
5. Collaborate using comments and annotations: Microsoft Word provides built-in commenting features that allow collaborators to leave feedback, suggestions, or questions within the template. Utilize these comments to communicate effectively, resolve queries, and discuss specific changes or improvements.
6. Provide training and guidance: If collaborating with colleagues who may be less familiar with using templates, offer training or provide detailed instructions on how to use the template effectively. This helps ensure that everyone understands the purpose of the template, formatting guidelines, and any specific customization options.
7. Establish a template library or repository: Create a centralized repository or shared folder where all team members can access and store templates. This allows for easy retrieval, promotes consistency, and prevents duplication of efforts. Regularly update and maintain the template library to ensure that only the latest and approved templates are available.
8. Seek feedback and refine the template: Encourage collaborators to provide feedback on the template’s usability and effectiveness. Incorporate constructive suggestions to refine and improve the template, making it more user-friendly and aligned with the needs of the team or organization.
By leveraging the features offered by Microsoft Word and collaborative platforms, you can enhance teamwork, foster communication, and simplify the process of sharing and collaborating on templates. This promotes efficiency, consistency, and a unified approach to document creation within your team or organization.
Troubleshooting Common Issues with Templates in Microsoft Word
While Microsoft Word templates are a valuable tool for document creation, they can occasionally present challenges. Understanding and troubleshooting common issues will help you overcome any obstacles that arise during the template usage process. Here are some common problems you might encounter and how to address them:
1. Compatibility errors: When opening a template created in a different version of Microsoft Word, you might encounter compatibility errors. To resolve this, ensure you have the latest version of Microsoft Word installed, or save the template in a compatible format for older versions.
2. Formatting inconsistencies: Templates may experience formatting inconsistencies, especially when transferring content from one template to another or copying and pasting from external sources. To rectify this, review the formatting and use the “Clear Formatting” option to remove any unwanted styles or formatting.
3. Missing fonts: If a template contains specific fonts that are not installed on your computer, Word will substitute them with default fonts, causing the document to appear different. Install the required fonts or modify the template to use more widely available fonts to maintain the desired look.
4. Broken links to external content: Templates that include links to external content, such as images or files, may experience broken links if the content has been moved or deleted. Ensure that all linked content is in the correct location or reinsert the content to fix broken links.
5. Template corruption: In some cases, templates may become corrupted, causing them to malfunction or behave unexpectedly. To address this, try opening the template in a different document editor or create a new template using the same design elements.
6. Incorrect placeholders or variables: If placeholders or variables in the template are not functioning correctly or are not populating with the expected data, check the placeholder or variable syntax for accuracy. Verify that the correct properties or data sources are assigned to each placeholder or variable.
7. Poor template organization: Disorganized or cluttered template structures can make it challenging to navigate and modify the template. Review the template’s formatting, styles, and sections, organizing them in a logical and intuitive manner for easier navigation and future modifications.
8. Lack of user understanding: Users may encounter difficulties using a template if they are unfamiliar with its features or customization options. Provide clear instructions, conduct training sessions, or create documentation that outlines how to effectively utilize the template and its various functionalities.
9. Incorrect template version: Using an outdated version of a template may result in missing features or incompatibilities. Ensure you are using the most recent version of the template and keep track of any template updates or revisions.
By troubleshooting and addressing common issues with Microsoft Word templates, you can overcome challenges and maximize the benefits they offer. Regularly review and update your templates to prevent issues, and seek assistance from technical support or online resources if further troubleshooting is required.