
Choose a Template
When creating a Microsoft Word flowchart, starting with a template can save you time and help ensure that your flowchart is visually appealing and easy to understand. Word offers a wide range of pre-designed templates that you can choose from. Here’s how to do it:
1. Open Microsoft Word: Launch Microsoft Word on your computer.
2. Click on “File” in the upper left corner of the screen: This will open the File menu.
3. Select “New” from the drop-down menu: A list of template categories will appear.
4. Choose “Flowchart”: Scroll through the template categories and select “Flowchart.”
5. Browse the available templates: Word will display a variety of flowchart templates for you to choose from. Take your time to explore the options and find the template that best suits your needs and the purpose of your flowchart.
6. Select a template: Click on the desired template to preview it.
7. Click on “Create”: Once you’ve found the template you like, click on the “Create” button to open a new document based on that template.
It’s important to choose a template that aligns with your flowchart’s purpose. For example, if you’re creating a flowchart for a business process, look for a template that includes relevant shapes and symbols related to the business world. If you’re designing a flowchart for a technical process, choose a template with shapes and symbols suitable for technical diagrams.
Remember, a well-chosen template can provide a solid foundation for your flowchart, making it easier for others to understand and follow. Once you have selected a template, you can start customizing it to fit your specific needs.
Open a New Document
Before you can start creating your Microsoft Word flowchart, you’ll need to open a new document. Follow these steps to get started:
1. Launch Microsoft Word: Open the Microsoft Word application on your computer.
2. Click on “File” at the top left corner of the screen: This will open the File menu.
3. Select “New” from the menu: A list of template categories will appear.
4. Choose “Blank Document”: Scroll through the template categories and select “Blank Document.” This will open a new document without any pre-designed content.
5. Begin your flowchart: With the blank document open, you are now ready to start creating your flowchart.
Opening a new document gives you a clean canvas to work with. You can start from scratch and design your flowchart exactly the way you want without any pre-existing elements.
Keep in mind that when creating your flowchart, it is a good practice to save your progress regularly to avoid losing any work. You can either save your document locally on your computer or on cloud storage platforms such as Microsoft OneDrive or Google Drive for added accessibility and backup options.
By opening a new document, you have a fresh start to bring your flowchart to life. Now, it’s time to move on to the next step and begin inserting shapes to represent the different elements of your flowchart.
Insert Shapes
Once you have opened a new document in Microsoft Word, the next step in creating your flowchart is to insert shapes. Shapes are the building blocks of a flowchart and represent different steps or actions within the process. Follow these steps to insert shapes:
1. Click on the “Insert” tab at the top of the Word window: This will open the Insert tab with various options.
2. Click on the “Shapes” button: In the Illustrations group, you will find the Shapes button. Click on it to access a drop-down menu with a variety of shape options.
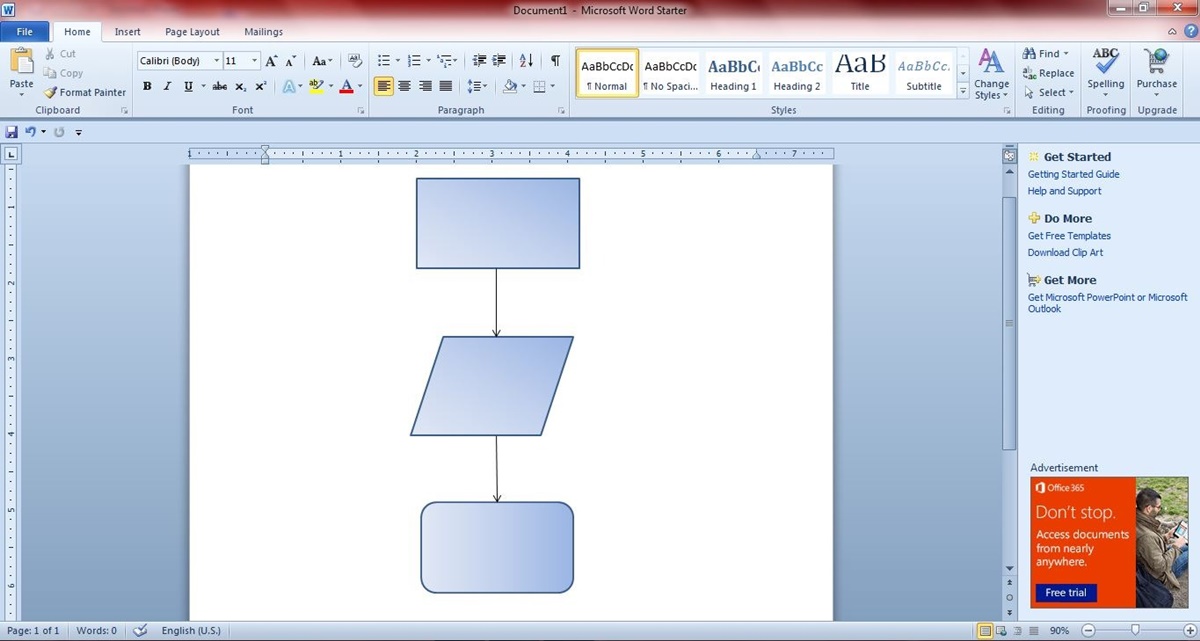
3. Select the desired shape: Choose the shape that best represents the step or process you want to illustrate in your flowchart. Common shapes used in flowcharts include rectangles for process steps, diamonds for decision points, and circles or ovals for connectors.
4. Click and drag to draw the shape: Click on the page where you want to place the shape, and drag the mouse to draw the shape to the desired size.
5. Resize and move the shape if needed: Once the shape is inserted, you can resize it by clicking and dragging on its edges. To move the shape, click inside it and drag it to a new location on the page.
You can repeat these steps to insert as many shapes as you need for your flowchart. Remember to position the shapes in a logical order to illustrate the flow of the process accurately.
Microsoft Word also provides additional shape formatting options that allow you to customize the appearance of the shapes. You can change the color, outline, and size of the shapes to enhance the visual appeal of your flowchart.
With the shapes in place, it’s time to add text to provide details and labels for each shape. The text will help clarify the purpose and function of each step or action in the process.
Customize Shapes
After you have inserted the shapes for your flowchart in Microsoft Word, you can further customize their appearance to enhance the visual clarity of your diagram. Here’s how you can customize the shapes:
1. Select the shape: Click on the shape you want to customize. Handles will appear around the shape, indicating that it is selected.
2. Formatting options: With the shape selected, you can access various formatting options. The “Format” tab will appear on the Word ribbon, providing you with a range of customization tools.
3. Modify the fill color: To change the color inside the shape, click on the “Shape Fill” option in the Format tab. A color palette will appear, allowing you to choose a new fill color. You can also use gradient, texture, or pattern fills for a more distinctive look.
4. Adjust the outline color and style: To change the color or thickness of the shape’s outline, click on the “Shape Outline” option in the Format tab. Select a new color or customize the line style according to your preference.
5. Resize and reshape the shape: If you want to resize or reshape the shape, click and drag the handlebars around the shape’s edges. You can also use the rotation handle to rotate the shape if needed.
6. Group or ungroup shapes: Sometimes, you may want to group multiple shapes together to treat them as a single unit or ungroup them to modify each shape individually. To do this, select the desired shapes, right-click, and choose the appropriate option from the context menu.
7. Use SmartArt for more advanced customization: Microsoft Word also offers SmartArt, a collection of pre-designed graphic elements that can be used to create more complex flowcharts. To access SmartArt, click on the “Insert” tab and select “SmartArt” to browse through different diagram styles and layouts.
Customizing the shapes in your flowchart can help differentiate between different steps, actions, or decision points in the process. By using colors, patterns, and variations in size and shape, you can create a visually engaging and easy-to-follow flowchart.
Next, let’s move on to adding text to your flowchart to provide explanations and labels for each shape.
Add Text
Adding text to your Microsoft Word flowchart is crucial for providing details and labels that explain the purpose of each shape in the diagram. Here’s how you can add text to your flowchart:
1. Select the shape: Click on the shape where you want to add text. Handles will appear around the shape, indicating that it is selected.
2. Double-click inside the shape: Double-click inside the shape, and a cursor will appear, allowing you to enter text directly. Alternatively, you can right-click the shape and choose “Add Text” or “Edit Text” from the context menu.
3. Type your text: Simply start typing to add your desired text. You can include step descriptions, instructions, or any other relevant information that helps clarify the purpose of the shape.
4. Format the text: Use the formatting options available in the Word ribbon to customize the appearance of your text. You can change the font, size, color, and alignment to make the text more readable and visually appealing.
5. Add additional text: Repeat the process for other shapes in your flowchart, ensuring that each shape has a clear and concise label or description.
Adding text to your flowchart provides important context and guidance for understanding the process or steps involved. It helps viewers follow along and comprehend the flowchart more easily.
In addition to adding text inside the shapes, you can also include text boxes outside the shapes to provide additional explanations or notes. This can be useful for providing extra details that may not fit within the confines of a shape.
Remember to keep the text clear, concise, and easy to read. Use short and descriptive labels that effectively communicate the purpose of each shape. Avoid excessive text that may overwhelm the flowchart or make it difficult to understand at a glance.
Now that your flowchart contains both shapes and text, it’s time to connect the shapes to illustrate the flow of the process.
Connect Shapes
Connecting the shapes in your Microsoft Word flowchart is essential for indicating the flow and sequence of the process. By adding connectors between the shapes, you create a visual representation of how the steps or actions are linked together. Here’s how you can connect the shapes:
1. Select the first shape: Click on the shape from which you want to connect the flow.
2. Click on the “Insert” tab at the top of the Word window: This will open the Insert tab with various options.
3. Click on the “Shapes” button: In the Illustrations group, you will find the Shapes button. Click on it to access a drop-down menu with a variety of shape options.
4. Choose the desired connector: Select the type of connector that best fits the flowchart layout. Common connectors used in flowcharts are straight lines, elbow connectors, or curved connectors.
5. Click and drag to connect the shapes: Click on the starting point on the first shape, and then drag the mouse to the ending point on the second shape. Release the mouse to create the connector line.
6. Adjust the connector line: You can adjust the length and angle of the connector line by clicking and dragging its endpoints or midpoints. You can also reroute the line by clicking and dragging on its segments.
7. Repeat for other shapes: Connect the remaining shapes in your flowchart, following the sequence of the process. Add connectors as needed to illustrate the flow between each step or action.
Connecting shapes with lines or connectors helps viewers understand the logical progression of the process. By visually representing the connections, it becomes easier to follow the flow and see how each step leads to the next.
Remember to position the connectors in a way that minimizes overlap and confusion. You can use the formatting options to change the color, thickness, or style of the connector lines to make them stand out or blend in with your flowchart design.
Now that your shapes are connected, you can add arrows to further clarify the direction of the flowchart.
Add Arrows
Adding arrows to your Microsoft Word flowchart can provide visual cues that indicate the direction of the flow and help viewers follow the sequence of steps more easily. Here’s how you can add arrows to your flowchart:
1. Select the connector line: Click on the connector line to which you want to add an arrow.
2. Click on the “Insert” tab at the top of the Word window: This will open the Insert tab with various options.
3. Click on the “Shapes” button: In the Illustrations group, find the Shapes button and click on it.
4. Choose the arrow type: Select the type of arrow that suits your flowchart design. You can choose from options such as a simple arrow, a curved arrow, or a double-ended arrow.
5. Click and drag to place the arrow: Click on the connector line where you want to add the arrowhead and drag the mouse to create the arrow shape.
6. Adjust the arrow position: You can move the arrowhead along the connector line by clicking and dragging it to the desired location. This allows you to position the arrow in a way that clearly indicates the direction of the flow.
7. Repeat for other connector lines: Add arrows to all the connector lines in your flowchart, ensuring that the arrows point in the direction of the flow from one step to the next.
The arrows visually enhance the flowchart by indicating the logical progression of the process. They help viewers quickly grasp the flow from one step to another, making the flowchart easier to understand and follow.
Remember to use arrows sparingly and strategically. Adding too many arrows can clutter the flowchart and make it difficult to comprehend. Use arrows only on the necessary connector lines to maintain clarity and visual appeal.
With arrows added, your flowchart is now visually complete. However, it’s important to format and organize the flowchart to ensure its professional and cohesive representation of the process.
Format the Flowchart
Formatting your Microsoft Word flowchart is crucial to ensure its readability, professionalism, and visual appeal. Here are some tips to help you format your flowchart:
1. Adjust the shape size and alignment: Make sure that all the shapes in your flowchart are uniform in size and aligned properly. Select each shape and resize or align them using the sizing handles and alignment options available in the Word toolbar.
2. Use consistent colors and styles: Maintain consistency in colors and styles throughout your flowchart to create a cohesive look. Choose a color scheme that fits the purpose and context of your flowchart. Use a limited number of fonts and font sizes to keep the text consistent and easy to read.
3. Apply themes and styles: Utilize Microsoft Word’s built-in themes and styles to quickly apply a professional look to your flowchart. Select the “Design” tab and choose a theme that best suits your flowchart’s purpose. You can further customize the theme by adjusting colors, fonts, and effects.
4. Organize the flowchart layout: Arrange the shapes and connectors in a logical and easy-to-follow layout. Avoid overcrowding by providing sufficient space between shapes. Group related shapes together and use blank space strategically to improve clarity and readability.
5. Add a title and labels: Include a descriptive title at the top of your flowchart to summarize the process or topic it represents. Label each step or action using clear and concise text to guide readers through the flowchart.
6. Add visual indicators: Use icons, symbols, or other visual indicators to highlight important steps, decision points, or outcomes. These visual cues can enhance comprehension and draw attention to key elements of the flowchart.
7. Review and revise: Take a step back and review your flowchart from a reader’s perspective. Ensure that the flowchart is easy to understand, well-organized, and visually appealing. Revise as needed to improve clarity and accuracy.
Formatting your flowchart enhances its impact and makes it more visually pleasing and user-friendly. Remember, a well-formatted flowchart can effectively communicate complex processes or ideas, helping readers grasp the information more easily.
Once you are satisfied with the formatting, it’s crucial to save your flowchart to preserve your work and share it with others.
Save the Flowchart
After putting in the effort to create a Microsoft Word flowchart, it’s essential to save your work to ensure its preservation and easy access for future use. Here are the steps to save your flowchart:
1. Click on the “File” tab at the top left corner of the Word window: This will open the File menu.
2. Select “Save As” from the menu: A dialog box will appear, allowing you to specify the location and name of the file.
3. Choose the file location: Select the folder or directory where you want to save your flowchart. You can save it on your computer’s hard drive or on cloud storage platforms like OneDrive or Google Drive for backup and accessibility.
4. Name the file: Give your flowchart a descriptive and meaningful name that reflects its content.
5. Choose the file format: Select the desired file format for your flowchart. Microsoft Word offers formats like .docx and .pdf. If you plan to share the flowchart with others who don’t have Word, consider saving it as a PDF for compatibility.
6. Click “Save”: Once you have specified the location, name, and file format, click the “Save” button to save the flowchart.
Saving your flowchart regularly while you work on it is crucial to avoid losing your progress in case of unexpected computer crashes or power outages. By saving your file, you can easily pick up where you left off and make any necessary updates or modifications.
Additionally, periodically saving different versions of your flowchart can provide flexibility in case you need to revert to a previous iteration or compare different versions of your design.
Remember to maintain backup copies of your flowchart files to ensure data integrity. You can create a backup on an external storage device or use cloud-based storage solutions for added security and accessibility.
With your flowchart saved, you can easily share it with colleagues, stakeholders, or anyone else involved in the process. You can also print a physical copy if needed, ensuring that the flowchart is available in the desired format for future reference or presentation.
Now that your flowchart is saved and secure, you can confidently use and share it as a valuable tool for visualizing processes, explaining concepts, and facilitating effective communication.