
Determine the Scope of the Project
When starting a graphic design project, the first step is to determine the scope. This involves clearly defining the project’s objectives, deliverables, and parameters. By establishing the scope upfront, you can set realistic expectations for both the client and the design team.
To determine the scope, start by identifying the project’s purpose. Is it to create a new brand identity, design a website, or develop marketing materials? Understanding the project’s primary goal will help guide the design process.
Next, assess the project requirements. This includes factors such as the number of design elements needed, the complexity of the design, and any specific features or functionality required. It’s important to gather all the necessary information from the client or project stakeholders to avoid misunderstandings or miscommunications.
Consider the timeline for the project. What is the desired completion date, and are there any specific milestones or deadlines that need to be met? Factor in the availability of resources, such as graphic designers and any external contributors, to ensure a realistic timeline.
Additionally, determine the key stakeholders involved in the project. This may include the client, project manager, marketing team, or other relevant parties. Understanding who will be providing feedback and making decisions throughout the design process is crucial for effective communication and project management.
Lastly, establish the budget for the project. This will help guide decision-making when it comes to allocating resources, such as time and materials. It’s important to have a clear understanding of the financial limitations and any constraints that may impact the design process.
By determining the scope of the project, you can set clear boundaries and expectations. This will allow the design team to focus their efforts on delivering a successful end product that meets the client’s needs and objectives.
Research and Gather Information
Before diving into the design process, it’s crucial to conduct thorough research and gather relevant information. This step is essential for understanding the target audience, industry trends, and the client’s brand identity.
Start by researching the client’s business or organization. Familiarize yourself with their products, services, mission, and values. This information will help you create a design that aligns with their overall brand image and resonates with their target audience.
Next, take the time to understand the target audience. Identify their demographics, preferences, and behaviors. This knowledge will enable you to tailor the design to their needs and capture their attention effectively.
Conduct a competitive analysis to gain insights into what other brands or organizations in the same industry are doing. Identify their strengths, weaknesses, and unique selling points. This will help you differentiate the client’s design and ensure it stands out in the market.
Stay up-to-date with current design trends and best practices. Explore various design styles, color schemes, typography choices, and layouts. While it’s important to create a design that is fresh and appealing, ensure that it also aligns with the client’s brand guidelines and industry standards.
In addition to design-related research, gather all the necessary content and materials for the project. This may include text, images, logos, or any other specific assets required for the design. Having all the information and materials upfront will streamline the design process and prevent delays.
Throughout the research phase, maintain open communication with the client or project stakeholders. Seek their input, clarify any doubts, and address any concerns. This will ensure that the design aligns with their vision and objectives.
By conducting thorough research and gathering relevant information, you will have a solid foundation to create a design that not only meets the client’s expectations but also resonates with the target audience. This step is crucial for creating effective and impactful graphic designs.
Define the Target Audience
One of the key factors in creating a successful graphic design project is understanding the target audience. Defining the target audience helps you tailor the design to their specific needs, preferences, and behaviors. By crafting a design that resonates with the target audience, you can effectively communicate the desired message and achieve the project’s goals.
To begin, gather demographic information about the target audience. Consider factors such as age, gender, location, and income level. Understanding these demographics will help you create a design that appeals to the specific characteristics of the target audience.
In addition to demographics, delve deeper into the psychographics of the target audience. This involves understanding their interests, values, beliefs, and motivations. By uncovering these insights, you can develop a design that connects with the audience on a deeper level and elicits the desired emotional response.
A key aspect of defining the target audience is conducting market research. This may involve surveys, focus groups, or analyzing existing data. The goal is to gain a comprehensive understanding of the target audience’s preferences, needs, and pain points. This research will serve as a guide when making design decisions throughout the project.
Consider the communication channels preferred by the target audience. Are they more likely to engage with the design through print media, online platforms, or social media? Understanding the channels they frequent will help you optimize the design for maximum visibility and impact.
Keep in mind that the target audience is not always a homogeneous group. There may be different segments within the audience that require tailored messaging or visuals. Identify these subgroups and adapt the design strategy accordingly to ensure each segment feels addressed and represented.
Throughout the design process, continually refer back to the defined target audience. Ask yourself whether the design elements, color choices, and messaging align with their preferences and needs. This will help you maintain focus and create a design that resonates with the intended audience.
By defining the target audience, you can create a design that speaks directly to their desires, needs, and aspirations. Understanding your audience is fundamental to designing a project that captures attention, engages, and ultimately achieves its objectives.
Understand the Client’s Goals and Objectives
When embarking on a graphic design project, it is crucial to have a clear understanding of the client’s goals and objectives. By understanding what the client hopes to achieve through the design, you can align your creative efforts and strategy to meet their expectations.
Start by engaging in open and effective communication with the client. Schedule a meeting or a call to discuss their goals and objectives in detail. Listen carefully and ask clarifying questions to ensure a thorough understanding of their vision.
It’s important to determine the purpose of the design. Is the client seeking to increase brand awareness, drive sales, promote an event, or convey a specific message? Understanding the primary objective will guide your design choices and ensure that the design effectively communicates the intended message.
Identify the specific outcomes the client desires from the project. Are they looking to expand their customer base, increase website traffic, generate leads, or enhance brand perception? Discussing these desired outcomes will help you craft a design strategy that aligns with the desired results.
Consider any existing branding guidelines or brand identity elements that should be incorporated into the design. Ensure that the design is consistent with the client’s overall brand image and reflects their core values and personality.
Understand the client’s target audience and the desired response from them. Are they aiming to elicit an emotional connection, educate, entertain, or inspire action? Tailor the design to resonate with the target audience and align with the desired response.
Collaborate with the client to establish any specific design requirements or preferences they may have. Discuss elements such as color schemes, typography, layout style, and any visual elements that should be incorporated into the design. Taking these preferences into account will help you deliver a design that meets the client’s expectations.
Throughout the design process, regularly seek feedback from the client. They play a key role in evaluating the design and providing input to ensure that it aligns with their goals and objectives. This feedback loop allows for adjustments and refinements to be made along the way.
By understanding the client’s goals and objectives, you can create a design that is purposeful and effective. Aligning your creative efforts with their vision will not only meet their expectations but also generate results that contribute to their overall success.
Identify the Deliverables
Identifying the deliverables is a crucial step in a graphic design project. It involves clearly defining the specific outputs or tangible items that you will provide to the client upon completion of the project. By determining the deliverables upfront, you can set clear expectations and ensure that both parties are aligned throughout the design process.
Start by discussing with the client the primary deliverables they expect from the project. This may include items such as a logo design, brochure, website, social media graphics, packaging design, or any other specific design elements required. Understanding the essential components will help guide your design strategy.
Consider any variations or versions of the deliverables that may be required. For instance, the client may need the design in different file formats or sizes to be used across various platforms or mediums. Discuss these requirements with the client to ensure all necessary versions are included in the scope of work.
Additionally, determine the desired level of customization for the deliverables. Will the client require editable files or templates that they can modify in the future? Or will the deliverables be finalized designs that do not need further modifications? Clarifying these details will prevent any misunderstandings once the project is complete.
Discuss the quantity or volume of the deliverables needed. For example, if the client is requesting social media graphics, determine how many posts or designs are required. Establishing the quantity upfront will help manage the workload and ensure timely delivery.
Understand the specific file formats that the client prefers for the deliverables. Common file formats include JPEG, PNG, PDF, or Illustrator/Photoshop files. Knowing the preferred formats will ensure that you deliver final designs that are readily usable and compatible with the client’s requirements.
Throughout the design process, regularly update the client on the progress and seek their input to ensure the deliverables are on track. This will allow for any adjustments or revisions to be made along the way, ensuring that the final deliverables meet the client’s expectations.
By clearly identifying the deliverables, you can define the scope of work and manage both the client’s expectations and your own workload. This step is essential for a smooth and successful graphic design project.
Create a Project Timeline
Creating a project timeline is essential to ensure that a graphic design project stays on track and is completed within the desired timeframe. A well-planned timeline helps manage expectations, ensures timely delivery, and allows for effective project management.
Start by discussing the project timeline with the client or project stakeholders. Understand their desired completion date for the project and any specific milestones or deadlines that need to be met. This will give you a clear starting point for structuring the timeline.
Break down the project into smaller tasks or phases. Identify the major stages of the design process, such as research, initial mockup, feedback and revisions, and finalization. Assign estimated timeframes to each stage, considering factors such as the complexity of the design and the availability of resources.
Consider dependencies or sequential tasks that need to be completed before moving on to the next stage. For example, research and gathering information may need to be completed before starting the initial design mockup. Establishing these dependencies will help you plan the timeline effectively.
Communicate the project timeline to the client and ensure they are in agreement. Keep them informed of the estimated timeframe for each stage of the project, allowing them to plan accordingly and provide necessary feedback or approvals within the expected timelines.
Regularly monitor and review the progress of the project against the timeline. Adjust and update the timeline as needed, taking into account any unforeseen delays or changes. Maintain open communication with the client, keeping them informed of any adjustments to the timeline and collaborating on finding solutions if necessary.
Consider the availability and workload of the design team or any external contributors involved in the project. Factor in their schedules to ensure that the timeline is realistic and achievable. Allocating sufficient time for each task or stage will prevent rushing the process and compromising the quality of the design.
Regularly communicate progress updates to the client, keeping them informed of the project’s status. Transparency and proactive communication will instill confidence in the client and demonstrate your commitment to meeting the agreed-upon timeline.
By creating a project timeline, you provide structure and clarity to the design process. It helps manage expectations, enables efficient project management, and ensures that the project stays on course to meet the desired completion date.
Define the Budget and Resources
Defining the budget and resources is a crucial step in a graphic design project. It involves determining the financial constraints and available resources to ensure successful project execution. By establishing the budget and allocating resources effectively, you can streamline the design process and deliver a high-quality end product.
Start by discussing the budget with the client or project stakeholders. Understand their financial limitations and expectations. Establish a clear understanding of the budget available for the project, including any additional costs for revisions, stock images, or external services.
Consider the scope of the project and the client’s goals to determine how the budget should be allocated. Assess the different aspects of the design process that will require financial resources, such as research, software licenses, graphic design tools, and any additional fees for specialized services or materials.
Identify any potential cost-saving measures without compromising the quality of the design. Consider alternatives for expensive resources or materials. Explore open-source design software, royalty-free images, or collaborations with cost-effective suppliers or freelancers to make the most of the available budget.
Determine the availability of internal resources for the project. If you have an in-house design team, assess their workload and skillset. Consider their availability to ensure that the project can be completed within the given timeframe and resources. If external resources are required, such as freelancers or specialized agencies, research and allocate the necessary funds in the budget.
Regularly track and manage expenses throughout the project. Keep a record of all costs incurred, including any unexpected expenses. This will help manage the budget effectively and provide transparency to the client or project stakeholders.
Openly communicate with the client or project stakeholders about the budget and resource allocation. Address any concerns or limitations upfront to avoid misunderstandings later on. Keep them informed of any adjustments that may be necessary and collaborate on finding solutions if the budget requires reallocation or additional funding.
By defining the budget and resources, you ensure financial transparency and maximize the efficient use of available resources. This step is crucial for successful project management, meeting client expectations, and ultimately delivering a high-quality graphic design project.
Brainstorm and Explore Design Ideas
Brainstorming and exploring design ideas is a creative and crucial step in the graphic design process. It allows for the generation of innovative concepts and provides a foundation for developing a unique and impactful design. By encouraging a free-flowing exchange of ideas and exploring various possibilities, you can create a design that effectively communicates the intended message and captures attention.
Start by conducting a brainstorming session with your design team or by yourself. Set a relaxed and open atmosphere that encourages creativity and collaboration. Explore different design directions, experiment with various styles, and encourage outside-the-box thinking.
Gather inspiration from various sources. Look at design trends, art, nature, architecture, or any other visual medium. Draw inspiration from different industries or fields to bring fresh perspectives to your design approach.
Research the client’s industry, target audience, and competition to gain insights into their preferences and expectations. This research will help you align your design ideas with the client’s brand image and differentiate the design from competitors.
Consider the psychology of design and its impact on human emotions and behaviors. Explore how different colors, typography, shapes, and layouts can evoke specific feelings or responses. Use this knowledge to create a design that effectively conveys the desired message and resonates with the target audience.
Sketch or create rough wireframes of your design ideas. This allows you to quickly visualize and iterate on different concepts. Don’t worry about perfection at this stage; focus on capturing the essence of each idea and exploring their potential.
Collaborate and seek feedback from the client or project stakeholders throughout the process. Share your design ideas and concepts, and engage in open discussions to ensure that their vision and expectations align with the creative direction. Incorporate their feedback and integrate their input into your design exploration.
Create a mood board or visual collage that represents the desired atmosphere, style, and visual elements. Use this as a reference and visual guide to maintain consistency and coherence throughout the design process.
Continuously refine and iterate on your design ideas based on feedback, research, and your own creative instincts. Push your boundaries, embrace experimentation, and challenge conventions to create designs that stand out and make a lasting impression.
Remember, the purpose of this stage is to generate multiple design ideas that can be refined and narrowed down later. Allow yourself the freedom to explore various possibilities and let your creativity flow.
By brainstorming and exploring design ideas, you lay the groundwork for creating a unique and impactful design. This process fosters creativity, collaboration, and innovation, enabling you to deliver a design that effectively communicates the client’s message and captivates the audience’s attention.
Develop a Concept and Visual Style
In the graphic design process, developing a concept and visual style is a crucial step that brings your ideas to life. This stage involves refining your design direction, honing in on a cohesive concept, and establishing a distinct visual style that aligns with the client’s goals and resonates with the target audience.
Based on your brainstorming and exploration of design ideas, begin to refine and narrow down your concepts. Take into account the client’s preferences and objectives, as well as the insights gained from research and feedback. Choose a concept that best captures the essence of the project and effectively communicates the desired message.
Consider how the visual elements, such as color, typography, imagery, and layout, will come together to support and enhance the concept. Determine the overall mood and tone that you want to evoke with the design, ensuring it aligns with the client’s brand identity and the intended emotional response from the audience.
Develop a visual style by selecting appropriate colors that evoke the desired emotions and reflect the client’s brand personality. Consider the psychology of color and its impact on the audience’s perception and behavior. Choose typography that not only complements the concept but also enhances readability and visual appeal.
Explore different layout options and the hierarchy of information to ensure that the design effectively guides the viewer’s attention and delivers the intended message. Create a harmonious balance between text and visual elements, ensuring that the design is visually appealing and easy to comprehend.
Consider visualizing the concept through sketches or digital mockups. Experiment with different graphic elements and compositions to find the most compelling visual representation of the concept. Incorporate diverse design techniques, such as illustration, photography, or iconography, that align with the visual style you have chosen.
Collaborate closely with the client or project stakeholders during this stage. Present your concept and visual style, seeking their feedback and input. Ensure that the design aligns with their vision and goals. Incorporate their suggestions or revisions while maintaining the integrity of the concept and visual style.
Continuously refine and iterate on the chosen concept and visual style based on feedback and ongoing research. Strive for a design that is visually engaging, cohesive, and distinct. Experiment with variations within the chosen style to explore different possibilities and ensure a comprehensive exploration of the concept.
By developing a concept and visual style, you create a strong foundation for the design that effectively communicates the message and resonates with the target audience. This stage sets the stage for the subsequent design implementation, ensuring a cohesive and visually appealing end product.
Sketch or Wireframe the Design
In the graphic design process, sketching or creating wireframes is an important step in visualizing and refining the design concept. It allows you to explore layout possibilities, test different compositions, and provide a blueprint for the final design. This stage bridges the gap between conceptualization and execution, helping you refine your ideas before diving into the detailed design process.
Start by reviewing your chosen concept and visual style. Consider the key components and elements that need to be included in the design. Begin sketching rough outlines or wireframes that represent the overall structure and composition.
Focus on capturing the basic layout and arrangement of elements, such as text, images, and interactive components if applicable. Use simple shapes and lines to outline the positioning of these elements, ensuring a clear understanding of their placement and hierarchy.
During the sketching or wireframing process, iterate on different variations and explore multiple design options. This allows you to compare and evaluate different layouts and compositions, ensuring that you select the most effective visual arrangement for conveying the intended message.
Consider the flow and navigation of the design, especially for digital projects such as websites or apps. Ensure that the user’s journey is intuitive and that important information is easily discoverable. Sketch out the different screens or pages and how they connect with each other to create a cohesive user experience.
Collaborate with the client or project stakeholders during this stage. Share your sketches or wireframes and gather their feedback. This active engagement will ensure that you are aligned with the client’s vision and expectations before investing more time into the detailed design process.
Once the sketches or wireframes are reviewed and approved, refine them further by adding more detail. Begin to flesh out the design elements, incorporating typography, color, and representative images or placeholders. This step allows you to visualize the design in a more comprehensive way and gives you a clearer sense of the final product.
Continue to iterate on the sketches or wireframes based on feedback, revising and enhancing the design elements as necessary. Seek input from the client or project stakeholders to ensure that the refined sketches accurately represent their vision and meet their objectives.
By sketching or wireframing the design, you establish a strong foundation for the final visual execution. This stage allows you to test and refine your ideas before investing the time and effort into detailed design work, ensuring that the final product resonates with the intended audience and effectively communicates the desired message.
Choose the Right Color Palette and Typography
Choosing the right color palette and typography is essential in creating a visually appealing and cohesive design. Colors and typography play a significant role in conveying emotions, establishing brand identity, and creating visual hierarchy. By carefully selecting the right combinations, you can enhance the overall impact and readability of the design.
Start by understanding the client’s brand identity and the message they want to communicate. Consider their existing brand guidelines or style guides that outline their preferred colors and typography. If there are no specific guidelines, work closely with the client to determine the desired tone and personality of the design.
When selecting a color palette, consider the psychology of color. Different colors evoke various emotions and associations. Choose colors that align with the intended message and the audience’s expectations. Take into account the client’s branding and ensure that the colors complement their brand identity while creating visual harmony within the design.
Experiment with different color combinations to find the right balance. Consider using a combination of primary and secondary colors, as well as neutrals, to create a visually appealing design. Pay attention to contrast and readability, ensuring that the chosen colors enhance the legibility of text and make important design elements stand out.
Typography is equally important in conveying the right message and establishing visual hierarchy. Consider the typefaces that best reflect the design’s intention – whether it’s a modern, elegant, playful, or professional feel. Choose complementary typefaces that work well together and ensure readability in different contexts, such as headlines, body text, and captions.
Consider the weights, sizes, and spacing of the selected typefaces to create visual hierarchy and emphasis. Use font variations to distinguish different types of content or to highlight important elements. Ensure that the typography choices align with the overall design concept and reinforce the intended visual style.
Take into account the readability of the chosen typefaces, especially in digital design. Consider legibility on different devices and screen sizes. Optimize the typography for both desktop and mobile experiences to ensure that the design remains clear and accessible across various platforms.
Closely collaborate with the client or project stakeholders during this stage. Present the chosen color palette and typography options, seeking their feedback and input. Consider their preferences and incorporate any necessary adjustments to align with the client’s vision and goals.
Continuously seek feedback on the color palette and typography choices from the client or project stakeholders as the design progresses. Make any necessary refinements to enhance readability, coherence, and alignment with the overall design concept.
By choosing the right color palette and typography, you create a visually engaging and harmonious design. The use of appropriate colors and typography enhances the design’s message, establishes brand identity, and ensures optimal readability, resulting in an impactful and well-executed graphic design project.
Select and Edit Imagery and Graphics
Selecting and editing imagery and graphics is a crucial step in the graphic design process. Visual elements play a significant role in capturing attention, conveying messages, and enhancing overall design aesthetics. By carefully curating and refining the visual assets, you can create a compelling and cohesive design that effectively communicates the intended message.
Start by understanding the project requirements and the client’s preferences for imagery and graphics. Consider the target audience and the desired emotional response. This will help guide your selection process and ensure that the visuals align with the overall design concept and the client’s objectives.
Research various options for high-quality imagery and graphics that match the design theme and style. Utilize stock photography websites, consider illustrations, or create original graphics if applicable. Look for visuals that evoke the desired emotions and convey the intended message in a visually impactful way.
Consider the visual composition and balance within the design. Select imagery and graphics that complement and enhance the other design elements. Ensure that there is visual harmony between the typography, color palette, and other design components.
Edit or modify the imagery and graphics as needed to align with the design concept. Adjust brightness, contrast, or color balance to ensure consistency and alignment with the overall visual style. Crop or resize images to fit the design layout appropriately.
Ensure that the selected visuals are of high resolution and suitable for the intended medium. Consider the necessary file formats and sizes for both print and digital outputs. Optimize the visuals to ensure that they load quickly and display correctly across different devices and platforms.
Collaborate closely with the client or project stakeholders during this stage. Share the selected imagery and graphics for their feedback and input. Ensure that the visuals meet their expectations and align with their vision for the project. Incorporate any necessary adjustments or design revisions based on their feedback.
Follow legal and copyright guidelines when using imagery and graphics. Ensure that you have the necessary licenses or permissions to use the visuals in the design. If using stock photography, properly attribute the source or obtain the appropriate license.
Continuously review and refine the imagery and graphics as the design progresses. Seek feedback from the client or project stakeholders and make any necessary adjustments to align with their preferences or to enhance the overall visual impact of the design.
By selecting and editing imagery and graphics with care and intention, you can elevate the design’s visual appeal and ensure that it effectively communicates the desired message. Thoughtfully curated visuals, aligned with the design concept, contribute to a cohesive and impactful graphic design project.
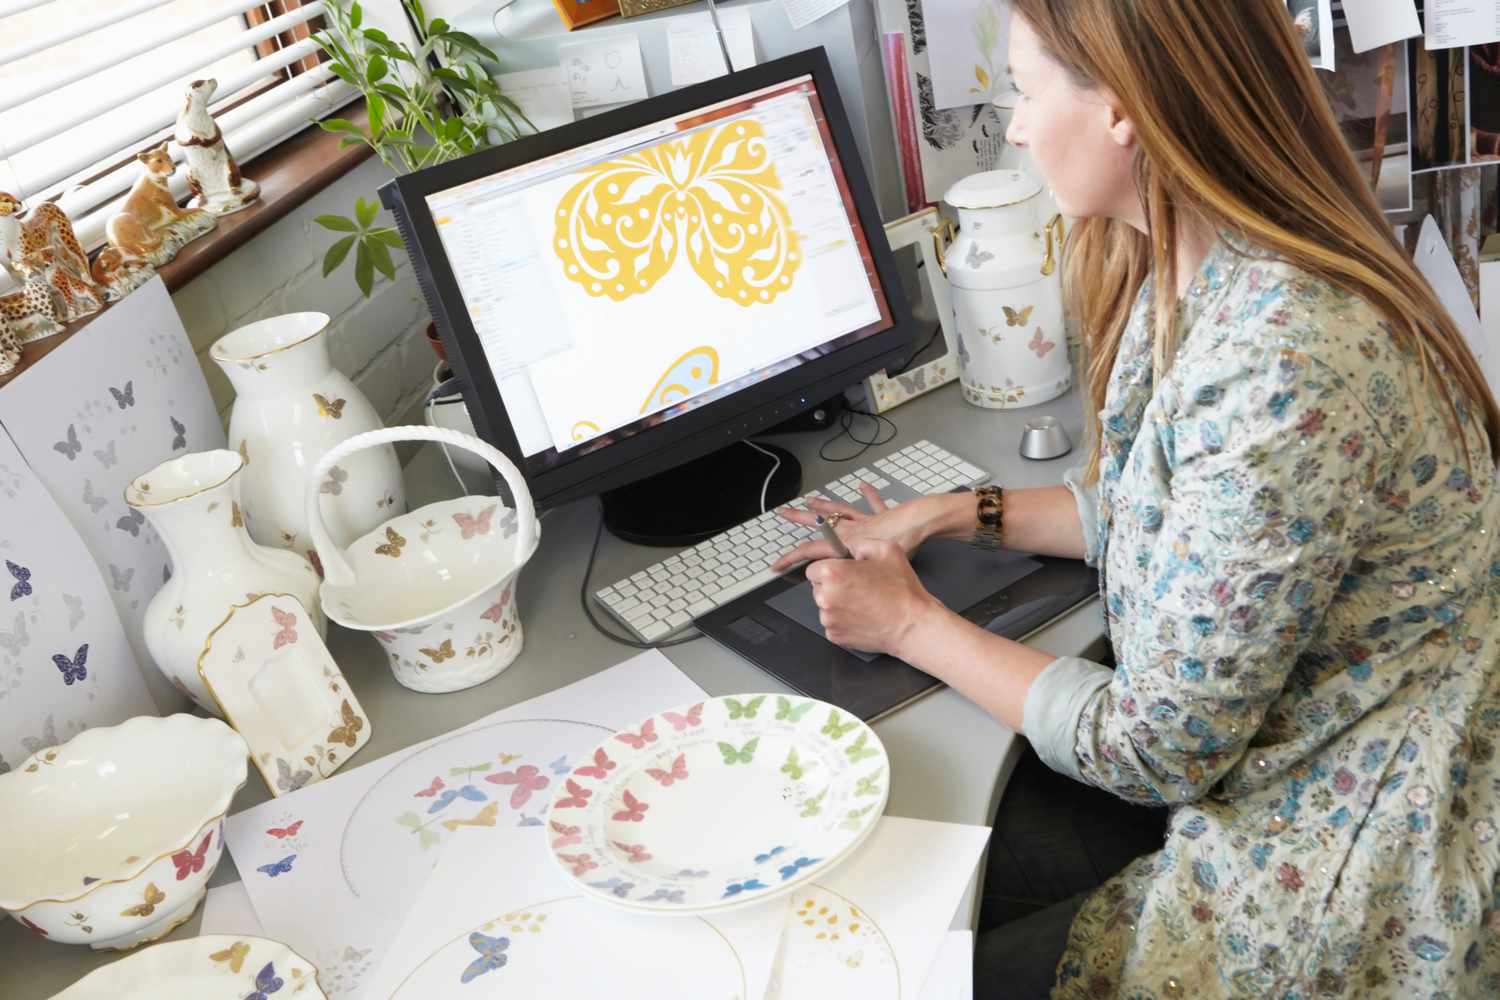
Create the Initial Design Mockup
Creating the initial design mockup is a crucial step in the graphic design process. It involves bringing together all the elements – color scheme, typography, imagery, and layout – to create a visual representation of the final design. The initial mockup serves as a blueprint that guides the subsequent design iterations and ensures that the project stays on track.
Start by using design software or tools to translate your selected visual elements into a digital format. Adhere to the established design concept and visual style, applying the chosen color palette, typography, and imagery to create a cohesive and visually appealing mockup.
Consider the overall layout and composition of the design. Ensure that the visual hierarchy is consistent with the intended message, guiding the viewer’s attention to key elements and information. Pay attention to spacing, alignment, and balance, ensuring that the design has a visually pleasing and harmonious arrangement.
Focus on creating a user-friendly experience, especially for digital designs. Consider the flow and navigation of the design, ensuring that important information is easily accessible and interactions are intuitive. Verify that the design adheres to best practices in terms of usability and accessibility.
Strive for visual clarity in the initial mockup, ensuring that the design effectively communicates the intended message. Use appropriate font sizes, line spacing, and contrast to enhance readability and legibility. Adjust or refine any design elements that might hinder understanding or distract from the core message.
Collaborate closely with the client or project stakeholders during this stage. Share the initial mockup and seek their feedback and input. Discuss any necessary revisions or adjustments to ensure that the mockup aligns with their expectations and goals. Incorporate their feedback while maintaining the integrity of the design concept.
Be open to iterating and refining the design mockup based on the feedback received. Remain flexible and adaptable, as the initial mockup is a starting point for further design exploration. Incorporate constructive feedback to enhance the overall visual impact and effectiveness of the design.
Continuously evaluate the initial mockup against the project requirements. Ensure that the design addresses the client’s goals and objectives. Consider how the design resonates with the target audience and aligns with the project’s overall purpose.
As you progress through subsequent design iterations, build upon the initial mockup, refining and adding detail to further develop the design. Incorporate visual tweaks, fine-tune the design elements, and polish the overall presentation. This iterative process helps you create a refined and visually compelling final design.
By creating the initial design mockup, you establish the visual direction and foundation for the design. The mockup acts as a guide for subsequent design iterations and serves as a visual communication tool between you and the client or project stakeholders, ensuring that everyone is aligned on the design direction.
Seek Feedback and Iterate on the Design
Seeking feedback and iterating on the design is a crucial step in the graphic design process. It involves gathering input from clients, project stakeholders, and potentially end users to refine and enhance the design. By actively soliciting feedback and embracing an iterative approach, you can create a design that meets the client’s objectives and resonates with the target audience.
Share the design with the client or project stakeholders and clearly communicate your design choices and intentions. Present the design in a way that highlights its key features and elements. Invite their feedback, questions, and suggestions to gain a comprehensive understanding of their perspective.
Actively listen to the feedback provided, both positive and constructive. Consider each comment with an open mind and evaluate it against the project requirements and goals. Look for recurring themes or patterns in the feedback to identify areas that may require further improvement or exploration.
Collaborate closely with the client or project stakeholders during this feedback phase. Engage in open and constructive discussions to gain a deeper understanding of their expectations, preferences, and objectives. Use this feedback as a guide for refining the design and aligning it with their vision.
Iterate on the design based on the feedback received. Incorporate suggested revisions and improvements while maintaining the overall integrity of the design concept. Experiment with different approaches, explore alternative solutions, and refine the design elements to further enhance its effectiveness.
Consider conducting usability testing or gathering input from potential end users, if applicable. Collecting feedback from the target audience can provide valuable insights into their preferences, expectations, and usability issues. Adjust the design based on this user feedback to create a more user-centered and intuitive experience.
Regularly share the updated design iterations with the client or project stakeholders to keep them engaged and involved in the design process. Document and track the changes made to the design to ensure transparency and maintain a record of revisions for future reference.
Continuously seek feedback at different stages of the design process to ensure that the design aligns with the evolving expectations and goals. Iterate on the design as necessary, refining and polishing it to achieve the desired outcome.
Remain flexible and adaptive throughout the feedback and iteration process. Embrace the opportunity to learn and grow, exploring different possibilities and solutions. The iterative nature of design allows for continuous improvement and allows you to create a design that truly exceeds expectations.
By actively seeking feedback and embracing an iterative approach to design, you can refine and strengthen the design, resulting in a final product that effectively communicates the desired message and resonates with the intended audience.
Finalize the Design and Prepare for Delivery
Finalizing the design and preparing it for delivery is the last crucial step in the graphic design process. It involves reviewing and fine-tuning the design to ensure that it is polished, error-free, and ready for the intended purpose. By paying attention to detail and adhering to technical specifications, you can confidently deliver a high-quality design to the client or project stakeholders.
Review the design thoroughly, assessing it for any inconsistencies, errors, or areas that may require further refinement. Pay close attention to typography, spacing, color accuracy, and alignment. Ensure that the design is visually consistent and harmonious, reflecting the established visual style and concept.
Proofread the design to eliminate any grammatical or typographical errors. Verify that all text is accurate, properly spelled, and grammatically correct. Pay attention to details such as punctuation, line breaks, and font consistency throughout the design.
Test the design across different devices, platforms, or mediums, if applicable. Verify that it displays correctly and functions as intended. Test interactive elements, links, or navigation to ensure a seamless user experience.
Seek a fresh pair of eyes to review the design. Ask a colleague or another designer for their input. An external perspective can bring new insights and identify any areas that may have been overlooked.
Collaborate closely with the client or project stakeholders during this stage. Share the final design for their approval and seek their confirmation before proceeding with the delivery. Encourage open communication to address any final revisions or adjustments that may be required.
Prioritize the client’s satisfaction and ensure that their feedback and requests are addressed. Make any final changes or refinements based on their input, ensuring that the design meets their expectations and aligns with their vision.
Prepare the design for delivery according to the agreed specifications. Export the design files in the required formats, resolutions, and color profiles. Verify that the design files are organized, easily accessible, and labeled accurately.
If the design is intended for print, double-check that all files are in CMYK color mode and have the appropriate bleed and trim marks. If the design is for digital use, verify that the files are optimized and compressed without compromising quality or functionality.
Create a comprehensive handover package that includes all necessary design assets and documentation. This may include fonts, color codes, style guides, image sources, and any other relevant materials that the client or project stakeholders may need for future reference or usage.
Communicate with the client or project stakeholders about the delivery logistics. Provide clear instructions on how the design files will be transferred, whether it’s through a digital file-sharing platform, email, or any other agreed-upon method.
Ensure that all legal and copyright obligations are met. Verify that you have the necessary rights and permissions for any licensed materials used in the design. Provide proper attribution or credit for any external assets used.
By finalizing the design and preparing it for delivery with meticulous attention to detail, you can confidently deliver a high-quality, polished design that meets the client’s expectations. This stage ensures that all technical requirements are met and sets the stage for a successful handover of the final design files.
Review and Test the Design Across Different Devices and Platforms
Reviewing and testing the design across different devices and platforms is an essential step in the graphic design process. With the increasing diversity of devices and platforms, it’s crucial to ensure that the design is visually appealing and functional across various screen sizes, resolutions, and operating systems. By conducting thorough reviews and tests, you can identify any issues or inconsistencies and optimize the design for a seamless user experience.
Start by reviewing the design on different devices such as desktop computers, laptops, tablets, and smartphones. Assess the layout, typography, and image quality on each device to ensure readability and visual appeal. Verify that the design elements are appropriately sized and spaced for optimal viewing on different screen sizes.
Consider different operating systems and web browsers when reviewing the design. Test the design on popular browsers such as Chrome, Safari, Firefox, and Edge to ensure compatibility and consistent rendering. Verify that the design maintains its intended appearance and functionality across different environments.
Pay attention to the responsiveness of the design on mobile devices. Test how the design adapts to different orientations (portrait and landscape) and verify that the user experience remains consistent and intuitive. Check the usability of any interactive elements, such as buttons or menus, on touchscreens.
Test the loading speed of the design, particularly for web-based designs or digital assets. Optimize image file sizes and utilize caching techniques to ensure fast loading times. Evaluate the design’s performance on different network conditions to ensure smooth and responsive user interactions.
Consider different platforms and contexts in which the design will be used. If the design is intended for social media platforms, review it as it appears in the feed or on the profile page. Ensure that the design stands out and catches the audience’s attention within the platform’s specific visual context.
Test the design’s functionality by navigating through different pages or sections. Check that links and interactive elements work correctly and direct users to the intended destinations. Validate any forms or input fields to ensure that they function as expected and provide proper feedback to the user.
Involve the client or project stakeholders in the review and testing process. Share the design across different devices and platforms with them, seeking their feedback and input. Gather their insights on usability and functionality, ensuring that the design meets their requirements and aligns with their expectations.
Iterate on the design based on the feedback and findings from the reviews and tests. Make necessary adjustments and refinements to address any issues and enhance the design’s compatibility and usability across different devices and platforms. Repeat the review and testing process as needed to ensure that the design is consistently optimized.
By reviewing and thoroughly testing the design across different devices and platforms, you can ensure that it delivers a consistent and engaging user experience. This step minimizes the risk of user interface issues and enhances the design’s usability and functionality, leading to a successful end product.
Deliver the Final Design Files to the Client
Delivering the final design files to the client is the last step in the graphic design process. It is essential to ensure a smooth and organized handover of the design assets, ensuring that the client can access and utilize them effectively. By following a systematic approach and providing the necessary documentation, you can successfully deliver the final design files to the client.
Prepare a comprehensive package that includes all the final design files and assets. Organize the files in a logical and structured manner to facilitate ease of use for the client. Create separate folders for different file formats (such as JPEG, PNG, or PDF), and label them clearly.
Include a README file or an instruction document that guides the client on how to use and access the design files. Provide clear directions on file formats, proper usage, and any specific requirements for the design assets. This document serves as a handy reference for the client and ensures they can navigate and work with the deliverables effectively.
If applicable, ensure that fonts used in the design are included or properly licensed. Include a font folder or provide instructions for obtaining the required fonts if they are not included. This ensures that the client has access to the necessary typography assets for future usage or modifications.
Ensure that the final design files are thoroughly checked and finalized before delivery. Verify that all necessary revisions have been addressed and that the design accurately represents the client’s vision and requirements. Double-check the file quality, resolution, and color profiles to ensure they meet the specifications agreed upon.
Choose a secure and reliable file-sharing method to send the final design files to the client. Consider using a trusted cloud storage platform, such as Dropbox or Google Drive, or a secure file transfer service. Share the download links or file access permissions with the client and confirm that they have successfully received the files.
Communicate with the client or project stakeholders to confirm the successful delivery of the final design files. Provide any necessary follow-up support or clarification to ensure that the client can access and utilize the design assets without any issues.
Offer ongoing support and assistance to the client, should they require further guidance or have any questions regarding the design files. Maintain open lines of communication, allowing for a seamless transition and effective use of the design assets by the client.
Follow up with the client after delivery to gather feedback and ensure their satisfaction with the final design files. Use this feedback to continually improve your delivery process and enhance the overall client experience.
By delivering the final design files in an organized and accessible manner, with clear instructions and documentation, you enable the client to make the most of the design assets. A smooth handover ensures client satisfaction and establishes a solid foundation for any ongoing design collaboration or future design needs they may have.
Document and Archive the Project for Future Reference
Documenting and archiving the project is a crucial step in the graphic design process. It involves organizing and storing all project-related materials, including design files, feedback, and communication records, for future reference. Proper documentation and archiving ensure easy retrieval of information, facilitate design continuity, and support future modifications or iterations of the design.
Start by creating a project folder or digital repository to store all project-related files and documents. Organize the files in a logical and consistent manner, using a standardized naming convention. This allows for efficient navigation and retrieval of relevant materials.
Include all versions of design files, including initial drafts, iterations, and the final approved design. Label each file with a clear description and date to ensure easy identification in the future. Organize the files in sub-folders, categorizing them based on specific stages, file formats, or design elements.
Document the project processes, milestones, and the rationale behind design decisions. Keep track of project timelines, client feedback, and the evolution of the design. This documentation acts as a reference for future design iterations or for understanding the design context when revisiting the project.
Archive any email exchanges, meeting notes, or communication records related to the project. This ensures that all conversations and client requirements are documented and easily accessible in case of future inquiries or modifications. Keep a record of client approvals or sign-offs to confirm agreement on specific design elements or versions.
Capture and store any external resources used during the project, such as stock photos, fonts, or third-party assets. Include relevant licensing information and attribution details to ensure compliance and legal documentation of the project.
Consider creating a style guide or brand guidelines document that outlines the visual elements and specifications of the final design. This document serves as a reference for brand consistency in the future and promotes design continuity across different projects or design assets.
Backup all project files and documents regularly to prevent data loss or corruption. Consider using cloud storage services, external hard drives, or other reliable backup solutions. Ensure that multiple copies of critical files are stored in separate locations or on different devices to minimize the risk of losing important project data.
Update the project documentation and archive as necessary when significant changes or updates occur, such as design iterations or client feedback. Regularly review and maintain the project archive to ensure that it remains organized and up to date.
By meticulously documenting and archiving the project, you establish a comprehensive reference for future design-related needs. This practice promotes design continuity, facilitates effective collaboration, and ensures that important project details and assets are readily accessible, providing a solid foundation for future design engagements and revisions.