
Disabling Autofill Feature in Safari
Safari’s Autofill feature can be convenient for quickly filling in forms and saving time. However, it can also pose a security risk by saving sensitive information such as usernames, passwords, and credit card details. If you value your privacy and want to disable the Autofill feature in Safari, follow the steps below.
To disable Autofill on iPhone Safari:
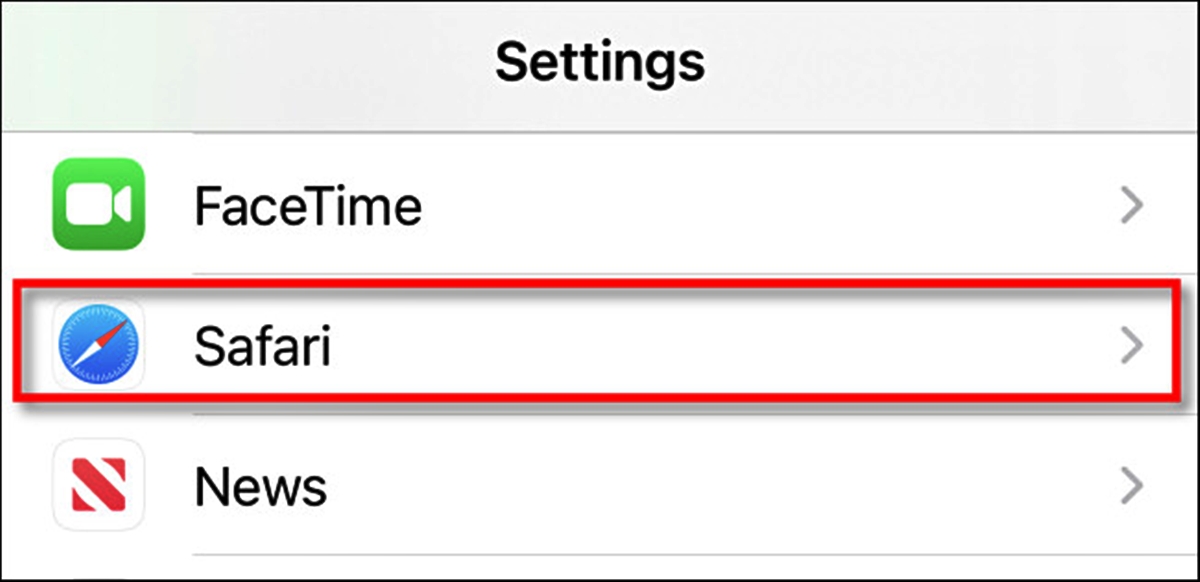
- Open the Settings app on your iPhone.
- Scroll down and tap on Safari.
- Under the General section, tap on Autofill.
- You will see options for Contacts, Names and Passwords, and Credit Cards. Disable the toggles for the information you no longer want Safari to Autofill.
By disabling Autofill, Safari will no longer suggest or fill in your personal information on websites. This helps protect your data from being stored and potentially accessed by unauthorized individuals.
Disabling Autofill can also be useful if you share your device with others and want to prevent them from accessing your personal information. However, keep in mind that you will need to manually fill in forms each time you visit websites that require your information.
Remember to periodically clear your browsing history and cookies to further protect your privacy.
Now that you know how to disable the Autofill feature in Safari, take control of your browsing experience and safeguard your personal information.
Clearing Browsing History and Cookies
Browsing history and cookies can contain a wealth of information about your online activities, including the websites you’ve visited, login credentials, and preferences. Clearing your browsing history and cookies periodically can help protect your privacy and ensure a clean browsing experience. If you’re using Safari on your iPhone, follow the steps below to clear your browsing history and cookies:
- Open the Settings app on your iPhone.
- Scroll down and tap on Safari.
- Under the Privacy & Security section, tap on “Clear History and Website Data”.
- A confirmation popup will appear. Tap “Clear History and Data” to proceed.
This will remove your browsing history and cookies from Safari. It’s important to note that clearing your browsing history will also log you out of any websites you’re currently logged into.
By regularly clearing your browsing history and cookies, you can minimize the chances of unauthorized individuals accessing your personal data and prevent websites from tracking your online activities. It’s a good habit to perform this task periodically, especially if you share your device with others or are concerned about your privacy.
Keep in mind that clearing your browsing history and cookies will not affect saved passwords, AutoFill information, or bookmarks. If you want to remove any saved passwords or other information, you will need to manually delete them from the respective settings in Safari.
Take control of your browsing data by regularly clearing your browsing history and cookies in Safari. This simple step can go a long way in safeguarding your privacy and ensuring a more secure online experience.
Enabling Private Browsing Mode
Private browsing mode is a useful feature in Safari that allows you to browse the internet without leaving any trace of your online activities on your device. This can be particularly helpful if you’re using a shared device or want to keep your browsing history private. To enable private browsing mode in Safari on your iPhone, follow the simple steps below:
- Launch the Safari app on your iPhone.
- Tap on the Tab icon in the lower-right corner of the screen.
- In the bottom-left corner, you will see a “Private” button. Tap on it.
- A new private browsing window will open, indicated by a dark background.
Once you’re in private browsing mode, Safari will not save your browsing history, cookies, or other information. Any websites you visit, as well as any searches you perform, will not be stored on your device.
It’s important to note that enabling private browsing mode does not make you completely anonymous online. It only prevents Safari from saving your browsing data on your device. Your internet service provider, websites you visit, and other parties may still be able to track your online activities.
If you want to exit private browsing mode, simply tap on the tab icon again and then tap on “Private” to turn off the private browsing mode. This will take you back to the regular browsing mode, where Safari will resume saving your browsing data.
Private browsing mode can be a helpful tool for maintaining your privacy and keeping your browsing activities separate from your regular browsing history. Remember to regularly clear out your history and cookies for comprehensive privacy protection.
Enjoy a more discreet and private browsing experience by utilizing the private browsing mode in Safari on your iPhone.
Managing Safari Extensions
Safari extensions are small software programs that integrate with the Safari browser to provide additional functionality and customization options. These extensions allow you to enhance your browsing experience by adding features like ad blockers, password managers, and productivity tools. If you’re using Safari on your iPhone, here’s how you can manage your Safari extensions:
- Open the Settings app on your iPhone.
- Scroll down and tap on Safari.
- Under the General section, tap on Extensions.
- You will see a list of installed extensions. From here, you can enable or disable individual extensions by toggling the switch next to each extension’s name.
- If you want to uninstall an extension, tap on the extension, and then select “Uninstall” to remove it from Safari.
By managing your Safari extensions, you can tailor your browsing experience according to your needs and preferences. Enabling or disabling extensions allows you to control the additional functionality they provide, ensuring a smooth and efficient browsing experience.
It’s important to note that Safari extensions may require access to certain permissions and data in order to function properly. Be cautious when installing extensions from third-party sources, and make sure to review their privacy policies to ensure your data is being handled securely.
Regularly review your installed Safari extensions to ensure they are still relevant and serving their intended purposes. Uninstalling unnecessary or unused extensions can help declutter your browsing experience and improve overall performance.
Keep in mind that not all Safari extensions are available on iPhone, as the availability of extensions may vary depending on the version of Safari and the device you’re using.
Take advantage of Safari extensions to customize your browsing experience and make the most out of your iPhone’s Safari browser.
Blocking Pop-up Windows in Safari
Pop-up windows can be annoying and intrusive while browsing the internet. They can disrupt your browsing experience by displaying unwanted advertisements or potentially leading to malicious websites. Fortunately, Safari provides a built-in feature that allows you to block pop-up windows and enjoy a smoother browsing experience on your iPhone. Follow these steps to block pop-up windows in Safari:
- Open the Settings app on your iPhone.
- Scroll down and tap on Safari.
- Under the General section, toggle on the switch next to “Block Pop-ups”.
Enabling this option will instruct Safari to block any pop-up windows that may appear while you browse the web. This helps to keep your browsing experience uninterrupted, safe, and free from unwanted distractions.
Keep in mind that Safari’s built-in pop-up blocker is designed to block most common types of pop-ups. However, it may not be able to block all pop-ups, especially those generated by certain websites or malicious scripts. If you encounter persistent pop-ups, consider using a content blocker app from the App Store for additional protection.
If you find that a website you frequently visit uses legitimate pop-ups for important content or functionality, you can add exceptions to allow pop-ups from certain websites. To do this, go to Settings > Safari > General > Block Pop-ups and tap on “Allow” to add specific websites to the exceptions list.
Remember to keep your iPhone’s Safari browser up to date to ensure you have the latest security features and improvements.
By blocking pop-up windows in Safari, you can enjoy a more streamlined and hassle-free browsing experience on your iPhone.
Restricting Website Access with Content Restrictions
Safari’s content restrictions feature enables you to control the type of content that can be accessed while browsing the internet on your iPhone. This can be especially useful if you want to restrict certain websites or ensure a safer browsing environment, especially for children. Here’s how you can set up content restrictions in Safari:
- Open the Settings app on your iPhone.
- Scroll down and tap on Screen Time.
- Tap on Content & Privacy Restrictions.
- Toggle on the switch for Content & Privacy Restrictions.
- Tap on Content Restrictions.
- Under Web Content, select Limit Adult Websites.
Enabling this option will automatically restrict access to adult websites and filter out explicit content. However, if you want to further customize the website restrictions, you can tap on “Add Website” under the “Never Allow” section to manually block specific websites.
It’s important to note that the content restrictions feature in Safari utilizes various technologies and databases to filter and classify websites. While it does a reasonably good job, it may occasionally block or allow websites that do not align perfectly with your preferences. Therefore, it’s recommended to periodically review the blocked and allowed websites to ensure they meet your expectations.
Additionally, you can also use the “Allowed Websites Only” option to restrict access to only the websites you explicitly allow. This can be useful for creating a controlled browsing environment, especially if you’re managing the device for children.
Remember to set up a passcode for the content restrictions to prevent unauthorized changes or bypassing of the restrictions. This will help ensure that the content restrictions remain effective and provide the desired level of control over website access.
By setting up content restrictions in Safari, you can have peace of mind and control over the type of websites that can be accessed on your iPhone.
Adjusting Safari Privacy Settings
Safari offers a range of privacy settings that allow you to customize your browsing experience and protect your personal information when using your iPhone. By adjusting these settings, you can enhance your privacy and security while browsing the internet. Here’s how you can adjust Safari’s privacy settings:
- Open the Settings app on your iPhone.
- Scroll down and tap on Safari.
- Under the Privacy & Security section, you’ll find various privacy settings that you can configure to suit your preferences.
Here are some key privacy settings in Safari:
- Prevent Cross-Site Tracking: Enabling this setting helps prevent websites from tracking your browsing activity across multiple sites. It can help protect your privacy by limiting the data collected about your online behavior.
- Block All Cookies: By toggling on this setting, Safari will block all cookies from being stored on your device. Cookies are small text files that websites use to track your preferences and login status. Blocking cookies can help improve your privacy, but keep in mind that it may affect certain website functionalities.
- Ask Websites Not to Track Me: Enabling this option sends a request to websites, asking them not to track your browsing activity. However, it’s important to note that compliance with this request is voluntary and not all websites may honor it.
Additionally, you can also manage specific website settings under the “Website Data” option. Here, you can view and delete website data stored by Safari, such as cookies, local storage, and caches. Clearing this data periodically can help protect your privacy and free up storage space on your device.
Keep in mind that adjusting these privacy settings is a trade-off between privacy and convenience. While tightening the privacy settings can enhance your security, it may also affect certain website functionalities or cause inconvenience in some cases.
It’s recommended to periodically review and adjust these privacy settings based on your preferences and the level of privacy you desire. By taking control of Safari’s privacy settings, you can safeguard your personal information and enjoy a more secure browsing experience on your iPhone.
Controlling Location Services in Safari
Location services in Safari allow websites to request and access your device’s location information. While this feature can be useful for location-based services and features, some users may prefer to restrict or disable location access for privacy reasons. Here’s how you can control location services in Safari on your iPhone:
- Open the Settings app on your iPhone.
- Scroll down and tap on Safari.
- Under the Privacy & Security section, tap on Location Services.
- Here, you can adjust the location settings for Safari.
Here are the available options for controlling location services in Safari:
- Never: This option completely disables location services for Safari, preventing any websites from accessing your device’s location information.
- While Using the App: Selecting this option allows Safari to access your location only while you are actively using the browser. Once you close Safari, location access will be disabled.
- Ask Next Time: When this option is chosen, Safari will prompt you to grant or deny permission for a website to access your location each time a site requests it.
By controlling location services in Safari, you can protect your privacy and have more control over the sharing of your location information with websites. It’s important to note that even if you disable location services for Safari, certain websites may still be able to approximate your location using other methods or IP address geolocation.
Additionally, you can manage specific website settings under the “Website Settings” option. This allows you to view and manage website permissions, including location access, for individual websites that you have previously visited.
Be mindful of the websites you grant location access to and consider the potential privacy implications. Review and adjust these settings periodically based on your preferences and level of comfort with sharing your location information.
Take control of location services in Safari to ensure a more secure and privacy-conscious browsing experience on your iPhone.
Managing Website Data in Safari
As you browse the internet using Safari on your iPhone, websites may store data locally on your device. This can include information such as cookies, caches, and other browsing data. Managing website data can help you maintain your privacy, free up storage space, and improve browser performance. Here’s how you can manage website data in Safari:
- Open the Settings app on your iPhone.
- Scroll down and tap on Safari.
- Under the Privacy & Security section, tap on “Website Data”.
- You will see a list of websites that have stored data on your device.
- Swipe left on a website to reveal the “Delete” button, and tap on it to remove the data associated with that website.
- If you want to remove all website data stored on your device, scroll to the bottom of the list and select “Remove All Website Data”.
By managing website data, you can control the information that websites store on your device. Removing website data can help protect your privacy by deleting any stored login credentials, browsing history, and preferences.
It’s important to note that clearing website data may sign you out of websites and remove any saved preferences. Some websites may also require you to log in again when you revisit them.
Regularly clearing website data can also free up storage space on your device and improve Safari’s performance. This is particularly helpful if you have limited storage capacity or notice that Safari is running slowly.
Keep in mind that clearing website data only removes the data stored on your device. It does not delete any data stored on the websites’ servers. If you want to remove your data completely from a website, you may need to follow the website’s specific data removal procedures or contact their support.
Take control of website data in Safari to maintain your privacy, optimize storage space, and enjoy an efficient browsing experience on your iPhone.
Setting Up Password AutoFill in Safari
Safari’s Password AutoFill feature conveniently saves and fills in your usernames and passwords, making it easier to log in to websites on your iPhone. This can save you time and effort, especially for frequently visited websites. To set up Password AutoFill in Safari, follow these steps:
- Open the Settings app on your iPhone.
- Scroll down and tap on Safari.
- Under the General section, tap on Passwords.
- Enable the “AutoFill Passwords” toggle.
- If you haven’t already, you will need to set up a passcode or use Touch ID/Face ID for added security.
- You can also choose to enable “Suggest Strong Passwords” to have Safari generate secure passwords for you when creating new accounts.
Once Password AutoFill is set up, Safari will automatically suggest saved usernames and passwords when you visit a login page on a website. Simply tap on the suggested username or password to fill in the login fields.
If you’ve saved multiple usernames and passwords for the same website, Safari will display a list of saved credentials for you to choose from. You can also manage and view your saved passwords in the Safari settings under “Passwords”.
Remember to keep your device secure by setting a strong passcode or using biometric authentication like Touch ID or Face ID. This helps ensure that your saved passwords and sensitive information are protected.
If you prefer not to use Password AutoFill or want to clear your saved passwords, you can disable the AutoFill toggle in the Safari settings or manually delete individual passwords in the Passwords section.
Keep in mind that while Password AutoFill can be a convenient feature, it’s important to use it responsibly. Be cautious of using AutoFill on shared devices or on websites that may not have a secure connection.
Set up Password AutoFill in Safari to streamline your login process and securely manage your passwords on your iPhone.