
Checking System Requirements
Before connecting your Steam Deck to a TV, it’s important to ensure that your system meets the necessary requirements. Here are the key factors to consider:
- TV Compatibility: Make sure that your TV has an available HDMI port. Most modern TVs have at least one HDMI port, but double-check to ensure compatibility.
- Steam Deck Settings: Ensure that your Steam Deck is updated with the latest firmware and system software. This ensures optimal compatibility and performance when connecting to a TV.
- Resolution and Refresh Rate: Check the supported resolution and refresh rate on both your Steam Deck and your TV. To achieve the best experience, make sure they are compatible and set to the same settings.
- Audio Configuration: Verify that your TV supports audio output through HDMI. If not, you may need additional audio cables to connect the sound output from the Steam Deck to your TV or speakers.
- Internet Connection: Although not directly related to connecting your Steam Deck to a TV, a stable internet connection is essential for enjoying online multiplayer games and accessing content on your Steam account.
By confirming these requirements before connecting your Steam Deck to a TV, you can ensure a smooth and hassle-free setup process. Once you’ve verified that your system is compatible, you can move on to the next step: gathering the necessary cables and equipment.
Gathering Necessary Cables and Equipment
Before you can connect your Steam Deck to a TV, it’s important to gather the necessary cables and equipment. Here’s what you’ll need:
- HDMI Cable: Ensure you have an HDMI cable that is long enough to reach from your Steam Deck to the TV. A high-quality HDMI cable is recommended for the best video and audio performance.
- Power Adapter: Make sure your Steam Deck is fully charged or connected to a power source using its power adapter. This is crucial to prevent any interruptions while playing games on the TV.
- TV Remote: Keep your TV remote handy as you may need to access the TV’s settings during the setup process.
- Optional Audio Cables: If your TV does not support audio output through HDMI, you may need additional cables such as an optical audio cable or RCA cables to connect the audio output from the Steam Deck to your TV or external speakers.
- Wireless Game Controllers: If you prefer to play games using a wireless game controller, ensure that your preferred controller is compatible with your Steam Deck and that it is fully charged or has fresh batteries.
Once you have gathered these cables and equipment, you can move on to connecting your Steam Deck to the TV via HDMI. Having everything ready beforehand will save you time and ensure a smooth setup process.
Connecting the Steam Deck to the TV via HDMI
To connect your Steam Deck to a TV, follow these simple steps:
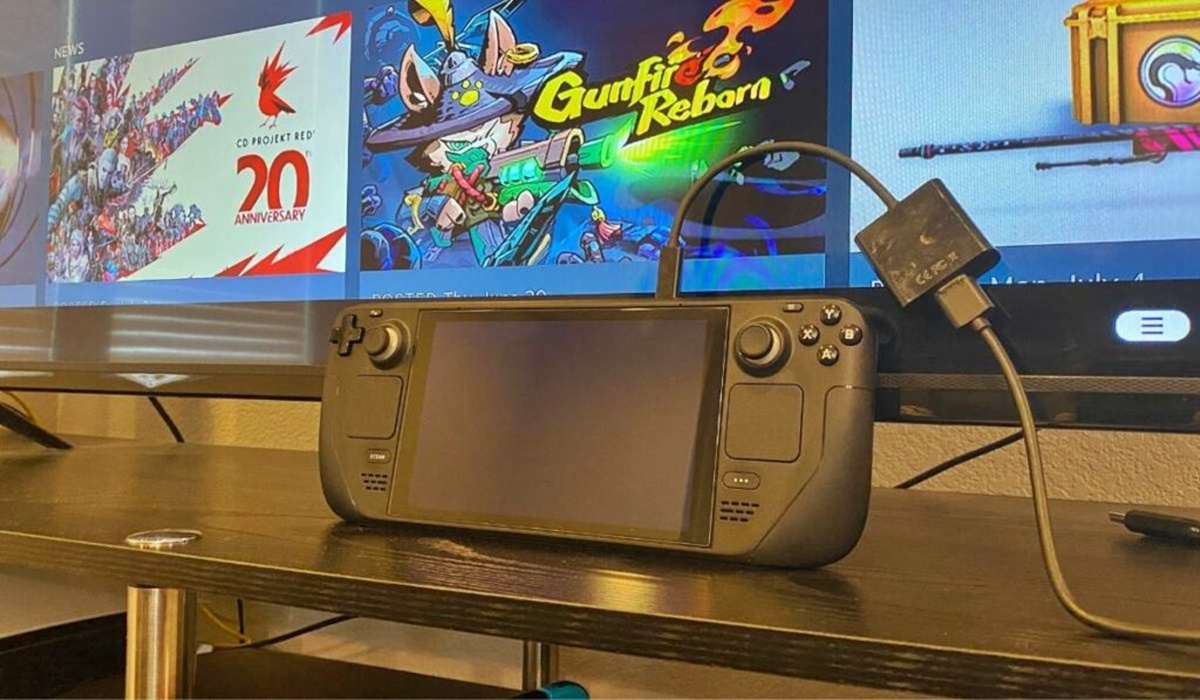
- Locate the HDMI port on your Steam Deck. It is typically situated on the side or back of the device. Plug one end of the HDMI cable into the HDMI port on your Steam Deck.
- Locate an available HDMI input port on your TV. It is usually labeled as “HDMI” or represented by an HDMI icon. Plug the other end of the HDMI cable into the HDMI input port on your TV.
- Using your TV remote, switch the input/source setting to the corresponding HDMI port where you connected the Steam Deck. This may involve pressing an “Input” or “Source” button on the remote and selecting the appropriate HDMI input from the on-screen menu.
- Turn on your Steam Deck. The TV should now display the Steam Deck’s screen, mirroring what you see on the device’s display.
If the TV doesn’t detect the Steam Deck or there’s no signal, double-check the cable connections and ensure that both devices are powered on. If the issue persists, try using a different HDMI cable or connecting to a different HDMI input port on your TV.
Once the Steam Deck is successfully connected to your TV via HDMI, you’re ready to configure the TV settings for an optimal gaming experience. Continue reading to learn how to adjust the display settings on both the TV and the Steam Deck.
Configuring the TV Settings
After connecting your Steam Deck to the TV, it’s important to configure the TV settings for the best gaming experience. Here are some key settings to consider:
- Picture Mode: Explore the picture mode options on your TV, such as “Game Mode” or “PC Mode.” These modes are designed to reduce input lag and enhance the visual quality when gaming.
- Resolution: Check the resolution settings on your TV and ensure it matches the resolution supported by your Steam Deck. Adjust the resolution if necessary to ensure the games are displayed correctly.
- Refresh Rate: If your TV supports different refresh rate options, consider selecting a higher refresh rate to minimize motion blur and achieve smoother gameplay.
- Audio Output: If your TV supports various audio output options, select the appropriate one to ensure the sound from your games is played through the desired speakers.
- Input Labels: Consider labeling the HDMI input used for the Steam Deck as “Steam Deck” or any other recognizable name. This makes it easier to navigate among different input sources on your TV.
- Additional TV Features: Explore other TV settings that can enhance your gaming experience, such as adjusting brightness, contrast, and sharpness levels to your preference.
Keep in mind that the available settings may vary depending on your TV model. Refer to the TV’s user manual or consult the manufacturer’s website for specific guidance on adjusting the settings.
Once you have configured the TV settings, it’s time to adjust the display settings on your Steam Deck to ensure seamless gameplay. Continue reading to learn how to optimize the Steam Deck’s display settings.
Adjusting the Steam Deck Display Settings
After connecting your Steam Deck to the TV and configuring the TV settings, it’s important to optimize the display settings on your Steam Deck for the best gaming experience. Here’s how:
- On your Steam Deck, go to the system settings by clicking on the gear icon in the top-right corner of the home screen.
- Select “Display & sound” from the menu to access the display settings.
- Adjust the screen resolution to match the resolution supported by your TV for optimal visual quality. Select the recommended resolution if available.
- Consider adjusting the screen refresh rate if your Steam Deck and TV support higher refresh rates. A higher refresh rate can provide smoother gameplay.
- Explore other settings such as display brightness, color, and font size to customize your viewing experience according to your preference.
Keep in mind that the available display settings may vary depending on your Steam Deck model and software version. Refer to the user manual or official documentation for specific guidance on adjusting the display settings.
After making the necessary adjustments to the Steam Deck display settings, you’re all set to start playing games on the TV. However, if you encounter any issues or need further assistance, refer to the troubleshooting tips in the next section to help troubleshoot common problems.
Troubleshooting Tips
While connecting your Steam Deck to a TV is usually a straightforward process, you may encounter some issues along the way. Here are some troubleshooting tips to help you resolve common problems:
- No Signal on TV: Double-check the HDMI cable connections between the Steam Deck and the TV. Ensure that both devices are powered on and the TV is set to the correct HDMI input. Try using a different HDMI cable or connecting to a different HDMI input port on your TV.
- No Audio: If you’re not getting any sound, make sure the TV’s audio output is set to the correct source. If your TV doesn’t support audio output through HDMI, use additional audio cables to connect the sound output from the Steam Deck to your TV or external speakers.
- Unsupported Resolution: If the TV displays an “Unsupported Resolution” message, check the supported resolutions on both the Steam Deck and the TV. Adjust the resolution on both devices to ensure compatibility.
- Stuttering or Lag: If you experience stuttering or lag during gameplay on the TV, try reducing the resolution or adjusting the graphics settings in the games you’re playing. This helps optimize performance and minimize any issues related to hardware constraints.
- Firmware/Software Updates: Ensure that your Steam Deck and TV have the latest firmware and software updates installed. These updates often provide bug fixes, performance improvements, and additional compatibility features.
If you’re still encountering issues after trying these troubleshooting tips, consult the user manual for your Steam Deck, TV, or contact the respective support teams for further assistance.
With these troubleshooting tips, you should be able to overcome common challenges and enjoy a smooth gaming experience on your TV with the Steam Deck. Next, we’ll explore how to play games on the TV using your Steam Deck.
Playing Games on the TV with Steam Deck
Once you have successfully connected your Steam Deck to the TV and configured the necessary settings, you’re ready to start playing your favorite games on the big screen. Here’s how:
- Launch the Steam application on your Steam Deck.
- Select the game you want to play from your Steam library.
- Click on the “Play” button to start the game.
- Your Steam Deck’s screen will be mirrored on the TV, allowing you to enjoy the game on a larger display.
- Use your Steam Deck’s built-in controls or connect wireless game controllers to play the games comfortably from your couch.
With the Steam Deck’s powerful hardware and the ability to connect to a TV, you can enjoy an immersive gaming experience on a larger screen. Whether you’re playing single-player adventures or engaging in multiplayer battles, the Steam Deck provides a versatile gaming platform that can be enjoyed in the comfort of your living room.
Remember to adjust any in-game settings, such as display resolution and graphics quality, to suit your preferences and ensure the best visual performance on your TV.
Additionally, take advantage of features like Steam Big Picture Mode to navigate through your game library and explore other entertainment options available on the Steam platform.
Keep in mind that the performance of games on the TV may vary depending on the game’s graphics requirements and the capabilities of your Steam Deck. Adjust the game settings as needed to achieve a smooth and enjoyable gaming experience.
Now that you know how to play games on the TV with your Steam Deck, you can sit back, relax, and enjoy the excitement of gaming on the big screen.
Additional Tips and Considerations
When connecting your Steam Deck to a TV, here are some additional tips and considerations to enhance your gaming experience:
- Optimal Distance: Position yourself at an optimal distance from the TV to have a comfortable and immersive gaming experience. Find a distance that allows you to see the screen clearly without straining your eyes.
- Wireless Connectivity: Take advantage of the Steam Deck’s wireless connectivity options. Connect wireless headphones or speakers for an immersive audio experience without the hassle of cables.
- Game Controller Compatibility: Ensure that the game controllers you plan to use with your Steam Deck are compatible with both the Steam Deck and the games you want to play. Refer to the Steam Deck’s documentation or contact the controller manufacturer for compatibility information.
- Internet Speed: For online multiplayer gaming or downloading games, a stable and fast internet connection is essential. Connect your Steam Deck to a reliable Wi-Fi network or use an Ethernet cable for the best online gaming experience.
- Game Streaming: Take advantage of game streaming services that are compatible with your Steam Deck. This allows you to play games from cloud-based platforms on your TV, further expanding your gaming library.
- Screen Mirroring: If you prefer to use your TV as a secondary display instead of mirroring the Steam Deck’s screen, configure your TV’s settings accordingly. This allows you to use the TV for browsing, streaming media, or other tasks while gaming on your Steam Deck.
Keep in mind that these tips may vary depending on your specific setup and preferences. Experiment with different settings and configurations to find what works best for you.
Lastly, always ensure that your Steam Deck is properly stored and protected when not in use. Use a carrying case or sleeve to prevent any damage during transportation.
By following these additional tips and considerations, you can optimize your gaming experience and make the most out of your Steam Deck when connected to a TV.