
What is a Nest Thermostat?
The Nest Thermostat is a smart home device developed by Nest Labs, a subsidiary of Google. It is designed to help you control and monitor the temperature of your home, making it more energy-efficient and comfortable. The Nest Thermostat learns your schedule and adapts to your heating and cooling needs, saving you money on energy bills.
One of the key features of the Nest Thermostat is its ability to connect to your Wi-Fi network. This allows you to control the temperature settings from anywhere using your smartphone or computer. You can easily adjust the temperature even when you’re not at home, ensuring that your house is always at the desired comfort level.
The Nest Thermostat also comes with a variety of advanced features. It uses sensors to detect when you’re away from home and automatically adjusts the temperature to conserve energy. It can even learn your preferred temperature settings over time and create a personalized schedule for different times of the day or week.
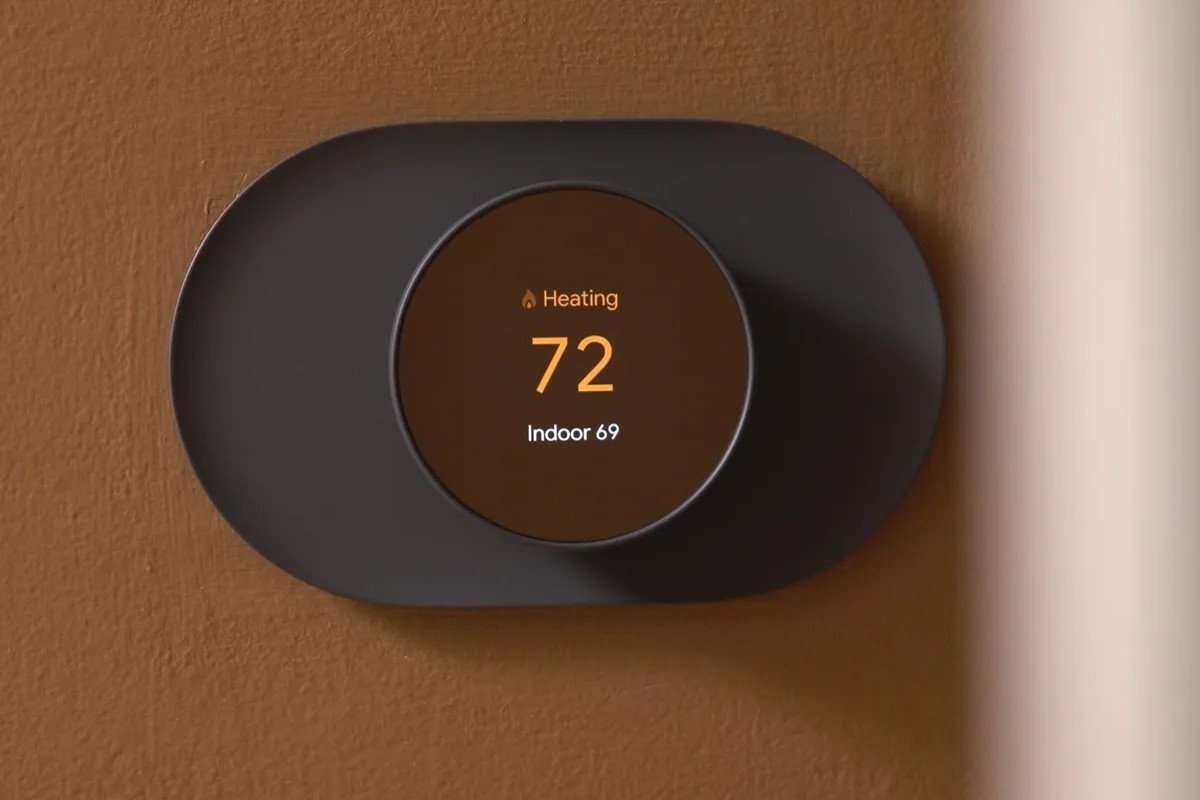
In addition to its smart features, the Nest Thermostat is also aesthetically pleasing. It has a sleek and modern design, with a clear display that shows the current temperature and other relevant information. The thermostat itself is easy to install and works with most HVAC systems, making it a versatile option for any home.
Overall, the Nest Thermostat is an innovative and user-friendly device that offers both convenience and energy savings. Whether you’re looking to reduce your carbon footprint, lower your energy bills, or simply have more control over your home’s temperature, the Nest Thermostat is a smart choice.
What do you need to connect a Nest Thermostat?
Before you can connect a Nest Thermostat, there are a few things you need to ensure a successful installation:
- Compatibility: Check if your existing HVAC system is compatible with the Nest Thermostat. You can use the online compatibility checker provided by Nest to verify if your system works with their thermostat.
- Wi-Fi Network: A stable Wi-Fi network is necessary for the Nest Thermostat to connect and function properly. Ensure that you have a reliable internet connection at your home.
- Power Sources: The Nest Thermostat requires a power source to operate. Most HVAC systems use a low-voltage wire to supply power to the thermostat, but some systems might require additional power sources, such as a C wire or Power Extender Kit. Check your system’s wiring to determine if any additional power sources are needed.
- Tools: Gather the necessary tools for installation, which typically include a screwdriver, wire stripper, wire connectors, and a level. Having these tools ready will make the installation process easier.
It’s important to note that if you’re uncomfortable or unsure about any step of the installation process, it’s recommended to seek professional help from a licensed HVAC technician. They can ensure the correct installation and ensure the Nest Thermostat is properly connected.
Once you have everything ready, you can proceed with the installation process. In the following steps, we’ll guide you through the process of connecting a Nest Thermostat to your HVAC system and Wi-Fi network.
Step 1: Turn off your HVAC system
Before beginning the installation process, it’s important to turn off your HVAC (heating, ventilation, and air conditioning) system. This ensures your safety and prevents any potential damage to the system during the installation.
To turn off your HVAC system, locate the main power switch or circuit breaker that controls the power supply to your system. This switch is typically found near the indoor unit or in the electrical panel of your home.
If you’re unsure about the location of the main power switch or circuit breaker, consult the user manual of your HVAC system or contact a professional for assistance.
Once you’ve located the main power switch or circuit breaker, carefully switch it off to disconnect power from your HVAC system. Take note that some systems may have multiple power switches or breakers, so ensure that you turn off all of them.
After turning off the power, it’s always a good idea to check if the system is completely off by adjusting the temperature settings on your existing thermostat. If no air blow or temperature change occurs, this confirms that your HVAC system is powered off.
Turning off your HVAC system not only guarantees your safety but also provides a stable environment for the installation process. The next step is to remove your old thermostat, which we will guide you through in the following section.
Step 2: Remove your old thermostat
Once you have turned off your HVAC system, the next step is to remove your old thermostat. Removing the old thermostat is necessary to make way for the installation of the Nest Thermostat.
- Turn off your system’s power: Before removing the old thermostat, double-check that the power to your HVAC system is turned off. This can be done by switching off the main power switch or circuit breaker as mentioned in the previous step.
- Remove the thermostat cover: Carefully remove the cover of your old thermostat. In most cases, the cover can be detached by gently pulling it away from the wall. If there are any screws holding the cover in place, use a screwdriver to remove them before lifting off the cover.
- Note the wiring connections: Take note of the wiring connections on your old thermostat. You can either take a photo of the wiring or make a diagram to keep track of the wires and their respective terminals. This will help you connect the wires correctly to the Nest Thermostat later on.
- Disconnect the wires: Once you have noted the wiring connections, carefully disconnect the wires from the terminals on the old thermostat. To do this, loosen the terminal screws or release any locking tabs to free the wires.
- Remove the mounting plate: After the wires are disconnected, remove the mounting plate of the old thermostat from the wall. This is typically done by loosening the screws that secure the plate in place. Once the screws are loosened, you can lift the plate off the wall.
- Inspect and prepare the wall: With the old thermostat removed, inspect the wall to ensure it is clean and free of any debris or protruding wires. If necessary, patch any holes left by the previous thermostat to create a smooth surface for the installation of the Nest Thermostat.
By following these steps, you can safely remove your old thermostat and prepare the wall for the installation of the Nest Thermostat in the next steps.
Step 3: Install the Nest base
After removing your old thermostat, you can now proceed to install the Nest Thermostat base. The base serves as the foundation for the thermostat and enables it to connect to your HVAC system.
- Prepare the Nest base: Take out the Nest base from the packaging and ensure that all necessary components, such as screws and a mounting plate, are included. Familiarize yourself with the different parts to ensure a smooth installation.
- Position the base: Choose a suitable location on the wall where you want to install the Nest Thermostat. The location should be centrally located and easily accessible for temperature adjustments. Use a level to ensure that the base will be mounted straight.
- Mount the base: Place the mounting plate on the wall, aligning it with any screw holes or markings left by the previous thermostat. Secure the mounting plate in place using screws or adhesive strips, depending on the type of mounting option provided by Nest.
- Connect the wires: Take the wires that you disconnected from your old thermostat and thread them through the opening on the base plate. Gently guide the wires to their respective terminals on the Nest base.
- Secure the wires: Once the wires are in place, use a screwdriver to tighten the terminal screws on the Nest base. Ensure that the wires are securely connected and there is no chance of them coming loose or contacting each other.
By following these steps, you can effectively install the Nest base and prepare it for the next step of connecting the wires. Ensure that the base is firmly mounted to the wall to provide a stable platform for the Nest Thermostat.
Step 4: Connect the wires to the Nest base
With the Nest Thermostat base securely installed on the wall, the next step is to connect the wires from your HVAC system to the Nest base. This step ensures that the thermostat can communicate and control your heating and cooling equipment effectively.
- Identify the wires: Take a look at the wires you removed from your old thermostat. Each wire is typically labeled with a letter or color-coded to represent its function. Common labels include R (power), W (heat), Y (cool), and G (fan).
- Refer to the Nest Thermostat wiring diagram: Consult the Nest Thermostat installation guide or use the online compatibility checker to determine the correct wiring configuration for your specific system. The wiring diagram will provide guidance on which terminals the wires should be connected to on the Nest base.
- Connect the wires: Match each wire from your HVAC system to the appropriate terminal on the Nest base. Use a screwdriver to loosen the terminal screws, insert the wires into the designated terminals, and then tighten the screws to secure the connections.
- Additional wire considerations: Some HVAC systems may require additional wires, such as a C wire (common wire) or a Power Extender Kit, for proper power supply. If needed, follow the specific wiring instructions provided by Nest to ensure a successful connection.
- Double-check the connections: Once all the wires are connected, double-check that they are properly seated in their respective terminals. Give each wire a gentle tug to confirm that they are securely fastened.
- Label the wires: To make future maintenance or troubleshooting easier, use the included wire labels or create your own labels to identify the wires connected to the Nest base. This will help you quickly identify each wire’s function if needed.
By carefully connecting the wires to the Nest base according to the wiring diagram and instructions, you can ensure that the Nest Thermostat is ready to control your HVAC system effectively.
Step 5: Attach the Nest display
After connecting the wires to the Nest base, the next step is to attach the Nest display. The display serves as the control panel for your Nest Thermostat, allowing you to adjust settings and view temperature information.
- Remove the protective film: Start by removing any protective film or packaging from the Nest display. This ensures a clear and pristine screen for optimal visibility.
- Align and attach the display: Hold the Nest display near the Nest base, aligning the connectors on the display with the corresponding connectors on the base. Gently press the display onto the base, ensuring that the connectors are securely connected.
- Secure the display: Once the display is attached to the base, use the provided screws or adhesive strips to secure the display in place. Follow the instructions provided by Nest to ensure a secure and stable attachment.
- Adjust the display’s angle: The Nest Thermostat display is designed to pivot and adjust its angle for optimal viewing. Adjust the display to the desired angle, ensuring that it can be easily viewed and accessed from your preferred location.
- Test the display: Once the display is securely attached, test its functionality by pressing different buttons and navigating through the menu options. Ensure that the display is responding accurately and displaying the appropriate information.
By following these steps, you can successfully attach the Nest display to the Nest base. The display serves as the user interface for the thermostat, allowing you to interact with and control the temperature settings in your home.
Step 6: Turn on your HVAC system
After completing the installation of the Nest Thermostat and attaching the display, the next crucial step is to turn on your HVAC system. This step allows the thermostat to start communicating with the HVAC equipment and regulate the temperature in your home.
- Locate the main power switch: Find the main power switch or circuit breaker that controls the power supply to your HVAC system. This switch is typically located near the indoor unit or in the electrical panel of your home.
- Turn on the power: Carefully flip the main power switch or turn on the circuit breaker to restore power to your HVAC system. This action allows the system to begin functioning and prepares it for communication with the Nest Thermostat.
- Listen for the system startup: Once the power is restored, listen for any sounds indicating that the HVAC system is starting up. You may hear the fan running or feel a change in air circulation. These are positive signs that your system is operational.
- Observe the Nest Thermostat: As the HVAC system powers on, pay attention to the Nest Thermostat display. It should light up and display relevant information, such as the current temperature or on-screen prompts that guide you through the initial setup process.
- Ensure the system is running smoothly: Monitor your HVAC system for a few minutes to ensure it is running smoothly and responding appropriately to commands from the Nest Thermostat. If you notice any unusual behavior or issues, consult the Nest support resources or reach out to a professional technician for assistance.
By following these steps and properly turning on your HVAC system, you enable the Nest Thermostat to pçontrol and regulate the temperature in your home effectively. This step is crucial for ensuring that your heating and cooling equipment function properly in conjunction with the Nest Thermostat.
Step 7: Connect the Nest Thermostat to Wi-Fi
Connecting the Nest Thermostat to your Wi-Fi network is an essential step that allows you to control the thermostat remotely and access additional features through the Nest app. Follow these steps to connect the thermostat to Wi-Fi:
- Ensure your Wi-Fi network is active: Make sure that your Wi-Fi network is up and running. Check the network settings on your smartphone or computer to confirm its availability and stability.
- Access the Nest Thermostat settings: On the Nest display, go to the settings menu by pressing the display and selecting the gear icon in the top right corner.
- Select “Network” and “Connect to Wi-Fi”: In the settings menu, navigate to the “Network” option and select “Connect to Wi-Fi” to initiate the Wi-Fi setup process.
- Follow the on-screen prompts: The Nest Thermostat will display a list of available Wi-Fi networks. Select your network from the list and enter your Wi-Fi password if prompted.
- Wait for connection: Once the correct network name and password are entered, the Nest Thermostat will attempt to connect to your Wi-Fi network. It may take a few moments for the connection to establish.
- Confirm successful connection: Once connected, the Nest Thermostat will display a confirmation message or the Wi-Fi icon to indicate a successful connection. This means that the thermostat can now communicate with the Nest app and other devices on your network.
After connecting the Nest Thermostat to your Wi-Fi network, you can control and monitor your thermostat remotely using the Nest app on your smartphone or computer. This allows you to adjust the temperature, create schedules, and access advanced features and settings from anywhere.
It’s important to note that a stable Wi-Fi connection is crucial for the proper functioning of the Nest Thermostat. If you experience any connectivity issues, ensure that your Wi-Fi signal is strong and consider troubleshooting or seeking assistance from Nest support.
Step 8: Set up the Nest Thermostat
Once you have connected your Nest Thermostat to Wi-Fi, the next step is to set up the thermostat for optimal performance and personalized comfort. Follow these steps to complete the initial setup:
- Launch the Nest app: Download and install the Nest app on your smartphone or tablet. Open the app and sign in to your Nest account or create a new account if you haven’t done so already.
- Add your Thermostat: In the app, tap on the “+” or “Add” button to add a new device. Select “Thermostat” from the list of available devices and follow the on-screen instructions to add your Nest Thermostat to the app.
- Verify the serial number: The Nest app will prompt you to verify the serial number of your Nest Thermostat. This can be found on the packaging or on the back of the thermostat display. Enter the serial number correctly to proceed.
- Configure your preferences: The app will guide you through a series of setup options, including selecting your HVAC system type, setting temperature units (Celsius or Fahrenheit), and choosing your desired energy-saving features. Make the appropriate selections based on your preferences.
- Set your schedule: The Nest Thermostat allows you to create a personalized schedule for different times of the day or week. Set your desired temperature settings for wake-up, leave, return, and bedtime to maximize comfort and energy efficiency.
- Explore additional features: The Nest app provides access to various additional features, such as home/away assist, which automatically adjusts the temperature when you leave or return home, and energy usage reports to help you monitor and optimize your energy consumption.
- Test the settings: After completing the setup, test your thermostat settings to ensure that the temperature adjusts according to your preferences. Make any necessary adjustments in the app, and observe the thermostat’s response.
By following these steps and configuring your preferences, your Nest Thermostat is now set up and ready to provide personalized comfort and energy efficiency for your home. You can continue to fine-tune the settings in the app and make adjustments as needed based on your lifestyle and preferences.
Step 9: Customize your Nest settings
Once you’ve completed the initial setup of your Nest Thermostat, it’s time to customize the settings to tailor the thermostat to your specific preferences and needs. These settings allow you to further optimize your comfort, energy efficiency, and overall experience with the thermostat. Follow these steps to customize your Nest settings:
- Access the Nest app: Launch the Nest app on your smartphone or tablet and sign in to your Nest account, if not already signed in.
- Explore the thermostat settings: Navigate through the app to find the thermostat settings menu. This menu typically includes options such as temperature display units, language selection, and system mode settings.
- Adjust temperature settings: Fine-tune the temperature settings to your liking. You can set different temperatures for heating and cooling, configure specific temperature ranges for different times of the day, and even create custom temperature schedules for specific days or occasions.
- Enable energy-saving features: Take advantage of the various energy-saving features offered by the Nest Thermostat. These features, such as Eco Mode and Home/Away Assist, help optimize energy consumption and save on utility bills.
- Explore advanced settings: Dive into the advanced settings menu to discover additional features and options specific to your Nest Thermostat model. This may include settings for fan control, humidifier or dehumidifier integration, and temperature limits.
- Set up notifications: Configure notifications to receive alerts and reminders from your Nest Thermostat. These notifications can include reminders to change air filters, maintenance notifications, and energy usage reports.
- Integrate with other smart home devices: If you have other compatible smart home devices, such as smart speakers or smart home hubs, explore integrations to control your Nest Thermostat using voice commands or automation routines.
- Regularly review and adjust settings: As seasons change or your lifestyle evolves, regularly review and adjust your Nest Thermostat settings to ensure optimal comfort and energy efficiency. Fine-tuning the settings based on your changing needs will help you get the most out of your thermostat.
By customizing the Nest settings according to your preferences and requirements, you can create a personalized and comfortable environment while maximizing energy savings. Take advantage of the various features and options available to fully optimize your Nest Thermostat experience.
Troubleshooting common issues
While the Nest Thermostat is a reliable and user-friendly device, you may encounter some common issues that can be easily resolved. Here are a few troubleshooting steps for common problems:
- No power or display: If your Nest Thermostat is not responsive or has no power, check the power source. Ensure that the wires are securely connected to the Nest base and that the HVAC system has power. If necessary, check the circuit breaker or replace the thermostat’s batteries if applicable.
- Wi-Fi connectivity issues: If your Nest Thermostat is having trouble connecting to your Wi-Fi network, ensure that your Wi-Fi signal is strong and that you’ve entered the correct network name and password during the setup process. Check that your Wi-Fi network is functioning properly and consider restarting your router if necessary.
- Inaccurate temperature readings: If you notice discrepancies between the temperature displayed on your Nest Thermostat and the actual room temperature, make sure the thermostat is placed away from direct sources of heat or drafts. You can also calibrate the temperature sensor in the settings menu of the Nest app.
- Heating or cooling issues: If your HVAC system is not heating or cooling properly, verify that the wires are correctly connected to the Nest base and that the system is set to the correct mode (heat or cool) in the Nest app. Check your HVAC system’s filters to ensure they are clean and not obstructing airflow.
- Compatibility issues: If you’re experiencing compatibility problems with your HVAC system, consult the Nest compatibility checker to ensure that your system is compatible with the Nest Thermostat. If compatibility issues persist, reach out to Nest support or consult a professional HVAC technician for assistance.
- App or software issues: If you’re experiencing any difficulties with the Nest app or software, ensure that you have the latest version installed on your device. Try restarting the app or clearing its cache. If problems persist, contact Nest support for further assistance.
If you’ve exhausted troubleshooting steps and encounter persistent issues with your Nest Thermostat, it’s recommended to consult the Nest support resources, including their online documentation or customer support channels, for further guidance and assistance specific to your situation.
Remember, if you’re uncomfortable troubleshooting or dealing with any electrical components, it’s always best to seek professional help from a licensed HVAC technician or Nest-certified professional to ensure proper resolution and safety.