
Enable Spring-Loaded Folders
If you often find yourself navigating through numerous folders on your Mac, the spring-loaded folders feature in Finder can greatly streamline your workflow. With this feature enabled, you can quickly browse through nested directories and access the desired files or folders without manually clicking through each level of the hierarchy.
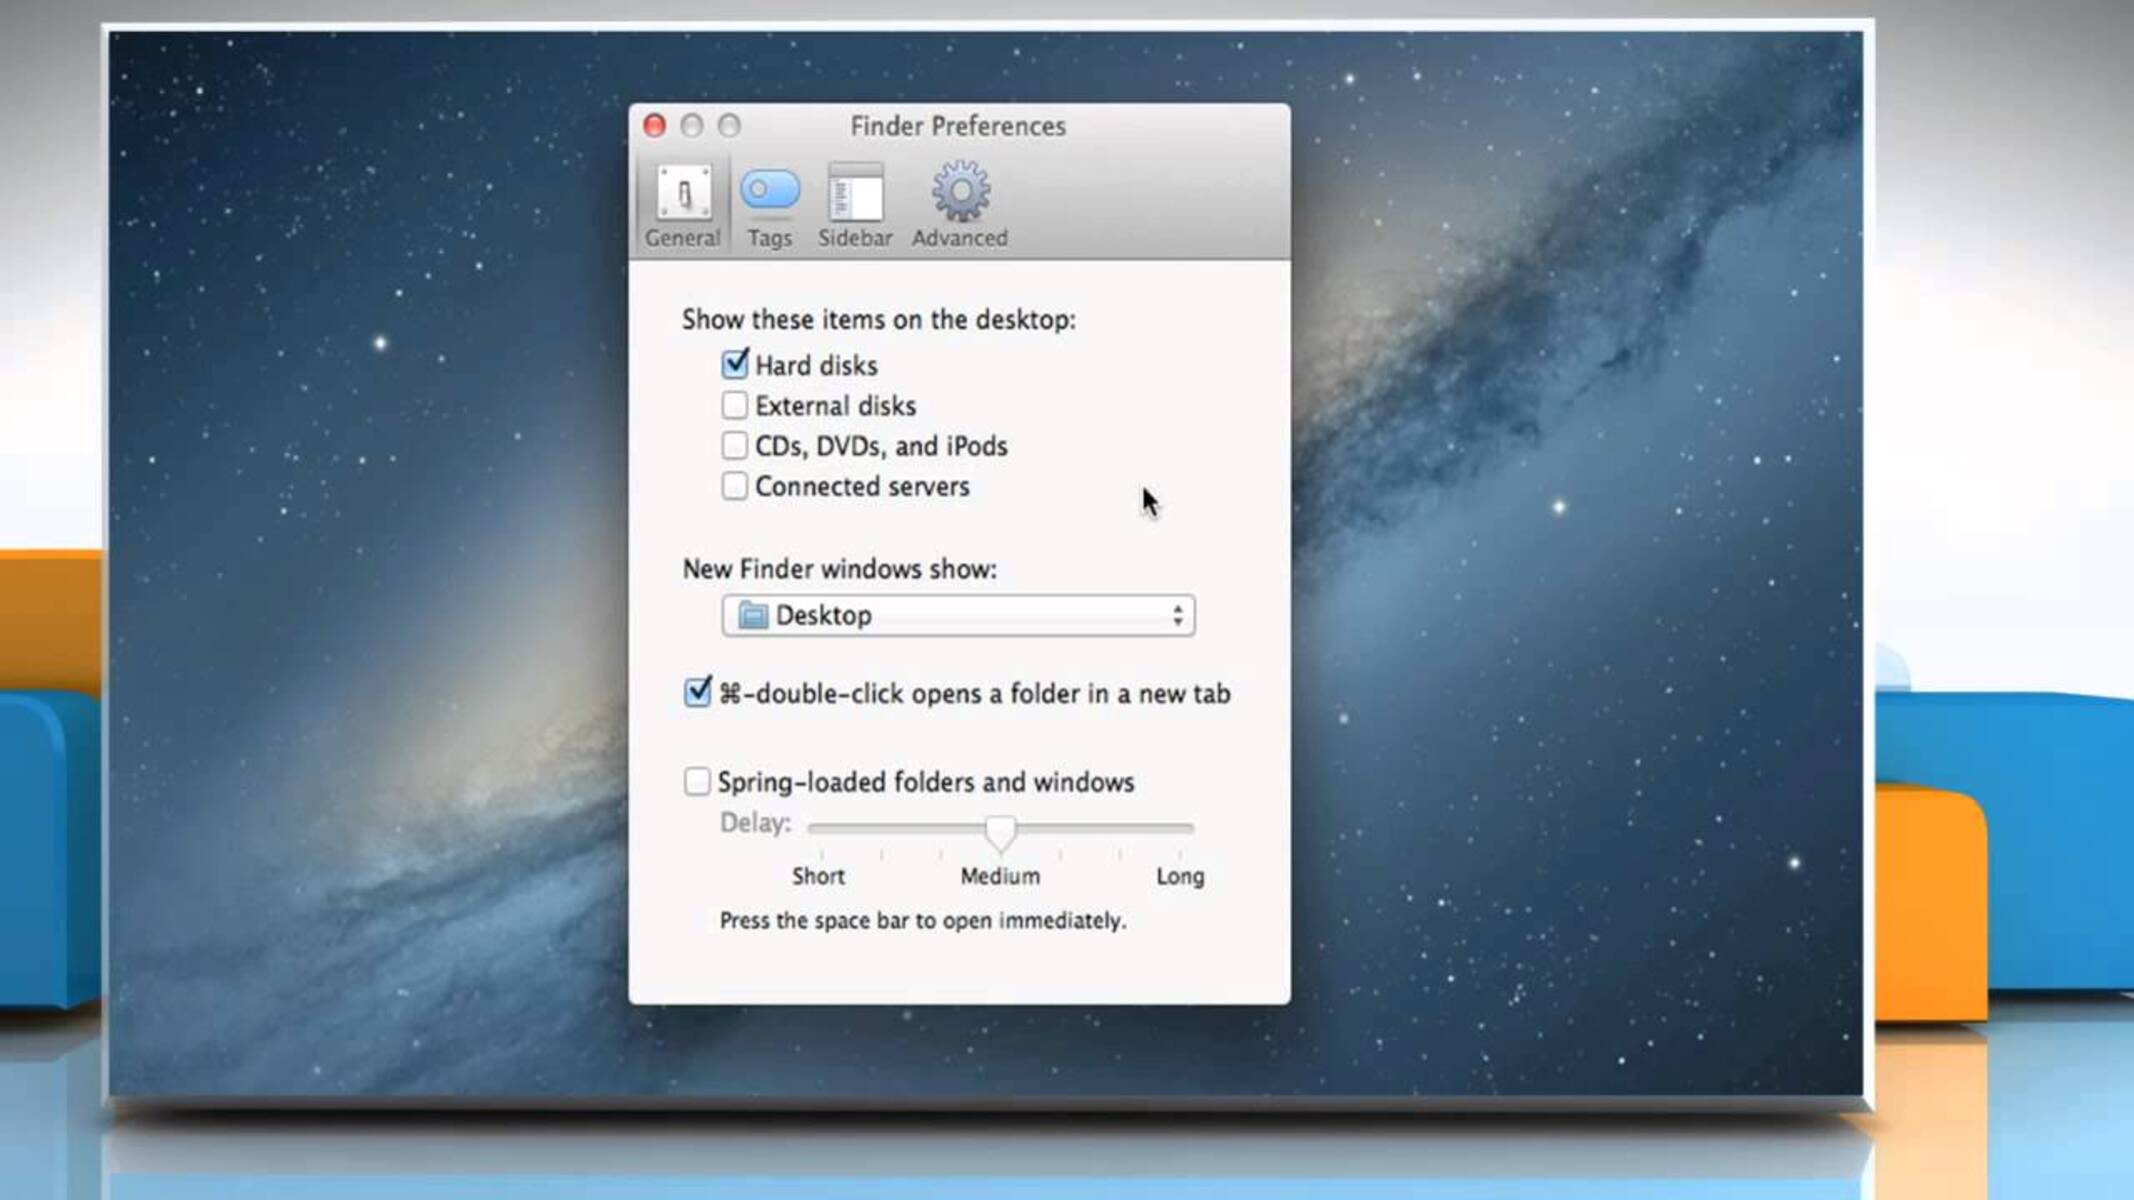
To enable spring-loaded folders, follow these steps:
- Open a Finder window on your Mac.
- Click on the “Finder” menu in the top menu bar.
- Select “Preferences” from the drop-down menu.
- In the Preferences window, click on the “General” tab.
- Check the box next to “Spring-loaded folders and windows”.
Once you have enabled spring-loaded folders, you can start taking advantage of this convenient feature. Simply hover your cursor over a folder, and after a brief delay, the folder will automatically open. This allows you to navigate through the folder structure with ease. If you decide to explore a sub-folder within the spring-loaded folder, simply hover over the sub-folder, and it will open as well. You can continue this process until you reach the desired location.
Spring-loaded folders can significantly speed up your file browsing experience, especially when dealing with complex directory structures. By reducing the number of clicks required to access files and folders, you can save time and effort while working on your Mac.
Now that you have enabled spring-loaded folders, let’s explore how you can further customize this feature to suit your preferences.
Adjust Spring-Loaded Folders Activation Delay
By default, the activation delay for spring-loaded folders is set to a specific time interval. However, you may find that the default delay is either too short or too long for your liking. Luckily, macOS allows you to adjust this activation delay according to your preference.
To adjust the spring-loaded folders activation delay, follow these steps:
- Open a Finder window on your Mac.
- Click on the “Finder” menu in the top menu bar.
- Select “Preferences” from the drop-down menu.
- In the Preferences window, click on the “General” tab.
- Next to “Spring-loaded folders and windows,” you will find a slider to adjust the activation delay.
- Drag the slider to the left to reduce the delay or to the right to increase it.
As you adjust the activation delay, you will notice the change in responsiveness as you hover over folders. Decreasing the delay will make the folders open more quickly, while increasing it will provide a longer delay before the folder opens.
The ability to customize the activation delay allows you to fine-tune the spring-loaded folders feature to your desired level of responsiveness. Experiment with different delay settings until you find the one that best suits your workflow and browsing preferences.
Now that you have adjusted the activation delay for spring-loaded folders, let’s move on to customizing the behavior of these folders.
Customize Spring-Loaded Folder Behavior
While spring-loaded folders provide a convenient way to navigate through nested directories, you may want to customize their behavior further to better align with your workflow. Fortunately, macOS offers options to modify various aspects of spring-loaded folders.
To customize the behavior of spring-loaded folders, follow these steps:
- Open a Finder window on your Mac.
- Click on the “Finder” menu in the top menu bar.
- Select “Preferences” from the drop-down menu.
- In the Preferences window, click on the “General” tab.
- Next to “Spring-loaded folders and windows,” click on the “Options…” button.
In the “Spring-Loaded Folders and Windows” options window, you will find several customization options:
- Double-click speed: Adjust the speed at which a double-click is registered. This setting can affect the activation of spring-loaded folders when you double-click on a folder.
- Spring-loaded folders: Choose between “Hover” and “Click” activation modes. In “Hover” mode, folders will open automatically after a certain delay when you hover over them. In “Click” mode, you need to click on a folder to make it open.
By customizing these settings, you can adapt the behavior of spring-loaded folders to better suit your preferences and working style. Whether you want instant folder opening with a hover or prefer a more deliberate click-based approach, macOS offers flexibility to cater to your needs.
Now that you know how to customize the behavior of spring-loaded folders, let’s explore the option to enable dragging of these folders for even more efficient file management.
Enable Dragging of Spring-Loaded Folders
Dragging and dropping files and folders is a common task when organizing and managing your files on a Mac. With the spring-loaded folders feature enabled, you can easily drag files into nested directories without having to manually navigate through each level.
To enable dragging of spring-loaded folders, follow these steps:
- Open a Finder window on your Mac.
- Click on the “Finder” menu in the top menu bar.
- Select “Preferences” from the drop-down menu.
- In the Preferences window, click on the “Advanced” tab.
- Check the box next to “Spring-loaded folders and windows allow dragging”.
Once you enable this feature, you can effortlessly drag files or folders to a spring-loaded folder without having to wait for it to fully open. Simply hover over the spring-loaded folder, and after a brief delay, the folder will automatically open, allowing you to drop the item into the desired location.
This feature saves you time and effort by eliminating the need to manually open each folder in the destination hierarchy. Whether you’re organizing files or moving them to specific directories, dragging and dropping with spring-loaded folders enabled enhances your productivity and workflow.
Now that you have enabled dragging of spring-loaded folders, you can adjust the activation delay to further optimize your file management experience. Let’s explore how to do that next.
Adjust Dragging of Spring-Loaded Folders Activation Delay
The activation delay for dragging spring-loaded folders determines how long you need to hover over a folder before it opens. By default, macOS sets a specific delay for this action. However, you can adjust it to your preference, allowing for a more personalized and efficient file management experience.
To adjust the activation delay for dragging spring-loaded folders, follow these steps:
- Open a Finder window on your Mac.
- Click on the “Finder” menu in the top menu bar.
- Select “Preferences” from the drop-down menu.
- In the Preferences window, click on the “Advanced” tab.
- Locate the “Spring-loaded folders and windows” section.
- Adjust the slider next to “Delay when spring loading folders during drag operations” to increase or decrease the activation delay.
You can slide the control to the left to decrease the delay, allowing the folder to open more quickly when you drag an item over it. Conversely, sliding it to the right increases the delay, giving you more time to position the item before the folder opens.
By fine-tuning the activation delay for dragging spring-loaded folders, you can optimize your workflow and file management efficiency. Experiment with different delay settings to find the sweet spot that works best for you.
Now that you have adjusted the activation delay for dragging spring-loaded folders, you may have times when you’d prefer to temporarily disable this feature. Let’s explore how to do that next.
Disable Spring-Loaded Folders
If you find that the spring-loaded folders feature in Finder is not aligning with your workflow or causing unintended delays, you have the option to disable it. Disabling this feature will allow you to navigate through folders in a traditional click-based manner.
To disable spring-loaded folders, follow these steps:
- Open a Finder window on your Mac.
- Click on the “Finder” menu in the top menu bar.
- Select “Preferences” from the drop-down menu.
- In the Preferences window, click on the “General” tab.
- Uncheck the box next to “Spring-loaded folders and windows”.
Once you disable spring-loaded folders, you will need to manually click on each folder to navigate through hierarchical structures. This can be useful if you prefer a more controlled and precise approach when browsing your files and folders.
Disabling spring-loaded folders does not remove the feature entirely from your Mac. You can always re-enable it by following the same steps mentioned earlier and checking the “Spring-loaded folders and windows” option again.
If you have disabled spring-loaded folders but later decide to re-enable them, you can easily do so by revisiting the preferences and checking the appropriate box.
Now that you know how to disable spring-loaded folders, let’s explore how to reset them to their default settings if needed.
Reset Spring-Loaded Folders to Default Settings
If you have made several customizations to the spring-loaded folders feature in Finder and want to revert to the default settings, you can easily reset it. This will restore the original behavior and settings of spring-loaded folders on your Mac.
To reset spring-loaded folders to their default settings, follow these steps:
- Open a Finder window on your Mac.
- Click on the “Finder” menu in the top menu bar.
- Select “Preferences” from the drop-down menu.
- In the Preferences window, click on the “Advanced” tab.
- Locate the “Spring-loaded folders and windows” section.
- Click on the “Reset…” button.
By clicking the “Reset…” button, macOS will reset all customizations made to the spring-loaded folders feature. This includes the activation delay, dragging behavior, and any other adjustments made in the preferences related to spring-loaded folders.
Once you reset the spring-loaded folders, they will revert to their default settings, offering the standard behavior and interactions provided by macOS. This can be useful if you want to start fresh or undo any changes that may have impacted your workflow negatively.
Remember that resetting spring-loaded folders will affect all aspects of this feature, so make sure to consider your modifications before proceeding with the reset.
With the ability to reset spring-loaded folders, you can always restore the default settings whenever needed.