
Why Clear Your Google Search History?
Your browsing history is like a digital trail of your online activities, and it includes every search query you have ever made on Google. While this history can be helpful for quickly accessing previous searches or recommendations, there are several reasons why you may want to consider clearing your Google search history from time to time.
Privacy Concerns: Clearing your search history helps protect your online privacy. It prevents others from accessing your device and seeing your search activity, which can include sensitive or personal information. Whether you are using a shared computer or simply want to keep your online activities confidential, clearing your search history is essential.
Security Reasons: Clearing your search history can also help mitigate potential security risks. By removing your search queries, you reduce the chance of accidentally revealing personal information or leaving behind a digital footprint that could be exploited by malicious individuals.
Preventing Targeted Advertising: Have you ever noticed how the ads you see online seem closely related to your recent searches? This is because search history is used to create targeted advertisements. Clearing your search history can help prevent personalized ads from following you around the internet.
Decluttering Search Suggestions: Have you ever started typing something in Google, only to be greeted with a list of suggestions based on your previous searches? If you find these suggestions intrusive or irrelevant, clearing your search history can help declutter and improve your search experience.
Starting Fresh: Clearing your search history gives you a fresh start, allowing you to explore new topics or search for different information without any previous biases or influences affecting your search results. Whether you are conducting research, planning a surprise gift, or simply wanting a clean slate, clearing your search history can be liberating.
Enhancing Performance: Deleting your search history can help improve the performance of your device. Over time, your search history grows, and the cache files associated with it can take up valuable storage space. Clearing this history can free up storage and potentially enhance the speed and efficiency of your device.
Controlling Your Digital Footprint: When you clear your Google search history, you have more control over your digital footprint. This can be particularly important if you are concerned about your online presence or if you are planning to sell or give away a device.
Protecting Personal Information: Clearing your search history is especially important if you have conducted searches that involve personal, sensitive, or confidential information. By regularly clearing your search history, you can help prevent unintended access to this information.
Keeping Up with Good Online Practices: Taking the time to clear your search history is a good habit to adopt as part of your overall online security and privacy practices. It demonstrates an awareness of the potential risks associated with leaving behind a trail of your search activity.
While clearing your search history has its benefits, it is important to note that it does not make you completely invisible online. Other forms of data collection, such as cookies and tracking technologies, may still be used to monitor your online activities. Incorporating additional privacy measures, such as using a VPN, can further enhance your online security and anonymity.
How to Clear Your Google Search History on a Desktop
If you frequently use Google on your desktop and want to clear your search history, follow these simple steps:
- Open your preferred web browser on your desktop computer.
- Go to the Google homepage by typing “www.google.com” in the address bar and pressing Enter.
- Click on the “Settings” option located at the bottom right corner of the Google homepage.
- From the dropdown menu, select “Your data in Search.”
- A new page will open where you can manage your search activity. Click on the “Delete last hour” option to remove any search queries made in the last hour. If you wish to clear your entire search history, click on “Delete all activity” and confirm your decision.
- Google may ask you to sign in to your Google account if you haven’t already done so. Enter your credentials to proceed.
- Once you have selected the desired option, Google will start deleting your search history. This process may take a few moments, depending on the amount of data to be cleared.
- Once the deletion process is complete, you will receive a notification confirming that your search history has been cleared.
- To double-check that your search history has indeed been cleared, perform a sample search on Google and see if any of your previous queries appear in the suggestions.
Please note that clearing your search history only applies to the device and web browser you are using. If you use multiple devices or browsers, you will need to repeat these steps on each individual device to ensure your search history is completely cleared.
If you have signed in to your Google account on other devices, such as a mobile device or another computer, you may need to clear your search history separately on those devices as well.
Clearing your search history is a simple and effective way to maintain your privacy and control the information available about your online activities. It is a good practice to periodically clear your search history to ensure that your online presence remains secure and protected.
How to Clear Your Google Search History on a Mobile Device
If you frequently use Google on your mobile device and want to clear your search history, follow these simple steps:
- Open the Google app on your mobile device. Ensure that you are signed in to your Google account.
- In the search bar at the top of the screen, tap on your profile picture or initials.
- From the dropdown menu, tap on “Search activity.”
- You will be taken to a page where you can manage your search activity. Tap on the three-dot menu icon in the top-right corner of the screen.
- From the menu that appears, select “Delete activity by” to choose the time range of the search history you want to clear.
- Select the desired time range, such as “Last hour,” “Last day,” “All time,” or a custom range.
- Tap on the “Delete” button to confirm your decision and clear your search history within the selected time range.
- If you want to clear your entire search history, tap on the “Delete all” option. Keep in mind that this action cannot be undone.
- Google will initiate the deletion process and notify you once your search history has been cleared.
- To ensure that your search history has been successfully deleted, perform a new search and check if any of your previous queries appear in the search suggestions.
Clearing your search history on a mobile device is an important step to protect your privacy and ensure that your online activities remain confidential. It is recommended to regularly clear your search history to maintain control over the information stored on your device.
Please note that clearing your search history on a mobile device only applies to the Google app. If you use other web browsers or search apps on your mobile device, you will need to follow their respective procedures to clear your search history within those apps as well.
Additionally, if you are using a Google account on multiple devices, such as a phone and a tablet, you may need to clear your search history separately on each device to ensure that your search activity is completely cleared.
By regularly clearing your search history, you can enjoy a more private and personalized search experience while maintaining control over your online activities.
Clearing Google Search History on the Google App
The Google app is a popular choice for quickly searching the web on mobile devices. If you want to clear your search history within the Google app, follow these simple steps:
- Open the Google app on your mobile device.
- Tap on the profile picture or initials located in the top-right corner of the screen.
- In the menu that appears, select “Search history.”
- You will be taken to a page that displays your recent search activity within the Google app.
- To clear your entire search history, tap on the three-dot menu icon in the top-right corner of the screen.
- From the menu that appears, select “Delete options.”
- You will be presented with two options: “Delete last hour” and “Delete custom range.”
- If you want to remove your search history from the last hour, select “Delete last hour.”
- If you prefer to specify a custom range, select “Delete custom range” and choose the desired time period to clear your search history within that range.
- Tap on the “Delete” button to confirm your decision and remove the selected search history.
- If you wish to clear your entire search history, tap on the “Delete all” option instead. Keep in mind that this action cannot be undone.
- Google will start the deletion process and notify you once your search history has been cleared.
- To verify that your search history has been successfully deleted, perform a new search within the Google app and check if any of your previous queries appear in the search suggestions.
Clearing your search history within the Google app is a simple way to maintain your privacy and control the information stored on your mobile device. It is recommended to periodically clear your search history to ensure that your search activity remains confidential.
Please note that clearing your search history within the Google app only applies to the Google app itself. If you use other web browsers or search apps on your device, you will need to follow their respective procedures to clear your search history within those apps as well.
By regularly clearing your search history, you can enjoy a more private and personalized search experience while having better control over your digital footprint.
Clearing Google Search History on the Chrome Browser
If you use the Google Chrome browser for your web searches and want to clear your search history, follow these steps:
- Open the Chrome browser on your desktop or mobile device.
- Click on the three-dot menu icon located in the top-right corner of the browser window.
- From the dropdown menu, hover over “History” and select “History” again to open the History page.
- You can also use the shortcut “Ctrl+H” (Windows) or “Cmd+Shift+H” (Mac) to directly access the History page.
- On the History page, you will see a list of your browsing history.
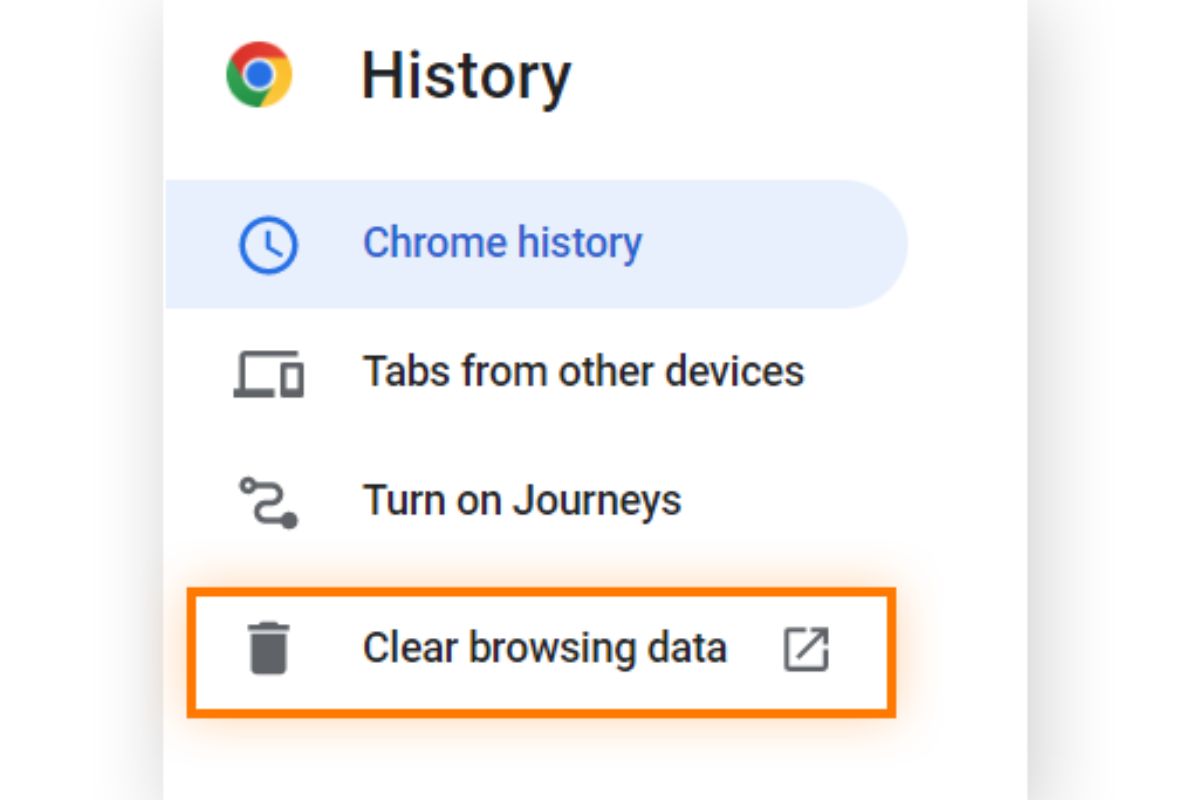
- To clear your entire search history, click on the “Clear browsing data” option located in the left-hand sidebar.
- A dialog box will appear with various options for clearing browsing data.
- Make sure the “Browsing history” option is selected. You can also choose to clear other types of data, such as cookies and cache, if desired.
- Select the time range for which you want to clear your search history. You can choose “Last hour,” “Last 24 hours,” “Last 7 days,” or “All time.”
- Click on the “Clear data” button to initiate the deletion process.
- Chrome will start clearing your search history, and a notification will appear once the process is complete.
- To confirm that your search history has been successfully deleted, perform a new search in the Chrome browser and check if any of your previous queries appear in the search suggestions.
Clearing your search history in the Chrome browser helps protect your privacy and ensures that your search activity remains confidential. It is recommended to regularly clear your search history to maintain control over the information stored in your browser.
Please note that clearing your search history in Chrome only applies to the device and browser you are using. If you use Chrome on multiple devices or browsers, you will need to repeat these steps on each individual device and browser to clear your search history completely.
By regularly clearing your search history, you can enjoy a more private and personalized browsing experience, knowing that your search activity is not being stored or tracked.
Clearing Google Search History on Other Web Browsers
If you use a web browser other than Google Chrome and want to clear your Google search history, the process may vary slightly. Below are general instructions for clearing search history on popular web browsers:
- Firefox: Open Firefox and click on the three-bar menu icon located in the top-right corner. From the dropdown menu, select “History” and then click on “Clear Recent History.” In the dialog box that appears, make sure the “Browsing & Download History” option is selected. Choose the desired time range and click on “Clear Now.”
- Safari: Open Safari and click on “History” in the top menu bar. From the dropdown menu, select “Clear History.” In the dialog box, choose the desired time range and click on “Clear History.”
- Microsoft Edge: Open Microsoft Edge and click on the three-dot menu icon located in the top-right corner. From the dropdown menu, select “History” and then click on “Clear browsing data.” Make sure the “Browsing history” option is selected. Choose the desired time range and click on “Clear.”
- Opera: Open Opera and click on the “Opera” button located in the top-left corner. From the dropdown menu, select “Clear browsing data.” In the dialog box that appears, make sure the “History” option is selected. Choose the desired time range and click on “Clear browsing data.”
- Brave: Open Brave and click on the three-line menu icon located in the top-right corner. From the dropdown menu, select “History” and then click on “Clear browsing data.” Make sure the “Browsing history” option is selected. Choose the desired time range and click on “Clear data.”
Please note that the steps above provide general instructions for clearing search history on other web browsers. The exact process may vary depending on the version of the browser you are using.
By regularly clearing your search history on different web browsers, you can ensure that your search activity remains private and prevent any sensitive information from being stored on your device.
Remember to also clear your search history within the respective search engines, such as Bing or Yahoo, if you use them as your default search engines. Each search engine may have its own process for clearing search history, so consult their documentation or settings for guidance.
Using Incognito Mode to Avoid Search History
If you want to perform searches without leaving a trace of your search history, using the incognito mode feature offered by most web browsers can be helpful. Here’s how to use incognito mode to avoid search history:
- Google Chrome: Open Chrome and click on the three-dot menu icon located in the top-right corner. From the dropdown menu, select “New Incognito Window.” A new window will open with a dark theme and an icon in the top-right corner indicating that you are in incognito mode. Any searches or browsing you do in this window will not be saved in your search history.
- Firefox: Open Firefox and click on the three-bar menu icon located in the top-right corner. From the dropdown menu, select “New Private Window.” A new window will open with a purple mask icon in the top-right corner, indicating that you are in private browsing mode. Any searches or browsing you do in this window will not be saved in your search history.
- Safari: Open Safari and click on “File” in the top menu bar. From the dropdown menu, select “New Private Window.” A new window will open with a dark theme, confirming that you are in private browsing mode. Any searches or browsing you do in this window will not be saved in your search history.
- Microsoft Edge: Open Microsoft Edge and click on the three-dot menu icon located in the top-right corner. From the dropdown menu, select “New InPrivate Window.” A new window will open with the “InPrivate” label in the top-left corner, indicating that you are in InPrivate mode. Any searches or browsing you do in this window will not be saved in your search history.
- Opera: Open Opera and click on the “Opera” button located in the top-left corner. From the dropdown menu, select “New private window.” A new window will open with a dark theme, indicating that you are in private browsing mode. Any searches or browsing you do in this window will not be saved in your search history.
When using incognito mode, it’s important to remember that while your search history is not being saved on your device, your internet service provider, employer, or certain websites may still be able to track your online activities.
Additionally, incognito mode does not offer complete anonymity. Websites may still collect your data through cookies or other means. To further enhance your privacy and security, consider using a virtual private network (VPN) or other privacy-focused tools.
Using incognito mode is a convenient way to perform searches or browse the web without leaving behind a trail of your search history. It allows you to maintain privacy and prevents your search activity from being stored on your device or associated with your account.
Clearing Your Google Search History Permanently
If you want to ensure that your Google search history is cleared permanently and cannot be retrieved, follow these steps:
- Go to the Google Account homepage by typing “myaccount.google.com” in your web browser’s address bar and press Enter.
- Sign in to your Google account if you haven’t already done so.
- Click on “Data & personalization” in the left-hand sidebar. This will take you to the page where you can manage your Google account data.
- Scroll down until you find the “Activity controls” section. Click on “Web & App Activity.”
- On the next page, you will see a toggle switch to enable or disable the saving of your activity. To permanently clear your search history, turn off this toggle switch.
- Google will display a warning message explaining the consequences of turning off this feature. Read through the information to understand the impact of your decision. If you still want to proceed, click on “Pause” to stop saving your search history.
- A confirmation message will appear, indicating that your web and app activity is paused. Click on “Got it” to confirm.
- To ensure that your search history is cleared permanently, you can also visit the “My Activity” page on the Google Account homepage. On this page, you can manually delete specific items or entire sections of your search history by clicking on the three-dot menu icon next to each entry and selecting “Delete.”
- It’s worth noting that while turning off web and app activity will prevent Google from saving your future search history, it may not remove previously collected data. To completely remove any existing search history, you can click on “Delete activity by” in the left-hand sidebar and choose the desired time range or select “All time” to delete all of your search history.
- Once you have cleared your search history, perform a new search on Google to verify that no previous queries appear in the search suggestions.
Clearing your Google search history permanently ensures that your previous search queries and activities are not accessible or stored by Google. It offers an additional layer of privacy and control over your online activities.
Please note that while clearing your search history on Google is important, it does not guarantee complete anonymity online. Other websites, search engines, and online services may still collect and store your data. It’s advisable to employ additional privacy measures, such as using a VPN or adjusting browser settings, to further protect your online privacy.