
Gather the Necessary Supplies
Before you begin cleaning your laptop touchpad, it’s important to gather the necessary supplies to ensure a thorough and effective cleaning process. Having the right tools at hand will make the task easier and help you achieve optimal results. Here is a list of items you will need:
- Microfiber cloth: This soft and lint-free cloth is ideal for cleaning delicate surfaces, such as laptop touchpads. It effectively removes dirt, smudges, and fingerprints without leaving scratches.
- Compressed air: A can of compressed air is essential for removing dust and debris that may have accumulated around the touchpad area. The pressurized air blasts away particles from hard-to-reach crevices.
- Cleaning solution: If there are stubborn stains or sticky residue on your touchpad, a mild cleaning solution can help. Choose a non-abrasive, alcohol-free solution specifically designed for electronic devices to avoid damaging the surface. Alternatively, you can use a mixture of water and isopropyl alcohol.
- Toothpick or cotton swabs: These small tools are useful for precision cleaning. A toothpick can be used to gently dislodge debris that may be stuck in tiny crevices. Cotton swabs are great for applying cleaning solution to specific areas or removing stubborn dirt.
Make sure to gather these supplies before you proceed with cleaning your laptop touchpad. Having everything ready will save you time and ensure a smooth and effective cleaning process. Once you have gathered all the necessary items, you can move on to the next steps in the cleaning process.
Shut Down and Unplug Your Laptop
Before you start cleaning your laptop touchpad, it is crucial to shut down your laptop completely and unplug it from the power source. This ensures your safety and prevents any damage to your device.
To shut down your laptop, follow these simple steps:
- Save your work: Make sure to save any open files or documents before proceeding. This prevents any potential loss of data during the shutdown process.
- Close all applications: Close any open applications or programs running on your laptop. This ensures that all processes are properly terminated before shutting down.
- Click on “Start” or the Windows icon: This is typically located at the bottom left corner of your screen. A menu will appear.
- Select “Shut down” or “Power Off”: Depending on your operating system, you may see different options such as “Shut down,” “Power Off,” or a power button icon. Click on the option that will completely power off your laptop.
Once you have shut down your laptop, unplug it from the power source by removing the charging cable from the laptop’s port. This step prevents any electrical accidents and ensures that you can safely clean the touchpad without any interruptions.
Remember, it’s vital to shut down your laptop and unplug it before cleaning the touchpad to avoid any accidental button presses or electrical mishaps. Taking these precautions will help protect your laptop and prolong its lifespan.
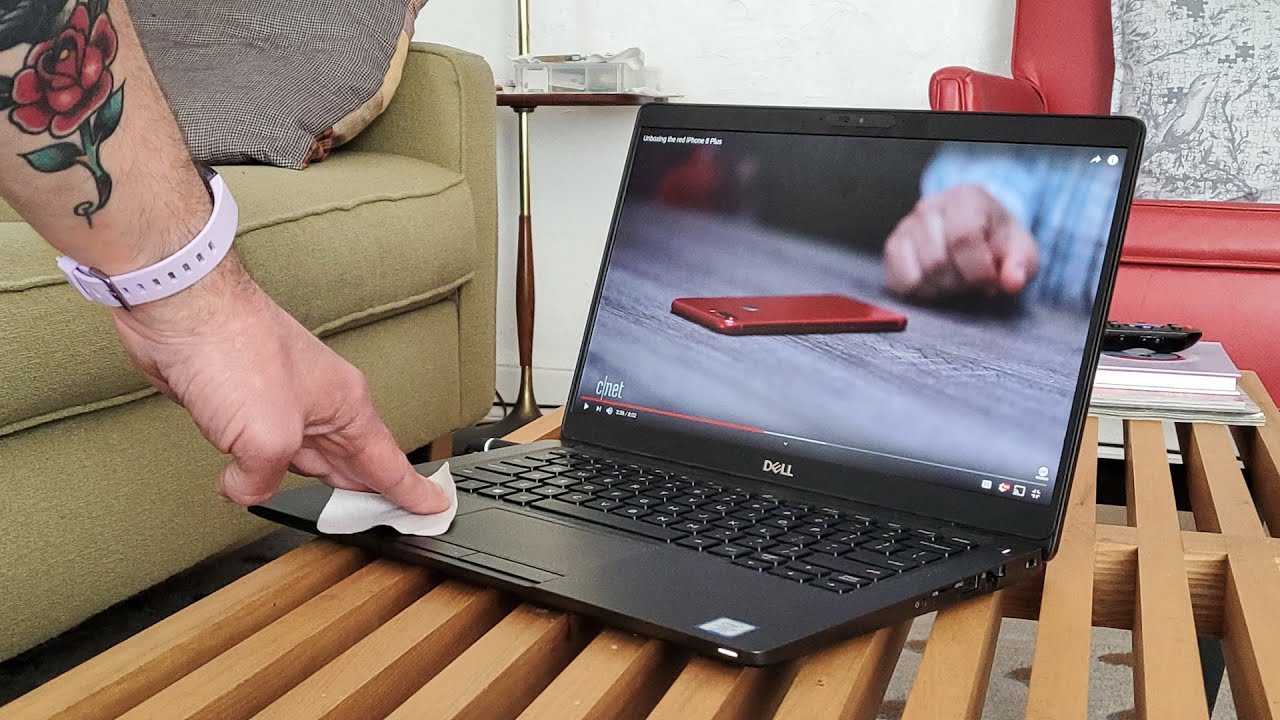
Use a Microfiber Cloth to Wipe the Touchpad Surface
Once you have gathered the necessary supplies and ensured your laptop is shut down and unplugged, it’s time to start cleaning the touchpad surface. The first step is to use a microfiber cloth to wipe away any dirt, smudges, or fingerprints that may have accumulated.
Follow these steps to properly clean the touchpad surface:
- Dampen the microfiber cloth: Take a clean microfiber cloth and lightly dampen it with water or a mild cleaning solution. Be sure not to saturate the cloth with liquid, as excessive moisture can damage the touchpad.
- Gently wipe the touchpad: Begin by gently wiping the touchpad surface in a circular motion. Apply light pressure to remove any visible smudges or dirt. Be careful not to press too hard to avoid damaging the touchpad.
- Pay attention to the edges: Make sure to clean the edges of the touchpad as well, as dirt and grime can accumulate in these areas. Use the dampened microfiber cloth to gently wipe along the edges and corners.
- Dry the touchpad: After cleaning, use a dry portion of the microfiber cloth to wipe off any excess moisture from the touchpad. This ensures that no moisture remains on the surface, which can lead to streaks or water damage.
Using a microfiber cloth is ideal for cleaning the touchpad surface because it is gentle and does not leave scratches. The material also helps to trap and remove dirt and grime effectively without the need for harsh chemicals.
Remember to take your time and be gentle when wiping the touchpad with the microfiber cloth. This will help you achieve a clean and smudge-free touchpad surface, enhancing both the appearance and functionality of your laptop.
Use Compressed Air to Remove Dust and Debris
In addition to cleaning the touchpad surface with a microfiber cloth, it’s important to remove any dust and debris that may have accumulated around the touchpad area. This can be easily achieved by using compressed air.
Follow these steps to effectively remove dust and debris:
- Hold the can of compressed air upright: Ensure that the can of compressed air is held in an upright position. Tipping the can while in use can release liquid propellant, which can damage the touchpad or other components.
- Locate the vent or crevices around the touchpad: Look for any vents or crevices near the touchpad area where dust and debris may have accumulated. These areas are typically found around the sides or corners of the touchpad.
- Aim the nozzle at the target area: Point the nozzle of the compressed air can towards the targeted area. Maintain a safe distance of a few inches from the touchpad to avoid any potential damage.
- Release short bursts of compressed air: Press the nozzle of the can to release short bursts of compressed air into the targeted area. This will effectively dislodge and remove any dust or debris that may be present.
- Repeat the process for other areas: If there are additional vents or crevices around the touchpad, repeat the process by aiming the compressed air into those areas as well. Ensure that you cover all the possible areas where dust and debris may have accumulated.
Using compressed air is an efficient way to remove dust and debris from hard-to-reach areas around the touchpad. The powerful burst of air dislodges particles without the need for physical contact, reducing the risk of damage.
Remember to handle the can of compressed air carefully, following the manufacturer’s instructions. Always use short bursts of air, and avoid tilting the can to prevent any liquid propellant from being released.
By removing dust and debris, you can enhance the overall performance and longevity of your laptop touchpad, ensuring smooth and accurate navigation.
Remove Any Sticky Residue
If you notice any sticky residue on your laptop touchpad, it’s important to remove it to maintain smooth and accurate navigation. Sticky residue can interfere with the touchpad’s responsiveness and make it difficult to use. Luckily, there are simple steps you can follow to effectively remove sticky residue.
Here’s what you need to do:
- Dampen a microfiber cloth: Take a clean microfiber cloth and dampen it with a mild cleaning solution. Ensure the cloth is not excessively wet, as excess moisture can potentially damage the touchpad.
- Gently wipe the affected area: Gently wipe the touchpad surface where the sticky residue is located. Apply light pressure while using circular motions to lift and remove the residue. Avoid pressing too hard to prevent any damage to the touchpad.
- If necessary, use a mild cleaning solution: If the sticky residue persists, you can apply a mild cleaning solution to the microfiber cloth. Choose a non-abrasive, alcohol-free solution specifically designed for electronic devices. Alternatively, you can mix water and isopropyl alcohol in a 1:1 ratio.
- Apply the cleaning solution: Apply a small amount of the cleaning solution to the microfiber cloth. Make sure the cloth is damp and not dripping with liquid. Then, gently wipe the affected area of the touchpad, using circular motions to loosen and remove the sticky residue.
- Dry the touchpad: After removing the sticky residue, use a dry portion of the microfiber cloth to gently dry the touchpad. Ensure that no moisture remains on the touchpad’s surface, as it can cause streaks or potential damage.
It’s important to note that harsh cleaning solutions, such as bleach or ammonia-based products, should be avoided, as they can damage the touchpad’s surface. Stick to mild cleaning solutions and be gentle when wiping the touchpad to prevent any scratches or other damage.
By meticulously removing any sticky residue, you can restore the touchpad’s functionality and enjoy smooth and effortless navigation on your laptop.
Clean the Sides and Edges of the Touchpad
When cleaning your laptop touchpad, it’s essential not to forget about the sides and edges of the touchpad. These areas can collect dirt, dust, and grime over time, impacting both the appearance and functionality of your touchpad. Here’s how you can effectively clean the sides and edges:
- Turn off your laptop: Before cleaning the sides and edges of the touchpad, make sure your laptop is turned off and unplugged to avoid any accidental button presses or electrical mishaps.
- Dampen a microfiber cloth: Take a clean microfiber cloth and lightly dampen it with water or a mild cleaning solution. Ensure that the cloth is not too wet, as excessive moisture can be damaging to your device.
- Gently wipe the sides and edges: Using the damp microfiber cloth, gently wipe the sides and edges of the touchpad. Pay attention to any visible dirt or smudges and apply light pressure to remove them. Be careful not to press too hard and avoid getting any moisture into the openings or ports around the touchpad.
- Reach into crevices: Use a toothpick or a cotton swab lightly dampened with cleaning solution to reach into any small crevices or hard-to-reach areas around the sides and edges of the touchpad. This will help remove any stubborn dirt or buildup that may be present.
- Dry the touchpad: After cleaning the sides and edges, use a dry portion of the microfiber cloth to gently dry those areas. Make sure no moisture remains, as it can lead to streaks or potential damage.
By paying attention to the sides and edges of the touchpad, you can achieve a comprehensive cleaning and maintain the overall cleanliness and functionality of your laptop touchpad. Regularly cleaning these areas will help prevent dirt and grime from accumulating and potentially affecting the performance of your touchpad.
Remember to be gentle while cleaning and avoid using abrasive materials or excessive moisture. By taking these precautions, you can ensure that your touchpad remains in optimal condition for smooth and accurate navigation.
Use a Toothpick or Cotton Swab for Precision Cleaning
In some cases, there may be stubborn dirt or debris stuck in tiny crevices around your laptop touchpad. To ensure a thorough cleaning, it’s helpful to use a toothpick or a cotton swab for precision cleaning.
Follow these steps to effectively remove dirt in hard-to-reach areas:
- Select a clean toothpick or cotton swab: Choose a toothpick or cotton swab that is free of any debris or residue. This ensures that you won’t introduce additional dirt or particles to the touchpad.
- Moisten the cotton swab (if necessary): If you’re using a cotton swab, you may lightly moisten it with a small amount of water or a mild cleaning solution. Make sure it’s not soaked or dripping, as excessive moisture can cause damage to the touchpad.
- Gently insert the toothpick or cotton swab: Carefully insert the toothpick or cotton swab into the crevices or tight areas around the touchpad. Be cautious not to apply excessive pressure or force to avoid damaging the touchpad or pushing the debris further inside.
- Rotate or swipe: Depending on the type of dirt or debris, rotate the toothpick or swipe the cotton swab in a gentle motion to dislodge and remove the particles. Take your time and repeat the process as needed to ensure a thorough cleaning.
- Inspect and clean any residue: After precision cleaning, inspect the touchpad and surrounding areas for any leftover residue. If necessary, use a microfiber cloth to wipe away any remaining dirt or debris.
Using a toothpick or cotton swab allows you to effectively clean hard-to-reach areas that may have accumulated dirt or debris. These tools provide precision cleaning without the risk of damaging the touchpad.
Remember to be gentle and cautious when using a toothpick or cotton swab, ensuring that you do not apply too much pressure or force. Taking your time and being meticulous with your cleaning will help maintain the optimal performance and appearance of your laptop touchpad.
Allow the Touchpad to Dry Completely Before Using It Again
After cleaning your laptop touchpad, it’s crucial to allow it to dry completely before using it again. This ensures that any moisture from cleaning solutions or damp cloths has evaporated, preventing potential damage and ensuring optimal functionality.
Here’s what you need to do:
- Inspect for moisture: After cleaning the touchpad, visually inspect it to ensure there is no visible moisture or dampness on the surface.
- Pat dry with a dry cloth: Gently pat the touchpad with a clean, dry cloth to absorb any remaining moisture. Avoid rubbing or applying excessive pressure, as this can cause damage or leave streaks on the touchpad.
- Air dry: Allow the touchpad to air dry naturally for at least 15-30 minutes or until it is completely dry. Avoid using any heat sources or hairdryers, as the excessive heat can damage the touchpad.
- Double-check before using: Before using your laptop again, double-check that the touchpad is completely dry. Lightly touch the surface to ensure there is no residual moisture.
Allowing the touchpad to dry completely is essential because using it while it is still damp can cause malfunction or damage. Moisture can interfere with the touchpad’s sensors and disrupt its functionality, leading to inaccurate or unresponsive navigation.
By taking the time to ensure the touchpad is thoroughly dry, you can avoid any potential issues and ensure its long-term reliability. Once it is dry, you can confidently resume using your laptop with a clean and fully functional touchpad.