
Materials Needed
In order to clean your laptop properly, you will need a few essential materials. Gathering these items beforehand will ensure that you have everything you need to give your laptop a thorough cleaning. Here are the materials you will need:
- Microfiber cloth: This soft cloth is ideal for wiping down the screen and keyboard without scratching them.
- Compressed air canister: Use compressed air to remove dust and debris from the keyboard, ports, and vents of your laptop.
- Soft brush or cloth: A soft brush or cloth can be used to gently clean the keyboard and remove any loose particles.
- Isopropyl alcohol: This alcohol is useful for cleaning stubborn stains or residue on the laptop’s exterior surfaces.
- Cotton swabs: These small and precise tools are great for applying isopropyl alcohol to specific areas and removing dirt from hard-to-reach areas.
- Damp cloth: A damp cloth can be used to wipe down the exterior of the laptop and remove any dirt or smudges.
Having these materials ready and easily accessible will make the cleaning process much more efficient and effective. Make sure to check that you have all of these items before you begin cleaning your laptop.
Step 1: Shut Down the Laptop
Before you start cleaning your laptop, it is important to shut it down completely. This will ensure that you can safely clean all areas of the device without the risk of accidental damage or interference. Follow these steps to shut down your laptop:
- Save your work: Make sure to save any open files or programs you are currently working on. If needed, take a few minutes to back up any important data to an external storage device.
- Close all applications: Close any open applications or programs. This will prevent any data loss or corruption during the shutdown process.
- Click on the Start menu: Locate the Start menu button on your laptop’s desktop and click on it to open the Start menu.
- Select the Power option: In the Start menu, you will see a Power icon or option. Click on it to open the power options menu.
- Choose Shut Down: From the power options menu, select the “Shut Down” option. This will initiate the process of shutting down your laptop.
- Wait for the shut down: Give your laptop a few moments to complete the shut down process. You may see a screen indicating that your computer is shutting down or a black screen, depending on your laptop model.
- Ensure complete shutdown: Check that all lights and indicators on your laptop are turned off, indicating that it is fully shut down and no longer running.
Once your laptop is completely shut down, you can proceed to the next steps of cleaning without any concerns. Remember to allow your laptop to cool down if it was recently in use to avoid any potential heat-related issues during the cleaning process.
Step 2: Disconnect all External Devices
Before you start cleaning your laptop, it is important to disconnect all external devices to ensure a thorough and safe cleaning process. This step will prevent any damage to the laptop or the connected devices. Follow these steps to disconnect the external devices:
- Unplug the power cord: If your laptop is connected to a power source, unplug the power cord from the laptop. This will prevent any electrical hazard and give you better access to clean the laptop.
- Remove USB devices: Check for any USB devices connected to your laptop, such as a mouse, keyboard, external hard drive, or flash drive. Safely eject them and disconnect them from the laptop.
- Remove other cables: If you have any other cables connected to your laptop, such as an HDMI cable, Ethernet cable, or audio cable, remove them carefully.
- Eject discs: If there are any discs (CDs or DVDs) in your laptop’s optical drive, make sure to eject them before proceeding.
- Disconnect external monitors: If you have an external monitor connected to your laptop, disconnect the cable or cables that connect it to the laptop.
- Remove docking station: If your laptop is attached to a docking station, disconnect it according to the manufacturer’s instructions.
By disconnecting all external devices, you will have a clear view and easy access to clean your laptop effectively. This step will also help prevent any accidental damage to the devices and ensure a safe cleaning process.
Step 3: Use Compressed Air to Remove Dust from Keyboard
The keyboard of your laptop can accumulate a significant amount of dust, crumbs, and other debris over time. To remove this build-up, you can use compressed air. This step will ensure that your keyboard is clean and free from any particles that may affect its performance. Follow these steps to use compressed air to clean your laptop keyboard:
- Hold the canister upright: Take the canister of compressed air and hold it in an upright position. Ensure that the nozzle is facing away from you and any other nearby objects.
- Position the nozzle: Locate the small straw-like nozzle that comes with the compressed air canister. Attach it to the nozzle on the canister if necessary. Position the nozzle so that it is close to your laptop’s keyboard.
- Burst short blasts of air: Press the trigger on the compressed air canister to release short bursts of air. Aim the nozzle at the gaps between the keys and areas where dust may have accumulated. Move across the entire keyboard, paying extra attention to the areas where you can see visible debris.
- Repeat if necessary: If there are still areas with stubborn dust, repeat the process of using short bursts of compressed air until all visible dust is removed.
- Give it a shake: After using the compressed air, gently tilt your laptop to the side and give it a gentle shake. This will help dislodge any remaining loose particles.
Using compressed air is an effective way to remove dust and debris from your laptop keyboard. It is important to do this step in a well-ventilated area to avoid inhaling any airborne particles. By keeping your keyboard clean, you can ensure smooth typing and prevent any potential issues caused by a dirty keyboard.
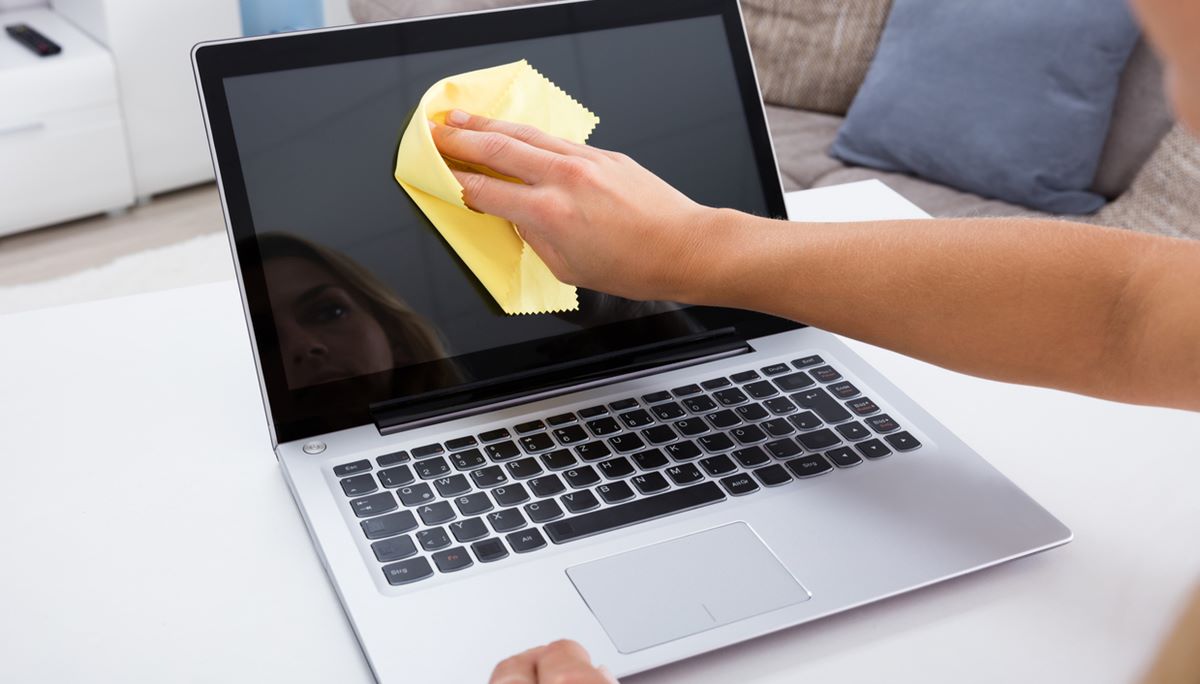
Step 4: Clean the Screen with a Microfiber Cloth
The screen of your laptop can easily accumulate smudges, fingerprints, and dust, which can affect the clarity of the display. To keep your screen clean and clear, you can use a microfiber cloth. This gentle material will help remove dirt without scratching or damaging the screen. Follow these steps to clean your laptop screen effectively:
- Power off your laptop: Before cleaning the screen, make sure your laptop is powered off. This will provide a better view and help prevent any accidental inputs or damage.
- Dampen the microfiber cloth: Moisten the microfiber cloth slightly with water. Ensure that it is only slightly damp and not dripping wet. Alternatively, you can use a screen cleaning solution specifically designed for electronic devices.
- Gently wipe the screen: Starting from one corner of the screen, gently wipe the microfiber cloth across the surface of the screen in straight, horizontal or vertical motions. Apply light pressure to remove smudges and fingerprints without exerting too much force.
- Pay attention to edges and corners: Take extra care when cleaning the edges and corners of the screen, as these areas tend to accumulate more dirt and fingerprints. Use a soft, circular motion to clean these areas effectively.
- Check for streaks: After cleaning the screen, check for any streaks or smudges that may have been missed. If necessary, repeat the process using a clean, dry microfiber cloth to remove any remaining marks.
It is important to avoid using paper towels, tissues, or rough materials to clean the screen, as they can scratch or damage the surface. A microfiber cloth is the safest and most effective option for keeping your laptop screen clean and free from smudges.
Step 5: Clean the Keyboard with a Soft Brush or Cloth
Over time, the keyboard of your laptop can accumulate dirt, crumbs, and other debris that can affect its functionality and appearance. To keep your keyboard clean and in good working condition, you can use a soft brush or cloth. This step will help remove any loose particles and maintain the overall cleanliness of your laptop. Follow these steps to clean your laptop keyboard effectively:
- Power off your laptop: Before cleaning the keyboard, make sure your laptop is powered off. This will prevent any accidental inputs or damage.
- Use a soft brush: Take a soft brush, such as a small paintbrush or a clean makeup brush, and gently brush the surface of the keyboard. Start from the top and work your way down, brushing between and around the keys. This will help remove any loose dirt or debris.
- Alternatively, use a cloth: If you don’t have a soft brush, you can use a clean and slightly damp cloth. Gently wipe the surface of the keyboard, paying extra attention to the areas between the keys where dirt may accumulate. Make sure the cloth is not too wet to avoid any liquid seeping into the keyboard.
- Use a can of compressed air: If there are any stubborn particles that are hard to remove with a brush or cloth, you can use a can of compressed air. Hold the can upright and use short bursts of air to dislodge the stubborn particles. Make sure to aim the air at an angle to prevent any debris from being pushed further into the keyboard.
- Repeat if necessary: If there are still areas with visible dirt or debris, repeat the brushing or wiping process until your keyboard looks clean and free from any particles.
Regularly cleaning your laptop keyboard will not only keep it looking neat, but it will also prevent dirt from accumulating and potentially causing issues with the keys. By using a soft brush or cloth, you can safely remove dirt and maintain the functionality of your laptop keyboard.
Step 6: Remove Stubborn Stains with Isopropyl Alcohol and Cotton Swabs
Despite regular cleaning, your laptop keyboard may develop stubborn stains or residue over time. To effectively remove these tough stains, you can use isopropyl alcohol and cotton swabs. Isopropyl alcohol acts as a solvent, breaking down the stains without harming the keyboard. Follow these steps to remove stubborn stains from your laptop keyboard:
- Dampen a cotton swab: Dip a cotton swab in a small amount of isopropyl alcohol. Make sure the cotton swab is not dripping wet, as excess liquid may damage the keyboard.
- Gently rub the stain: Locate the stubborn stain on your keyboard and gently rub the area with the dampened cotton swab. Use circular motions and apply light pressure to lift and dissolve the stain.
- Continue until the stain is gone: Repeat the process of rubbing the stain with the dampened cotton swab until the stain is completely removed. You may need to use a fresh cotton swab if the stain is particularly stubborn.
- Let the area dry: After removing the stain, allow the area to air dry for a few minutes. Make sure there is no excess moisture present before using your laptop.
It is important to note that isopropyl alcohol should be used sparingly and with caution. Avoid directly applying the alcohol to the keyboard or using excessive amounts, as this can potentially damage the keys or the internal components of your laptop. Always use a minimal amount of alcohol on the cotton swab and exercise gentle pressure when rubbing the stain.
If you are unsure about using isopropyl alcohol or if the stain persists, it is recommended to seek professional assistance or consult the manufacturer’s guidelines for safe cleaning methods specific to your laptop model.
Step 7: Clean the Touchpad with a Damp Cloth
The touchpad of your laptop can accumulate dirt, fingerprints, and smudges over time, affecting its responsiveness and sensitivity. To keep your touchpad clean and functioning properly, you can use a damp cloth. This step will help remove any dirt and improve the overall performance of your touchpad. Follow these steps to clean your laptop touchpad effectively:
- Power off your laptop: Before cleaning the touchpad, make sure your laptop is powered off. This will prevent any accidental inputs or damage.
- Dampen a cloth: Moisten a clean, lint-free cloth with water. Ensure that the cloth is only slightly damp and not dripping wet. Excess moisture can damage the touchpad or other components of your laptop.
- Gently wipe the touchpad: Starting from one side of the touchpad, gently wipe the damp cloth across the surface of the touchpad. Use gentle, circular motions to remove any dirt, fingerprints, or smudges that may have accumulated. Pay extra attention to the edges and corners of the touchpad.
- Let it air dry: After cleaning the touchpad, allow it to air dry for a few minutes. Avoid using the laptop until the touchpad is completely dry to prevent any potential damage.
- Check for residue: Once the touchpad is dry, inspect it for any residue or streaks. If necessary, repeat the cleaning process using a clean, dry cloth to remove any remaining marks.
It is important to avoid using harsh cleaning agents or abrasive materials on the touchpad, as they can scratch or damage the surface. Using a slightly damp cloth is sufficient to clean the touchpad effectively without causing any harm. By keeping your touchpad clean, you can ensure smooth navigation and improved functionality while using your laptop.
Step 8: Use Compressed Air to Blow Out Dust from Ports and Vents
Over time, dust and debris can accumulate in the ports and vents of your laptop, hindering proper airflow and potentially causing overheating. To ensure optimal performance and prevent hardware issues, it is important to clean these areas regularly. Using compressed air is an effective method to blow out dust from ports and vents. Follow these steps to clean your laptop ports and vents:
- Power off your laptop: Before cleaning the ports and vents, make sure your laptop is powered off. This will prevent any accidental damage or injury while cleaning.
- Hold the canister upright: Take the canister of compressed air and hold it in an upright position. Ensure that the nozzle is facing away from you and any other nearby objects.
- Aim the nozzle at the ports and vents: Locate the ports and vents on your laptop. These may include USB ports, headphone jacks, ventilation grilles, and other openings. Position the nozzle of the compressed air canister near the ports and vents.
- Burst short bursts of air: Press the trigger on the compressed air canister to release short bursts of air into the ports and vents. Move across each port and vent, focusing on areas where dust is visible or likely accumulated. Be sure to hold the canister at a distance to prevent the force of the air from causing damage.
- Repeat if necessary: If there are still visible dust particles or debris, repeat the process of using short bursts of compressed air until the ports and vents appear clean.
- Ensure proper ventilation: After cleaning, ensure that the vents are not blocked by any objects, as this can hinder proper airflow and lead to overheating. Keep your laptop on a flat and stable surface to allow for adequate ventilation.
Regularly cleaning the ports and vents of your laptop will help prevent overheating and ensure the longevity of your hardware. By using compressed air, you can effectively remove dust and debris, restoring proper airflow and maintaining optimal performance.
Step 9: Wipe Down the Exterior of the Laptop with a Damp Cloth
The exterior of your laptop can accumulate dirt, smudges, and fingerprints, giving it a less-than-appealing appearance. To keep your laptop looking clean and well-maintained, it is important to regularly wipe down the exterior. You can do this by using a damp cloth. Follow these steps to effectively clean the exterior of your laptop:
- Power off your laptop: Before cleaning the exterior, make sure your laptop is powered off. This will prevent any accidental inputs or damage.
- Dampen a soft cloth: Moisten a soft cloth with water. Ensure that the cloth is only slightly damp and not soaking wet. Excess moisture can damage the laptop’s surfaces and internal components.
- Gently wipe the exterior: Starting from the top, gently wipe the damp cloth across the exterior surfaces of your laptop. Pay attention to areas that are prone to accumulate dirt, such as the lid, keyboard area, and palm rest. Apply light pressure to remove any smudges, fingerprints, or dirt. Avoid pressing too hard to prevent causing any damage.
- Pay attention to edges and crevices: Use a soft toothbrush or cotton swab to clean hard-to-reach areas, such as the edges, ports, and crevices. Be gentle and thorough while cleaning these areas to remove any hidden dirt or debris.
- Allow it to air dry: After wiping down the exterior, allow it to air dry for a few minutes. Ensure that there is no excess moisture remaining before turning on your laptop.
It is important to note that different laptops may have different materials and finishes, so it is advisable to follow the manufacturer’s guidelines for cleaning. If your laptop has specific cleaning instructions, be sure to adhere to them to avoid any potential damage. By regularly wiping down the exterior of your laptop, you can maintain its cleanliness and overall aesthetic appeal.
Step 10: Reconnect External Devices and Power On the Laptop
After cleaning your laptop thoroughly, it’s time to reconnect any external devices and power it back on. Following the proper steps for reconnecting devices will ensure that everything works smoothly and efficiently. Here’s what you need to do:
- Check the cleanliness: Before reconnecting anything, take a quick look at your laptop to ensure that it’s clean and free from any leftover debris or moisture.
- Reconnect the power cord: If your laptop was unplugged during the cleaning process, now is the time to plug it back in. Connect the power cord securely to the appropriate port on your laptop and then plug it into a power outlet.
- Reconnect USB devices: If you disconnected any USB devices, such as a mouse or a keyboard, now is the time to reconnect them. Plug them back into the USB ports on your laptop, making sure they are securely inserted.
- Check other cables: If you disconnected any other cables, such as an HDMI, Ethernet, or audio cable, carefully reconnect them to their respective ports.
- Reconnect the docking station: If you use a docking station for your laptop, carefully reconnect it according to the manufacturer’s instructions.
- Power on the laptop: Finally, press the power button on your laptop to turn it on. Wait for it to boot up fully and ensure that it is functioning properly.
By following these steps to reconnect external devices and power on your laptop, you can ensure that everything is back in its proper working order. Take a moment to test the functionality of each device and verify that they are functioning as expected.
Now that your laptop is clean and all devices are reconnected, you can resume your work or enjoy your leisure activities with a refreshed and well-maintained device.