
Enable the Windows Startup Sound
The Windows startup sound is a familiar and nostalgic feature that many users enjoy hearing when they power on their computers. However, sometimes the startup sound might be disabled, either due to personal preferences or system settings. If you wish to enable the Windows startup sound, follow the steps outlined below:
- Click on the Start button and select the “Settings” option.
- In the Settings window, click on “Personalization.”
- From the left sidebar, choose “Themes.”
- Scroll down to the “Related Settings” section and click on “Sounds.”
- In the “Sound” tab, under the “Program Events” section, scroll down and locate the “Windows” category.
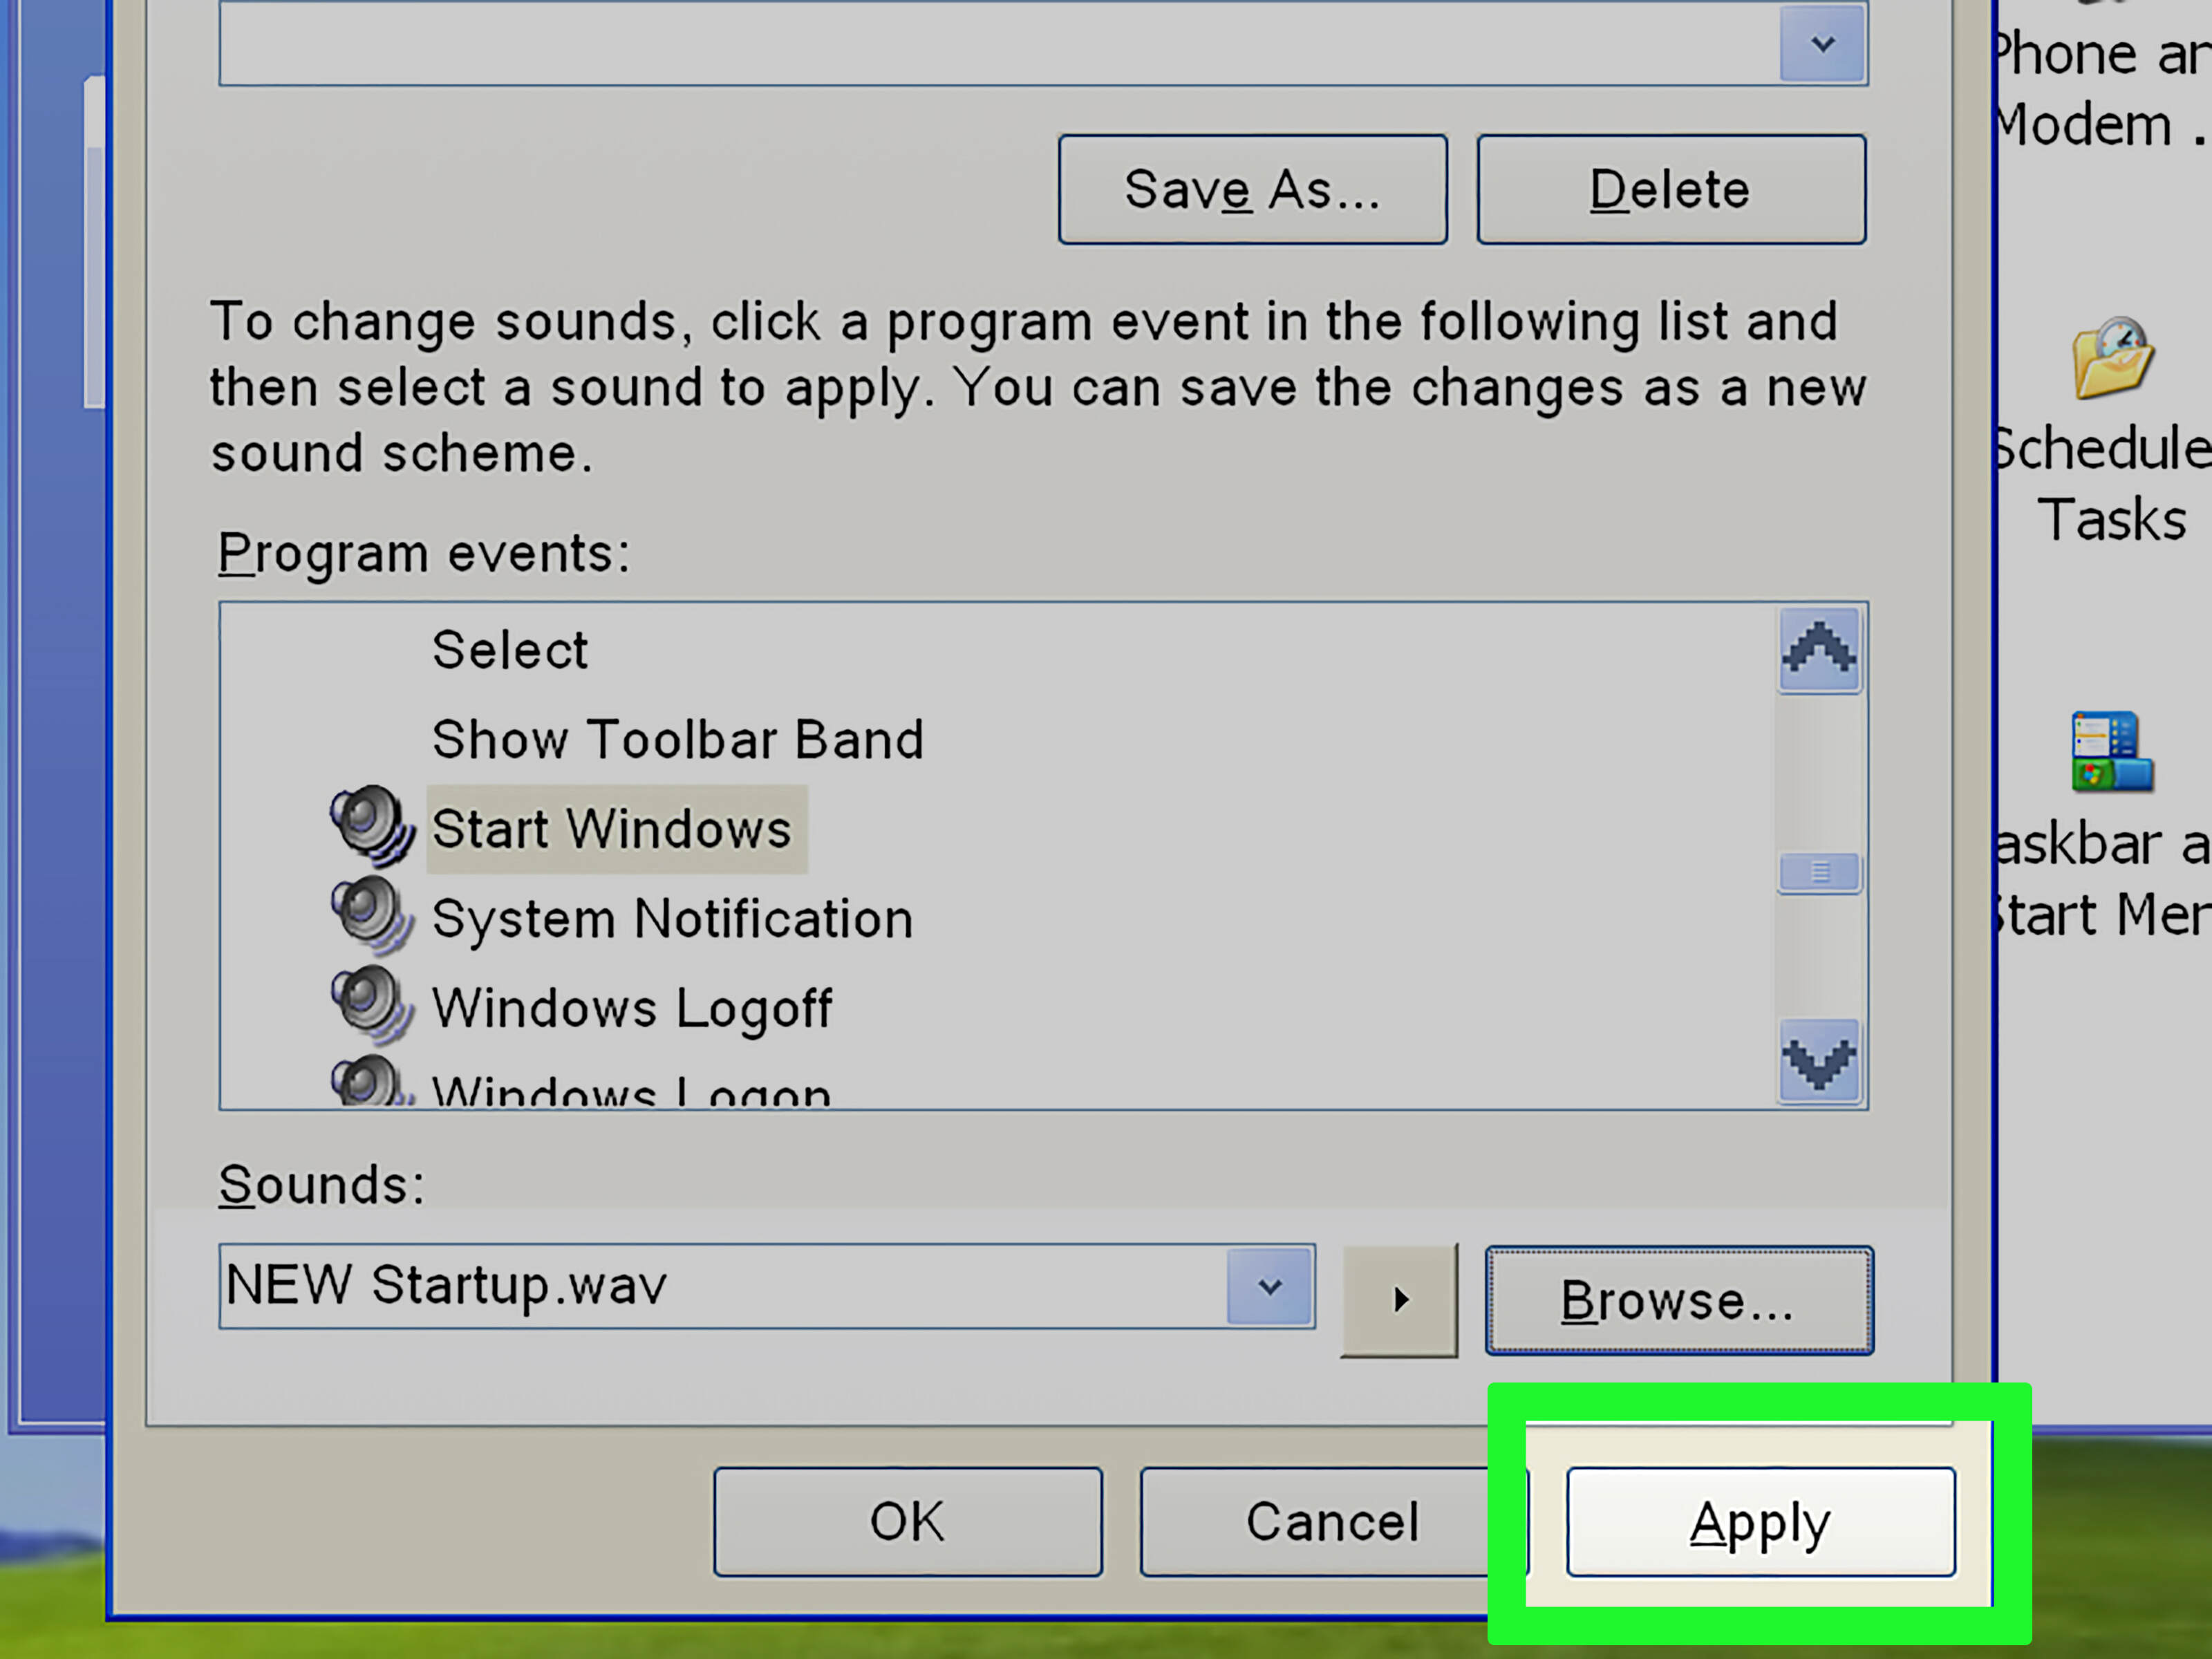
- Look for the “Startup” event and click on it.
- Ensure that the “Sounds” dropdown menu is set to “Windows Startup” or choose any other sound from the list.
- Click “Apply” and then “OK” to save the changes.
Once you have completed these steps, the Windows startup sound should be enabled. The next time you start your computer, you will hear the familiar sound playing as the system boots up.
Disable the Windows Startup Sound
While the Windows startup sound can be a pleasant greeting, it might not always be desirable, especially in certain situations where you prefer a silent startup. Fortunately, disabling the Windows startup sound is a straightforward process. Here’s how to do it:
- Click on the Start button and select the “Settings” option.
- In the Settings window, click on “Personalization.”
- From the left sidebar, choose “Themes.”
- Scroll down to the “Related Settings” section and click on “Sounds.”
- In the “Sound” tab, under the “Program Events” section, scroll down and locate the “Windows” category.
- Look for the “Startup” event and select it.
- Choose the “None” option from the “Sounds” dropdown menu.
- Click “Apply” and then “OK” to save the changes.
By following these simple steps, you can disable the Windows startup sound. The next time you boot up your computer, you won’t be greeted with the sound during the startup process.
Choose a New Startup Sound
If you want to add a personal touch to your Windows experience, you can choose a new startup sound that better reflects your style or preferences. Windows provides a variety of built-in sounds that you can select from. To choose a new startup sound, follow the steps below:
- Click on the Start button and select the “Settings” option.
- In the Settings window, click on “Personalization.”
- From the left sidebar, choose “Themes.”
- Scroll down to the “Related Settings” section and click on “Sounds.”
- In the “Sound” tab, under the “Program Events” section, scroll down and locate the “Windows” category.
- Look for the “Startup” event and click on it.
- In the “Sounds” dropdown menu, you will find a variety of pre-installed startup sound options.
- Select the sound you prefer and click “Apply” and then “OK” to save the changes.
By following these steps, you can easily choose a new startup sound for your Windows system. Experiment with different options to find the one that suits your taste and adds a personalized touch to your computer’s startup experience.
Use a Custom Startup Sound
If you want to go beyond the built-in startup sound options provided by Windows, you can use a custom sound to truly personalize your computer’s startup experience. By following these steps, you can set a custom startup sound:
- Make sure the sound file you want to use as the startup sound is in the WAV format. If it’s not in this format, you can convert it using various audio editing software or online converters.
- Once you have the WAV file ready, navigate to the following folder on your computer:
C:\Windows\Media. This is where Windows looks for startup sound files. - Rename your custom sound file to
Windows Startup.wavto replace the default startup sound file. - When prompted, grant administrative permission to replace the file.
- Restart your computer to apply the changes.
After following these steps, your customized sound will play when you start up your Windows computer. Enjoy the unique and personalized startup experience every time you power on your PC!
Convert an Audio File to the Required Format
Before you can use a custom startup sound in Windows, you need to ensure that it is in the correct WAV format. If your sound file is not already in WAV format, you can easily convert it using the steps outlined below:
- Open an audio editing software or use an online audio converter.
- Import your sound file into the software or upload it to the online converter.
- Select the WAV format as the output format for the conversion.
- Adjust any desired settings such as bitrate or sample rate (if applicable).
- Start the conversion process.
- Wait for the conversion to complete.
- Once the conversion is finished, download the converted WAV file to your computer.
After converting your sound file to the required WAV format, you can proceed to use it as your custom startup sound in Windows by following the appropriate steps. Enjoy the flexibility of using your own audio creations as the startup sound for a more personalized and unique Windows experience.
Rename and Replace the Startup Sound File
Once you have the desired sound file in the WAV format, the next step is to rename and replace the default startup sound file in Windows. Here’s how you can go about it:
- Navigate to the following folder on your computer:
C:\Windows\Media. This is where Windows looks for startup sound files. - Locate the default startup sound file, which is usually named
Windows Startup.wav. - Before replacing the file, it’s a good idea to create a backup of the original. Right-click on the file and select “Copy” to make a copy of it in a separate location.
- Rename your custom sound file to
Windows Startup.wavto replace the default startup sound file. - When prompted, grant administrative permission to replace the file.
After completing these steps, your custom sound file will replace the default startup sound in Windows. The next time you start up your computer, your personalized startup sound will play, creating a unique and customized experience.
Create a Backup of the Original Startup Sound File
Before replacing the default startup sound file in Windows, it’s always a good idea to create a backup of the original file. This allows you to easily restore the default sound if you ever want to revert back to it. Here’s how you can create a backup of the original startup sound file:
- Navigate to the following folder on your computer:
C:\Windows\Media. This is where Windows looks for startup sound files. - Locate the default startup sound file, which is usually named
Windows Startup.wav. - Right-click on the file and select “Copy” to make a copy of it.
- Choose a different location on your computer to store the backup file, such as your desktop or a dedicated backup folder.
- Right-click in the desired location and select “Paste” to create a copy of the original startup sound file.
By creating a backup of the original startup sound file, you can easily restore it if needed. This is particularly useful if you decide to change or remove your custom startup sound in the future. Keep the backup file in a safe place so that you can access it whenever necessary.
Restore the Original Startup Sound
If you have previously replaced the default startup sound in Windows with a custom sound and now wish to restore it to the original sound, you can do so by following these simple steps:
- Navigate to the location where you have stored the backup of the original startup sound file. If you followed the previous steps, it should be a copy of the
Windows Startup.wavfile. - Right-click on the backup file and select “Copy.”
- Go to the following folder on your computer:
C:\Windows\Media. - Right-click in the folder and select “Paste” to replace the current startup sound file with the original one.
- When prompted, grant administrative permission to replace the file.
Once you have completed these steps, the original startup sound will be restored in Windows. The next time you start up your computer, you will hear the default sound playing during the startup process.