
Check if your Mac supports lock screen customization
Before you dive into changing the lock screen on your Mac, it’s important to ensure that your device supports this customization feature. Although most recent Mac models offer the flexibility to personalize the lock screen, older models might not have this capability.
To check if your Mac supports lock screen customization, follow these simple steps:
- About This Mac: Click on the Apple logo in the top left corner of your screen and select “About This Mac” from the dropdown menu. A window will appear displaying the basic information about your Mac, including its model and macOS version.
- Model and Year: Take note of your Mac’s model and year, which can be found in the “Overview” section of the “About This Mac” window. If your Mac is a relatively newer model, there is a high likelihood that it supports lock screen customization.
- macOS version: In the same “About This Mac” window, look for the “Software Update” button and click on it. This will take you to the macOS Updates page, where you can check if your Mac is running the latest version of macOS. Lock screen customization features are usually available in newer macOS versions.
If your Mac is indeed compatible with lock screen customization, you can proceed with the steps in the subsequent sections of this tutorial. However, if your Mac does not support this feature, don’t despair! There are still alternative ways to personalize your Mac’s appearance and make it uniquely yours.
Remember, having a personalized lock screen not only adds a touch of individuality to your Mac but also enhances the overall user experience. So, before you embark on the journey of lock screen customization, ensure that your Mac meets the necessary requirements.
Find and select the desired lock screen image
Now that you’ve confirmed that your Mac supports lock screen customization, it’s time to choose a captivating image that will grace your lock screen. There are several ways you can find and select the perfect lock screen image to suit your style and preferences.
Here are a few options to consider:
- Stock wallpapers: macOS comes with a collection of stunning stock wallpapers for you to choose from. To access these wallpapers, go to “System Preferences” and click on “Desktop & Screen Saver.” From there, navigate to the “Desktop” tab and explore the various categories of wallpapers. Once you find an image you like, select it, and it will automatically become your lock screen image.
- Personal photos: If you prefer a more personalized touch, you can use one of your own photos as the lock screen image. Choose a photo with high resolution and an aspect ratio that fits your screen size. To set it as your lock screen image, go to “System Preferences,” select “Desktop & Screen Saver,” and click on the “+” icon in the left pane to add your photo to the collection. Then, choose the photo and set it as your lock screen image.
- Online image repositories: Another option is to browse online image repositories that offer a wide range of stunning lock screen images. Websites like Unsplash, Pexels, and Pixabay provide a vast selection of high-quality, royalty-free images that you can download and use as your lock screen. Simply visit these websites, search for the type of image you want, and download it to your Mac. Then, follow the steps mentioned earlier to set it as your lock screen image.
When selecting a lock screen image, consider your personal preferences, aesthetic preferences, and the overall ambiance you want to create. Whether it’s a serene landscape, an abstract artwork, or a motivational quote, choose an image that resonates with you and makes you feel inspired every time you unlock your Mac.
Ensure that the chosen image is of appropriate resolution to avoid distortion or pixelation on your lock screen. Experiment with different images until you find the perfect one that reflects your style and sets the right mood for your Mac’s lock screen.
Change the lock screen using System Preferences
Now that you have selected the desired lock screen image, it’s time to make the change using the System Preferences on your Mac. Follow these simple steps to customize your lock screen:
- Open System Preferences: Click on the Apple logo in the top left corner of your screen and select “System Preferences” from the dropdown menu.
- Select Desktop & Screen Saver: In the System Preferences window, locate and click on the “Desktop & Screen Saver” icon.
- Choose the Lock Screen tab: Once the Desktop & Screen Saver window opens, you will see multiple tabs at the top. Select the “Screen Saver” tab and then click on the “Lock Screen” tab located in the bottom-left corner.
- Select the previously chosen image: In the Lock Screen tab, you will find the image that is currently set as your lock screen. To change it, click on the image preview and a drop-down menu will appear.
- Browse and select a new image: From the drop-down menu, you can choose to select a new image from various sources, including stock wallpapers, your personal photos, and any other image repositories. Click on the desired image and it will be set as your new lock screen.
- Adjust lock screen settings: Additionally, you can make further adjustments to the lock screen by clicking on the “Screen Saver Options” button. This will allow you to customize the duration of the lock screen display, configure password settings, and more.
- Save changes: Once you are satisfied with your lock screen selection and settings, close the System Preferences window. The changes you made will be applied, and the new lock screen image will be displayed on your Mac.
With these simple steps, you can effortlessly change and customize your lock screen using the System Preferences on your Mac. Feel free to explore different lock screen images and settings to find the perfect combination that suits your style and preferences.
Remember, the lock screen is one of the first things you see when you interact with your Mac, so make it visually appealing and inspiring to enhance your overall user experience.
Use third-party apps to customize your lock screen
If you want to take your lock screen customization to the next level, you can explore the vast array of third-party apps available for Mac. These apps offer additional features, themes, and customization options that go beyond the capabilities of the default System Preferences. Here are some popular options to consider:
- Lock Screen Plus: Lock Screen Plus is a popular app that allows you to customize your lock screen with widgets, weather information, and even personal messages. You can choose from a variety of pre-designed themes or create your own unique lock screen design.
- Unlox: Unlox is an app that enables you to unlock your Mac using your iPhone’s Touch ID or Face ID. Along with this convenience, it also offers the ability to customize your lock screen with personal messages and stylish backgrounds.
- Wallcat: Wallcat provides a curated collection of stunning high-resolution wallpapers that automatically change on your lock screen every day. This app ensures that your lock screen never gets dull and always showcases a fresh, captivating image.
- MacID: MacID is an app that allows you to unlock your Mac using your iPhone, Apple Watch, or even your fingerprint. Alongside this functionality, it offers customizable lock screen options such as displaying the currently playing music and showing a clock.
These are just a few examples of the many third-party apps available in the Mac App Store that can enhance your lock screen customization experience. When choosing an app, read reviews, explore the features, and ensure compatibility with your Mac model and macOS version.
Once you find a suitable app, simply download it from the Mac App Store and follow the instructions provided by the app developer to personalize your lock screen according to your preferences. These apps often offer intuitive interfaces that make customization a breeze.
Keep in mind that third-party apps may require additional permissions and settings adjustments for proper functioning. Make sure to review the app’s documentation or user guide to understand how to grant necessary permissions and ensure a seamless lock screen customization experience.
By utilizing third-party apps, you can unlock a whole new world of possibilities for customizing your lock screen and make it truly unique to your style and personality.
Utilize the macOS built-in screen saver as a lock screen
Did you know that you can utilize the built-in screen saver feature on macOS as a creative way to personalize your lock screen? The screen saver not only adds a touch of visual interest to your Mac when it’s idle but can also serve as an alternative lock screen option.
Follow these steps to utilize the macOS built-in screen saver as your lock screen:
- Open System Preferences: Click on the Apple logo in the top left corner of your screen and select “System Preferences” from the dropdown menu.
- Select Desktop & Screen Saver: In the System Preferences window, locate and click on the “Desktop & Screen Saver” icon.
- Choose the Screen Saver tab: Once the Desktop & Screen Saver window opens, you will see multiple tabs at the top. Select the “Screen Saver” tab.
- Configure screen saver settings: In the Screen Saver tab, you can choose from a variety of screen saver options, including beautiful visuals such as Nature, Cosmos, or Drift. Select the desired screen saver that you want to use as your lock screen.
- Enable “Require password” setting: To ensure that the screen saver acts as a lock screen, make sure to check the box next to “Require password.” This setting will require a password to be entered after the screen saver is activated or when your Mac goes into sleep mode.
- Customize screen saver: If desired, you can further customize the screen saver by adjusting parameters such as speed, time before activation, or photo album selection. Experiment with these settings to find the perfect balance for your lock screen.
- Save changes: Once you are satisfied with the screen saver settings, close the System Preferences window. The changes you made will be applied, and the screen saver will now serve as your lock screen.
By utilizing the macOS built-in screen saver as your lock screen, you not only personalize your Mac but also enjoy the beautiful visual experience that these screen savers offer. Every time your Mac goes idle or into sleep mode, you will be greeted with stunning visuals that reflect your chosen screen saver.
Remember to adjust the screen saver settings according to your preferences and security needs. By enabling the “Require password” setting, you ensure that your Mac remains secure even when the screen saver is activated.
Take advantage of this unique feature provided by macOS to transform your lock screen into a visually captivating experience that brings a little bit of joy to your daily interactions with your Mac.
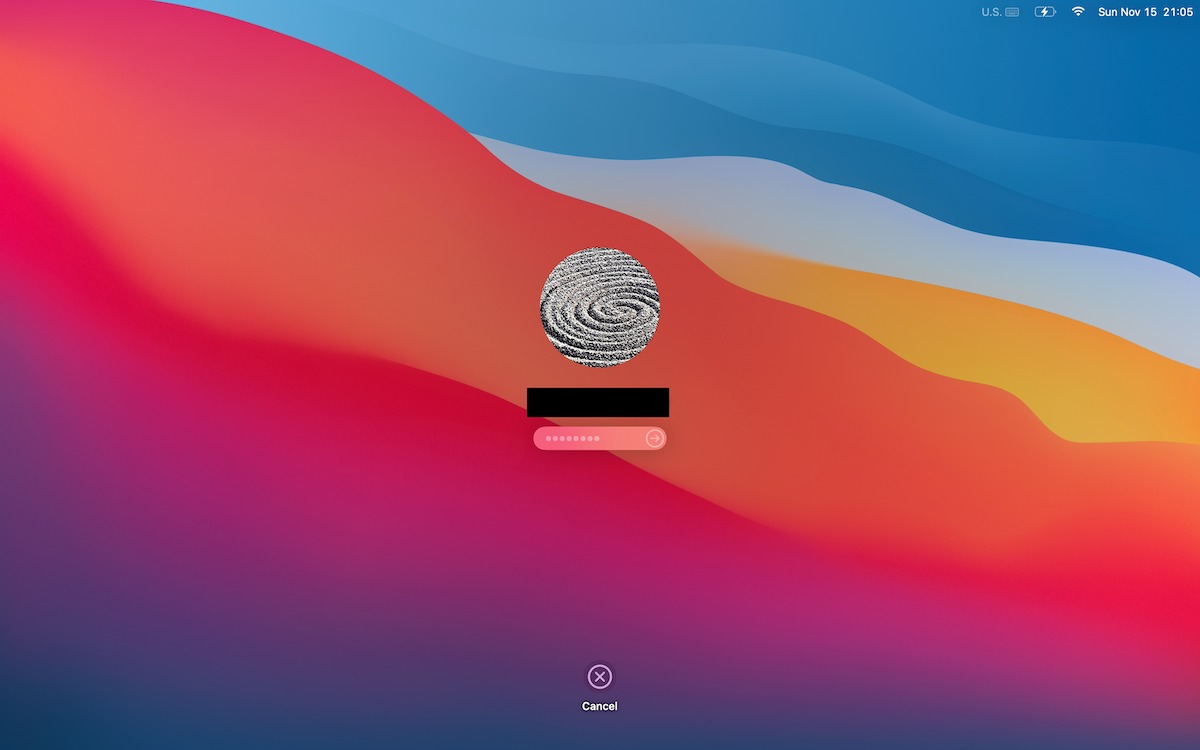
Enable a password or Touch ID for enhanced security
One of the most important aspects of lock screen customization is enhancing the security of your Mac. While personalizing the lock screen adds a touch of aesthetics, it’s crucial to ensure that your device remains protected from unauthorized access. To achieve this, you can enable a password or utilize the Touch ID feature on compatible Mac models.
Here’s how you can enable a password or Touch ID for enhanced security:
- Open System Preferences: Click on the Apple logo in the top left corner of your screen and select “System Preferences” from the dropdown menu.
- Select Security & Privacy: In the System Preferences window, locate and click on the “Security & Privacy” icon.
- Configure the password: In the Security & Privacy settings, click on the “General” tab. Here, you can set a secure password for your Mac by clicking on the “Change Password” button. Follow the instructions to create a strong password that is easy for you to remember but difficult for others to guess.
- Enable Touch ID: If your Mac supports Touch ID, navigate to the “Touch ID” tab within the Security & Privacy settings. Follow the instructions to set up Touch ID with your fingerprint. This will allow you to unlock your Mac and approve certain actions using your fingerprint.
- Adjust security settings: In the Security & Privacy settings, you can also configure additional security options, such as enabling the “Require password” feature after the computer goes idle or when waking from sleep. Adjust these settings according to your preferences and security needs.
- Save changes: Once you have configured the password or Touch ID settings, close the System Preferences window. Your lock screen will now require a password or fingerprint verification for access.
By enabling a password or utilizing Touch ID, you add an extra layer of security to your Mac and protect against unauthorized access. It is crucial to choose a strong password and avoid using easily guessable information like birthdays or common words. This will ensure that your lock screen remains secure and your personal data is protected.
Remember, security should always be a top priority, and it’s important to regularly update your password or fingerprint settings to maintain the integrity of your lock screen.
Take advantage of these security features provided by macOS to enhance the protection of your Mac while enjoying the customized lock screen appearance.
Troubleshooting common issues with lock screen changes
While changing the lock screen on your Mac is a straightforward process, you might encounter some common issues along the way. Understanding and troubleshooting these issues can help you overcome any obstacles and successfully customize your lock screen. Here are some common problems and their potential solutions:
Issue 1: Lock screen image doesn’t change: If you have followed the steps to change the lock screen image but it doesn’t seem to take effect, try restarting your Mac. Sometimes, a simple reboot can resolve the issue and apply the changes correctly.
Issue 2: Lock screen image appears distorted: If the selected lock screen image appears stretched, pixelated, or distorted, ensure that the image has the appropriate resolution for your screen size. Consider selecting an image with a higher resolution or specifically designed for your Mac’s screen dimensions.
Issue 3: Lock screen options are greyed out: If you find that the lock screen options are disabled or greyed out in the System Preferences, it could be due to certain system restrictions or administrator settings. Check if you have the necessary permissions to make changes or consult with the system administrator for assistance.
Issue 4: Third-party apps aren’t working: If you encounter issues with third-party apps for lock screen customization, make sure you have downloaded the latest version of the app that is compatible with your macOS version. You can also try reinstalling the app or reaching out to the app developer for troubleshooting or support.
Issue 5: Lock screen freezes or becomes unresponsive: If your lock screen becomes unresponsive or freezes, it could indicate a software issue. Try restarting your Mac or resetting the System Management Controller (SMC) to resolve the problem. If the issue persists, you may need to seek assistance from Apple Support or a certified technician.
Issue 6: Password or Touch ID not working: If you have enabled a password or Touch ID for your lock screen but it’s not functioning properly, double-check that you have entered the correct password or set up Touch ID correctly. If the problem persists, consider reconfiguring the settings or contacting Apple Support for further assistance.
Remember, troubleshooting can vary depending on individual system configurations and software versions. If you encounter any other issues that are not mentioned here, refer to official Apple documentation, support forums, or contact Apple Support for personalized assistance.
By troubleshooting and addressing these common issues, you can overcome any obstacles that may arise during the lock screen customization process and enjoy a personalized lock screen experience on your Mac.
Additional tips and tricks for lock screen customization
Now that you’ve mastered the basics of changing and customizing your lock screen on your Mac, here are some additional tips and tricks to take your lock screen customization to the next level:
1. Experiment with widgets: Some third-party lock screen customization apps allow you to add widgets such as weather updates, calendar events, or even music controls. Explore these options to add additional functionality and convenience to your lock screen.
2. Create a personalized message: Consider adding a personalized message to your lock screen. It can be an inspirational quote, a motivating reminder, or a simple note to brighten your day when you unlock your Mac.
3. Rotate lock screen images: If you have multiple lock screen images that you love, you can set them to rotate automatically. This will give you a fresh image every time you unlock your Mac and prevent boredom from seeing the same image repeatedly.
4. Customize notification settings: Take a moment to review and adjust the notification settings on your lock screen. You can choose the types of notifications that appear or configure them to show previews or hide sensitive information.
5. Match lock screen and desktop backgrounds: For a cohesive look, consider matching your lock screen background with your desktop background. This creates a unified visual experience and enhances the overall aesthetics of your Mac’s interface.
6. Explore dynamic wallpapers: Dynamic wallpapers are animated backgrounds that subtly change throughout the day or in response to certain events. These wallpapers can add a dynamic and engaging element to your lock screen experience.
7. Schedule lock screen changes: If you like to switch up your lock screen regularly, use scheduling options available in some apps or macOS itself to automatically change the lock screen image at specific intervals or times of the day.
8. Be mindful of battery usage: Some animated or dynamic lock screen options may consume more battery power. Keep an eye on your battery usage to ensure that the lock screen customization doesn’t significantly impact your Mac’s battery life.
9. Consider a dark mode lock screen: If you prefer a dark-themed interface, explore the option to set a dark mode lock screen. This can be visually pleasing and may help to reduce eye strain, particularly in low-light environments.
10. Stay up-to-date with macOS updates: As new macOS versions are released, keep an eye out for any additional lock screen customization features or improvements. Updating your Mac ensures you have access to the latest options and enhancements.
With these additional tips and tricks, you can truly personalize and optimize your lock screen experience on your Mac. Enjoy the flexibility and creativity that lock screen customization offers, and make your Mac truly your own.