
Getting Started
Welcome to our guide on how to change the ink cartridge in your Canon printer. Whether you’re a seasoned printer user or a beginner, this step-by-step process will help you successfully replace the ink cartridge and get your printer up and running again. Before we dive into the detailed steps, let’s go over what you’ll need to get started.
To change the ink cartridge in your Canon printer, you will need the following supplies:
- A new ink cartridge compatible with your Canon printer model
- A clean lint-free cloth or tissue
- Disposable gloves (optional, but recommended)
Once you have gathered all these supplies, you’re ready to begin the ink cartridge replacement process. It’s important to note that each Canon printer model may have slight variations in the steps required, so it’s best to consult your printer’s user manual for specific instructions. However, the general process remains the same for most Canon printers.
Now that you have everything you need, let’s move on to the step-by-step process of changing the ink cartridge in your Canon printer. Remember to take your time, follow the instructions carefully, and handle the ink cartridges with care to avoid any unnecessary spillage or damage.
Before we jump into the detailed steps, make sure your Canon printer is turned on and connected to your computer, as this will ensure a smooth and uninterrupted ink cartridge replacement process. With the printer powered on, let’s move on to the next step – opening the ink cartridge door.
Step 1: Gather the necessary supplies
Before you can start changing the ink cartridge in your Canon printer, it’s essential to gather all the necessary supplies. This will ensure a smooth and efficient cartridge replacement process. Here’s a list of the supplies you’ll need:
- A new ink cartridge compatible with your Canon printer model: It’s important to choose the correct ink cartridge that is compatible with your specific Canon printer model. Using an incompatible cartridge may result in poor print quality or damage to your printer.
- A clean lint-free cloth or tissue: This will be useful for cleaning any ink residue or dust from the printer or your hands during the cartridge replacement process.
- Disposable gloves (optional, but recommended): Wearing gloves can protect your hands from any ink smudges or stains. It’s especially useful if you are concerned about getting ink on your skin or clothes.
Once you have collected these supplies, ensure that you have a clean and well-lit workspace. A clutter-free area will help you work more efficiently and reduce the chances of misplacing any components. It’s also a good idea to have a flat and stable surface to place your printer on while replacing the ink cartridge.
If you’re unsure about the specific ink cartridge that is compatible with your Canon printer model, you can refer to the printer’s user manual or search for the information on Canon’s official website. Additionally, it’s worth noting that there are two types of ink cartridges available: black ink cartridges for monochrome printing and color ink cartridges for printing in color.
By having all the necessary supplies on hand, you can proceed to the next steps with confidence. In the following steps, we will guide you through the process of changing the ink cartridge in your Canon printer, ensuring that you can resume printing with optimal print quality.
Step 2: Turn on your Canon printer
Before you begin the ink cartridge replacement process, it’s crucial to make sure that your Canon printer is turned on. Turning on your printer will ensure that it’s ready to perform the necessary functions required to change the ink cartridge. Here’s how you can do it:
1. Locate the power button on your Canon printer. Typically, it’s located on the top or front panel of the printer.
2. Press the power button to turn on the printer. Wait for a few moments as the printer initializes and prepares for use.
3. Check the LED display or indicator lights on the printer to confirm that it is powered on. Different Canon printer models may have different indicators, such as a solid power indicator or a screen displaying the printer’s status.
It’s important to note that some Canon printers may have a separate power switch on the back or side. In such cases, ensure that you turn on both the main power switch and the power button on the control panel.
By turning on your Canon printer, you ensure that it is ready for the subsequent steps of the ink cartridge replacement process. If your printer is not powered on, the printer heads may not be in the correct position, hindering your ability to replace the ink cartridge efficiently.
Once your Canon printer is turned on and ready, you can proceed to the next step of opening the ink cartridge door.
Step 3: Open the ink cartridge door
Now that your Canon printer is powered on, it’s time to open the ink cartridge door. This step will give you access to the ink cartridges inside the printer. Follow these simple instructions to open the ink cartridge door:
1. Locate the ink cartridge door on your Canon printer. The exact location may vary depending on the model, but it is typically located on the front panel or top cover of the printer.
2. Gently grasp the handle or tab of the ink cartridge door. Apply slight pressure and lift it upwards or towards you. The door should open smoothly, exposing the ink cartridge holders or slots inside.
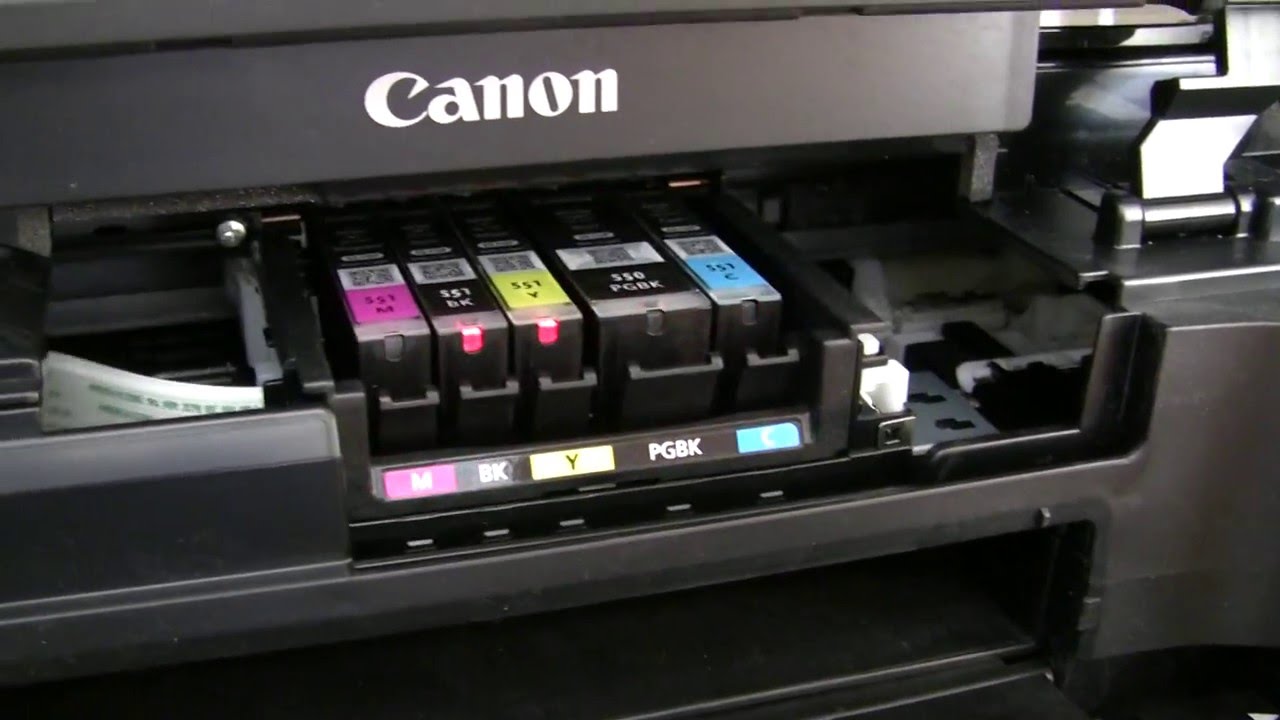
3. Take a moment to familiarize yourself with the ink cartridge holders or slots. These are typically labeled with letters or symbols that correspond to each ink cartridge color. For example, “C” for cyan, “M” for magenta, “Y” for yellow, and “K” for black.
It’s essential to open the ink cartridge door carefully to avoid any damage to the printer or the cartridges. If you encounter any resistance or difficulty while opening the door, double-check the printer’s user manual for specific instructions or seek assistance from a technical support professional.
Once the ink cartridge door is open, you’re ready to proceed to the next step of removing the old ink cartridge. Remember to handle the ink cartridges with care and avoid touching the ink nozzles or sensitive electrical contacts to prevent any potential printing issues.
Step 4: Remove the old ink cartridge
With the ink cartridge door open, it’s time to remove the old ink cartridge from your Canon printer. Follow these simple steps to safely remove the old cartridge:
1. Locate the old ink cartridge that you want to replace. Identify the corresponding cartridge holder or slot based on the label or symbol on the printer.
2. Gently push down on the cartridge to release it from the holder. The cartridge may make a clicking sound as it unlocks.
3. Carefully pull the old cartridge out of the holder, holding it by the sides or the areas designated for handling. Be cautious not to touch the ink nozzles or the copper-colored electrical contacts.
4. Set the old cartridge aside in a safe place. If you’re disposing of it, make sure to follow proper recycling or disposal guidelines for ink cartridges in your area.
It’s important to note that some Canon printer models may require you to press a release lever or tab to remove the ink cartridge. Refer to your printer’s user manual or check for any specific instructions on how to remove the old cartridge.
Take your time and handle the old cartridge with care to avoid any ink spills or stains. Ink cartridges can contain residual ink, so it’s best to keep them in an upright position to prevent leakage.
Once you have successfully removed the old ink cartridge, you can move on to the next step of preparing the new cartridge for installation.
Step 5: Prepare the new ink cartridge
Now that the old ink cartridge has been removed, it’s time to prepare the new ink cartridge for installation in your Canon printer. Proper preparation ensures a seamless replacement process and helps maintain print quality. Follow these steps to prepare the new cartridge:
1. Carefully unpack the new ink cartridge from its packaging. Avoid touching the ink nozzles or copper contacts as this can affect print quality.
2. Take a moment to inspect the new cartridge for any protective tapes or seals. Some cartridges have a protective seal that needs to be removed before installation. Check the instructions or diagrams on the cartridge packaging to determine if there are any such seals.
3. If there is a protective tape or seal, gently pull it off or remove it as indicated. Make sure to avoid touching the exposed areas where ink is released.
4. Before installing the new cartridge, give it a gentle shake from side to side. This helps distribute the ink evenly within the cartridge.
5. Take a clean lint-free cloth or tissue and wipe the contacts on the new cartridge. This helps remove any dust or residue that may affect the electrical connection with the printer.
6. Make sure to refer to your printer’s user manual or the instructions that came with the new cartridge for any specific preparation steps or precautions.
By properly preparing the new ink cartridge, you ensure that it is ready for installation and optimal printing performance. Taking the time to go through these preparation steps helps maintain the longevity of your printer and ensures high-quality prints.
With the new cartridge now prepared, it’s time to move on to the next step of inserting the cartridge into the printer.
Step 6: Insert the new ink cartridge
Now that the new ink cartridge has been prepared, it’s time to insert it into your Canon printer. Follow these step-by-step instructions to ensure a successful installation:
1. Locate the cartridge holder or slot from where you removed the old ink cartridge.
2. Hold the new cartridge with the label facing up and the contacts facing towards the printer.
3. Align the cartridge with the corresponding slot, making sure it fits securely. The label on the cartridge should match the label or symbol on the printer.
4. Gently push the cartridge into the slot until it clicks or locks into place. This ensures that the cartridge is correctly seated in the holder.
5. Repeat the process for any additional ink cartridges that need to be replaced.
It’s important to handle the new cartridge with care and avoid touching the ink nozzles or the electrical contacts. Any contact can disrupt the flow of ink or cause printing issues.
If you encounter resistance while installing the new cartridge, double-check that it is aligned correctly with the slot. Avoid exerting excessive force to avoid damaging your printer or the cartridge.
Once all the new cartridges have been securely installed, you can move on to the next step of closing the ink cartridge door.
Remember, each printer model may have slight variations in the installation process, so it’s always a good idea to refer to your printer’s user manual for any specific instructions or guidelines.
With the new cartridges in place, you’re one step closer to enjoying crisp and clear prints from your Canon printer.
Step 7: Close the ink cartridge door
After inserting the new ink cartridges into your Canon printer, it’s time to close the ink cartridge door. Closing the door properly ensures that the cartridges are securely in place and protects them from dust or damage. Follow these simple steps to close the ink cartridge door:
1. Make sure that all the new ink cartridges are correctly inserted and securely in place.
2. Gently lower or push the ink cartridge door back into its original position.
3. Apply slight pressure to ensure that the door is fully closed.
4. Listen for a clicking or snapping sound, indicating that the door has locked into place.
It’s important to ensure that the ink cartridge door is closed properly before continuing to the next step. An improperly closed door may result in alignment issues or printing errors.
If your Canon printer has an LCD or LED display, check for any on-screen prompts or messages that indicate whether the ink cartridge door is closed securely. Some printers may display an error message or an indication if the door is not properly closed.
By closing the ink cartridge door, you protect the ink cartridges from exposure to external elements and help maintain the proper functioning of your Canon printer.
With the ink cartridge door securely closed, you’re ready to move on to the next step – testing the new ink cartridge.
Step 8: Test the new ink cartridge
Once you have successfully installed the new ink cartridge and closed the ink cartridge door on your Canon printer, it’s important to perform a test to ensure that the cartridge is functioning correctly. Here’s how you can test the new ink cartridge:
1. Load a few sheets of plain paper into the printer’s paper tray or input tray.
2. Open a document or an image on your computer that you want to print.
3. Select the “Print” option in the application or software you are using. Make sure to choose the appropriate printer and adjust any printing settings, if necessary.
4. Monitor the printing process and check for any issues, such as faded or streaky prints, misaligned text or images, or error messages on the printer’s display.
5. If the print quality is satisfactory and there are no errors, then the new ink cartridge is working correctly. You can continue to use your Canon printer for your printing needs.
6. In the event that there are any issues with the print quality or error messages, refer to your printer’s user manual or Canon’s official website for troubleshooting tips. It’s possible that there may be a simple solution, such as cleaning the print heads or aligning the cartridges.
Performing a test print allows you to verify that the new ink cartridge is providing good print quality and ensures that the replacement process was successful. It also gives you the opportunity to address any potential issues early on, avoiding any inconvenience in the future.
Remember, the test print is not only for checking the functionality of the new cartridge but also for ensuring that the printer is properly calibrated and the ink flow is optimal.
With the new ink cartridge tested and working correctly, you can now resume your printing tasks with confidence and enjoy high-quality prints from your Canon printer.
Step 9: Dispose of the old ink cartridge safely
Properly disposing of the old ink cartridge is an important step in the ink cartridge replacement process. Disposing of it safely ensures environmental responsibility and prevents any potential harm to human health or the ecosystem. Here are some guidelines to help you dispose of the old ink cartridge safely:
1. Check the recycling options: Before discarding the old ink cartridge, research your local recycling options. Many communities offer recycling programs specifically for printer cartridges. Look for recycling centers or drop-off locations that accept ink cartridges.
2. Return to the manufacturer: Some printer manufacturers, including Canon, have recycling programs or initiatives in place. They may provide convenient ways to return used ink cartridges for recycling. Check the manufacturer’s website or contact their customer support for details on their recycling programs.
3. Follow community guidelines: Follow the recycling guidelines set by your community or municipality. They may have specific instructions on how to dispose of ink cartridges. This could include placing them in specific bins or designated recycling containers.
4. Protect the environment: If you are unable to recycle the ink cartridge, it’s essential to dispose of it properly. Avoid throwing it in the regular trash or dumping it in landfill. Ink cartridges contain toxic materials and can harm the environment if not handled correctly.
5. Store for bulk recycling: If you have multiple ink cartridges, consider storing them until you have a larger quantity to recycle. This can help maximize the efficiency of recycling efforts in your area.
6. Follow any additional instructions: Some ink cartridges may come with specific instructions for disposal. Be sure to read and follow the instructions provided by the manufacturer to ensure proper handling and disposal.
By disposing of the old ink cartridge in an environmentally responsible manner, you contribute to sustainable practices and help protect our planet. Additionally, recycling or returning the cartridge to the manufacturer allows for the materials to be reused or properly processed, reducing waste and conserving resources.
With the old ink cartridge safely disposed of, you can now enjoy your newly installed ink cartridge and continue printing with confidence!