
Why Blocking Unwanted Emails is Important
Email has become an integral part of our lives, enabling effective communication and information exchange. However, with the convenience of email comes the downside of unsolicited and unwanted messages, commonly known as spam. Unwanted emails can clutter your inbox, waste your time, and even pose a security risk. That’s why it’s crucial to know how to block unwanted emails from senders in Yahoo Mail.
First and foremost, blocking unwanted emails helps you maintain a clean and organized inbox. Spam emails can flood your mailbox, making it difficult to find important messages from genuine contacts. By blocking senders of irrelevant or unwanted emails, you can eliminate unnecessary clutter and focus on the emails that truly matter.
Moreover, blocking unwanted emails helps protect your privacy and security. Some spam messages may contain malicious attachments or links that can harm your computer or compromise your personal information. By blocking these senders, you minimize the risk of falling victim to phishing attempts or malware infections. It’s an essential step in safeguarding your digital life.
Blocking unwanted emails also saves you time and improves your productivity. When your inbox is inundated with unwanted messages, it takes precious time to sift through and delete them. By blocking the senders directly, you eliminate the need to manually filter out spam emails, allowing you to focus on more important tasks.
Additionally, blocking unwanted emails can improve your overall email experience. Instead of being bombarded with irrelevant promotions, scams, or unsolicited messages, you can create a curated inbox tailored to your specific needs. This enhances your ability to receive and respond to important emails promptly, without distractions.
To summarize, blocking unwanted emails is essential for multiple reasons. It helps maintain a clean and organized inbox, enhances privacy and security, saves time and improves productivity, and overall enhances your email experience. By taking proactive steps to block these senders, you can regain control over your inbox and enjoy a more efficient and secure email experience.
How to Block a Sender in Yahoo Mail
If you’re tired of receiving unwanted emails from a specific sender in your Yahoo Mail inbox, you can easily block them with just a few simple steps. Here’s how:
Step 1: Open Yahoo Mail and Access Email Settings
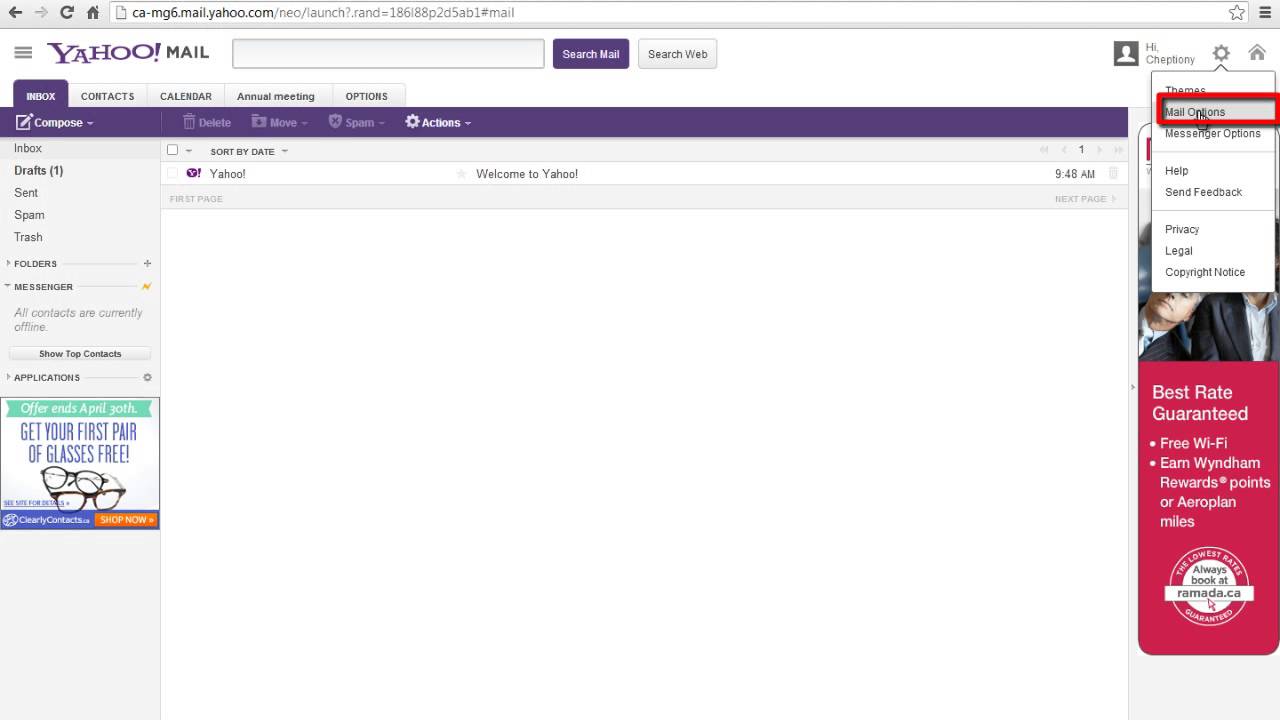
To start blocking a sender, log in to your Yahoo Mail account and click on the gear icon in the upper right corner to access the settings.
Step 2: Select the “Blocked Addresses” Option
From the settings menu, select “More Settings.” Then, choose “Security and Privacy” from the left-hand side menu, followed by “Blocked Addresses.”
Step 3: Enter the Email Address to Block
In the “Blocked Addresses” section, you will find a text box where you can enter the email address of the sender you want to block. Type in the email address and click the “Block” button or press Enter to confirm.
Step 4: Save the Blocked Address and Confirm
After you have entered the email address, click on the “Save” button to apply the changes. Yahoo Mail will confirm that the sender has been blocked, and any future emails from that address will be sent directly to the spam folder.
That’s it! You have successfully blocked a sender in Yahoo Mail. Any future emails from that sender will no longer appear in your inbox, providing you with a clutter-free and personalized email experience.
Remember, if you ever change your mind and want to unblock a sender, you can follow similar steps to access the “Blocked Addresses” section and remove the email address from the list.
Blocking senders in Yahoo Mail is a simple and effective way to take control of your email inbox and prevent unwanted messages from cluttering your mailbox. Whether it’s spam, promotional emails, or annoying messages, blocking a sender ensures that their future emails are automatically diverted to the spam folder, freeing up your time and attention for important emails.
Step 1: Open Yahoo Mail and Access Email Settings
To begin the process of blocking a sender in Yahoo Mail, the first step is to open your Yahoo Mail account and access the email settings. Follow these steps:
1. Launch your preferred web browser and go to the Yahoo Mail website.
2. Enter your login credentials (username and password) to access your Yahoo Mail account.
3. Once you’re logged in, you will be directed to your Yahoo Mail inbox.
4. Look for the gear icon, which is typically located in the upper right corner of the screen. This icon represents the settings menu.
5. Click on the gear icon to open the drop-down menu.
6. From the drop-down menu, select the “Settings” or “More Settings” option. This will lead you to the email settings page.
By following these steps, you will have successfully opened Yahoo Mail and accessed the email settings, allowing you to proceed with the next steps for blocking a sender. The email settings provide you with various options to customize and manage your Yahoo Mail account.
Please note that the location and appearance of the settings icon may vary depending on the version of Yahoo Mail you are using. If you are using the classic version of Yahoo Mail, the gear icon may be replaced with a “Settings” link that you can click to access the email settings.
It’s important to have access to the email settings because it allows you to configure different aspects of your Yahoo Mail account, such as filters, forwarding, signatures, and, in this case, blocking unwanted senders. By accessing the settings, you gain control over your email preferences and can tailor your Yahoo Mail experience to your liking.
Once you have successfully accessed the email settings, you are ready to move on to the next step in the process of blocking a sender in Yahoo Mail.
Step 2: Select the “Blocked Addresses” Option
After accessing the email settings in Yahoo Mail, the next step in blocking a sender is to navigate to the “Blocked Addresses” section. Follow these steps:
1. Once you have accessed the email settings, look for the “More Settings” option. This is typically located on the left-hand side menu. Click on it to expand the menu options.
2. Among the options in the expanded menu, locate and select “Security and Privacy.” This will open a new page with additional settings related to security and privacy features in Yahoo Mail.
3. On the “Security and Privacy” page, look for the “Blocked Addresses” option. It is usually listed under the “Mail” section or in a separate section titled “Blocked Addresses.”
4. Click on the “Blocked Addresses” option to access the settings related to blocking unwanted senders.
By following these steps, you will successfully navigate to the “Blocked Addresses” section in Yahoo Mail, where you can manage the list of blocked email addresses. This section allows you to view and modify the list of senders that you have previously blocked.
The “Blocked Addresses” option is a crucial feature in Yahoo Mail as it empowers you to control who can send you emails. When you block an email address, any future emails from that sender will be automatically sent to the spam folder, saving you from the nuisance of unwanted messages cluttering your inbox.
Keep in mind that the location and terminology of the “Blocked Addresses” option may vary depending on the version of Yahoo Mail you are using. It’s important to familiarize yourself with the settings page to locate this option.
Once you have successfully selected the “Blocked Addresses” option, you are now ready to proceed to the next step in the process of blocking a sender in Yahoo Mail.
Step 3: Enter the Email Address to Block
Once you have accessed the “Blocked Addresses” section in Yahoo Mail, the next step in blocking a sender is to enter the email address that you want to block. Follow these steps:
1. In the “Blocked Addresses” section, you will find a text box or a field labeled “Add an address” or similar. This is where you can input the email address of the sender you wish to block.
2. Type the email address of the sender you want to block into the text box. Ensure that you enter the email address correctly to avoid blocking unintended senders.
3. After entering the email address, double-check it for any typos or errors.
4. Once you have confirmed that the email address is correct, click on the “Block” button or press Enter to initiate the blocking process.
By following these steps, you will successfully enter the email address of the sender you want to block in Yahoo Mail. This effectively ensures that any future emails from that particular email address will be diverted to the spam folder, keeping your inbox free from unwanted clutter.
When entering the email address to block, you have the option to block specific email addresses or even entire domains. For example, if you want to block all emails from a specific domain, you can simply enter “@domainname.com” in the text box, replacing “domainname” with the actual domain you want to block.
It’s important to note that Yahoo Mail allows you to block multiple email addresses. If you have more than one sender you wish to block, simply repeat the process of entering the email addresses in the text box one by one.
After you have entered the email address to block, you are now ready to move on to the next step in the process of blocking a sender in Yahoo Mail.
Step 4: Save the Blocked Address and Confirm
After entering the email address of the sender you want to block in Yahoo Mail, the final step is to save the blocked address and confirm your settings. Follow these steps:
1. Once you have entered the email address to block, review it to ensure accuracy. Make sure that the email address is correctly spelled and doesn’t contain any typos.
2. After verifying the email address, locate the “Save” or “Add” button, typically located near the text box where you entered the email address.
3. Click on the “Save” or “Add” button to save the blocked address and add it to your list of blocked senders.
4. Yahoo Mail will display a confirmation message indicating that the sender has been successfully added to the blocked addresses list.
5. Take a moment to review the confirmation message to ensure that the correct email address has been blocked.
By following these steps, you have successfully saved the blocked address and confirmed your settings in Yahoo Mail. Any future emails from the blocked email address will now be automatically filtered into the spam folder, keeping your inbox free from unwanted messages.
It’s important to note that after blocking a sender, you can always review and manage your list of blocked addresses in Yahoo Mail settings. If you ever need to unblock a sender or make changes to the blocked addresses list, you can revisit the “Blocked Addresses” section and modify it accordingly.
Blocking unwanted senders in Yahoo Mail provides you with control over your inbox and helps you effectively manage the flow of emails. It ensures that your mailbox remains clutter-free and allows you to focus on important messages without the distraction of unwanted or spam emails.
With the completion of this final step, you have successfully blocked a sender in Yahoo Mail. Congratulations! Enjoy a more organized and hassle-free email experience.
How to Unblock a Sender in Yahoo Mail
If you have previously blocked a sender in Yahoo Mail and now want to unblock them, you can easily do so by following these steps:
Step 1: Access Yahoo Mail and Open Email Settings
To start unblocking a sender, log in to your Yahoo Mail account and click on the gear icon in the upper right corner to access the settings menu. From there, select “More Settings” to proceed.
Step 2: Navigate to the “Blocked Addresses” Section
In the settings menu, look for the “Security and Privacy” option. Click on it to access additional security and privacy settings for your Yahoo Mail account. Within this section, you will find the “Blocked Addresses” option.
Step 3: Locate the Blocked Email Address
In the “Blocked Addresses” section, you will see a list of email addresses that you have previously blocked. Scroll through the list to locate the specific email address you want to unblock. Alternatively, you can use the search function to find the address more quickly if you remember part of it.
Step 4: Unblock the Sender and Save Changes
Once you have found the blocked email address, click on the “Remove” or “Unblock” button next to it. Yahoo Mail will prompt you to confirm the action. Click “OK” or a similar confirmation button to unblock the sender. Make sure to save your changes to apply the unblocking.
That’s all it takes to unblock a sender in Yahoo Mail. Once you have completed these steps, any future emails from the unblocked sender will no longer be diverted to your spam folder but will instead appear in your inbox as normal.
Unblocking a sender allows you to re-establish communication with individuals or organizations you previously blocked. It’s especially useful if you accidentally blocked someone or if you no longer consider them as unwanted contacts.
Remember to exercise caution when unblocking a sender. Be sure to review the email address carefully to avoid unblocking the wrong sender or inadvertently allowing unwanted emails back into your inbox.
By knowing how to unblock a sender in Yahoo Mail, you can easily manage your blocked addresses list and fine-tune your email filtering preferences to ensure a customized and efficient email experience.
Step 1: Access Yahoo Mail and Open Email Settings
To unblock a sender in Yahoo Mail, the first step is to access your Yahoo Mail account and open the email settings. Follow these steps:
1. Open your preferred web browser and navigate to the Yahoo Mail website.
2. Enter your login credentials, including your username and password, to access your Yahoo Mail account.
3. Once you’re logged in, you will be directed to your Yahoo Mail inbox, where you can see a list of your received emails.
4. Look for the gear icon located in the upper right corner of the screen. This gear icon represents the settings menu.
5. Click on the gear icon to open the dropdown menu that contains various options for customizing your Yahoo Mail account.
6. From the dropdown menu, select the “Settings” option. This will open the email settings page.
By following these steps, you will successfully access your Yahoo Mail account and open the email settings. The settings menu allows you to personalize your Yahoo Mail experience and configure various options, including managing blocked senders.
Please note that the specific location and appearance of the settings icon or the “Settings” option may vary depending on the version of Yahoo Mail you are using. If you are using the classic version of Yahoo Mail, the gear icon may be replaced with a “Settings” link that you can click to access the email settings.
Accessing the email settings is essential as it gives you control over various aspects of your Yahoo Mail account. In addition to unblocking senders, you can configure filters, manage folders, set up vacation responses, and more. This flexibility allows you to tailor your email experience according to your preferences and needs.
Once you have successfully accessed Yahoo Mail and opened the email settings, you are now ready to proceed to the next step of unblocking a sender, which involves navigating to the appropriate section where you can manage the blocked addresses list.
Step 2: Navigate to the “Blocked Addresses” Section
After accessing the email settings in Yahoo Mail, the next step in unblocking a sender is to navigate to the “Blocked Addresses” section. Follow these steps:
1. Once you have accessed the email settings, you will see a menu on the left-hand side of the page. Look for the “Security and Privacy” or “Security” option in the menu.
2. Click on the “Security and Privacy” or “Security” option to expand it and reveal additional settings related to security and privacy features in Yahoo Mail.
3. Within the “Security and Privacy” or “Security” section, locate and click on the “Blocked Addresses” option. This will direct you to the page where you can manage the list of blocked senders.
By following these steps, you will successfully navigate to the “Blocked Addresses” section in Yahoo Mail. This section allows you to view and manage the list of email addresses that you have previously blocked.
The “Blocked Addresses” section is an important feature in Yahoo Mail as it enables you to have control over the senders you wish to unblock. It allows you to review the list of blocked addresses and make changes as needed.
Keep in mind that the location and terminology of the “Blocked Addresses” section may vary depending on the version of Yahoo Mail you are using. It’s important to familiarize yourself with the settings page to locate this section.
By navigating to the “Blocked Addresses” section, you are one step closer to unblocking a sender and allowing their emails to reach your inbox once again. From this point, you can proceed to locate the specific email address you want to unblock and remove it from the blocked addresses list.
Now that you have successfully navigated to the “Blocked Addresses” section, you are ready to move on to the next step in the process of unblocking a sender in Yahoo Mail.
Step 3: Locate the Blocked Email Address
Once you have accessed the “Blocked Addresses” section in Yahoo Mail, the next step in unblocking a sender is to locate the email address that you want to unblock. Follow these steps:
1. In the “Blocked Addresses” section, you will see a list of email addresses or domains that you have previously blocked. This list represents the senders whose emails are currently being diverted to your spam folder.
2. Scroll through the list to locate the specific email address you want to unblock. You can also use the search function or filters available to narrow down the results if you remember part of the email address.
3. Take your time to review the list and locate the blocked email address accurately. Make sure to double-check the spelling and formatting to ensure you identify the correct sender.
4. If you have a long list of blocked addresses and the one you want to unblock is not immediately visible, consider using the search function within the “Blocked Addresses” section to find it more quickly.
By following these steps, you will successfully locate the specific email address that you want to unblock in Yahoo Mail. It’s important to take your time and ensure you’ve identified the correct sender before proceeding to unblock them.
Having the ability to locate the blocked email address is valuable as it allows you to review your preferences and make necessary changes based on your evolving email habits. It also gives you the flexibility to manage your email settings and ensure that you have control over who can communicate with you.
Once you have located the blocked email address, you will be ready to proceed to the final step of unblocking the sender in Yahoo Mail. This step involves removing the email address from the blocked addresses list and confirming the changes.
Now that you have successfully located the blocked email address, you can proceed to unblock the sender and allow their emails to appear in your inbox again.
Step 4: Unblock the Sender and Save Changes
After locating the blocked email address in Yahoo Mail, the final step in unblocking a sender is to unblock them and save the changes. Follow these steps:
1. Once you have located the blocked email address, you will see a corresponding “Remove” or “Unblock” button next to it in the “Blocked Addresses” section.
2. To unblock the sender, click on the “Remove” or “Unblock” button next to their email address. Yahoo Mail will prompt you to confirm the action.
3. Review the confirmation message to ensure that you are unblocking the correct sender. Double-check the email address and ensure it matches the one you want to unblock.
4. After confirming, click on the “OK” or “Confirm” button to proceed with unblocking the sender.
5. Remember to save the changes to ensure that the unblocked sender can now send emails directly to your inbox.
By following these steps, you will successfully unblock the sender in Yahoo Mail, allowing their emails to reach your primary inbox once again.
It’s important to exercise caution and pay attention to the email address you’re unblocking. Review the confirmation message and ensure that you are unblocking the correct sender. This ensures that you don’t unintentionally unblock someone you intended to keep blocked.
Unblocking a sender in Yahoo Mail gives you the opportunity to re-establish communication with individuals or organizations you previously blocked. It can be useful if you have changed your mind about their emails or if you want to restore contact with them.
Remember, Yahoo Mail provides you with the ability to manage your blocked addresses list. If you ever need to make changes in the future, simply revisit the “Blocked Addresses” section and modify it accordingly.
With the completion of this final step, you have successfully unblocked the sender in Yahoo Mail. Congratulations! You can now receive their emails in your inbox and resume communication with them.
Additional Tips for Blocking Unwanted Emails
Blocking unwanted emails in Yahoo Mail is an effective way to maintain a clean and organized inbox. Here are some additional tips to enhance your experience and further protect against unwanted messages:
Tip 1: Set Up Filters to Automatically Block Unwanted Emails
In addition to manually blocking individual senders, you can set up filters in Yahoo Mail to automatically detect and block certain types of unwanted emails. Filters allow you to create rules based on specific criteria, such as subject lines, sender addresses, or keywords. This helps to proactively block unwanted emails without the need for manual intervention.
Tip 2: Be Cautious with Sharing your Email Address
One way to minimize the influx of unwanted emails is to be cautious about who you share your email address with. Avoid providing your email address to unfamiliar websites, questionable online services, or third-party marketers. Be mindful of checkboxes or consent options when signing up for newsletters or online services to avoid unintentionally allowing unwanted emails to flood your inbox.
Tip 3: Report Spam Emails to Yahoo
If you come across spam or malicious emails in your Yahoo Mail inbox, it’s essential to report them to Yahoo. Reporting these emails provides valuable feedback to Yahoo’s security systems, allowing them to improve their email filters and better protect users from such messages. By reporting spam emails, you contribute to the overall safety and security of the Yahoo Mail community.
Tip 4: Regularly Review and Update Your Blocked Addresses List
Take the time to periodically review your blocked addresses list in Yahoo Mail. Over time, your email habits may change, and some blocked addresses may no longer serve a purpose. By removing unnecessary blocked addresses, you ensure that your email management remains up to date and accurate.
Tip 5: Keep Your Yahoo Mail Account Secure
Maintaining the security of your Yahoo Mail account is essential in preventing unwanted emails. Use strong, unique passwords for your account and enable two-factor authentication for an extra layer of security. Be vigilant about phishing attempts and avoid clicking on suspicious links or providing personal information in response to unsolicited emails.
By following these additional tips, you can further enhance your ability to block unwanted emails in Yahoo Mail and maintain a clutter-free inbox. Customizing filters, practicing caution with your email address, reporting spam, reviewing your blocked addresses list, and prioritizing account security are crucial steps in creating a more secure and enjoyable email experience.
Tip 1: Set Up Filters to Automatically Block Unwanted Emails
One powerful feature of Yahoo Mail is the ability to set up filters to automatically block unwanted emails. Filters allow you to create specific rules that determine how incoming emails are managed and organized. By utilizing filters effectively, you can minimize the presence of unwanted messages without having to manually block individual senders. Follow these steps to set up filters in Yahoo Mail:
Step 1: Access the Settings Menu
Click on the gear icon in the upper-right corner of Yahoo Mail to access the settings menu. From there, select “More Settings” to proceed to the full settings page.
Step 2: Navigate to the Filters Section
In the settings page, look for the “Filters” option, which is usually located in the left-hand sidebar. Click on it to access the filter management section.
Step 3: Create a New Filter
Click on the “Add new filters” button to create a new filter. You will be prompted to specify the criteria for the filter.
Step 4: Define the Filter Criteria
Define the criteria that will trigger the filter. This can include the sender’s email address, subject line, specific keywords, or other elements of the email. You can use multiple criteria to create more targeted filters.
Step 5: Set the Actions for the Filter
Specify the actions that the filter should take when an email matches the defined criteria. This can include moving the email to a specific folder, marking it as read or starred, forwarding it to another email address, or even automatically deleting it.
Step 6: Save the Filter
After defining the criteria and actions, click on the “Save” button to save the filter. You can create multiple filters to handle different scenarios and types of unwanted emails.
By setting up filters in Yahoo Mail, you gain the ability to automatically block unwanted emails based on specific criteria. This allows you to create a tailored email management system that keeps your inbox organized and free from clutter.
Some examples of filters you can create include blocking emails containing specific keywords associated with spam or unwanted promotions, or automatically moving newsletters or promotional emails to a separate folder.
Regularly review and update your filters as needed to ensure they are effectively blocking unwanted emails and adjusting to any changes in your email patterns.
By utilizing filters to automatically block unwanted emails, you can significantly reduce the time and effort spent manually managing your inbox, allowing you to focus on the messages that truly matter.
Tip 2: Be Cautious with Sharing your Email Address
In the digital age, it’s essential to be cautious about sharing your email address to minimize the influx of unwanted emails and protect your privacy. Here are some important tips to follow when it comes to sharing your email address:
1. Be Selective
Be mindful of the websites, services, and platforms you provide your email address to. Only share it with trusted sources that you have a genuine interest in or require for communication purposes. Refrain from inputting your email address on unfamiliar websites or platforms whose trustworthiness is questionable.
2. Opt-Out and Unsubscribe
When signing up for newsletters, promotions, or online services, pay attention to checkboxes or consent options that may grant permission to send you additional emails or share your information with third parties. Take the time to review the terms and conditions, select appropriate opt-out options, and unsubscribe from mailing lists if you no longer wish to receive their emails.
3. Use Disposable Email Addresses
Consider using disposable email addresses or alias accounts for online registrations, freebies, or one-time interactions. These temporary or alternative addresses can help protect your primary email address from potential spam or unwanted messages.
4. Enable Privacy Settings
Make use of privacy settings provided by your email service provider, such as Yahoo Mail. Review and adjust your privacy preferences to ensure your email address is not visible or shared publicly without your consent.
5. Use Email Forwarding
If you’re concerned about giving out your primary email address, utilize email forwarding services. Set up a separate email address that automatically forwards emails to your primary inbox. This way, you can control the flow of incoming messages and easily identify if any unwanted emails are being sent to the forwarded address.
6. Be Wary of Phishing Attempts
Be cautious when clicking on links or responding to emails that appear suspicious or ask for personal information. Phishing attempts often occur through emails that mimic legitimate sources, attempting to trick recipients into divulging sensitive information. Pay careful attention to the sender’s email address, message content, and overall authenticity before responding or taking action.
Taking these precautions when sharing your email address can significantly reduce the likelihood of receiving unwanted emails and protect your privacy. It’s crucial to remain vigilant and mindful of where and to whom you provide your email address to maintain control over your inbox and data security.
Remember, prevention is key when it comes to unwanted emails. By being cautious and selective with the sharing of your email address, you can effectively minimize the influx of spam and unwanted messages in your Yahoo Mail inbox.
Tip 3: Report Spam Emails to Yahoo
One way to contribute to a safer and more secure email environment is by reporting spam emails to Yahoo. By reporting these unwanted and potentially malicious emails, you help Yahoo enhance their email filtering systems and protect other users from falling victim to similar scams. Here’s how you can report spam emails in Yahoo Mail:
1. Identify the Spam Email
Before reporting a spam email, take a moment to confirm that it is indeed an unsolicited and potentially harmful message. Look for telltale signs such as suspicious senders, requests for sensitive information, or emails promoting scams or illegal activities.
2. Open the Spam Email
Click on the spam email to open and view its contents. Be cautious and avoid interacting with any potentially dangerous links or attachments within the email.
3. Report as Spam
In the Yahoo Mail interface, look for the “Spam” button or the “Report as spam” option. This button or option is typically located near the top of the email interface, above the email content. Click on it to report the email as spam.
4. Provide Additional Information (Optional)
Yahoo Mail may prompt you to provide additional information about the spam email, such as the reason for reporting it or any relevant details that can help improve their filtering systems. If prompted, provide the requested information to assist in their efforts to combat spam.
5. Delete the Spam Email
Once you have reported the spam email, it’s advisable to delete it from your inbox to avoid accidentally interacting with it in the future. Use the delete button or the trash icon available in Yahoo Mail to remove the spam email permanently.
By reporting spam emails to Yahoo, you play an important role in keeping the email ecosystem safer for everyone. Reporting allows Yahoo to analyze patterns, improve their filtering algorithms, and stay one step ahead of spammers and scammers.
It’s important to note that reporting spam emails is not only beneficial for Yahoo Mail users but also for users of other email providers. By reporting spam, you contribute to a global effort to combat unwanted and harmful emails across different email platforms.
Remain vigilant and report spam emails promptly to help maintain a safer and more secure email environment for yourself and others. Together, we can collectively fight against spam and reduce the potential risks associated with unsolicited and malicious emails.