
Why Use Tags in Word Documents
Tags are a powerful feature in Microsoft Word that allow you to categorize and organize your documents in a more efficient and effective way. By adding tags to your Word documents, you can easily identify and retrieve important information, making it easier to navigate and work with your files. Here are some key reasons why you should consider using tags in your Word documents:
- Improved Searchability: Tags provide an extra layer of metadata that can significantly enhance the search functionality in Word. When you tag your documents, you create keywords that help you quickly find specific files, even in a large document library. Instead of sifting through countless files, you can simply search for the relevant tags and get instant results.
- Enhanced Organization: With tags, you can easily group and categorize your documents based on specific criteria. Whether you’re organizing by project, topic, or any other category, tags offer a flexible and customizable way to manage your files. This can save you valuable time and effort, especially when dealing with numerous documents.
- Quick Identification of Important Information: Tags provide a visual cue for important information in your documents. By adding specific tags to highlight critical sections, you can focus your attention on the most relevant content. This feature is particularly useful when collaborating with others or when revisiting documents at a later stage.
- Efficient Document Navigation: Tags serve as signposts that guide you through your document. By utilizing tags strategically, you can create a seamless navigation experience, allowing you to jump to different sections or chapters within your document with ease. This can be especially valuable when working on lengthy reports, manuals, or research papers.
Incorporating tags into your Word documents can greatly enhance your workflow and boost productivity. The ability to quickly search, organize, highlight, and navigate through your files will save you time and make your work more efficient. Take advantage of this feature in Word and start harnessing the power of tags in your documents today.
How to Enable the Tags Feature
The tags feature in Microsoft Word is not enabled by default, but it’s easy to enable it in just a few simple steps. Follow these instructions to enable the tags feature in Word:
- Open Word: Launch Microsoft Word on your computer to begin.
- Go to Options: Click on the “File” tab at the top left corner of the screen, and then select “Options” from the drop-down menu. This will open the Word Options window.
- Access the Customize Ribbon Settings: In the Word Options window, click on the “Customize Ribbon” tab on the left-hand side.
- Modify the Ribbon: In the Customize Ribbon section, you will see a list of available tabs and commands on the right-hand side. Under the “Customize the Ribbon” section, select the check box next to “Developer” to enable it. This will add the Developer tab to the Ribbon.
- Save Changes: Click the “OK” button to save the changes and close the Word Options window.
Once you have enabled the Developer tab, you will be able to access the tags feature in Word. The Developer tab provides various tools and features for advanced users, including tagging and adding metadata to documents.
To use the tags feature, simply navigate to the Developer tab in Word and click on the “Tags” button. This will open a drop-down menu with options to add tags, manage categories, and perform other tagging-related tasks.
Enabling the tags feature in Word gives you greater control over organizing and managing your documents. By utilizing tags, you can efficiently classify your files, making it easier to locate and retrieve them when needed.
Take advantage of this useful feature in Word and enable the tags functionality today to streamline your document management process.
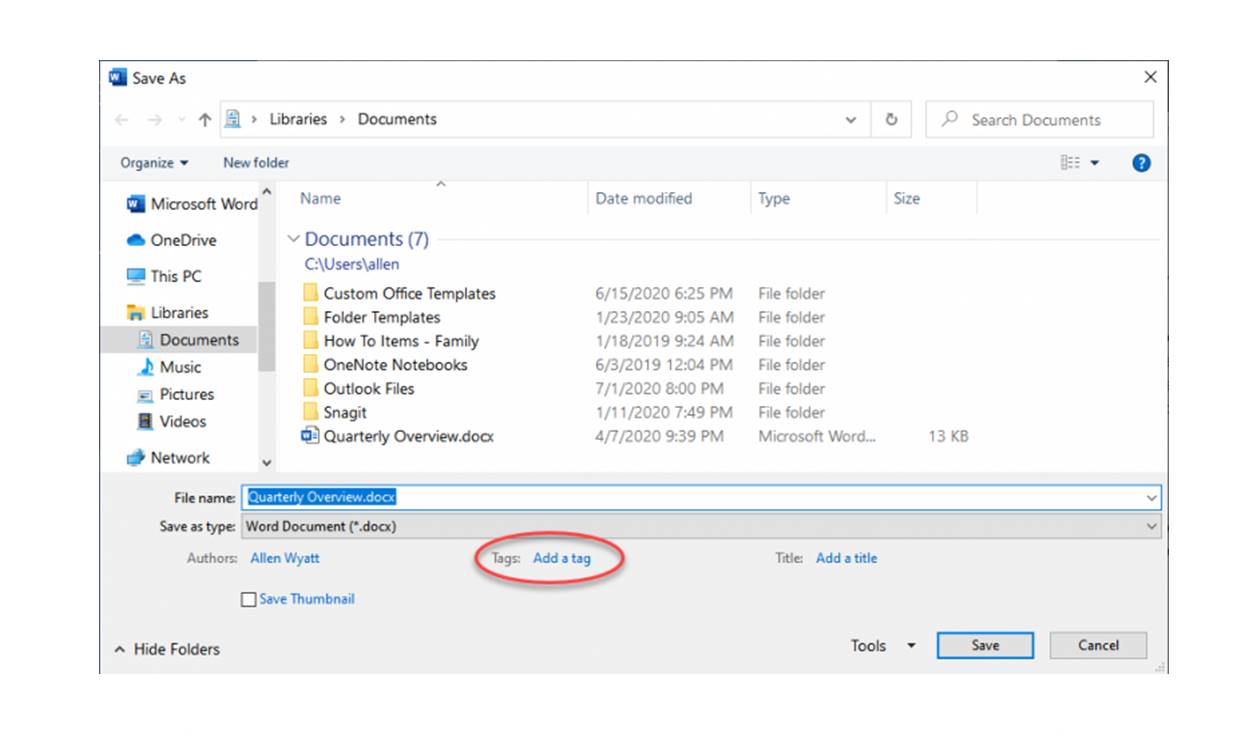
How to Add Tags to a Word Document
Adding tags to a Word document is a straightforward process that can help you organize and classify your files effectively. Follow these steps to add tags to your Word documents:
- Open the Word Document: Launch Microsoft Word and open the document you want to add tags to.
- Navigate to the Developer Tab: Click on the “Developer” tab in the Ribbon. If you don’t see the Developer tab, you may need to enable it first by following the instructions in the previous section.
- Click on the Tags Button: In the Developer tab, click on the “Tags” button. This will open a drop-down menu with various tagging options.
- Select a Tag: From the drop-down menu, choose the appropriate tag that best represents the content or purpose of your document. Options may include categories such as “Important,” “Confidential,” “Research,” or you can create custom tags that suit your specific needs.
- Apply the Tag: Once you have selected a tag, it will be applied to the entire document or the selected section, depending on your selection. You can use multiple tags in a single document to indicate different aspects or categories.
- Save the Document: After adding the desired tags, save the document to ensure that the changes are preserved.
Tags provide a descriptive and visual element to your Word documents, making it easier to identify and search for specific files. By adding relevant tags, you create a structured system for organizing and managing your documents, saving you time and effort in the long run.
Remember, tags can be edited or removed at any time. Simply navigate to the Developer tab, click on the “Tags” button, and make the necessary changes. You can also apply additional tags or remove existing ones as your document evolves.
By utilizing the tagging feature in Word, you can enhance your document management capabilities and ensure that important information is easily accessible and properly categorized.
Adding Tags to Highlight Important Information
Tags in Microsoft Word can be a powerful tool for highlighting and emphasizing important information within your documents. By adding tags, you can visually identify critical sections or key points, making it easier to navigate and review your content. Here’s how to add tags to highlight important information in a Word document:
- Open the Word Document: Launch Microsoft Word and open the document you want to work with.
- Select the Text: Identify the specific portions of the document that you want to highlight as important. You can select a single word, a phrase, or even an entire paragraph.
- Navigate to the Developer Tab: Click on the “Developer” tab in the Ribbon. If you don’t see the Developer tab, you may need to enable it first as described in the previous sections.
- Click on the Tags Button: In the Developer tab, click on the “Tags” button to open the drop-down menu with tagging options.
- Choose a Relevant Tag: From the drop-down menu, you can select a tag that signifies importance, such as “Important” or “Attention Required.” Alternatively, you can create custom tags that suit your specific needs.
- Apply the Tag: Once you have selected the appropriate tag, it will be applied to the selected text, visually highlighting it as important or critical.
- Save the Document: After adding the tags to highlight important information, remember to save the document to ensure that the changes are preserved.
By adding tags to highlight important information, you can draw attention to critical details, make key points stand out, and create an organized visual structure within your document. This can be particularly useful in reports, presentations, or any document where important information needs to be easily recognizable.
Furthermore, tags can also be used in combination with other formatting options, such as bold or italic text, to further enhance the visibility of the highlighted information. Experiment with different styles and combinations to find the most effective way to emphasize important content in your Word documents.
Remember, tags are not just limited to highlighting text; you can also use them to mark important charts, tables, images, or any other element within your document. The versatility of tags allows you to adapt them to your specific needs and make your important information easily accessible and recognizable.
Organizing Your Tags with Categories
When using tags in Microsoft Word, one of the key benefits is the ability to organize them into categories. By creating categories, you can group related tags together, making it easier to manage and navigate your tagged documents. Here’s how to organize your tags with categories in Word:
- Open the Word Document: Launch Microsoft Word and open the document that contains the tags you want to organize.
- Navigate to the Developer Tab: Click on the “Developer” tab in the Ribbon. If you don’t see the Developer tab, you may need to enable it first using the instructions mentioned earlier.
- Click on the Tags Button: In the Developer tab, click on the “Tags” button to open the drop-down menu with tagging options.
- Select Manage Categories: From the drop-down menu, click on the “Manage Categories” option. This will open the Tag Categories dialog box.
- Create a New Category: In the Tag Categories dialog box, click on the “New” button to create a new category. Give the category a relevant name that represents the group of tags you want to organize.
- Add Tags to the Category: After creating the category, select it from the list and click on the “Add” button. This will allow you to add existing tags or create new tags and assign them to the selected category.
- Save the Changes: Once you have organized your tags into categories, click on the “OK” button to save the changes.
By organizing your tags with categories, you can create a structured system for managing and locating your tagged documents. Categories provide a higher level of organization, allowing you to group related tags together and quickly identify relevant files within your document library.
Furthermore, categories can be customized based on your specific needs and preferences. You can create categories based on project names, departments, topics, or any other classification that makes sense for your workflow. This flexibility allows you to adapt your categories to match your document management requirements.
Remember to regularly review and update your categories as needed. As your document library evolves, you may need to create new categories or reorganize existing ones to reflect changes in your organization or workflow.
By organizing your tags with categories, you can optimize your document management process, streamline navigation, and enhance the overall efficiency of working with tagged documents in Microsoft Word.
Searching for Tags in Word
The tags feature in Microsoft Word not only helps you organize your documents but also enables you to search for specific tags within your document library. This search functionality makes it effortless to locate documents that are associated with particular tags. Here’s how to search for tags in Word:
- Open Word: Launch Microsoft Word on your computer.
- Go to the “Tags” Pane: Click on the “Developer” tab in the Ribbon and then click on the “Tags” button. This will open the “Tags” pane on the right-hand side of the document window.
- Locate the Search Bar: In the “Tags” pane, you will find a search bar at the top. Click inside the search bar to activate it.
- Enter the Tag: Type the tag you want to search for in the search bar. As you type, Word will automatically filter and display the documents that contain the matching tag.
- View the Search Results: The search results will be displayed in the “Tags” pane. Click on a document to open it or double-click to open it directly in Word.
Word’s search functionality for tags allows you to quickly find documents that are associated with specific tags, saving time and effort when managing a large number of files. Whether you are searching for a specific project, a category, or any other tag, this feature simplifies the process of retrieving relevant documents.
It’s essential to note that Word not only searches for tags in the document content but also in the document properties and metadata. This means that if you have assigned tags to the document properties, such as “Author,” “Date Created,” or “Category,” Word will consider those tags in the search as well.
By incorporating the search functionality for tags in Word, you can efficiently locate and access the documents that are most relevant to your current workflow or project. This streamlines your document management process, allowing you to work with ease and confidence.
Editing or Deleting Tags in Word
As you work with tagged documents in Microsoft Word, you may need to make changes to existing tags or remove them altogether. Word provides simple methods to edit or delete tags, giving you flexibility in managing your document metadata. Here are the steps to edit or delete tags in Word:
- Open the Word Document: Launch Microsoft Word and open the document that contains the tags you want to edit or delete.
- Navigate to the Developer Tab: Click on the “Developer” tab in the Ribbon. If the Developer tab is not visible, enable it following the instructions provided earlier in this article.
- Click on the Tags Button: In the Developer tab, click on the “Tags” button to open the drop-down menu with tagging options.
- Select Manage Tags: From the drop-down menu, click on the “Manage Tags” option. This will open the Manage Tags dialog box.
- Edit a Tag: To edit a tag, select it from the list in the Manage Tags dialog box and click on the “Modify” button. In the Modify Tag dialog box, make the desired changes to the tag’s name, properties, or any other relevant details, and then click “OK” to save the changes.
- Delete a Tag: To delete a tag, select it from the list in the Manage Tags dialog box and click on the “Delete” button. Confirm the deletion when prompted. Keep in mind that deleting a tag will remove it from all the documents in which it was applied.
- Save the Document: After editing or deleting tags, remember to save the document to ensure that the changes are preserved.
By providing the ability to edit or delete tags, Word allows you to manage and refine your document metadata as your requirements evolve. Whether you need to update tag names, modify tag properties, or remove tags that are no longer relevant, this flexibility ensures the ongoing accuracy and relevancy of your tagged documents.
It’s important to note that when you edit or delete a tag in Word, the changes will be applied to all the documents in which that tag was used. This means that if you modify a tag’s name or properties, the changes will be reflected across your document library.
By using the Edit and Delete functions for tags in Word, you can ensure that your document management process remains organized, efficient, and adaptable to your evolving needs. Regularly reviewing and refining your tags will help maintain a streamlined and effective system for managing your documents.
Tips for Using Tags Effectively
While tags are a valuable feature in Microsoft Word for organizing and managing your documents, using them effectively can maximize their benefits. Here are some tips to help you make the most out of tags in Word:
- Create a Consistent Tagging System: Establish a clear and consistent tagging system that aligns with your workflow. Consistency in naming conventions and categories will make it easier to search for and locate tagged documents.
- Use Descriptive Tag Names: Choose tag names that accurately describe the content or purpose of a document. Clear and concise tag names will help you quickly identify the meaning and relevance of each tag.
- Create Custom Tags: Utilize the option to create custom tags that suit your specific needs. Custom tags allow you to address specific aspects or categories that are unique to your document management requirements.
- Combine Tags with Other Formatting: Enhance the visibility of tagged information by combining tags with formatting options like bold or italic text. This combination can make important content stand out even more.
- Keep Tags Updated: Regularly review and update your tags as needed. Remove or modify tags that are no longer relevant and create new tags when necessary. This ensures that your tagged documents remain accurate and up to date.
- Use Multiple Tags: Don’t hesitate to use multiple tags for a single document. Different tags can represent different aspects of a document, allowing for more detailed categorization and searchability.
- Train Colleagues and Team Members: If you work in a collaborative environment, educate your colleagues and team members about the importance of tags and how to use them effectively. Consistent tagging across the team will improve document management and collaboration.
- Regularly Review and Refine: Take the time to review your tagging system periodically. Assess the effectiveness and relevance of your tags, and make any necessary adjustments to ensure an optimized document management process.
- Utilize Filtering and Sorting: Take advantage of Word’s filtering and sorting capabilities to quickly locate tagged documents. This allows you to narrow down your search and focus on specific tags, categories, or combinations of criteria.
By following these tips, you can harness the full potential of tags in Word and streamline your document management process. Effective use of tags enables efficient organization, easy retrieval of information, and improved collaboration, ultimately boosting productivity and reducing time spent searching for documents.
Experiment with different approaches and find the tagging strategies that work best for you and your workflow. With consistent and thoughtful use of tags, you can stay organized, stay on top of your documents, and simplify your work in Microsoft Word.