
What are Philips Hue Lights
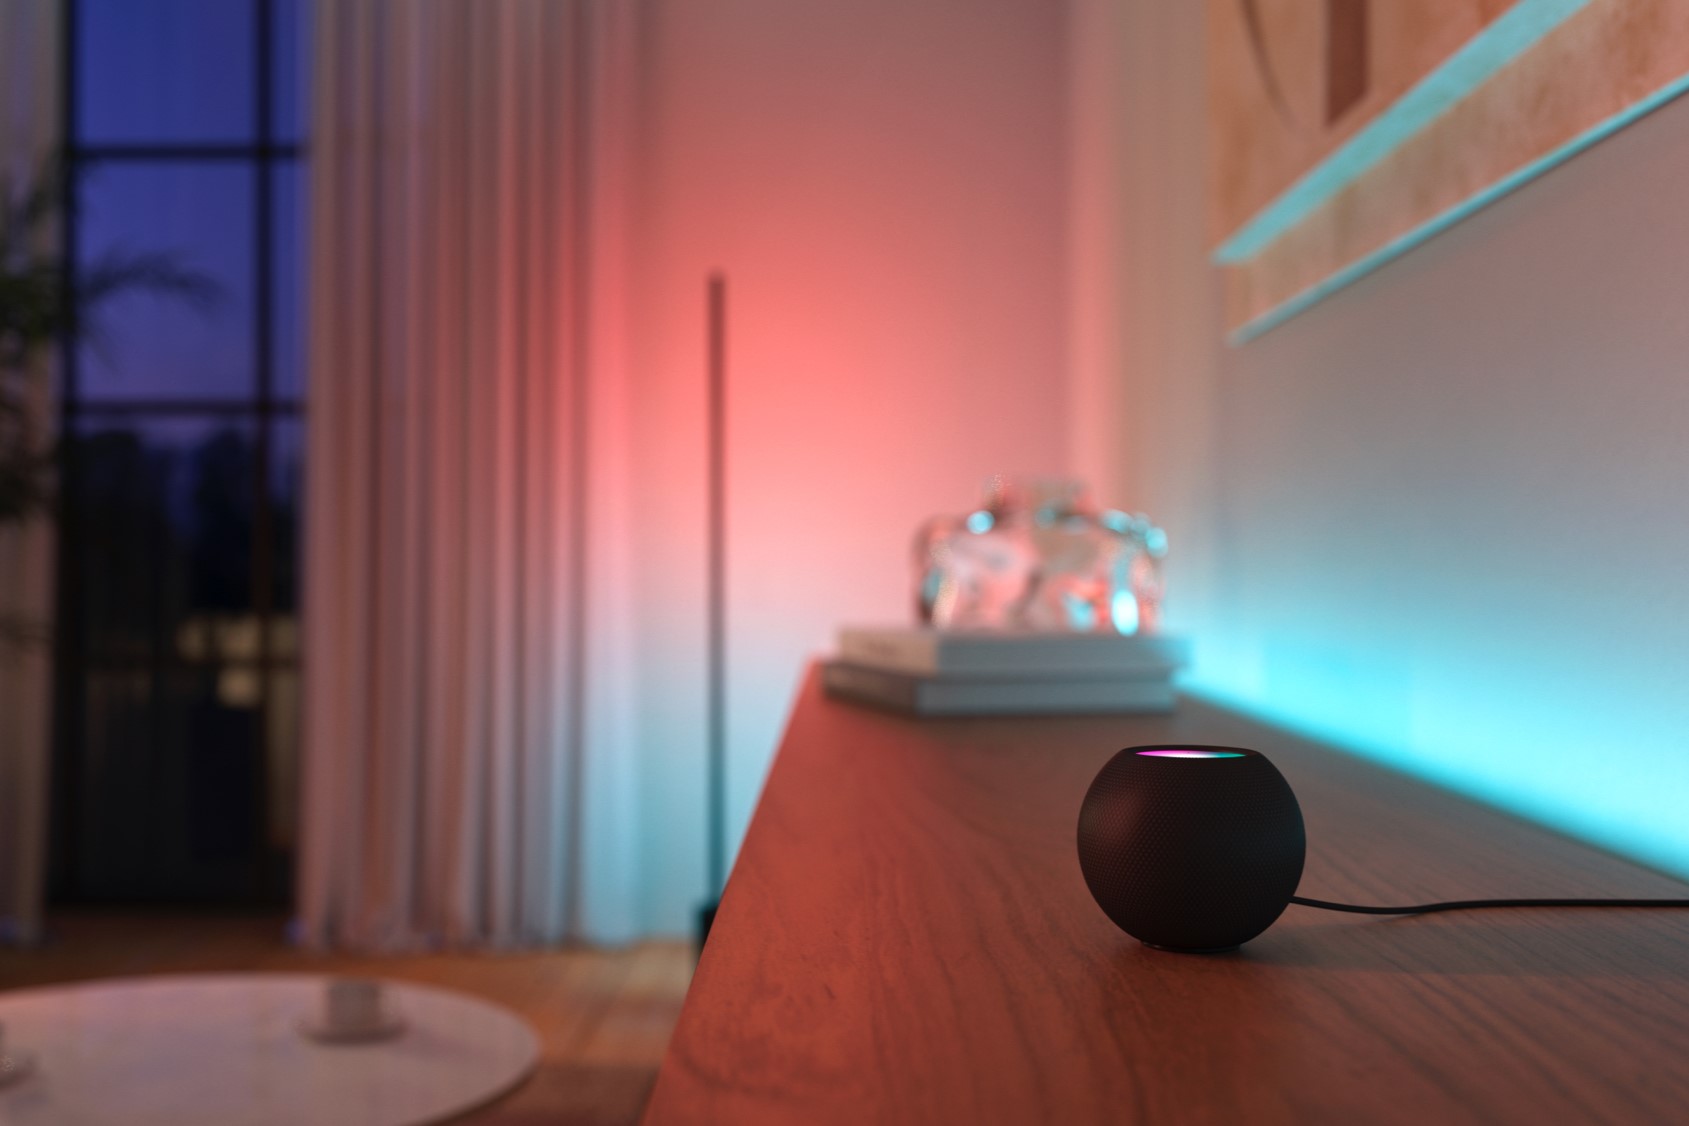
Philips Hue lights are smart LED bulbs that can be controlled and customized to create the perfect lighting atmosphere in your home. With the ability to adjust brightness, color, and even schedule lighting patterns, Philips Hue lights offer unparalleled convenience and versatility.
One of the standout features of Philips Hue lights is the ability to control them remotely using your smartphone or voice commands. This means you can turn your lights on or off, dim them, or change their color from anywhere in the world. Whether you want to create a cozy ambiance before you arrive home or ensure your lights are off while on vacation, Philips Hue gives you complete control.
Another advantage of Philips Hue lights is their compatibility with various smart home systems, including Apple HomeKit, Amazon Alexa, and Google Assistant. This allows you to integrate your lighting setup seamlessly with other smart devices in your home, creating a truly connected and automated living space.
With the Philips Hue app, you have access to a wide range of preset scenes and lighting effects. Whether you want to simulate a sunrise, create a romantic atmosphere, or set the mood for a party, there’s a preset for every occasion. Additionally, you can create your own custom scenes and schedules to suit your personal preferences and routines.
In terms of installation, Philips Hue lights are easy to set up. They come in various bulb types, including A19, BR30, and GU10, ensuring compatibility with your existing light fixtures. Simply replace your incandescent or CFL bulbs with the Philips Hue bulbs, connect them to the Hue Bridge, and you’re ready to go.
Overall, Philips Hue lights are a game-changer when it comes to lighting your home. With their smart features, remote control capabilities, and integration with other smart home systems, they offer endless possibilities for creating the perfect lighting ambiance. Whether you want to set the mood for relaxation, productivity, or entertainment, Philips Hue lights are a must-have addition to your smart home setup.
Requirements for Adding Philips Hue Lights to Homekit
Before you can add Philips Hue lights to Homekit, there are a few requirements you need to meet. Ensuring that you have the necessary components and compatible devices will make the setup process smooth and hassle-free. Here are the key requirements:
1. Philips Hue Lights: Obviously, you will need Philips Hue lights or light bulbs to get started. These smart LED bulbs come in various types, including A19, BR30, and GU10, so make sure you choose the ones that suit your existing light fixtures.
2. Philips Hue Bridge: The Philips Hue Bridge is the central hub that connects your Hue lights to your home network. It serves as the bridge between your lights and the smart home system. It comes included in most Philips Hue starter kits, but if you don’t have one, you can purchase it separately.
3. Wi-Fi Network: To control your Philips Hue lights remotely and integrate them with Homekit, you need a stable Wi-Fi network. Make sure your home network is reliable and adequately covers the areas where you plan to install the lights.
4. Homekit-Compatible Device: To add Philips Hue lights to Homekit, you will also need a Homekit-compatible device. This could be an iPhone, iPad, or even an Apple HomePod. Ensure that your device is updated to the latest operating system and has the Home app installed.
5. Philips Hue App: Although not mandatory, having the Philips Hue app on your device can make the setup process more convenient. The app allows you to control and customize your Philips Hue lights, set up scenes, and manage your lighting preferences.
6. Philips Hue Account: To synchronize your Philips Hue lights with Homekit, you will need a Philips Hue account. You can create an account within the Philips Hue app or on the official Philips Hue website. This account will enable you to access advanced features and services offered by Philips Hue.
By ensuring you have the required components and devices, you will be well-equipped to add Philips Hue lights to Homekit seamlessly. Once all the prerequisites are met, you can move on to the step-by-step process of adding your lights to Homekit and customizing your home lighting experience.
Step 1: Prepare Your Philips Hue Lights
Before you can add your Philips Hue lights to Homekit, you need to ensure that they are ready for installation. This involves a few simple steps to get your lights prepared for setup. Follow these guidelines to prepare your Philips Hue lights:
1. Choose the Right Bulbs: Philips Hue lights come in various types, such as A19, BR30, and GU10. Make sure you select the bulbs that are compatible with your existing light fixtures. Consider the brightness level, color spectrum, and any specific features you may want for your lighting setup.
2. Screw in the Bulbs: Remove your old bulbs and screw in the Philips Hue bulbs into the light fixtures. Ensure they are securely tightened but be careful not to overtighten.
3. Power On the Lights: Once the bulbs are installed, turn on the power switch to the fixtures. This will supply electricity to the Philips Hue lights, enabling them to connect and communicate with the Hue Bridge.
4. Check the Philips Hue Bridge: Ensure that the Philips Hue Bridge is powered on and connected to an available Ethernet port on your router. The Bridge acts as the central hub that links your lights to the smart home system.
5. Keep the Lights Within Range: Make sure that your Philips Hue lights are within a reasonable range of the Bridge for optimal connection and performance. It is recommended to keep the lights within 30 feet (9 meters) of the Bridge, with minimal obstructions in between.
6. Confirm Power Supply: Double-check that your Philips Hue lights have a stable power supply. Loose connections or power outages can disrupt the setup process and cause connection issues later on.
By following these steps, you will have successfully prepared your Philips Hue lights for the next phase of the setup process. With your lights ready and connected, you can proceed to the next step, which involves setting up the Philips Hue Bridge.
Step 2: Set Up Philips Hue Bridge
Setting up the Philips Hue Bridge is an essential step in adding your Philips Hue lights to Homekit. The Bridge acts as the central hub that connects your lights to your home network and enables seamless control and integration with other smart devices. Follow these steps to set up your Philips Hue Bridge:
1. Plug in the Bridge: Connect the power adapter to the Philips Hue Bridge and plug it into a power outlet. Ensure that the power adapter is securely connected to both the Bridge and the power source.
2. Connect the Bridge to Your Router: Use the provided Ethernet cable to connect the Philips Hue Bridge to an available Ethernet port on your Wi-Fi router. Ensure the cable is securely inserted into both the Bridge and the router.
3. Power On the Bridge: Turn on the power switch located on the back of the Philips Hue Bridge. The LED lights on the front of the Bridge will illuminate, indicating that it is powered on and ready for setup.
4. Wait for the Connection: Allow a few moments for the Philips Hue Bridge to establish a connection with your home network. The lights on the Bridge will blink or change colors during this process.
5. Install the Philips Hue App: Download and install the Philips Hue app on a compatible device, such as your smartphone or tablet. The app is available for both iOS and Android devices.
6. Follow the In-App Instructions: Open the Philips Hue app and follow the in-app instructions to set up your account and discover the Philips Hue Bridge. The app will guide you through the process of connecting to the Bridge and preparing it for the next steps.
Once you have successfully set up the Philips Hue Bridge, you have laid the foundation for controlling and managing your Philips Hue lights. The next step involves connecting the Bridge to your home Wi-Fi network, allowing seamless communication between your lights and other smart devices in your home.
Step 3: Connect Philips Hue Bridge to Wi-Fi
Connecting the Philips Hue Bridge to your Wi-Fi network is a crucial step in integrating your Philips Hue lights with Homekit. This process enables remote control and access to your lights from anywhere using your smartphone or other compatible devices. Follow these steps to connect your Philips Hue Bridge to Wi-Fi:
1. Open the Philips Hue App: Launch the Philips Hue app on your device. Make sure that the app is updated to the latest version to ensure compatibility and access to all features.
2. Tap on “Settings”: In the Philips Hue app, locate and tap on the “Settings” option. It is usually represented by a gear or cog icon, and can typically be found in the bottom right or top left corner of the app interface.
3. Select “Bridge”: Within the “Settings” menu, look for an option named “Bridge” or “Hue Bridge.” Tap on it to access the settings specific to your Philips Hue Bridge.
4. Choose “Wi-Fi Setup”: Look for an option labeled “Wi-Fi setup” or something similar within the Bridge settings. Select it to initiate the process of connecting the Bridge to your Wi-Fi network.
5. Follow the App Instructions: The app will guide you through the necessary steps to connect your Bridge to Wi-Fi. This may involve selecting your network from a list of available networks and entering the Wi-Fi password when prompted.
6. Wait for Connection Confirmation: Once you have entered the Wi-Fi network details correctly, the app will attempt to connect the Philips Hue Bridge to your network. This process may take a minute or two. Be patient and wait for the app to provide confirmation of a successful connection.
With the Philips Hue Bridge successfully connected to your Wi-Fi network, you have established the link between your Philips Hue lights and your home network. This step allows you to control and customize your lights remotely using the app, as well as integrate them with other smart home systems like Homekit.
Step 4: Install the Philips Hue App
To fully utilize and control your Philips Hue lights, you’ll need to install the Philips Hue app on a compatible device. The app serves as a central command center for managing your lights, creating customized scenes, and accessing advanced features. Follow these steps to install the Philips Hue app:
1. Go to the App Store or Google Play Store: Depending on whether you have an iOS or Android device, open the respective app store.
2. Search for “Philips Hue”: In the app store’s search bar, type “Philips Hue” and tap the search icon to find the official Philips Hue app.
3. Select the App: Locate the Philips Hue app from the search results and tap on it to access the app’s details page.
4. Download and Install: Tap the “Install” or “Get” button to start the download and installation process. Depending on your device’s settings, you may need to provide your Apple ID or Google account credentials to proceed.
5. Wait for the Installation to Complete: Allow the app to download and install on your device. The duration will vary depending on your internet connection speed.
6. Open the App: Once the installation is complete, locate the Philips Hue app on your device’s home screen or app drawer. Tap on the app icon to launch it.
With the Philips Hue app now installed on your device, you can explore its various features and functionalities. The app provides intuitive controls to manage your lights, adjust their brightness and color, create personalized scenes, set schedules, and even integrate your lights with other smart devices and platforms like Homekit.
Note that some features within the app may require you to create a Philips Hue account or sign in with an existing one. This account enables access to additional settings, services, and remote control capabilities. By installing the Philips Hue app, you are one step closer to enjoying the full functionality of your Philips Hue lights and customizing your home lighting to your preferences.
Step 5: Add Philips Hue Lights to Homekit
Adding your Philips Hue lights to Homekit allows you to control them seamlessly using Siri and the Apple Home app. This step connects your lights to the Homekit platform, enabling integration with other smart devices and creating automated scenes. Follow these steps to add your Philips Hue lights to Homekit:
1. Open the Apple Home App: Launch the Apple Home app on your iOS device. Ensure that your device is updated to the latest operating system version for optimal compatibility.
2. Tap the “+” Icon: Look for the “+” icon located in the top right corner of the Home app interface. Tap on it to begin adding a new accessory or device to Homekit.
3. Select “Add Accessory”: In the “Add Accessory” section, choose the option to add an accessory manually. This allows you to enter specific details about your Philips Hue lights to connect them to Homekit.
4. Scan the HomeKit Code: Locate the HomeKit code on the side or base of your Philips Hue Bridge or packaging. Use your device’s camera to scan the HomeKit code and initiate the pairing process.
5. Follow the On-Screen Instructions: The Home app will guide you through the steps to add your Philips Hue lights to Homekit. This typically involves confirming your Bridge’s identification, verifying the association with your Homekit setup, and assigning the lights to specific rooms or zones.
6. Assign Names and Customize: Once the lights are successfully added to Homekit, you can assign names to each light, set preferred lighting levels, and organize them into specific rooms or zones within the app. This step allows you to control multiple lights or create scenes simultaneously.
Now that your Philips Hue lights are connected to Homekit, you can control them using Siri commands or through the Apple Home app. With voice control, you can adjust brightness, change colors, turn lights on or off, and even activate preset scenes by simply speaking to Siri. You can also create custom scenes and schedules within the Home app to automate your lighting based on specific preferences or routines.
Remember to ensure that your device and the Philips Hue Bridge are connected to the same Wi-Fi network for seamless communication between Homekit and your lights. By successfully adding your Philips Hue lights to Homekit, you have unlocked a new level of control and convenience in managing your home lighting.
Step 6: Customize Your Homekit Setup
Once you have added your Philips Hue lights to Homekit, you can further customize your setup to personalize your home lighting experience. Homekit offers a range of customization options, allowing you to create unique scenes, schedule automation, and integrate your lights with other compatible smart devices. Follow these steps to customize your Homekit setup:
1. Create Scenes: Within the Home app, you can create scenes that combine multiple actions for your lights. For example, you can create a “Relax” scene that dims the lights and sets them to warm white for a cozy ambiance. Experiment with different combinations to match your desired moods and activities.
2. Set Up Automation: Homekit allows you to automate your lighting based on triggers, time schedules, or even your location. For example, you could set your lights to turn on when you arrive home or automatically dim before bedtime. Explore the automation options and set up rules that suit your lifestyle.
3. Voice Control with Siri: With your Philips Hue lights connected to Homekit, you can control them using voice commands through Siri. This hands-free control is convenient and allows you to adjust your lights without even needing to reach for your phone or app. Simply say “Hey Siri” followed by your desired command.
4. Group Lights: The Home app allows you to group your lights together, making it easier to control multiple lights at once. For example, you could create a group for all the lights in your living room, allowing you to turn them all on or off with a single command.
5. Add Accessories: Homekit integrates with a wide range of compatible smart devices. Consider adding accessories such as motion sensors or smart switches to enhance your lighting automation. For instance, you can have your lights turn on automatically when motion is detected in a specific area.
6. Explore Advanced Settings: Take some time to explore the advanced settings available within the Home app. This includes adjusting light brightness, color temperature, and color options. You can fine-tune your lighting preferences to create the perfect ambiance for any occasion.
By customizing your Homekit setup, you can create a lighting experience that aligns with your lifestyle and preferences. Whether it’s setting the perfect lighting scene for a movie night or automating your lights for added security, Homekit offers endless possibilities to enhance your smart lighting experience.
Remember to regularly update your Homekit setup as your needs and preferences change. With each customization, you will be able to enjoy the convenience and versatility of your customized Philips Hue lights integrated with Homekit.
Troubleshooting Tips
While setting up and using Philips Hue lights with Homekit is generally a straightforward process, you may encounter some common issues along the way. Here are some troubleshooting tips to help you overcome any challenges and ensure a smooth experience:
1. Check Connectivity: Ensure that your Hue Bridge, lights, and Homekit-compatible device are all connected to the same Wi-Fi network. Inconsistent or weak Wi-Fi signals can result in connectivity issues.
2. Restart Devices: If you’re experiencing connection problems, try restarting your Hue Bridge, lights, and Homekit-compatible device. Power cycling can refresh the connections and resolve any temporary glitches.
3. Verify Firmware Updates: Ensure that your Philips Hue Bridge and lights are running the latest firmware versions. Visit the Philips Hue app or website to check for available updates and install them if necessary.
4. Reset and Re-pair: If a particular light is not responding or showing up in Homekit, try resetting it and re-pairing it with the Hue Bridge. Follow the instructions provided by Philips Hue to reset the specific light model.
5. Check Hue Bridge Placement: Make sure that the Hue Bridge is placed within a reasonable range of your lights. Also, minimize physical obstructions that may interfere with the signals between the Bridge and the lights.
6. Verify Homekit Compatibility: Ensure that your Homekit-compatible device is running the latest software version and is compatible with the Philips Hue lights. Consult the manufacturer’s guidelines or support documentation for any known compatibility issues or troubleshooting steps.
7. Disable Firewall or VPN: If you’re unable to connect your Hue Bridge to Homekit, temporarily disable firewalls or VPN (Virtual Private Network) on your router, as they may block the necessary communication.
8. Contact Support: If you have exhausted all troubleshooting options and are still experiencing issues, reach out to Philips Hue or Apple Homekit support for further assistance. They can provide more specific guidance based on your setup and address any hardware or software-related problems.
By following these troubleshooting tips, you can overcome common obstacles and ensure a seamless experience when using Philips Hue lights with Homekit. Remember to consult the respective support channels for device-specific troubleshooting guidance and promptly resolve any technical issues for uninterrupted enjoyment of your smart lighting setup.