
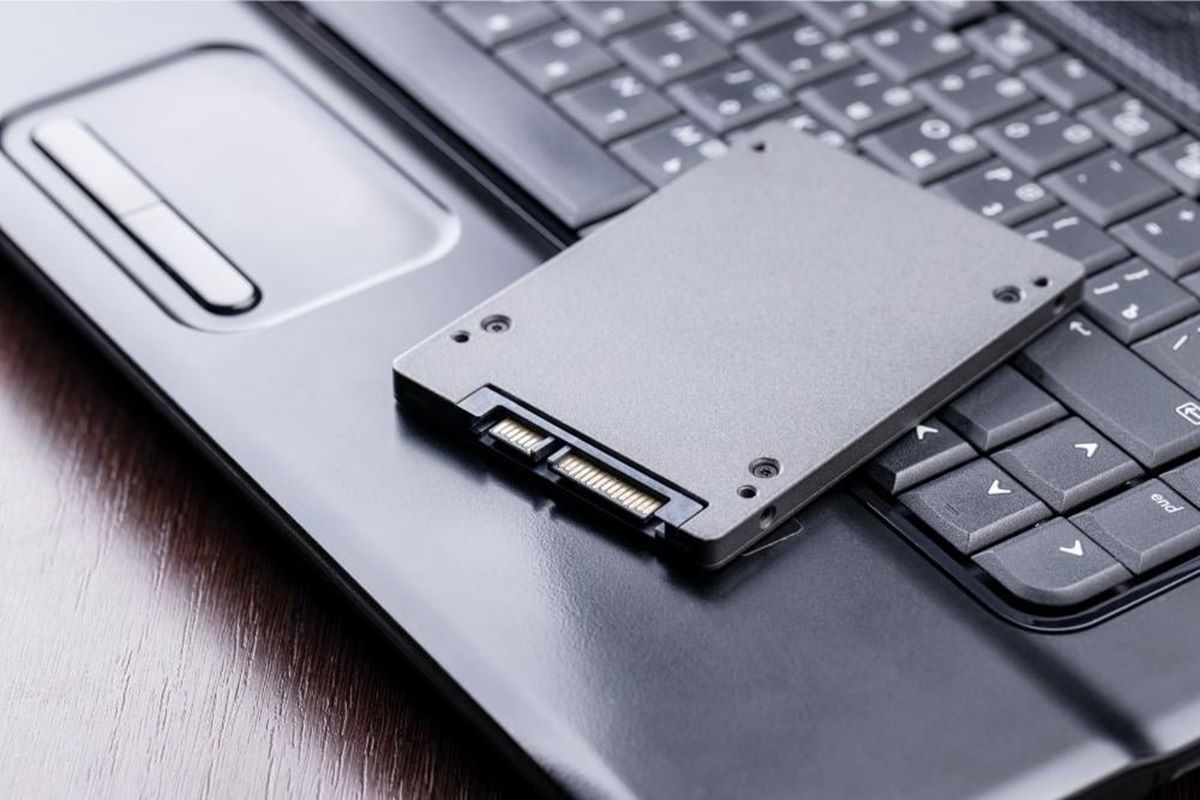
Upgrade Internal Hard Drive
One of the most effective ways to add more storage to a laptop is by upgrading the internal hard drive. Many laptops come with limited storage space, but fortunately, it’s usually possible to replace the existing hard drive with a larger one. Here are the steps to upgrade the internal hard drive:
- Back up your data: Before proceeding with any hardware changes, it’s important to back up all your important files and documents. You can use an external hard drive, cloud storage, or any other backup method of your choice.
- Research compatible hard drives: Look for compatible hard drives that are suitable for your laptop’s make and model. Consider factors like storage capacity, speed, and reliability.
- Prepare the necessary tools: You will typically need a small Phillips screwdriver and perhaps a pry tool to open your laptop’s casing.
- Turn off and unplug your laptop: Shut down your laptop completely and unplug it from any power source before starting the upgrade process.
- Locate the hard drive compartment: Your laptop’s user manual or manufacturer’s website should provide guidance on how to access the hard drive compartment. Usually, it involves removing the bottom panel or accessing it from the side.
- Remove the existing hard drive: Once you have access to the hard drive compartment, carefully disconnect the cables connected to the old hard drive and unscrew any mounting brackets or screws holding it in place.
- Install the new hard drive: Gently attach the new hard drive to the cables and secure it using the mounting brackets or screws.
- Reassemble your laptop: Carefully put the laptop’s casing back together, ensuring all screws are tightened and connections are secure.
- Install the operating system: After upgrading the hard drive, you may need to reinstall the operating system and restore your data from the backup.
- Test and verify: Once everything is set up, turn on your laptop and make sure the new hard drive is detected and functioning properly.
By following these steps, you can replace your laptop’s internal hard drive with a higher-capacity one, giving you ample storage space for your files, applications, and multimedia content.
Replace Optical Drive with a Hard Drive
If your laptop has a built-in optical drive that you rarely use, one clever way to add more storage is by replacing it with a hard drive. Optical drives, such as CD/DVD drives, are becoming less common with the rise of digital media and cloud storage. Here’s how you can replace your laptop’s optical drive with a hard drive:
- Check for compatibility: Before proceeding, ensure that your laptop supports the removal of the optical drive and the installation of a hard drive in its place. Consult your laptop’s manual or the manufacturer’s website for specific details.
- Choose the right hard drive: Select a hard drive suitable for your needs, considering factors like storage capacity, speed, and physical dimensions that match the optical drive bay in your laptop.
- Prepare the necessary tools: You will typically need a screwdriver and perhaps a pry tool to remove the optical drive and install the hard drive.
- Backup your data: Before making any hardware changes, it’s essential to back up your important files and documents to ensure their safety.
- Power off and unplug your laptop: Make sure your laptop is turned off and disconnected from any power source before you begin the replacement process.
- Remove the optical drive: Locate the screws or release mechanism that secures the optical drive in place, and carefully remove it from the laptop.
- Install the hard drive: Take the hard drive you’ve selected and insert it into the vacant bay left by the removed optical drive. Secure it in place with screws or any brackets provided.
- Reassemble your laptop: Once the hard drive is securely installed, put your laptop back together by reattaching any panels or screws that were removed during the process.
- Boot up your laptop: Power on your laptop and enter the BIOS settings to ensure that the new hard drive is recognized. If necessary, configure the boot order to prioritize the new drive for startup.
- Format and initialize the new hard drive: If the new drive is not recognized, you may need to format and initialize it using your laptop’s operating system or disk management tools.
Replacing the optical drive with a hard drive allows you to enjoy additional storage space while still having the option to use an external optical drive if needed. It’s a practical solution for those who rarely use CDs or DVDs and require more storage for their laptop.
Utilize an External Hard Drive
If you’re looking to add more storage to your laptop without making any internal hardware changes, utilizing an external hard drive is an excellent solution. An external hard drive offers convenience and portability while providing you with additional storage space. Here’s how you can make the most of an external hard drive:
- Select the right external hard drive: Choose an external hard drive that meets your storage requirements. Consider factors such as storage capacity, data transfer speeds, and compatibility with your laptop’s USB ports.
- Connect the external hard drive to your laptop: Plug the external hard drive into an available USB port on your laptop. Most modern laptops support USB 3.0 or higher, which provides faster data transfer speeds.
- Format the external hard drive: Before using the external hard drive, you may need to format it to a file system compatible with your operating system, such as NTFS or exFAT. Follow the instructions provided by the manufacturer or refer to your laptop’s user manual.
- Transfer or store files on the external hard drive: Once the external hard drive is connected and formatted, you can begin transferring files to it. Simply drag and drop or copy and paste files from your laptop onto the external hard drive as needed.
- Maintain organization: To ensure easy access and retrieval of files on the external hard drive, create folders and organize your data in a logical manner. This will help you locate specific files quickly and efficiently.
- Eject the external hard drive safely: Before disconnecting the external hard drive from your laptop, always properly eject it to prevent data corruption. Follow the recommended procedure to safely remove the device from your operating system.
- Keep your external hard drive protected: Invest in a carrying case or sleeve to protect your external hard drive from physical damage when transporting it. Additionally, consider backing up the files on your external hard drive to another location for added security.
- Utilize encryption software: If you store sensitive or confidential information on your external hard drive, consider using encryption software to protect your data from unauthorized access. Encryption adds an extra layer of security, ensuring that only authorized individuals can access your files.
By utilizing an external hard drive, you can easily expand your laptop’s storage capacity and keep your files organized and accessible. Whether you need additional storage for work files, media, or backups, an external hard drive offers a practical and portable solution.
Make Use of Cloud Storage Solutions
In the digital age, cloud storage has become increasingly popular for adding more storage to laptops and other devices. Cloud storage solutions offer the advantage of remote storage accessible from anywhere with an internet connection. Here’s how you can make the most of cloud storage:
- Choose a cloud storage provider: There are several reputable cloud storage providers available, such as Google Drive, Dropbox, OneDrive, and iCloud. Research and compare their features, storage plans, and pricing to determine the best fit for your needs.
- Create an account: Sign up for an account with your chosen cloud storage provider. This typically involves providing your email address and creating a password.
- Install the necessary software: Most cloud storage providers offer desktop and mobile applications that allow you to easily sync files between your devices and the cloud storage server. Download and install the software on your laptop.
- Configure sync settings: Specify which folders and files you want to sync with the cloud storage. You can choose to sync everything or select specific directories, ensuring that your most important files are backed up.
- Upload files to the cloud: To free up space on your laptop’s hard drive, move files from your local storage to the cloud storage by dragging and dropping them into the designated folder on your desktop software or using the web interface.
- Access files on different devices: Enjoy the convenience of accessing your files from anywhere by logging into your cloud storage account on different devices like laptops, smartphones, or tablets. Changes made on one device will be automatically synced across all synchronized devices.
- Share files with others: Cloud storage solutions often offer file sharing features, allowing you to easily share files or folders with colleagues, friends, or family members. You can control access levels and permissions, ensuring data security and privacy.
- Upgrade storage capacity: If you find that the free storage capacity provided by your chosen cloud storage provider is insufficient, consider upgrading to a paid plan that offers more storage space.
- Maintain security: Protect your data by enabling two-factor authentication and regularly updating your account password. Additionally, be mindful of the privacy settings of shared files and folders.
By utilizing cloud storage solutions, you can expand your laptop’s storage capacity without relying solely on physical hardware. Cloud storage offers convenience, accessibility, and scalability, making it an efficient and flexible option for storing and accessing your files.
Use USB Flash Drives or SD Cards
USB flash drives and SD cards are portable storage devices that can significantly increase your laptop’s storage capacity. These devices are lightweight, compact, and easy to use. Here’s how you can utilize USB flash drives or SD cards to add more storage to your laptop:
- Select the right USB flash drive or SD card: Choose a device with sufficient storage capacity that meets your needs. Consider factors such as storage size, read and write speeds, and compatibility with your laptop’s USB ports or SD card slots.
- Connect the USB flash drive or insert the SD card: Plug the USB flash drive into an available USB port on your laptop or insert the SD card into the designated slot. Ensure a secure connection to prevent data loss.
- Format the USB flash drive or SD card: If the device is new or needs to be formatted for your laptop’s file system, follow the instructions to format it. Be cautious as formatting erases all existing data on the device.
- Transfer files to the USB flash drive or SD card: After formatting, you can start transferring files from your laptop to the USB flash drive or SD card. Simply drag and drop or copy and paste the files to the device.
- Organize your files: To ensure easy access and retrieval of files, create folders and organize your data in a logical manner on the USB flash drive or SD card. This will help you find specific files quickly and efficiently.
- Eject the USB flash drive or SD card safely: Before removing the USB flash drive or SD card from your laptop, always use the “Safely Remove Hardware” or “Eject” option to avoid data corruption. Wait for the confirmation before physically disconnecting the device.
- Protect your USB flash drive or SD card: Use a protective case or sleeve to prevent physical damage to the device when not in use. Additionally, consider making duplicates or backups of important files stored on the USB flash drive or SD card for enhanced data security.
- Expand storage with multiple devices: If your laptop has multiple USB ports or SD card slots, you can connect and use multiple USB flash drives or SD cards simultaneously, effectively increasing your overall storage capacity.
- Consider encrypted USB flash drives or SD cards: For added security, opt for USB flash drives or SD cards with built-in encryption features. This will ensure that your data remains protected in case the device is lost or stolen.
USB flash drives and SD cards are convenient and versatile storage solutions that allow you to expand your laptop’s storage capacity on-the-go. Whether you need to store documents, media files, or backups, these portable devices offer a practical and reliable storage option.
Utilize Network Attached Storage (NAS)
Network Attached Storage (NAS) is a dedicated storage device that connects to your home or office network, providing a centralized location to store and access files from multiple devices. Utilizing NAS allows you to add significant storage capacity to your laptop. Here’s how you can make the most of NAS:
- Select a suitable NAS device: Research and choose a NAS device that meets your requirements in terms of storage capacity, data transfer speeds, number of drive bays, and features like RAID support.
- Set up the NAS device: Follow the manufacturer’s instructions to set up the NAS device and connect it to your home or office network. This typically involves connecting the device to your router using an Ethernet cable.
- Configure the NAS: Access the NAS device’s settings through a web interface or dedicated software provided by the manufacturer. Configure important settings such as network settings, security, and user access control.
- Install hard drives: Install one or more hard drives into the NAS device’s drive bays, following the manufacturer’s instructions. Consider using high-capacity drives or configuring them in RAID for data redundancy.
- Create shared folders: Set up shared folders on the NAS device to organize your files and make them accessible to laptops and other devices on the network. Customize access permissions to control who can access or modify specific folders.
- Map network drives: On your laptop, map the NAS shared folders as network drives to treat them like regular drives on your laptop. This allows you to access and work with files stored on the NAS as if they were located on your local storage.
- Backup data to the NAS: Utilize the NAS as a backup destination for your laptop’s important files. Set up automated backup solutions or manually copy files to the NAS regularly to ensure data integrity.
- Stream media from the NAS: If your NAS supports media server capabilities, you can stream movies, music, and photos directly from the NAS to your laptop or other devices, avoiding the need for local storage.
- Configure remote access: Some NAS devices offer remote access features, allowing you to access your files from outside your home or office network. Set up secure remote access to access your files on the go.
- Maintain security: Regularly update the firmware on your NAS device to protect against security vulnerabilities. Enable features like encryption and secure access to safeguard your data.
By utilizing Network Attached Storage (NAS), you can add significant storage capacity to your laptop while enjoying the convenience of centralized file storage and easy access from multiple devices. NAS provides a robust solution for managing and protecting your files in a networked environment.
Clean up and Remove Unnecessary Files
One of the simplest and most effective ways to add more storage to your laptop is by cleaning up and removing unnecessary files. Over time, your laptop can accumulate temporary files, duplicates, and unused applications that take up valuable space. Here’s how you can clean up and reclaim storage space:
- Identify and delete duplicate files: Use dedicated duplicate file finder tools or manually search for duplicate files on your laptop. Delete duplicates to free up storage without losing any important data.
- Remove temporary files: Temporary files, such as internet cache, installation files, and system logs, can quickly accumulate and consume your laptop’s storage. Use built-in disk cleanup tools or third-party software to remove these unnecessary files.
- Uninstall unused applications: Remove applications that you no longer use or need. Uninstalling unused software not only frees up storage but also improves system performance.
- Delete old or unnecessary downloads: Sort through your Downloads folder and delete files that you no longer need. It’s easy to forget about files you’ve downloaded in the past, so make sure to review and clean up this folder periodically.
- Clear browser cache and history: Web browsers store cache files and browsing history, which can consume considerable storage space over time. Regularly clear your browser’s cache and history to free up storage.
- Move large files to external storage: Identify large files such as multimedia files or archived backups that you don’t need immediate access to and transfer them to an external hard drive or cloud storage. This will free up space on your laptop’s internal storage.
- Empty the recycle bin or trash: When you delete files from your laptop, they often end up in the recycle bin or trash. Empty these folders to permanently delete the files and regain storage space.
- Review and delete old email attachments: Email attachments can accumulate over time and consume storage space. Review and delete old attachments that are no longer needed, or consider saving them to cloud storage instead.
- Use disk cleanup utilities: Many operating systems provide built-in disk cleanup utilities that can help you identify and remove unnecessary files automatically. Run these utilities regularly to optimize your laptop’s storage.
- Manage offline files: If you use offline files or synchronization features, review and remove any files that you no longer need or require offline access to. This can free up space in your laptop’s storage.
By cleaning up and removing unnecessary files, you can reclaim valuable storage space on your laptop. Regular maintenance and decluttering will not only enhance your laptop’s performance but also ensure a more efficient and organized workflow.
Compress Files to Free Up Space
Compressing files is an effective way to free up storage space on your laptop without permanently deleting any data. File compression reduces the size of files and folders, allowing you to store more files in the available storage capacity. Here’s how you can compress files on your laptop:
- Identify files to compress: Determine which files and folders are taking up significant storage space on your laptop. Look for large files, such as uncompressed media files or archived folders, that can be compressed.
- Choose a compression method: Select a compression method or file format suitable for your requirements. Popular file compression formats include ZIP, RAR, and 7z. Consider compatibility with other devices or software that may need to access the compressed files.
- Use built-in compression tools: Many operating systems provide built-in compression tools. For example, Windows has a built-in file compression feature, accessed by right-clicking on a file or folder and selecting “Send to” > “Compressed (zipped) folder”. Mac users can use the built-in Archive Utility by right-clicking on a file or folder and selecting “Compress” or using the “File” menu in the Finder.
- Utilize third-party compression software: If the built-in compression tools are not sufficient for your needs, consider utilizing third-party compression software such as WinRAR, 7-Zip, or WinZip. These tools often provide more advanced features and support for a wider range of file compression formats.
- Select compression settings: Depending on the compression software you choose, you may have the option to customize compression settings such as compression level or password protection. Adjust these settings based on your preferences or requirements.
- Compress files and folders: Follow the instructions provided by the compression software to compress the selected files or folders. This typically involves selecting the files or folders, specifying the compression format, and initiating the compression process.
- Verify file integrity: After compressing files, it’s a good practice to verify the integrity of the compressed files. Most compression software provides options to test or extract the contents of the compressed files to ensure they were compressed correctly and without errors.
- Store or transfer compressed files: Once you have compressed files, you can store them locally or move them to external storage devices such as USB drives or network storage. Compressed files are also ideal for sharing or sending via email, as they consume less storage and can be easily extracted by the recipient.
- Access and decompress files: When you need to access or use the compressed files, decompress them using the same compression software or the built-in decompression tools of your operating system. This will restore the files to their original size and format.
- Organize and manage compressed files: To prevent clutter, organize and manage your compressed files and folders. Consider creating a specific directory or folder for compressed files, making it easier to locate and manage them in the future.
By compressing files, you can significantly reduce their size and free up storage space on your laptop. This allows you to store more data or files while maintaining access to the compressed files when needed.
Use Storage Optimization Tools
Storage optimization tools are software applications designed to help you better manage and optimize your laptop’s storage space. These tools can identify and remove unnecessary files, perform disk cleanup, and provide insights into storage usage. Here’s how you can make use of storage optimization tools:
- Research and choose a storage optimization tool: Explore various storage optimization tools available for your operating system. Read reviews, compare features, and consider factors such as ease of use, reliability, and compatibility with your laptop.
- Download and install the storage optimization tool: Once you have selected a tool, download and install it on your laptop. Follow the installation instructions provided by the software.
- Scan your laptop’s storage: Run a scan using the storage optimization tool to analyze your laptop’s storage usage. The tool will identify files, folders, and applications that are taking up significant space.
- Review scan results: Take the time to review the scan results provided by the storage optimization tool. Look for large or unnecessary files, duplicates, temporary files, and other items that can be safely deleted or compressed.
- Utilize built-in cleanup features: Many storage optimization tools offer built-in cleanup features that allow you to quickly remove unnecessary files. These features may include disk cleanup, temporary file removal, or cache clearing.
- Delete unnecessary files: Use the storage optimization tool to delete unnecessary files identified during the scan. This will help free up storage space on your laptop without compromising important data.
- Manage startup programs: Some storage optimization tools also provide the ability to manage startup programs. Review and disable any unnecessary applications that launch automatically when your laptop boots up. This can help improve both storage space and performance.
- Monitor storage usage: Take advantage of the storage optimization tool’s monitoring features to keep an eye on your laptop’s storage usage over time. This will help you identify any potential storage hogs or issues that may arise.
- Set up scheduled scans and cleanups: To maintain an optimized storage space, consider setting up scheduled scans and cleanups using the storage optimization tool. This will ensure regular maintenance and prevent storage from becoming cluttered again.
- Stay updated: Keep your storage optimization tool up to date by installing any available updates. Software updates often include bug fixes, performance improvements, and new features that can enhance the effectiveness of the tool.
Using storage optimization tools can greatly simplify the process of managing and optimizing your laptop’s storage space. These tools provide a convenient way to identify and remove unnecessary files, keeping your laptop running smoothly and efficiently.
Store Files on an External Network Drive
Storing your files on an external network drive is a practical solution to expand your laptop’s storage capacity and securely store your data. An external network drive, also known as a network-attached storage (NAS), allows you to access your files from multiple devices connected to the same network. Here’s how you can store files on an external network drive:
- Select a suitable external network drive: Choose an external network drive that meets your storage capacity requirements and offers the necessary features. Consider factors such as the number of drive bays, data transfer speeds, and RAID support for data redundancy.
- Set up the external network drive: Follow the manufacturer’s instructions to connect and set up the external network drive on your home or office network. This typically involves connecting it to your router using an Ethernet cable.
- Create user accounts and permissions: Set up user accounts on the external network drive and define access permissions for different users or groups. This allows you to control who can access, modify, or delete specific files or folders.
- Create shared folders: Set up shared folders on the external network drive to organize your files. These shared folders can be accessed by laptops and other devices connected to the same network.
- Transfer files to the external network drive: Move or copy files from your laptop’s local storage to the shared folders on the external network drive. This frees up space on your laptop while making the files accessible to all authorized devices on the network.
- Organize and manage files on the external network drive: Maintain a logical file structure within the shared folders of the external network drive. Create subfolders and appropriately name files to ensure easy navigation and efficient file management.
- Access files from your laptop: Access the shared folders on the external network drive from your laptop by mapping network drives or using file explorer tools. This allows you to work with the files stored on the external network drive as if they were located on your local storage.
- Backup files on the external network drive: Utilize the external network drive as a backup destination for your laptop’s important files. Set up automated backups or manually copy files to the external network drive regularly to ensure data integrity.
- Secure your external network drive: Apply security measures to protect the external network drive and the data stored on it. Enable features like password protection, encryption, and secure remote access if available.
- Expand storage capacity: If the storage capacity of your external network drive becomes insufficient, consider adding additional hard drives or expanding its existing storage capacity to meet your growing needs.
Storing files on an external network drive not only expands your laptop’s storage capacity but also allows for centralized file management and easy access from multiple devices. It provides a secure and scalable solution to store and share files within your home or office network.