
Choosing a Photo Editing Software
When it comes to adding comic book speech balloons and text bubbles to your photos, having the right photo editing software is essential. There are several options available, each with its own set of features and capabilities. Here are some factors to consider when selecting the best software for your needs:
1. User-friendly interface: Look for software that has an intuitive interface and easy-to-use tools. This will ensure a smooth editing process and make it easier for you to add speech balloons and text bubbles to your photos.
2. Variety of shapes and designs: Check if the software provides a wide range of speech balloon and text bubble shapes, sizes, and designs. This will give you the flexibility to choose the perfect style to match the tone and theme of your photo.
3. Customization options: Make sure the software allows you to customize the size, position, and orientation of the speech balloons and text bubbles. This will help you create a visually appealing composition and ensure that the text fits perfectly within the balloon or bubble.
4. Text editing capabilities: Look for software that offers a range of fonts, sizes, and colors for the text. This will allow you to add personality and style to your speech balloons and text bubbles.
5. Special effects: Consider if the software offers additional effects like shadows, gradients, or outlines for the speech balloons and text bubbles. These effects can add depth and visual interest to your comic book-inspired photo.
6. Compatibility: Check if the software is compatible with your operating system and whether it offers the ability to export the final image in the desired file format.
By considering these factors, you’ll be able to choose a photo editing software that suits your needs and allows you to create stunning comic book-inspired photos with ease.
Creating a Blank Canvas for Your Image
Before you can start adding comic book speech balloons and text bubbles to your photos, you’ll need to create a blank canvas where you can work on. Follow these steps to set up the foundation for your creative editing:
1. Open your photo editing software: Launch the photo editing software of your choice on your computer. Ensure that you have a high-resolution photo that you want to add speech balloons and text bubbles to.
2. Create a new document: Look for the “New” or “Create” option in the software’s menu. This will open a dialog box where you can specify the dimensions of your blank canvas. Set the dimensions according to your desired final image size.
3. Choose the background color: Select a background color for your canvas. For comic book-style images, a solid white or light-colored background works best, as it helps the speech balloons and text bubbles stand out. This can typically be done by clicking on the color swatch or using the color picker tool in the software.
4. Set the resolution: Adjust the resolution of your canvas. For digital display purposes, a resolution of 72 pixels per inch (ppi) is usually sufficient. However, if you plan to print your comic book-inspired photo, a higher resolution, such as 300 ppi, is recommended for better print quality.
5. Save the blank canvas: Choose a file name and save your blank canvas in a suitable file format, such as JPEG or PNG. Saving your work periodically throughout the editing process is always a good practice to ensure you don’t lose any progress.
With your blank canvas created, you’re now ready to add the comic book speech balloons and text bubbles to your photo. Remember to refer back to your chosen software’s interface and tools to navigate through the editing process smoothly.
Selecting the Right Speech Balloon or Text Bubble Shape
Choosing the perfect speech balloon or text bubble shape is crucial for adding a comic book-inspired touch to your photos. Here are some tips to help you make the right selection:
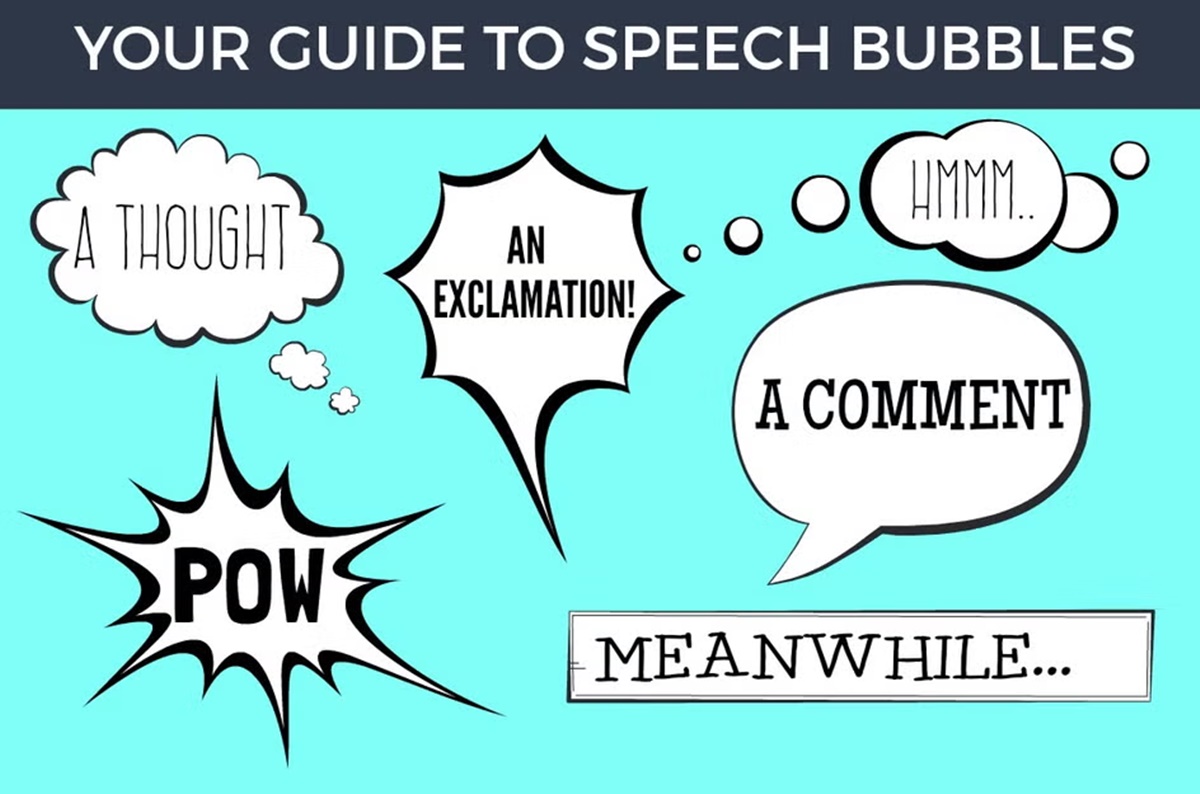
1. Consider the context: Think about the content and theme of your photo. Are you capturing a humorous moment or a serious conversation? Different speech balloon shapes can convey different emotions. For example, a classic cloud-shaped speech balloon is often used for regular dialogue, while an exclamation mark-shaped balloon can indicate surprise or excitement.
2. Look for variety: Photo editing software often provides a range of speech balloon and text bubble shapes. Explore the options available and experiment with different shapes to find the one that best complements your photo. Some common shapes include ovals, rectangles, thought bubbles, and caption boxes.
3. Size and placement: Consider the size of your photo and the space available for the speech balloons or text bubbles. Choose shapes that fit naturally within the composition without overcrowding or obstructing important elements in the image. Additionally, pay attention to the placement of the balloons or bubbles to guide the reader’s eye and maintain visual flow.
4. Reinforce the message: The shape of the speech balloon or text bubble can also be used to emphasize or reinforce the message in your photo. For example, using a jagged, irregular shape for a character’s dialogue can signify anger or frustration, while a heart-shaped bubble can portray romantic dialogue.
5. Consistency: If you’re working on a series of photos or creating a comic strip, aim for consistency in your speech balloon or text bubble shapes. This will create a cohesive look and improve the overall visual storytelling experience.
6. Personalize and experiment: Don’t be afraid to personalize and experiment with custom shapes for your speech balloons or text bubbles. Some photo editing software allows you to create your own shapes or import custom shapes from external sources. This can add a unique touch to your comic book-inspired photos.
By considering these factors, you can select the right speech balloon or text bubble shape that enhances the storytelling aspect and adds a playful and engaging element to your photos.
Adjusting the Size and Position of the Balloon or Bubble
Once you have chosen the perfect speech balloon or text bubble shape for your photo, the next step is to adjust its size and position to ensure it fits seamlessly within the composition. Here are some techniques to help you achieve the desired effect:
1. Scale proportionally: When resizing the balloon or bubble, make sure to maintain its proportions. This will prevent any distortion and ensure a visually pleasing result. Most photo editing software allows you to scale an object while maintaining its aspect ratio by holding down the Shift key while dragging the corner handles.
2. Fit within the image: Keep in mind that the speech balloon or text bubble should not dominate or overpower the photo. Adjust its size so that it complements the subject and other elements in the image, drawing the viewer’s attention without overshadowing the main focus.
3. Overlay and position: Position the balloon or bubble in a manner that appears natural within the photo. Depending on the dialogue or message, you may want to overlay the balloon or bubble on top of the character or object speaking, or position it nearby with an arrow pointing towards the speaker. Experiment with different placements to find the most visually appealing and contextually appropriate position.
4. Consider visual flow: The size and position of the balloon or bubble can influence the visual flow of the image. Ensure that the placement enhances the reading order and guides the viewer’s eye across the photo. Balloons or bubbles that are positioned too far apart or in awkward locations may disrupt the flow and detract from the overall narrative.
5. Grouping and sequencing: If you’re working with multiple speech balloons or sequence of dialogue, arrange them in a logical and visually appealing order. Grouping them together or positioning them in a sequential manner can help create a sense of continuity and improve the storytelling aspect.
6. Edit and refine: Don’t be afraid to make adjustments as you go. Fine-tune the size and position of the balloon or bubble until you are satisfied with the overall composition. Step back and take a fresh look to ensure that it complements the photo and conveys the intended message effectively.
By carefully adjusting the size and position of the speech balloon or text bubble, you can achieve a cohesive and visually pleasing result that enhances the storytelling aspect of your comic book-inspired photo.
Adding Text to the Balloon or Bubble
Adding text to the speech balloon or text bubble is where the narrative of your comic book-inspired photo truly comes alive. Here are some tips to consider when adding text:
1. Readability is key: Ensure that the text is easy to read by choosing a font size and style that are clear and legible. Avoid overly decorative or cursive fonts that may be difficult to decipher, especially in smaller sizes.
2. Fit the space: The text should fit comfortably within the speech balloon or text bubble without crowding or overflowing. Adjust the font size and line spacing to achieve a balanced look and ensure that the text doesn’t obscure any important visual elements in the photo.
3. Consider typography: Experiment with different typography techniques to add personality and express different tones of dialogue. For example, using bold or italicized text can emphasize certain words or add emphasis to a character’s speech. Varying the size or color of specific words can also convey emotions or draw attention to important details in the text.
4. Maintain consistency: If you’re working with multiple speech balloons or text bubbles in a series of photos or a comic strip, strive for consistency in the font choice, size, and style. This will create a cohesive look and aid in the readability and visual continuity of your narrative.
5. Align the text: Align the text within the speech balloon or text bubble to ensure optimal visual appeal and readability. Typically, the text is centered or left-aligned within the balloon or bubble, but you can experiment with different alignments to achieve the desired aesthetic.
6. Consider the character’s voice: Tailor the text to match the character’s personality and voice. Use colloquial language, slang, or specific speech patterns to differentiate the dialogue and make it feel authentic and engaging.
7. Proofread and edit: Before finalizing the text, proofread it for any errors or typos. Double-check that the text accurately reflects the intended message or dialogue. Edit as needed to maintain clarity and conciseness.
Remember, adding text to the speech balloon or text bubble is an opportunity to enhance the storytelling aspect of your comic book-inspired photo. With thoughtful consideration, you can bring your characters to life and create a captivating narrative through the power of words.
Choosing the Perfect Font and Color for the Text
When adding text to your speech balloon or text bubble, selecting the right font and color plays a vital role in conveying the intended message and enhancing the overall aesthetic. Here are some considerations to help you choose the perfect font and color:
1. Font style: Consider the style of font that best fits the tone and theme of your comic book-inspired photo. For a classic comic book feel, you can opt for bold, blocky fonts reminiscent of hand-drawn lettering. Alternatively, you can choose a more modern or playful font style to match the overall style of your photo.
2. Readability: Prioritize readability when selecting a font. Make sure the letters are clear and distinguishable, even when the text is scaled down or placed within a small speech balloon or text bubble. Avoid overly elaborate or decorative fonts that may hinder legibility.
3. Font size: Adjust the size of the text to ensure it is easily readable within the speech balloon or text bubble. Consider the available space and the level of detail in your photo. If necessary, experiment with different font sizes until you achieve a balance between readability and visual appeal.
4. Color contrast: When choosing the text color, consider the background color of the bubble or balloon as well as the overall color palette of your photo. Aim for a high contrast between the text and the background to ensure legibility. For example, if the background is light, choose a dark-colored text, and vice versa.
5. Emphasize through color: To add emphasis or highlight certain words or phrases, use a different color for those specific elements. This can help draw the reader’s attention and make the text more visually engaging within the speech balloon or text bubble.
6. Consistency: If you’re working on a series of photos or a comic strip, maintain consistency in the font and color choices throughout. This will create a cohesive look and enhance the overall visual storytelling experience.
7. Test different options: Don’t be afraid to explore various font styles and colors before making a final decision. Experiment with different combinations to see which ones best reflect the mood and message of your photo.
By carefully selecting the font and color for the text within the speech balloon or text bubble, you can enhance the overall visual impact of your comic book-inspired photo and ensure that the text is easily readable and visually appealing.
Adding Special Effects to the Balloon or Bubble
Adding special effects to your speech balloons or text bubbles can elevate the visual impact of your comic book-inspired photo. Here are some techniques to consider when adding special effects:
1. Shadows: By applying a subtle shadow effect to the speech balloon or text bubble, you can create depth and make it appear more three-dimensional. Experiment with different shadow options, such as distance, opacity, and direction, to achieve the desired effect.
2. Gradients: Applying gradients to the balloon or bubble can add a sense of dimension and visual interest. Experiment with different gradient styles, such as linear or radial, and play with the color stops to create a unique look.
3. Outlines: Adding an outline to the balloon or bubble can make it stand out more prominently against the background. Adjust the thickness and color of the outline to create a visually pleasing contrast that enhances readability and adds visual appeal.
4. Transparency: Depending on the style and effect you want to achieve, you can adjust the transparency or opacity of the speech balloon or text bubble. This can create a translucent or ghostly effect, adding a touch of mystery or whimsy to your photo.
5. Motion blur: If you want to convey movement or action, consider applying a motion blur effect to the speech balloon or text bubble. This can add a dynamic element to your photo and create a sense of energy.
6. Glows and highlights: Adding a soft glow or highlight effect to the speech balloon or text bubble can make it appear more vibrant and eye-catching. Experiment with different colors and opacities to achieve the desired effect.
7. Texture overlays: For a more vintage or textured look, you can apply texture overlays to the speech balloon or text bubble. This can add a tactile and nostalgic charm to your comic book-inspired photo.
8. Animation effects: If you’re working with digital formats or creating a comic strip for online use, consider adding animation effects to the speech balloon or text bubble. Animating the text can bring an extra layer of engagement and interactivity to your photo.
Remember, special effects should enhance the overall visual appeal of your comic book-inspired photo without overpowering or distracting from the main subject. Experiment with different effects, but exercise restraint to maintain a cohesive and visually appealing composition.
Enhancing the Overall Look of Your Photo
Adding comic book speech balloons and text bubbles is just one aspect of creating a visually captivating image. To truly enhance the overall look of your photo and achieve a professional result, consider the following tips:
1. Adjust brightness and contrast: Fine-tune the brightness and contrast levels of your photo to ensure optimal clarity and visual impact. This can help bring out the details and make your image pop.
2. Enhance colors: If needed, adjust the saturation and vibrancy of the colors in your photo. This can make the image more visually appealing and enhance the mood or atmosphere.
3. Crop and straighten: Use the cropping tool to remove any unnecessary elements from the photo and improve the composition. Additionally, straighten the image if it appears tilted.
4. Apply filters or effects: Experiment with filters or effects provided by your photo editing software to add a unique and artistic touch to your image. However, use them sparingly to avoid overdoing the visual enhancements.
5. Remove distractions: If there are any distracting elements in the background or foreground of your photo, consider using the clone stamp or healing brush tool to remove or mitigate their impact on the composition.
6. Sharpen details: Use the sharpening tool to enhance the clarity and sharpness of important details in your photo. However, be cautious not to oversharpen, as it can create artifacts or noise.
7. Adjust levels and curves: Use the levels and curves adjustment tools to fine-tune the tonal range and overall contrast in your photo. This can help achieve a more balanced and visually pleasing image.
8. Consider vignetting: Adding a subtle vignette effect around the edges of your photo can draw the viewer’s attention towards the center and create a more focused and dramatic look.
9. High-resolution output: When saving or exporting your final image, ensure that it is in a high-resolution format suitable for the intended use. This will maintain the quality and sharpness of the photo, especially for print or larger displays.
By implementing these techniques and paying attention to the overall aesthetics of your photo, you can enhance its visual appeal and create a stunning final result that complements the addition of comic book speech balloons and text bubbles.
Tips for a Professional-Looking Result
When adding comic book speech balloons and text bubbles to your photos, following these tips can help you achieve a professional-looking result:
1. Plan your composition: Before adding the speech balloons and text bubbles, plan out the composition of your photo. Consider the placement of the main subject, the dialogue, and any other visual elements to ensure a visually balanced and engaging composition.
2. Maintain consistency: Use a consistent style and design for your speech balloons and text bubbles throughout your photo series or comic strip. This will create a cohesive look and improve the flow of the narrative.
3. Pay attention to typography: Choose fonts that are easy to read and reflect the tone of the dialogue. Additionally, make sure the text is properly aligned and spaced within the balloons or bubbles for optimal readability.
4. Use color intentionally: Select colors for the speech balloons and text bubbles that complement the overall color scheme of the photo and help convey the intended mood or atmosphere. Aim for a harmonious and visually appealing color palette.
5. Avoid overcrowding: Don’t overcrowd the photo with too many speech balloons or text bubbles. Be strategic with your use of dialogue and allow enough negative space to maintain a clear and uncluttered composition.
6. Optimize readability: Ensure that the text is easily readable within the speech balloons or text bubbles by using appropriate font sizes, contrasting colors, and appropriate positioning. The dialogue should be clear and legible without straining the reader’s eyes.
7. Practice good grammar and punctuation: Proofread the text for correct grammar and punctuation. Use quotation marks, commas, and other punctuation marks appropriately to ensure clear and accurate dialogue.
8. Test on different devices: Preview your photo on different devices and screen sizes to ensure that the speech balloons and text bubbles are still easily readable and visually appealing across various platforms.
9. Seek feedback: Ask for feedback from others to get different perspectives and suggestions for improvements. This can help you identify any areas that may need further refinement or adjustments.
10. Practice and experiment: Continually practice and experiment with adding speech balloons and text bubbles to refine your skills and discover new techniques. The more you experiment, the more you will develop your own unique style and approach.
By incorporating these tips into your process, you can achieve a professional-looking result that effectively integrates comic book speech balloons and text bubbles into your photos.
Showcasing Your Newly Created Comic Book-Inspired Photo
Once you have added the comic book speech balloons and text bubbles to your photo, it’s time to showcase your creation. Here are some ways to effectively share and present your comic book-inspired photo:
1. Social media platforms: Share your photo on social media platforms like Instagram, Facebook, Twitter, or Pinterest. Use relevant hashtags and engaging captions to attract a wider audience and encourage interaction.
2. Online galleries and communities: Submit your photo to online galleries or photography communities that specialize in comic book or pop culture-themed content. This can help you reach a targeted audience and connect with fellow enthusiasts.
3. Blog or portfolio: Create a dedicated blog post or portfolio page where you can showcase your comic book-inspired photo. Provide some background information, insights into your creative process, and perhaps even a behind-the-scenes look at how you added the speech balloons and text bubbles.
4. Print and display: Print your photo and display it in your home or office. Consider framing it or incorporating it into a larger art piece to make a statement and catch the attention of visitors.
5. Collaboration or publication: Look for opportunities to collaborate with other artists, writers, or publications that align with comic book or creative themes. This could involve contributing your photo to a creative project or getting featured in an online or print publication.
6. Personalized merchandise: Explore options for turning your comic book-inspired photo into personalized merchandise. This can include items like mugs, prints, t-shirts, or phone cases. Sell or gift these items to showcase your unique and creative work.
7. Participate in contests or challenges: Take part in photography contests or challenges that specifically focus on comic book or pop culture themes. This can provide exposure for your work and potentially lead to recognition from a larger audience.
8. Engage with your audience: Respond to comments and engage with your audience when you share your photo. Encourage discussions, answer questions, and show appreciation for the support and feedback you receive.
9. Create a series: Consider creating a series of comic book-inspired photos that are interconnected or follow a specific narrative. This can generate interest and anticipation among your audience, keeping them engaged with your work over an extended period.
10. Collaborate with influencers: Reach out to influencers or creators in the comic book or photography space to collaborate on a project or get their insights and feedback. This can help expand your reach and tap into new audiences.
Remember, showcasing your newly created comic book-inspired photo is an opportunity to share your creativity and passion with others. Embrace these avenues to exhibit your work and connect with like-minded individuals who appreciate your unique vision.