
Features of the Messages App
The Messages app is a powerful tool on iPhones that allows users to send and receive text messages, photos, videos, and more. With various features and customization options, it has become an essential communication tool for iPhone users. In this section, we will explore some of the key features of the Messages app.
1. Text Messaging: The primary function of the Messages app is to send and receive text messages. You can easily compose a new message, add recipients from your contacts, and type your message. The app supports both individual and group messaging, making it convenient to communicate with multiple people at once.
2. Rich Media Sharing: One of the standout features of the Messages app is the ability to share photos and videos. You can simply tap on the camera icon to access your photo library or take a new picture/video using your phone’s camera. You can then send them instantly to your contacts, bringing your conversations to life.
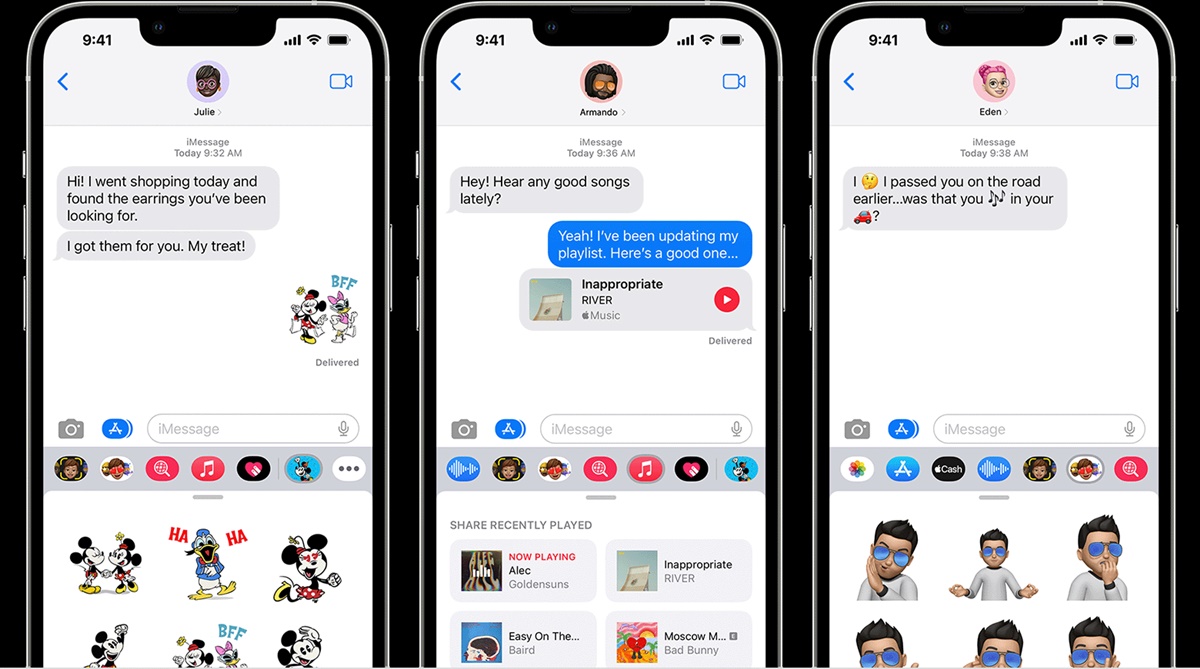
3. Emoji and Stickers: Injecting emotions into your messages is made easy with the Messages app. You can add various emojis and stickers to express yourself or enhance your messages. There is a wide range of options to choose from, allowing you to personalize your conversations and make them more engaging.
4. Customization Options: The Messages app offers several customization options to personalize your texting experience. You can choose from different text message bubble styles and wallpapers to dress up your conversations. Additionally, you can adjust notifications and sounds to suit your preferences.
5. Typing Indicator and Read Receipts: The app provides real-time indicators to let you know when someone is typing a reply. This can help you gauge when to expect a response. It also supports read receipts, showing you when your sent messages have been read by the recipient.
6. Siri Integration: Utilizing the power of Siri, you can send messages hands-free by simply dictating your words. For example, you can say “Hey Siri, send a message to John” and dictate your message. Siri will then transcribe and send it on your behalf, making messaging easier and more convenient.
7. Quick Reply from Lock Screen: When you receive a message, you can view and reply to it directly from the lock screen. This allows you to respond quickly without unlocking your phone or opening the Messages app, saving you time and effort.
8. iMessage Effects: The Messages app supports various visual effects that can be used to add a touch of creativity to your messages. You can send messages with balloons, confetti, or other animations to surprise and delight your contacts.
9. Message Management: The Messages app makes it easy to manage your message threads and notifications. You can swipe left on a conversation to delete it, or swipe right to mark it as read. Additionally, you can customize notifications to control when and how you are alerted to new messages.
10. Enhanced Security: With end-to-end encryption, the Messages app ensures that your conversations remain private and secure. This means that only you and the intended recipients can access the contents of your messages, protecting your sensitive information.
These are just some of the many features that make the Messages app an indispensable tool for iPhone users. With its seamless integration into the iOS ecosystem and continuous improvements with each update, it remains a reliable and efficient way to stay connected with friends, family, and colleagues.
How to Send a Text Message
Sending a text message using the Messages app on your iPhone is quick and simple. Follow these steps to compose and send your message:
Step 1: Open the Messages app: Locate the Messages app on your home screen and tap on it to open it. The app is represented by a green speech bubble icon.
Step 2: Start a new conversation: Once in the Messages app, tap on the pencil and paper icon located in the top-right corner of the screen. This will open a new message window.
Step 3: Add recipients: Tap on the “To:” field and start typing the name or phone number of the person you want to message. As you type, suggestions from your contacts will appear. You can select the correct contact from the list or continue typing the full number manually.
Step 4: Compose your message: Tap on the message field and start typing your message. You can write a simple text message or include emojis, stickers, or even photos and videos by tapping on the respective icons located above the keyboard.
Step 5: Send your message: Once you have composed your message, tap on the arrow icon or the “Send” button to send it. The message will be delivered to the recipient instantly.
Additional Tips:
– To send the same message to multiple recipients, separate each contact name with a comma in the “To:” field.
– If you want to attach a photo or video, tap on the camera icon beside the message field to access your camera roll or take a new picture/video.
– You can dictate your message using Siri by activating it with the voice command “Hey Siri” or by pressing and holding the home button (for devices with a home button) or the side button (for devices without a home button).
Sending text messages has never been easier with the Messages app on your iPhone. Whether you’re reaching out to a single person or a group, the app offers a straightforward and intuitive interface to ensure your messages are delivered efficiently and effectively.
Adding Photos and Videos to Messages
The Messages app on your iPhone allows you to enhance your conversations by adding photos and videos to your messages. Whether you want to capture a special moment or share a funny video clip, the app makes it easy to send multimedia content to your contacts. Here’s how you can add photos and videos to your messages:
Step 1: Open the Messages app: Locate the Messages app on your home screen and tap to open it. The app is represented by a green speech bubble icon.
Step 2: Start a new conversation or select an existing one: Choose the contact or group you want to send the photo or video to. You can either start a new conversation or select an existing one from your message list.
Step 3: Tap on the camera icon: Once you’re in the conversation, you’ll see a text field at the bottom of the screen. Tap on the camera icon located to the left of the text field.
Step 4: Choose a photo or video: You’ll be presented with options to either take a photo or video in real-time or select one from your camera roll. Tap on the appropriate option based on your preference.
Step 5: Capture or select your media: If you choose to take a photo or video, your camera will open, allowing you to frame your shot and capture the moment. If you opt to select from your camera roll, you’ll see a thumbnail grid of your saved photos and videos. Tap on the desired media to select it.
Step 6: Add optional message or caption: After selecting your photo or video, you can add an optional message or caption to accompany it. Tap on the text field above the photo or video to enter your message.
Step 7: Send your media: Once you’re satisfied with your photo or video and the accompanying message, tap the arrow icon or the “Send” button to send it. The media will be delivered to the recipient alongside your message.
Additional Tips:
– You can add multiple photos or videos to a single message by tapping on the “+” icon beside the photo or video you’ve already selected.
– You can enhance your photos by using the built-in editing tools available within the Messages app. After selecting a photo, tap on the “Edit” button to access these tools.
– To view media sent to you, simply tap on the thumbnail within the message thread to enlarge it.
Adding photos and videos to your messages adds a personal touch and allows you to share your experiences visually. It’s a great way to make your conversations more engaging and memorable with friends and family.
Using Emoji and Stickers
The Messages app on your iPhone offers a wide range of expressive tools to enhance your conversations, including emojis and stickers. Whether you want to convey an emotion, spice up a conversation, or simply add a touch of fun, emojis and stickers allow you to express yourself in a visual and playful way. Here’s how you can use emojis and stickers in the Messages app:
Using Emojis:
Step 1: Open the Messages app: Locate the Messages app on your home screen and tap to open it. The app is represented by a green speech bubble icon.
Step 2: Start a new conversation or select an existing one: Choose the contact or group you want to send the message to. You can either start a new conversation or select an existing one from your message list.
Step 3: Tap on the smiley face icon: Once you’re in the conversation, you’ll see a text field at the bottom of the screen. Tap on the smiley face icon located to the left of the text field.
Step 4: Browse through the emojis: You’ll now have access to a wide array of emojis. These are categorized into various sections like smileys and people, animals and nature, food and drink, activities, objects, and more. Swipe left or right to navigate through the different categories.
Step 5: Select an emoji: Tap on the emoji that you want to use. It will be added to the text field, and you can continue typing your message alongside the emoji.
Using Stickers:
Step 1: Open the Messages app: Locate the Messages app on your home screen and tap to open it. The app is represented by a green speech bubble icon.
Step 2: Start a new conversation or select an existing one: Choose the contact or group you want to send the message to. You can either start a new conversation or select an existing one from your message list.
Step 3: Tap on the App Store icon: Once you’re in the conversation, you’ll see a text field at the bottom of the screen. Tap on the App Store icon located to the left of the text field.
Step 4: Browse through sticker options: You’ll be taken to the App Store within the Messages app, where you can browse and download sticker packs. These packs offer a variety of fun and animated stickers for you to choose from.
Step 5: Select and send a sticker: After downloading your preferred sticker packs, tap on the stickers icon located at the bottom of the screen. Browse through the available stickers and tap on the one you want to send. It will be added to the conversation.
With emojis and stickers, you can add a touch of personality and creativity to your messages. Experiment with different options to enhance your communication and make your conversations more visually engaging and entertaining.
Customizing Text Message Settings
The Messages app on your iPhone offers various customization options to personalize your text message settings. These settings allow you to control how your messages are displayed, delivered, and notified. Here’s how you can customize your text message settings:
Step 1: Open the Settings app: Locate the Settings app on your home screen and tap on it to open it. The app is represented by a gear icon.
Step 2: Scroll and tap on “Messages”: In the Settings app, scroll down until you find the “Messages” option. Tap on it to access the Messages settings.
Step 3: Adjust settings as desired: Once in the Messages settings, you’ll have various options to customize your text message settings. Here are some key settings you can adjust:
- iMessage: Enable or disable iMessage, which allows you to send and receive messages over Wi-Fi or cellular data.
- Send Read Receipts: Choose whether you want others to see when you have read their messages by toggling the “Send Read Receipts” option on or off.
- Text Message Forwarding: Set up text message forwarding to enable your iPhone to send and receive SMS and MMS messages on other Apple devices linked to your iCloud account.
- Filter Unknown Senders: Enable the “Filter Unknown Senders” option to separate messages from unknown senders into a separate tab, helping you avoid spam and unwanted messages.
- Character Count: Turn on the “Character Count” option to display the character count while composing a message above the keyboard.
- Announce Messages with Siri: Configure Siri to announce incoming messages when your device is connected to AirPods or compatible headphones.
- Notification Options: Customize how you receive notifications for new messages, including sounds, banners, and previews.
- Show Previews: Choose whether message previews are displayed on the lock screen and in notification banners.
Step 4: Return to Messages app: Once you have customized your text message settings, you can exit the Settings app and return to the Messages app to start using the updated settings.
Additional Tips:
- – You can access additional message settings by going to a specific conversation in the Messages app, tapping on the contact or group name at the top of the screen, and selecting “info”. From there, you can customize settings like notifications, hide alerts, and more for that specific conversation.
- – Explore other options within the Messages settings to customize your messaging experience further, such as choosing a different text message tone or enabling message effects.
By customizing your text message settings, you can tailor your messaging experience to suit your preferences and needs. Whether it’s adjusting notification settings, enabling read receipts, or filtering unknown senders, these customization options give you more control over how you communicate via text messages on your iPhone.
Group Messaging
The Messages app on your iPhone allows you to participate in group messaging, a convenient way to communicate with multiple people simultaneously. Whether it’s coordinating plans, sharing updates, or simply having a group conversation, group messaging makes it easy to connect with a larger audience. Here’s how you can utilize group messaging:
Step 1: Start a new group conversation: Open the Messages app and tap on the pencil and paper icon to start a new message. Enter the names or phone numbers of the people you want to include in the group. As you type, suggestions from your contacts will appear. Tap on the correct contacts to add them to the group.
Step 2: Compose and send your message: Once the group is created, you can compose your message in the text field. Type your message as you would in a regular text message. You can also add emojis, stickers, photos, or videos to enhance your message. Tap the arrow or send button to send the message to all group members.
Step 3: View and participate in the conversation: As group members receive the message, they can read and respond to it. In the group conversation, you can see who has sent a message and when it was delivered. Each member’s response is displayed in the conversation thread, allowing for a dynamic and interactive discussion.
Step 4: Managing group settings: You have several options for managing group settings. Tap on the group name at the top of the conversation to access the group settings menu. From there, you can add or remove group members, customize the group name or photo, mute the conversation, or even leave the group if desired.
Additional Tips:
- – To mention someone specifically in a group message, type “@” followed by their name. This will notify them directly and highlight their name in the group conversation.
- – You can easily identify group messages by the presence of multiple recipients in the conversation header.
- – Group messages can include both iPhone users and Android users, allowing for seamless communication across different platforms.
- – Be mindful of the group dynamics and respect each member’s boundaries and preferences when participating in group conversations.
Group messaging is a powerful feature that promotes collaboration, coordination, and engagement among multiple individuals. It simplifies communication by allowing you to reach out to a group of people at once, making it convenient for various social and professional scenarios.
Typing Indicator and Read Receipts
The Messages app on your iPhone provides useful features like the typing indicator and read receipts, which enhance communication by providing real-time indicators of the status and progress of your messages. These features give you valuable insights into the responsiveness of your contacts and can help manage expectations in ongoing conversations. Here’s how the typing indicator and read receipts work:
Typing Indicator:
When someone you are chatting with in a conversation is actively typing a message, you will see a typing indicator appear in the chat window. It typically consists of three animated dots, indicating that the other person is actively composing a response. This indicator gives you real-time feedback on when to expect a reply, helping you gauge the responsiveness of your contact.
Read Receipts:
Read receipts provide confirmation when your sent messages have been read by the recipient. When a recipient opens and reads your message, you will see a “Read” indication below the message. This feedback lets you know that your message has been successfully received and seen.
Customizing Read Receipts:
Your iPhone allows you to enable or disable read receipts at the system level. By default, read receipts are turned on for iMessage conversations. However, you have the option to customize read receipts for individual conversations as well. Here’s how to manage read receipts:
- Enable or disable read receipts globally: Go to “Settings” on your iPhone, scroll down and tap on “Messages”, and toggle the “Send Read Receipts” option to activate or deactivate read receipts for all your conversations.
- Manage read receipts for specific conversations: Open the Messages app, select the conversation for which you want to customize read receipts, tap on the contact name at the top, and then toggle the “Send Read Receipts” option to enable or disable them for that specific conversation.
Additional Tips:
- – Remember that read receipts work only when both you and the recipient are using iMessage.
- – Keep in mind that read receipts can be helpful, but they can also create pressure to respond immediately. Respect each other’s boundaries and preferences regarding read receipts.
- – If you prefer not to send read receipts, keep in mind that disabling them globally will also prevent you from receiving read receipts from others.
- – Read receipts can be a beneficial tool for confirming message delivery, ensuring important messages have been acknowledged.
The typing indicator and read receipts in the Messages app offer valuable information and insights into your message exchange, enabling more efficient and effective communication with your contacts. These features enhance the transparency and responsiveness of your conversations, helping to facilitate clearer and more engaging communication experiences.
Using Siri to Send Messages
Siri, the virtual assistant on your iPhone, provides a hands-free and efficient way to send messages using just your voice. By utilizing Siri’s powerful voice recognition capabilities, you can compose and send messages without the need to type. This feature is especially useful when you’re on the go or have your hands full. Here’s how you can use Siri to send messages:
Step 1: Activate Siri: To activate Siri, you have multiple options. On devices with a Home button, simply press and hold the Home button until Siri appears. On devices without a Home button, like the iPhone X or newer models, you can either say “Hey Siri” or press and hold the side button.
Step 2: Give a voice command: Once Siri is activated, you can give a voice command to send a message. For example, you can say “Hey Siri, send a message to [Contact’s Name].” Siri will then prompt you to dictate the content of the message.
Step 3: Compose your message: When prompted, speak out the message you want to send. Siri will transcribe your words into text in real-time. You can include punctuation marks, emojis, and even specify the recipient if needed.
Step 4: Confirm and send: After dictating your message, Siri will display the transcribed text and ask for confirmation. Review the message to ensure accuracy, and if everything is correct, simply tell Siri to send the message.
Additional Tips:
- – If the dictated message is not accurate, you can edit it by tapping on the text field and making the required changes before sending.
- – Siri can send messages not only through the Messages app but also through third-party messaging apps like WhatsApp or Telegram. Simply mention the app name in your voice command, such as “Hey Siri, send a WhatsApp message to [Contact’s Name].”
- – If you want to send a message to a group, specify the group’s name instead of an individual contact.
Using Siri to send messages provides a convenient, hands-free option for quick communication. Whether you’re multitasking, driving, or simply prefer to use voice commands, Siri’s integration with the Messages app streamlines the process of composing and sending messages, making it more efficient and accessible.
Responding to Messages from the Lock Screen
With the Messages app on your iPhone, you can quickly and easily respond to incoming messages even when your device is locked. This feature allows you to stay connected and promptly reply to important messages without the need to unlock your device or open the Messages app. Here’s how you can respond to messages from the lock screen:
Step 1: Receive a new message: When a new message arrives, you will see a notification displayed on the lock screen. The notification will show the sender’s name or number, along with a preview of the message content. It may also play a sound or vibrate to alert you.
Step 2: Access the message: To respond to the message, tap on the notification itself. This will display the full message on the lock screen, allowing you to read the complete conversation thread without unlocking your device.
Step 3: Reply to the message: Once you’ve read the message, you can immediately respond to it. There are two options available:
- Quick Reply: On the lock screen, swipe left on the notification to reveal the “Reply” button. Tap on it, and a text field will appear. Enter your response using the keyboard that appears, and then tap “Send” to send the reply directly from the lock screen.
- Full Reply: If you prefer to access the full Messages app for a more comprehensive response, unlock your device using Touch ID, Face ID, or passcode. After unlocking, find the Messages app icon on the home screen or in the app drawer, open it, and navigate to the conversation where the new message was received. You can now type a more detailed response before sending it.
Additional Tips:
- – To dismiss a message notification without responding, swipe it to the right. This action will clear the notification from your lock screen.
- – When responding from the lock screen, keep in mind that you have limited access to other features and functionalities of the Messages app. For more extensive interactions, navigate to the full app.
- – Be cautious when responding to messages from the lock screen, especially if the content may be sensitive or require privacy. Consider the context and your surroundings to determine the appropriate response method.
Being able to respond to messages from the lock screen adds convenience and efficiency to your messaging experience. Whether it’s acknowledging an urgent message, providing a quick response, or simply staying connected, this feature allows you to manage your messages swiftly and effectively.
Sending Audio Messages
The Messages app on your iPhone allows you to send not only text-based messages but also audio messages, providing an additional way to communicate with your contacts. Whether you want to share a voice recording, a song snippet, or simply convey your tone and emotion through spoken words, sending audio messages can add a personal touch to your conversations. Here’s how you can send audio messages:
Step 1: Open the Messages app: Locate and open the Messages app on your iPhone. The app is represented by a green speech bubble icon and is typically found on your home screen.
Step 2: Start a conversation or select an existing one: Choose the contact or group to whom you want to send the audio message. Start a new conversation or select an existing one from your message list.
Step 3: Tap and hold the microphone icon: In the text field at the bottom of the conversation screen, you’ll see a small microphone icon to the right side. Tap and hold this icon to begin recording your audio message.
Step 4: Record your message: While holding the microphone icon, speak into the device’s microphone to record your message. You can say whatever you want to convey, and there’s no time limit for the length of the audio message.
Step 5: Release to send: When you’ve finished recording your audio message, release the microphone icon. The message will automatically be sent to the recipient in the conversation.
Additional Tips:
- – While recording your audio message, you can swipe left to cancel the recording if you decide not to send it.
- – If you want to switch to a text message instead of sending an audio message, slide your finger to the right while still holding the microphone icon.
- – When receiving an audio message, simply tap on the message to play and listen to it. You can reply to the sender by tapping on the text field and sending a text or audio message back.
- – Audio messages are a great way to capture the essence of sound, such as sharing a beautiful song snippet or a hilarious voice impression. They can add a personal touch and convey emotions that may not be easily expressed in text alone.
Sending audio messages through the Messages app gives you the flexibility to communicate creatively and expressively. They offer a dynamic and engaging way to exchange thoughts, emotions, and experiences with your contacts, enhancing the overall messaging experience.
Using iMessage Effects
The Messages app on your iPhone offers a range of fun and interactive iMessage effects that allow you to add excitement and visual flair to your messages. These effects can liven up conversations, convey emotions, and create memorable experiences for your contacts. Here’s how you can use iMessage effects:
Step 1: Open the Messages app: Locate the Messages app on your home screen and tap to open it. The app is represented by a green speech bubble icon.
Step 2: Start a new conversation or select an existing one: Choose the contact or group to whom you want to send the message. Start a new conversation or select an existing one from your message list.
Step 3: Compose your message: Type your message as you normally would in the text field at the bottom of the screen. You can include text, emojis, and other media elements to accompany your message.
Step 4: Access iMessage effects: To access iMessage effects, press and hold the send button located to the right of the text field. This will open the effects menu.
Step 5: Choose an effect: Within the effects menu, you’ll find a range of options to choose from. These include:
- Balloons: Displays a burst of colorful balloons that fill the screen.
- Confetti: Releases a shower of colorful confetti from the top of the screen.
- Fireworks: Creates a dazzling fireworks display against a dark background.
- Laser: Emits a trail of laser-like lights across the conversation screen.
- Love: Sends a heart animation that spreads love across the screen.
- Spotlight: Highlights your message with a glowing spotlight effect.
- Invisible Ink: Masks the message with a layer of pixilation that can be revealed by swiping it.
Step 6: Send your message: Once you’ve chosen the desired effect, release the send button to send the message. The effect will play for the recipient as your message is displayed on their device.
Additional Tips:
- – To apply an effect to an existing message, you can press and hold the message bubble, tap on “More”, and then choose an effect from the menu.
- – Experiment with combining different effects, emojis, text, and media elements to create unique and engaging messages.
- – Always consider the context and appropriateness of each effect when using them in conversations.
iMessage effects provide an interactive and immersive messaging experience, allowing you to surprise and captivate your contacts with creative visuals. Whether you’re celebrating a special occasion, expressing your feelings, or simply adding a touch of excitement to a conversation, iMessage effects offer endless possibilities for personalizing your messages and making them stand out.
Managing Message Threads and Notifications
The Messages app on your iPhone offers several features and options to help you effectively manage your message threads and customize notifications. By organizing your conversations and tailoring your notifications, you can stay on top of your messages and ensure that important conversations are not missed. Here’s how you can manage message threads and notifications:
Organizing Message Threads:
1. Pinning Conversations: To keep important conversations easily accessible, you can pin them to the top of your message list. Simply swipe right on a conversation and tap the pin icon that appears. Pinned conversations will remain at the top of your message list regardless of new messages received.
2. Grouping Messages by Threads: By default, the Messages app groups your messages by threads, allowing you to view conversations in a threaded format. This keeps related messages together, making it easier to find specific messages within a conversation.
Customizing Notifications:
1. Enabling/Disabling Notifications: You can control whether you receive notifications for new messages or not. Go to “Settings” on your iPhone, scroll down and tap on “Notifications”, and then find the “Messages” option. From there, you can toggle the “Allow Notifications” option on or off according to your preference.
2. Customizing Notification Styles: Within the “Messages” settings, you can further customize how notifications are displayed. You can choose to receive alerts with sound, banners that appear at the top of the screen, or notifications that appear on the lock screen. Additionally, you can opt for previews that show a snippet of the message content within the notification.
3. Managing Do Not Disturb: If you want to temporarily silence notifications, you can enable the “Do Not Disturb” feature. This will prevent any incoming messages from causing your device to ring or vibrate. You can activate Do Not Disturb manually by going to the Control Center, or you can schedule it to automatically activate during specific hours in the “Settings” app.
Additional Tips:
- – To mark a message as important and receive notifications specifically for that conversation, you can enable the “Hide Alerts” feature. Swipe left on the conversation and tap on “Hide Alerts” to mute all other messages while allowing notifications for that specific conversation.
- – Customize the alert tone for messages by going to “Settings”, selecting “Sounds & Haptics”, and choosing a different sound for the “Text Tone” option.
By effectively managing your message threads and customizing your notifications, you can ensure that you stay organized and in control of your messaging experience on your iPhone. Take advantage of these features to prioritize important conversations, minimize distractions, and tailor your notifications according to your preferences and needs.
Blocking and Reporting Spam Messages
The Messages app on your iPhone provides built-in features to help you block and report spam messages, allowing you to effectively manage unwanted and unsolicited messages. By taking advantage of these features, you can create a safer and more pleasant messaging experience. Here’s how you can block and report spam messages:
Blocking Messages:
Step 1: Open the Messages app: Locate and open the Messages app on your iPhone. The app is represented by a green speech bubble icon and is typically found on your home screen.
Step 2: Identify the spam message: Locate the spam message from the sender you wish to block. These messages may include advertisements, scams, or unwanted solicitations.
Step 3: Block the sender: Press and hold the message bubble containing the spam message. A menu will appear, giving you several options. Tap on “More” to select the message and activate the blocking feature. Then, tap on the icon resembling an arrow pointing upwards in the bottom-left corner of the screen. Finally, select “Block this Caller” to stop receiving messages from that specific sender.
Reporting Spam Messages:
Step 1: Open the Messages app: Locate and open the Messages app on your iPhone. The app is represented by a green speech bubble icon and is typically found on your home screen.
Step 2: Identify the spam message: Locate the spam message from the sender you wish to report. These messages may include scams, phishing attempts, or other malicious content.
Step 3: Report as Junk: Press and hold the message bubble containing the spam message. A menu will appear. Tap on “More” to select the message and activate more options. Then, tap on the icon resembling an arrow pointing upwards in the bottom-left corner of the screen. Finally, select “Report Junk” to report the message and provide feedback to Apple.
Additional Tips:
- – The “Report Junk” feature helps Apple identify and combat spam messages, protecting other users from similar messages.
- – To manage your blocked contacts and view the list of blocked senders, go to “Settings” on your iPhone, scroll down and tap on “Phone” or “Messages”, then select “Blocked Contacts”. From there, you can add or remove blocked contacts as needed.
- – Be cautious when blocking or reporting messages. Make sure you’re blocking or reporting the intended sender to avoid any inconvenience or misunderstanding.
Blocking and reporting spam messages empowers you to take control of your messaging experience, minimizing unwanted and unsolicited messages. By utilizing these features, you can maintain a safer and more enjoyable digital environment on your iPhone.
Integrating Third-Party Messaging Apps
In addition to the built-in Messages app, your iPhone allows you to integrate and use third-party messaging apps, expanding your options for communication and connecting with others. With a wide range of options available on the App Store, you can find messaging apps that offer unique features and cater to specific needs. Here’s how you can integrate and use third-party messaging apps:
Step 1: Discover and install messaging apps:
Explore the App Store to discover messaging apps that pique your interest. Search for keywords like “messaging apps” or browse curated collections to find popular and highly-rated options. Once you’ve found an app you want to try, install it like you would any other app by tapping the “Get” or “Install” button.
Step 2: Set up the messaging app:
After installing the messaging app, open it and follow the on-screen instructions for initial setup. Typically, you’ll be asked to sign in with your account or create a new account. Some messaging apps may also require additional permissions to access your contacts or other information.
Step 3: Grant necessary permissions:
To ensure the messaging app functions properly, you may be prompted to grant it permissions, such as access to your contacts, microphone, or camera. Review the permissions carefully and choose the ones you’re comfortable granting.
Step 4: Start using the messaging app:
Once the messaging app is set up, you can start using it to send and receive messages. Depending on the app, you may have access to additional features like video calling, voice messaging, stickers, or even games. Some messaging apps also offer end-to-end encryption for enhanced security.
Step 5. Manage messaging apps:
To manage your installed messaging apps, go to “Settings” on your iPhone and scroll down to find the section for “Installed Apps” or “Applications”. From there, you can access individual app settings, adjust notification preferences, or even remove apps if desired.
Additional Tips:
- – Stay cautious when using third-party messaging apps and ensure they have good security measures in place to protect your privacy and personal data.
- – Explore different messaging apps to find those that best align with your communication style, preferences, and needs.
- – Remember that for seamless communication, the person or group you want to message will also need to have the same messaging app installed.
Integrating and using third-party messaging apps on your iPhone allows you to expand your communication options and tailor your messaging experience to your preferences. Find apps that offer features and functionalities that resonate with you, and enjoy a more personalized and diverse messaging experience.
Troubleshooting Common Issues with Messages
The Messages app on your iPhone usually works seamlessly, but occasionally, you may encounter some issues that can disrupt your messaging experience. Fortunately, many of these issues can be resolved with simple troubleshooting steps. Here are some common issues with Messages and how to troubleshoot them:
Issue 1: Messages not sending or receiving:
- Solution: Check your internet connection, as Messages require either Wi-Fi or cellular data to send and receive messages. If the issue persists, try restarting your iPhone or enable/disable Airplane Mode to refresh the connection.
Issue 2: Messages not syncing across devices:
- Solution: Ensure that all your devices are signed in to the same Apple ID and have the Messages in iCloud feature enabled. This allows messages to sync across all your Apple devices seamlessly.
Issue 3: Delayed or out-of-order messages:
- Solution: Check your internet connection and ensure that it is stable. Sometimes, network issues can cause delays or interruptions in message delivery. If the issue persists, try restarting your device or toggling Airplane Mode on and off.
Issue 4: Unresponsive or frozen Messages app:
- Solution: Force close the Messages app by double-clicking the Home button (or swiping up from the bottom on iPhones without a Home button) and swiping up on the Messages app preview. Then, reopen the app to see if the issue is resolved. If the problem persists, try restarting your iPhone.
Issue 5: Messages app crashing:
- Solution: Ensure that your iPhone’s software is up to date, as outdated software can sometimes cause apps to crash. Go to “Settings”, select “General”, then “Software Update” to check for and install any available updates. If the problem persists, try force closing and reopening the Messages app or restarting your iPhone.
Issue 6: Missing or deleted messages:
- Solution: Check if the missing messages are archived by swiping down on the Messages app screen to reveal the search bar and entering relevant keywords. If you accidentally deleted messages, check the “Recently Deleted” folder within the Messages app to recover them within a limited timeframe.
Additional Tips:
- – Regularly backup your iPhone using iCloud or iTunes to safeguard your messages and other important data.
- – If the issue is specific to a particular conversation, try resetting the conversation by deleting it and starting a new one with the same contact.
- – If the issue persists or if you are experiencing more serious or recurring problems, consider contacting Apple Support for further assistance.
Troubleshooting common issues with Messages can help you maintain a smooth and hassle-free messaging experience on your iPhone. By following these steps, you can often resolve the issues on your own and get back to enjoying seamless communication with your contacts.
Tips and Tricks for Efficient Messaging
Messaging has become an integral part of our daily communication, and optimizing our messaging habits can greatly enhance our efficiency and productivity. Whether you’re using the Messages app on your iPhone or any other messaging platform, these tips and tricks will help you communicate more effectively and streamline your messaging experience:
1. Use Quick Responses: Save time by creating predefined quick responses for commonly asked questions or frequently used phrases. On an iPhone, you can create and manage quick responses in the “Settings” app under “Phone” or “Messages” settings.
2. Take Advantage of Dictation: Utilize the built-in voice dictation feature on your iPhone to compose messages hands-free. Simply tap the microphone icon on the keyboard and speak your message, allowing the device to convert your speech into text.
3. Utilize Keyboard Shortcuts: Take advantage of keyboard shortcuts or text replacement on your device. Set up shortcuts for commonly used words, phrases, or even email addresses to save time and typing effort.
4. Enable Predictive Text: Enable predictive text suggestions on your keyboard to speed up your typing. The keyboard will suggest words and phrases as you type, allowing you to select them with a simple tap instead of typing them out in full.
5. Utilize Emoji and Stickers: Express yourself more creatively by incorporating emojis and stickers into your messages. They can help convey emotions, add personality, and make your messages more engaging and fun.
6. Mute Notifications: Reduce distractions and maintain focus by muting message notifications when you need uninterrupted work or leisure time. Utilize the “Do Not Disturb” feature or customize notification settings to prioritize important messages.
7. Use Search and Filtering Tools: Take advantage of search and filtering tools within the messaging app to quickly find specific messages or content within conversations. This can save you time when you need to locate important information or references.
8. Utilize Reminders and Scheduled Messages: Set reminders for follow-up messages or important tasks related to your conversations. Some messaging apps also offer features to schedule messages in advance, ensuring your messages are sent at the desired time.
9. Practice Good Netiquette: Be mindful of your choice of words and tone when communicating via messages. Avoid misunderstandings by using clear and concise language and respecting the context and preferences of the recipient.
10. Regularly Clean Up Conversation Threads: Periodically review and tidy up your conversation threads by deleting unnecessary or outdated messages. This can help reduce clutter and make it easier to find important information in the future.
11. Be Mindful of Privacy and Security: When sharing sensitive information or discussing confidential matters, ensure that your messaging platform is secure and that you trust the recipient. Use end-to-end encrypted messaging apps whenever possible.
By implementing these tips and tricks, you can optimize your messaging habits and streamline your communication process. Efficiency in messaging not only saves time but also improves the overall quality of your conversations, allowing you to stay connected and productive in all aspects of your life.
Accessing Messages on Other Apple Devices
Apple devices offer a seamless integration that allows you to access and manage your Messages app across multiple devices. This feature enables you to stay connected and keep your conversations up to date, whether you’re using an iPhone, iPad, or Mac. Here’s how you can access your Messages on different Apple devices:
1. iPhone:
By default, your primary device for accessing Messages is your iPhone. All incoming and outgoing messages will be synced to your iPhone, and you can reply or start new conversations directly on your device.
2. iPad:
To access your Messages on an iPad, make sure that your iPad is signed in to the same Apple ID as your iPhone. Open the “Settings” app, tap on “Messages”, and enable the “Text Message Forwarding” feature. This will allow your iPhone to send and receive SMS and MMS messages on your iPad. You can then access your Messages app on your iPad and view your conversations.
3. Mac:
With macOS Sierra or later, you can also access your Messages on your Mac. Sign in to your Apple ID on your Mac and open the “Messages” app. Your messages will automatically sync, and you can view and reply to conversations right from your computer. Ensure that the “Text Message Forwarding” feature is enabled on your iPhone to receive and send SMS and MMS messages on your Mac as well.
4. iCloud:
To have your messages synced across different Apple devices, make sure to enable Messages in iCloud. This feature ensures that your messages, conversations, and attachments are kept up to date on all your devices. To enable Messages in iCloud, go to “Settings” on your iPhone, tap on your Apple ID, select “iCloud”, and enable the “Messages” option.
Additional Tips:
- – Allowing text message forwarding and enabling Messages in iCloud require a stable internet connection. Ensure that your devices are connected to Wi-Fi or have cellular data enabled.
- – Keep your devices up to date with the latest software updates to ensure optimal compatibility and functionality across all your Apple devices.
- – By accessing Messages on multiple devices, you can seamlessly transition between devices and continue your conversations without interruption.
Accessing your Messages on other Apple devices allows you to stay connected and manage your conversations conveniently, regardless of which device you are using. The seamless integration across Apple devices ensures that you can access and engage with your messages effortlessly, keeping you connected with friends, family, and colleagues at all times.
Exploring New Messaging Features in iOS Updates
With each new iOS update, Apple introduces exciting new features and enhancements to the Messages app, enhancing your messaging experience and providing you with new ways to communicate. These updates bring a range of capabilities, from new visual effects to additional functionality. Here are some notable messaging features introduced in recent iOS updates:
iOS 14:
- Pin Conversations: iOS 14 allows you to pin important conversations to the top of your message list for easy access and immediate visibility.
- Mention in Group Chats: In group chats, you can now mention someone specifically by typing “@” followed by their name to notify them directly.
- Inline Replies: iOS 14 introduces inline replies, enabling you to reply to a specific message within a conversation, making it easier to keep track of multiple conversations within a group chat.
- New Memoji Customizations: Enjoy even more customization options for your Memoji, including new hairstyles, headwear, face coverings, and age options.
iOS 13:
- Memoji Stickers: iOS 13 brings Memoji stickers, allowing you to create a sticker pack of your personalized Memoji to use in any app that supports stickers.
- New Animoji: iOS 13 introduces additional Animoji, such as the cow, mouse, octopus, and more, expanding the range of expressive characters available.
- Enhanced Photo and Video Sharing: Sharing photos and videos is improved with a redesigned interface, better quality, and options to quickly edit media and adjust lighting.
- Profile Picture and Display Name: iOS 13 lets you customize your profile picture and display name that will be visible to your contacts in their messaging apps.
Additional Tips:
- – Stay up to date with the latest iOS updates to enjoy new messaging features as they are released.
- – Check the App Store for updates to messaging apps that you use regularly, as developers also introduce new features and improvements to their own messaging platforms.
- – Explore Apple’s release notes or documentation for specific iOS updates to discover additional messaging features and improvements that may not be mentioned above.
Each iOS update brings exciting new features and enhancements to the Messages app, enhancing your messaging experience and introducing innovative ways to communicate. Stay up to date with the latest updates to explore and take full advantage of these new messaging features, making your conversations more engaging, personalized, and enjoyable.