
Getting Started
When it comes to creating captivating and visually appealing Google Slides presentations, bullet points can be a powerful tool. They help break down information into concise, digestible chunks, making it easier for your audience to follow along and retain key points. Whether you’re presenting a project update, sharing research findings, or giving a business pitch, using bullet points effectively can enhance the overall impact of your presentation.
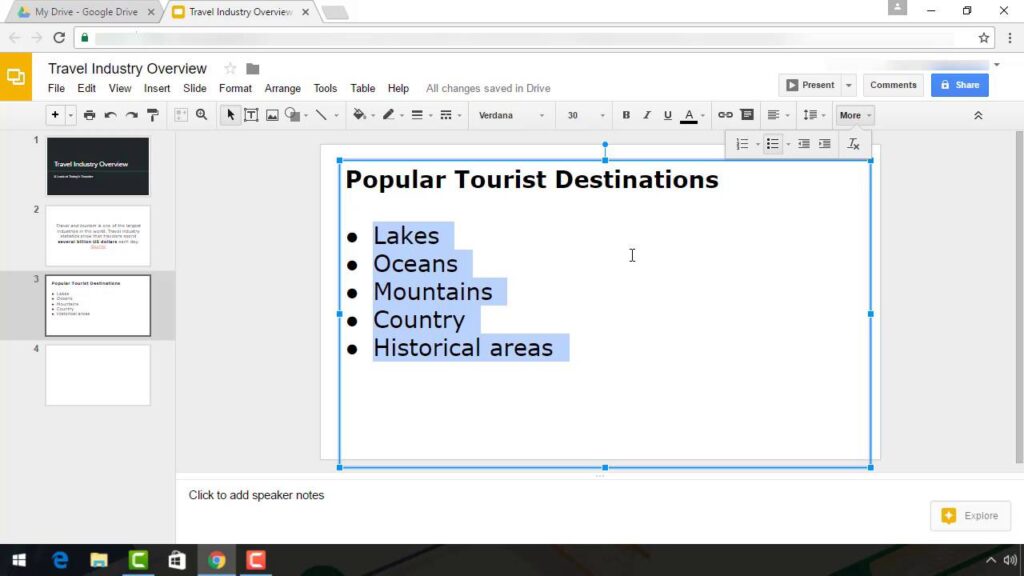
To get started, open your Google Slides presentation and navigate to the slide where you want to add bullet points. If you’re starting from scratch, create a new slide by clicking on the “New Slide” button.
Once you’re on the desired slide, click on the text box or placeholder where you want to add bullet points. This will allow you to start typing your content. If there isn’t a text box or placeholder available, you can simply click on the “Insert” tab at the top of the screen and select “Text box” from the drop-down menu. Then, click and drag on the slide to create a text box.
After entering your text, you can start creating a bullet list by pressing the “Enter” key on your keyboard after each point. Google Slides will automatically format the text into bullet points for you. If you want to remove a bullet point, simply press “Backspace” or “Delete” to delete the line of text.
Remember to keep your bullet points concise and to the point. Aim for one main idea per bullet point to ensure clarity and avoid overwhelming your audience. You can always provide additional details or explanations in the speaker notes or during your presentation.
Now that you have an understanding of how to get started with bullet points in Google Slides, let’s explore the different formatting options available to customize your bullet lists and make them visually appealing.
Creating a Bullet List
Creating a bullet list in Google Slides is a straightforward process that allows you to organize your content in a clear and structured manner. Here’s how you can create a bullet list:
1. Start by selecting the text box or placeholder where you want to add the bullet list. If there isn’t a text box or placeholder available, you can create one by clicking on the “Insert” tab and selecting “Text box.”
2. Once the text box is selected, start typing your first point. Press the “Enter” key on your keyboard to create a new line for the next bullet point.
3. Google Slides automatically adds a bullet point for each new line of text you enter. To customize the bullet points, such as changing the style or size, we’ll discuss these options later in the article.
4. Continue adding your bullet points by pressing “Enter” after each point until you have listed all the relevant information.
5. To end the bullet list, press “Enter” twice. This will exit the bullet point mode and allow you to continue typing without bullet points.
By following these steps, you can create a bullet list that neatly presents your information and improves readability. Bullet lists are a great way to break down complex concepts, highlight key takeaways, or present a series of steps or instructions.
Remember to keep your bullet list concise and organized. Each bullet point should convey a single idea or concept to avoid overwhelming your audience. Use bullet lists strategically to enhance the structure and flow of your presentation, making it easier for your audience to follow along.
Now that you know how to create a basic bullet list, let’s explore how to format and customize your bullet points to make them visually appealing in Google Slides.
Formatting Bullet Points
Once you’ve created a bullet list in your Google Slides presentation, you can take it a step further by formatting and customizing the appearance of your bullet points. This allows you to add a personal touch, align the design with your brand, or make the bullet points more visually engaging. Here are some formatting options you can explore:
1. Changing the Bullet Style: To change the default bullet style, select the bullet point you want to modify. Then, go to the “Format” menu and choose “Bullets & numbering.” From the options provided, select a different bullet style that suits your presentation. You can choose from various shapes, icons, and checkmarks to create a unique look.
2. Adjusting the Bullet Size: If you want to change the size of your bullet points, select the bullet list and navigate to the “Format” menu. Choose the “Bullets & numbering” option, and then select “Customize.” From here, you can adjust the size of the bullet points by dragging the slider or entering specific dimensions.
3. Changing the Bullet Color: To change the color of your bullet points, select the text box containing the bullet list. Go to the “Format” menu and choose “Text color.” Select a color from the palette, or use the “Custom” option to choose a specific color code. Applying a contrasting bullet color can make your list stand out and draw attention to important points.
4. Customizing the Bullet Image: Google Slides also provides the option to use custom images as bullet points. To do this, select the bullet point you want to change, go to the “Format” menu, and choose “Bullets & numbering.” Click on the “Image” tab, then select the “Choose image” option to upload your desired image. This can be a company logo, an icon, or any image that aligns with your presentation’s theme.
5. Adding Sub-bullets: Sometimes, you may want to further break down a point into sub-points. To add sub-bullets in Google Slides, simply press the “Tab” key before typing in the sub-point. This will add an indentation and create a sub-level bullet point. Press “Shift + Tab” to decrease the indentation and return to the main bullet level.
By utilizing these formatting options, you can elevate the visual impact of your bullet points and make your Google Slides presentation more engaging and visually appealing. Experiment with different styles, colors, and images to find the look that best complements your content and conveys your message effectively.
Changing the Bullet Style
One of the effective ways to make your bullet points visually appealing in a Google Slides presentation is by changing the bullet style. By choosing different bullet styles, you can add a unique touch to your presentation and align it with your branding or theme. Here’s how you can change the bullet style in your Google Slides:
1. Select the bullet point or the entire bullet list that you want to modify. You can do this by clicking and dragging your cursor over the text or by clicking on the bullet point itself.
2. Go to the “Format” menu at the top of the screen and select “Bullets & numbering.” This will open a sidebar on the right side of the screen with various formatting options.
3. In the sidebar, you’ll see a list of bullet styles to choose from. Scroll through the options and click on the style that appeals to you. Google Slides provides a wide range of bullet styles, including different shapes, icons, and checkmarks.
4. As you click on different bullet styles, you’ll see the changes applied in real-time to your selected bullet point or bullet list. This allows you to preview the different styles and choose the one that best fits your presentation.
5. If you want even more customization options, you can click on the “More options” button at the bottom of the sidebar. This will give you additional choices, such as bullet size, alignment, and even the ability to upload your own custom images as bullet points.
Changing the bullet style can be a subtle yet impactful way to enhance the visual appeal and professionalism of your presentation. It can help to establish visual hierarchy, draw attention to key points, and add a touch of creativity to your slides.
However, it’s important to remember that consistency is key. Choose a bullet style that not only looks visually appealing but also aligns with the overall design and tone of your presentation. Using a consistent bullet style throughout your slides will give your presentation a cohesive and polished look.
Take the time to explore the various bullet style options in Google Slides and experiment with different styles. By choosing the right bullet style, you can make your bullet points more engaging and leave a lasting impression on your audience.
Adjusting the Bullet Size
When it comes to creating visually appealing bullet points in your Google Slides presentation, adjusting the bullet size can play a significant role. By resizing the bullet points, you can highlight important information, emphasize key points, or create a hierarchy within your content. Here’s how you can adjust the bullet size in Google Slides:
1. Select the bullet point or the entire bullet list that you want to resize. You can do this by clicking and dragging your cursor over the text or by clicking on the bullet point itself.
2. Go to the “Format” menu at the top of the screen and select “Bullets & numbering.” This will open a sidebar on the right side of the screen with various formatting options.
3. In the sidebar, you’ll find a section labeled “Size” or “Scale,” depending on your Google Slides version. Adjust the slider to increase or decrease the bullet size according to your preference.
4. As you move the slider, you’ll see the bullet size change in real-time on your selected bullet point or bullet list. This provides a live preview of how the resized bullet points will appear in your presentation.
5. Experiment with different bullet sizes until you find the one that best complements your content and enhances the visual appeal of your presentation. Keep in mind that larger bullet sizes can attract more attention, while smaller sizes can create a more subtle effect.
It’s worth noting that the bullet size adjustment may vary depending on the bullet style you’ve chosen. Some bullet styles may have more options for customization, including specific size settings, while others may only allow for general resizing.
By adjusting the bullet size, you can add visual interest and emphasis to your bullet points, making them stand out on your slides. Remember to resize the bullets consistently throughout your presentation to maintain a cohesive look.
It’s important to strike a balance between readability and aesthetics. Ensure that the bullet size is large enough to be easily seen by your audience, especially if you’re presenting on a large screen or in a large room. However, avoid making the bullets too large to the point where they distract from the content itself.
Take the time to experiment with different bullet sizes and observe how they affect the overall look and feel of your presentation. By adjusting the bullet size effectively, you can create visually engaging bullet points that enhance the impact and understanding of your message.
Changing the Bullet Color
When it comes to enhancing the visual impact of your bullet points in a Google Slides presentation, changing the bullet color can make a significant difference. By customizing the color of your bullet points, you can catch your audience’s attention, highlight important information, or align the design with your branding. Here’s how you can change the bullet color in Google Slides:
1. Select the bullet point or the entire bullet list that you want to modify. This can be done by clicking and dragging your cursor over the text or by clicking on the bullet point itself.
2. Go to the “Format” menu at the top of the screen and select “Text color.” This will open a palette of color options for you to choose from.
3. Click on the desired color in the palette to apply it to your selected bullet point(s). You can choose from the available options, or click on “Custom” to select a specific color using a color picker or by entering a color code.
4. As you click on different colors, you’ll see the changes applied in real-time to your selected bullet point(s). This allows you to preview the different color options and choose the one that best fits your presentation.
5. Take into consideration the overall design and visual theme of your presentation when selecting the bullet color. Ensure that the color you choose contrasts well with the background, making the bullet points easily visible and readable for your audience.
Changing the bullet color can be an effective way to add visual interest and emphasize key points in your presentation. For example, you may want to use a bright or bold color for important information, while using a more subtle color for supporting details.
However, it’s important to maintain consistency throughout your presentation. Choose a color scheme that complements your overall design and use it consistently across all the slides. This will create a cohesive and professional look.
Remember to strike a balance between creativity and readability. While it is great to experiment with different colors, ensure that the bullet points remain legible and easily distinguishable from the background and surrounding text.
By changing the bullet color, you can create visually engaging bullet points that not only grab your audience’s attention but also enhance the overall aesthetic appeal of your Google Slides presentation.
Customizing the Bullet Image
Another way to make your bullet points visually appealing and unique in a Google Slides presentation is by customizing the bullet image. Instead of using the default bullet point icon, you can choose to use custom images that align with your topic, brand, or theme. Here’s how you can customize the bullet image in Google Slides:
1. Select the bullet point or bullet list where you want to change the image. You can do this by clicking and dragging your cursor over the text or by clicking on the bullet point itself.
2. Go to the “Format” menu at the top of the screen and select “Bullets & numbering.” This will open a sidebar on the right side of the screen with various formatting options.
3. In the sidebar, you’ll find a section labeled “Image” or “Picture,” depending on your Google Slides version. Click on the appropriate option to open the image settings.
4. From the image settings, you can choose to use either an image from the Google Slides gallery or upload your own custom image. If you want to use an image from the gallery, click on it to apply it to your selected bullet points.
5. If you prefer to upload your own custom image, click on the “Choose image” button and select the image file from your computer. Make sure the image is in a supported format (JPEG, PNG, or SVG) and has the desired appearance and dimensions.
As you apply different images to your bullet points, you’ll see the changes reflected in real-time on your selected bullet points. This allows you to preview the different images and choose the one that best suits your presentation.
Using custom images as bullet points can add a personal touch to your presentation and make your bullet points more engaging and memorable. You can use company logos, icons, or any relevant images that align with your content. This customization option gives you the flexibility to align the bullet points with your branding or convey specific messages visually.
When selecting custom images, ensure that they are appropriate for your audience and enhance the overall understanding of your content. Avoid using overly complex or distracting images that might overshadow the text.
With the ability to customize the bullet image in Google Slides, you can create visually captivating bullet points that leave a lasting impression on your audience.
Adding Sub-bullets
In a Google Slides presentation, sometimes it’s necessary to further break down a point into sub-points or provide additional details. This is where sub-bullets come in handy. Sub-bullets allow you to create a hierarchical structure within your bullet points, making it easier for your audience to follow along and understand the information. Here’s how you can add sub-bullets in Google Slides:
1. Start by creating your main bullet point as usual. Press the “Enter” key to move to the next line and create a new bullet point.
2. To add a sub-bullet, press the “Tab” key on your keyboard before typing in the sub-point. This will indent the text and create a sub-level bullet point under the main bullet point. You can also use the “Increase indent” button in the toolbar above your slide to achieve the same effect.
3. Continue adding sub-bullets by pressing “Tab” before typing in each sub-point. Each time you press “Tab,” the indent level increases, creating a nested sub-bullet structure.
4. To decrease the indent level and return to the previous bullet level, press “Shift + Tab” on your keyboard. This will remove the indentation and move the sub-bullet back to the main bullet level.
Adding sub-bullets allows you to organize your information in a structured and logical manner. It is especially useful when presenting complex concepts, outlining steps in a process, or providing detailed explanations.
It’s important to use sub-bullets sparingly and strategically. Avoid creating excessive levels of indentation, as this can make your slides look cluttered and difficult to read. Keep the hierarchy clear and make sure each sub-bullet supports and expands upon the main point.
In addition to using sub-bullets, consider using proper formatting techniques, such as different text colors or formatting styles, to visually distinguish the different levels of hierarchy. This can help your audience to easily identify the main points and sub-points within your bullet list.
By adding sub-bullets, you can enhance the overall clarity and organization of your Google Slides presentation, making it easier for your audience to comprehend and retain the information you’re sharing.
Adjusting Spacing and Alignment
In a Google Slides presentation, adjusting the spacing and alignment of your bullet points can greatly impact the overall readability and visual appeal. By properly aligning and spacing your bullet points, you can ensure clarity, maintain consistency, and create a visually pleasing design. Here’s how you can adjust spacing and alignment in Google Slides:
Spacing:
To adjust the spacing between bullet points:
1. Select the bullet point or bullet list that you want to modify. This can be done by clicking and dragging your cursor over the text or by clicking on the bullet point itself.
2. Go to the “Format” menu at the top of the screen and select “Line spacing.” A drop-down menu will appear with different spacing options.
3. Choose the desired line spacing option from the menu, such as single, 1.5 lines, or double. The bullet points will adjust accordingly to the selected spacing option.
You can experiment with different line spacing options to find the one that provides the optimal balance between readability and aesthetics. Be mindful not to use excessive spacing, as it may cause your slides to appear too sparse or disjointed.
Alignment:
To adjust the alignment of your bullet points:
1. Again, select the bullet point or bullet list that you want to modify.
2. Go to the “Format” menu and select “Alignment.” Here, you’ll find options to align your bullet points to the left, center, or right side of the text box or placeholder.
3. Choose the alignment option that best suits your content and design. For example, aligning bullet points to the left is typically used for most standard presentations, while center alignment can provide a more visually balanced look.
Ensuring proper alignment will give your presentation a clean and organized appearance. Consistency in alignment is essential, so make sure to maintain the same alignment throughout your slides for a unified visual experience.
By adjusting the spacing and alignment of your bullet points, you can enhance the legibility and aesthetics of your Google Slides presentation. Remember, a well-designed slide with appropriately spaced and aligned bullet points will help your audience better comprehend and engage with your content.
Changing Bullet Indentation
In Google Slides, changing the bullet indentation can help you create a structured and visually appealing presentation. By adjusting the indentation of your bullet points, you can establish a clear hierarchy and emphasize the relationship between different levels of information. Here’s how you can change the bullet indentation in Google Slides:
1. Select the bullet point or bullet list that you want to modify. You can do this by clicking and dragging your cursor over the text or by clicking on the bullet point itself.
2. Go to the “Format” menu at the top of the screen and select “Align & indent.” This will open a submenu with options for adjusting the indentation of your bullet points.
3. To increase the indentation and create a nested sub-bullet, click on the “Increase indent” button. This will move the selected bullet point(s) to the right, creating a hierarchy within the list.
4. To decrease the indentation and move the bullet point(s) back to the main level, click on the “Decrease indent” button. This will shift the selected bullet point(s) to the left, disassociating them from the higher-level points.
By adjusting the bullet indentation, you can visually represent the relationship between different pieces of information. It helps your audience understand the structure and organization of your content, especially when presenting complex ideas, step-by-step processes, or hierarchical concepts.
It’s important to be consistent with your indentation throughout your presentation. Maintain a uniform level of indentation within each level of your bullet points to create a visually pleasing and professional look.
Remember, proper indentation not only improves the clarity and readability of your slides but also adds visual interest and structure. Strive for a balance between too much and too little indentation, allowing the bullet points to flow naturally and guide your audience’s attention appropriately.
Experiment with changing the bullet indentation in Google Slides to create a well-organized and visually engaging presentation. By adjusting the indentation, you can reinforce the hierarchy of your content and make it easier for your audience to follow along and understand the key points you’re presenting.
Adding Animation to Bullet Points
Incorporating animation into your bullet points in a Google Slides presentation can bring them to life and make your presentation more engaging and dynamic. Animation allows you to reveal bullet points one at a time, creating a sense of anticipation and guiding your audience’s attention. Here’s how you can add animation to your bullet points in Google Slides:
1. Select the bullet point or the entire bullet list that you want to animate. You can do this by clicking and dragging your cursor over the text or by clicking on the bullet point itself.
2. In the toolbar at the top of the screen, click on the “Animate” button. This will open the animation options for your selected bullet points.
3. Choose the animation effect you want to apply to your bullet points. You can select from various entrance animations, such as fade in, slide from left, or bounce in. Experiment with different effects to find the one that best suits your presentation’s style and tone.
4. Once you have selected an animation effect, you can further customize it by adjusting the timing and duration. You can control when the animation starts (on click, with previous, or after previous) and how long it takes for the animation to complete. You can also choose to apply the animation to each bullet point individually or to the entire bullet list as a group.
5. Preview your animation by clicking the “Play” button in the animation options. This will allow you to see how the bullet points will animate during your presentation.
By adding animation to your bullet points, you can create a sense of progression and reveal information in a visually captivating way. Animating bullet points not only adds a touch of interactivity but also helps you control the flow of information and keeps your audience engaged.
However, it’s important to use animation thoughtfully and in moderation. Avoid overdoing animation, as it can become distracting or take the focus away from the content itself. Less is often more, so choose animations that enhance rather than overpower your message.
Remember to consider the overall design and tone of your presentation when selecting animations. Ensure that the chosen animation aligns with your branding and enhances the overall storytelling experience.
By adding animation to your bullet points in Google Slides, you can create a visually dynamic and immersive presentation that captivates your audience and effectively communicates your key points.