
Why Add a Credit Card to Cash App?
Adding a credit card to your Cash App account can offer you a range of benefits and convenience. Cash App, a popular mobile payment platform, allows users to send and receive money, make purchases, and even invest. By linking your credit card to Cash App, you can seamlessly manage your funds and enjoy a variety of features. Here are a few reasons why you might consider adding a credit card to your Cash App account:
- Convenience: Adding a credit card to Cash App eliminates the need to manually enter bank account details every time you want to make a purchase or send money. With your credit card linked, you can quickly and securely complete transactions with just a few taps on your smartphone.
- Wider Payment Options: By adding a credit card, you expand the payment methods available on Cash App. Whether it’s for online shopping, paying bills, or splitting expenses with friends, having a credit card on Cash App gives you more flexibility in how you use the app.
- Rewards and Cashback: Many credit cards offer rewards programs and cashback opportunities on eligible purchases. By using your credit card on Cash App, you can take advantage of these benefits and earn rewards or cashback while using the app for your day-to-day transactions.
- Security: Cash App takes security seriously, and by linking your credit card, you can have an additional layer of protection. In the event of any unauthorized transactions or fraudulent activities, your credit card company can provide you with fraud protection and assist in resolving any issues.
- Budgeting and Expense Tracking: Linking your credit card to Cash App allows you to easily track your spending and manage your budget. The app provides detailed transaction histories and spending summaries, making it simple to keep an eye on your finances.
With these benefits in mind, it’s clear why adding a credit card to your Cash App account can enhance your overall user experience. It not only offers convenience but also gives you access to a wider range of payment options, rewards, and security features. Now that you understand the advantages, let’s go through the step-by-step process of adding a credit card to your Cash App account.
Step 1: Open the Cash App and Log In
The first step to adding a credit card to your Cash App account is to open the app on your mobile device and log in using your account credentials. If you don’t have the app installed, you can download it from the App Store for iOS devices or the Google Play Store for Android devices.
Once you have downloaded and installed the Cash App, follow these steps:
- Tap on the Cash App icon to launch the application on your device.
- Enter your login credentials, which usually include your email address or phone number and the password associated with your account.
- Tap the “Sign In” button to log in to your Cash App account.
Make sure to double-check your login details to ensure they are correct. If you have forgotten your password, you can use the “Forgot Password” option provided by Cash App to reset it.
Upon successful login, you will be directed to the home screen of the Cash App, where you can access various features and settings.
Note that if you are a new user and do not have a Cash App account, you will need to sign up for an account before proceeding. The sign-up process typically requires providing your full name, email address or phone number, and creating a unique password.
Once you have logged in to your Cash App account, you are ready to move on to the next step in adding a credit card.
Step 2: Go to the Profile Icon
After logging into your Cash App account, the next step to add a credit card is to navigate to the Profile icon. This is where you can access your account settings and make changes or additions to your payment methods.
To find the Profile icon and proceed with the next steps, follow these instructions:
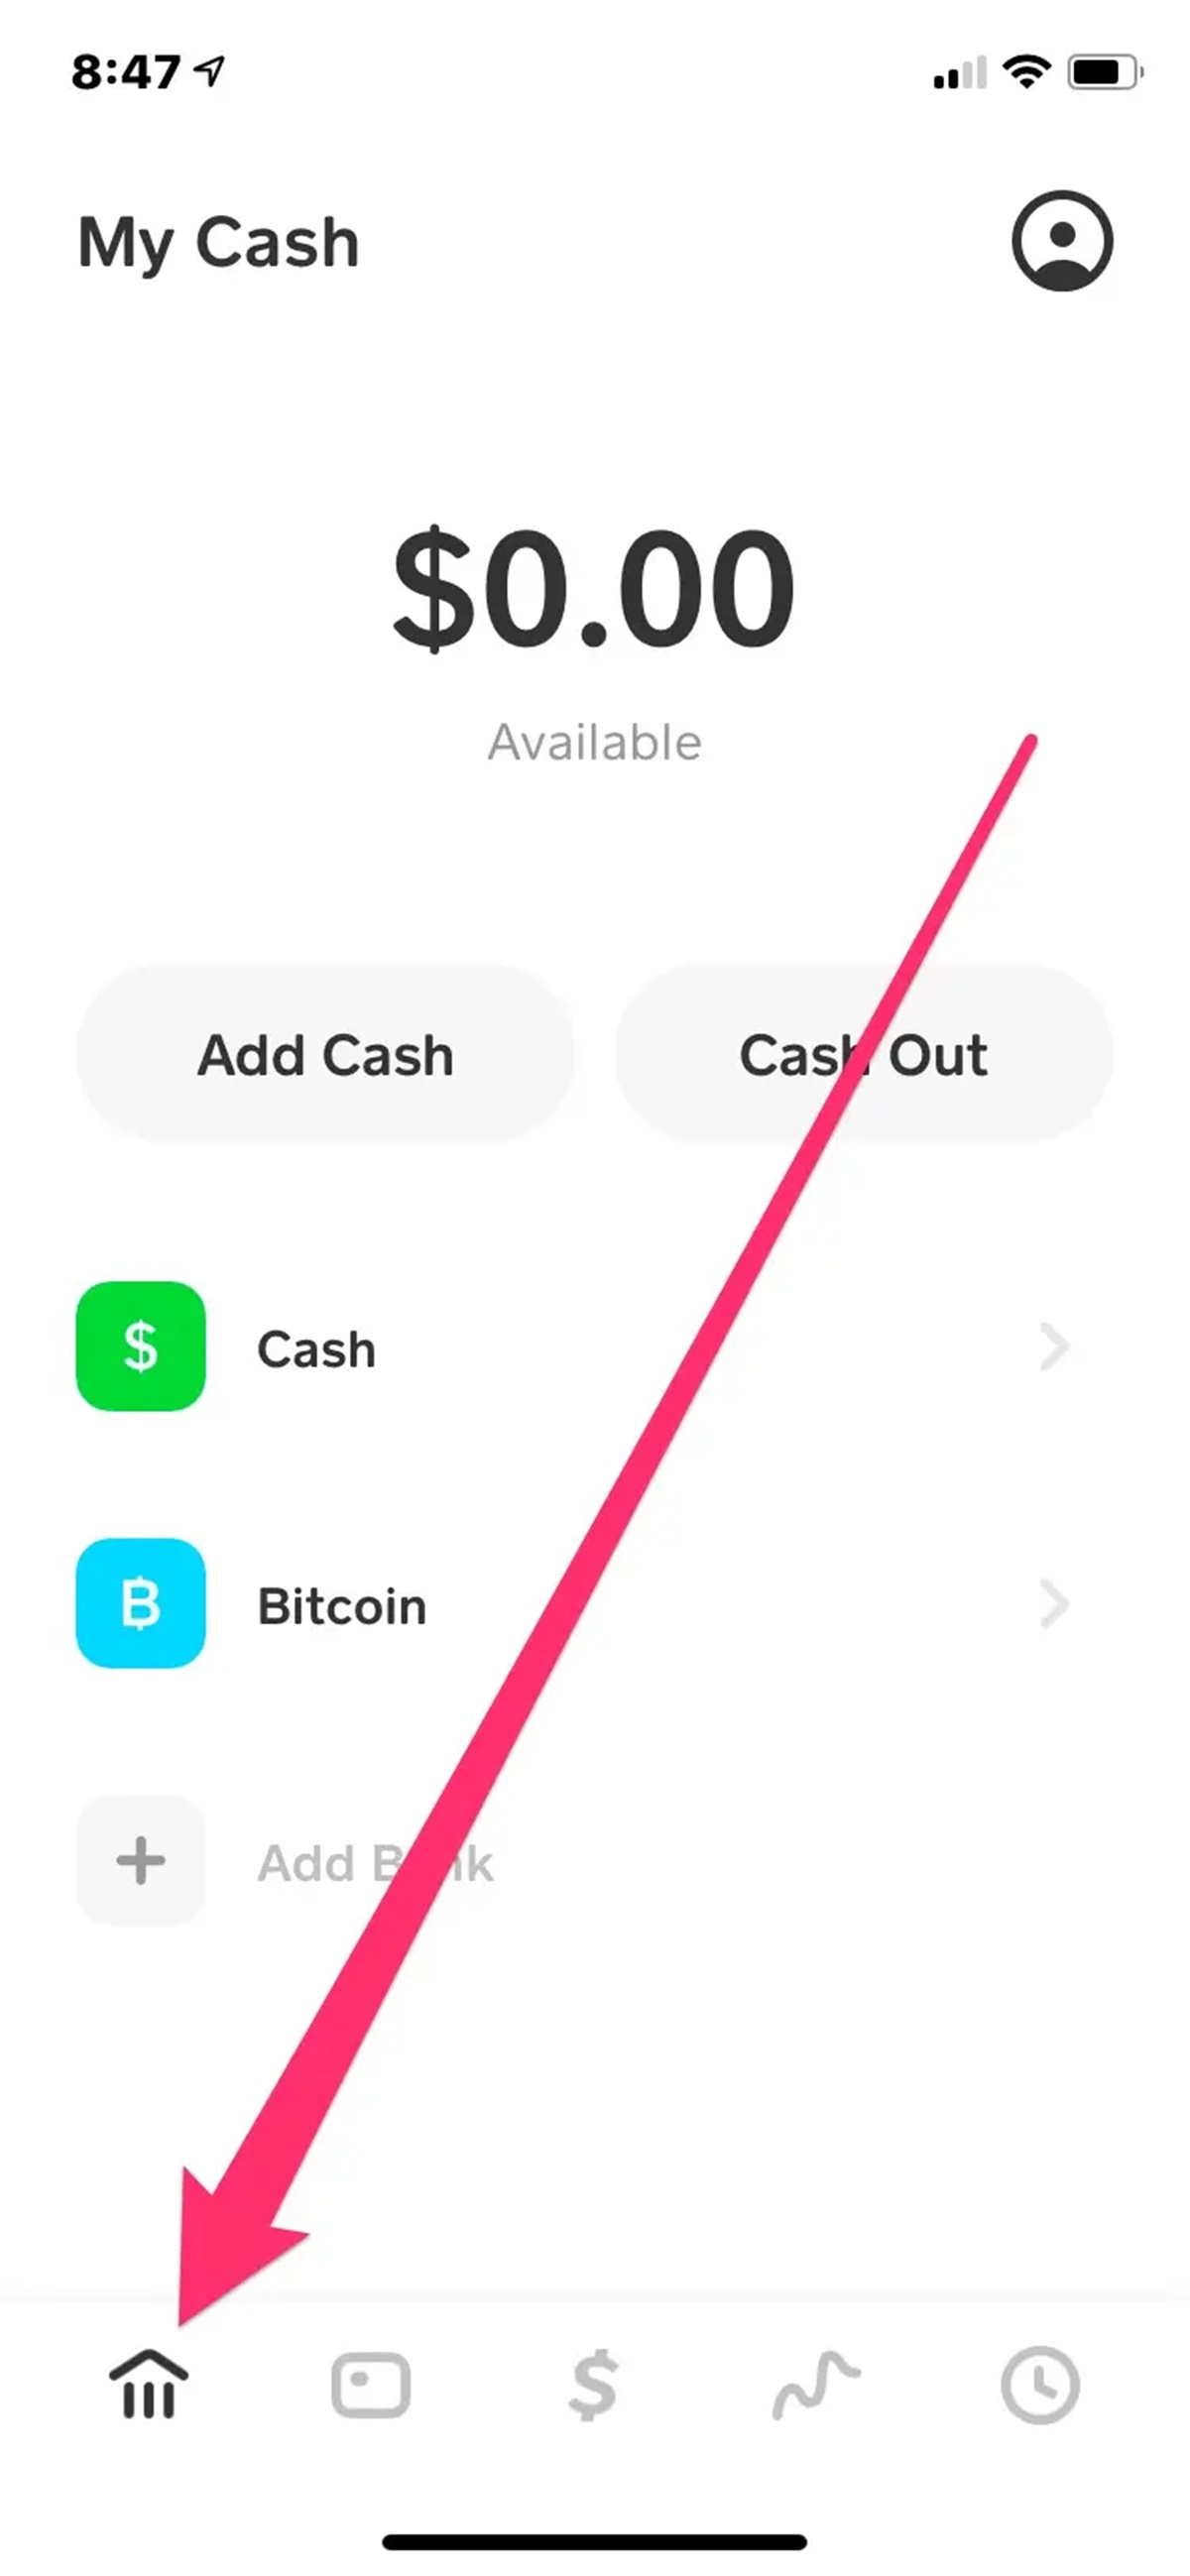
- Locate and tap on the icon displaying a person’s head and shoulders. This is usually found in the upper-left or upper-right corner of the Cash App home screen.
- Upon tapping the Profile icon, a dropdown menu or a new screen will appear, displaying various options and settings for your Cash App account.
Depending on the version of the app or the device you are using, the appearance and placement of the Profile icon may vary slightly. However, it is usually identifiable by an icon representing a person or an avatar.
On the Profile screen, you may also find other account information, such as your username, display name, and other personal details associated with your Cash App account. This screen allows you to manage various aspects of your profile, including your linked bank accounts, debit cards, and credit cards.
By accessing the Profile icon, you are one step closer to adding your credit card to Cash App. The next step will guide you through the process of adding a credit card to your account.
Step 3: Click on “Add a Credit Card”
Once you have accessed the Profile section within your Cash App account, the next step is to click on the option to “Add a Credit Card.” This will allow you to begin the process of linking your credit card to your Cash App account for seamless transactions and payments.
To proceed with adding a credit card, follow these simple instructions:
- Look for the option labeled “Add a Credit Card” in the Profile menu and click on it. This option is specifically designed for adding credit cards to your Cash App account.
- Upon clicking on “Add a Credit Card,” you may be prompted to enter your Cash App password or provide any additional verification, such as a passcode or fingerprint scan, depending on the security settings of your device.
- Once you have successfully verified your identity, you will be directed to a new screen or a pop-up window that allows you to enter your credit card information.
It is important to note that Cash App requires your credit card information to be accurate and up-to-date. Ensure that you have your credit card details readily available before proceeding to the next step.
By clicking on “Add a Credit Card,” you are taking the crucial step of initiating the process to link your credit card to your Cash App account. This will enable you to make quick and secure payments using your credit card within the app.
Now that you have clicked on “Add a Credit Card,” let’s move on to the next step, where you will enter your credit card information into Cash App.
Step 4: Enter the Credit Card Information
After clicking on “Add a Credit Card,” you will be directed to a new screen or pop-up window where you can enter your credit card information. This step is crucial for successfully adding and linking your credit card to your Cash App account.
Follow these steps to enter your credit card information:
- In the designated fields, enter the required information from your credit card:
- Credit card number: This is a series of digits found on the front of your card.
- Expiration date: The month and year when your credit card expires.
- CVV/CVC code: A three-digit security code located on the back of your card.
- Double-check the accuracy of your credit card information, ensuring that you have entered the correct details as they appear on your physical card.
- If applicable, you may also have the option to provide your name as it appears on the card or any other additional information required for verification.
- Once you have entered all the necessary credit card information, click on the “Next” or “Continue” button to proceed to the verification process.
It is important to note that Cash App utilizes secure encryption and takes measures to protect the confidentiality of your credit card information. However, it is still essential to enter your credit card details in a secure and private environment to minimize any potential risks.
By entering your credit card information into Cash App, you are one step closer to successfully linking your credit card and enjoying the convenience of using it for transactions within the app. The next step will guide you on how to verify your credit card.
Step 5: Verify the Credit Card
After entering your credit card information into Cash App, the next step is to verify your credit card. This verification process ensures the security and authenticity of your credit card before it is officially linked to your Cash App account.
Follow these steps to verify your credit card:
- Once you have entered your credit card information, Cash App will initiate the verification process. This may involve different methods depending on the credit card issuer or Cash App’s verification procedures.
- Typically, Cash App will make a small temporary charge to your credit card, usually less than $1. This charge serves as a verification method to confirm that the credit card is valid and belongs to you.
- Check the transaction history of your credit card account to find the verification charge made by Cash App.
- Note the exact amount of the verification charge.
- Return to the Cash App and enter the specific amount of the verification charge in the provided field.
- Click on the “Verify” or “Submit” button to complete the verification process.
It is important to ensure the accuracy of the verification charge amount to successfully complete the verification process. If you do not see the verification charge on your credit card statement, you may need to wait a few moments or contact Cash App support for assistance.
Once you have successfully verified your credit card, Cash App will confirm the verification and notify you that your credit card has been linked to your account. You can now start using the credit card for various transactions within the app.
Verifying your credit card adds an extra layer of security to your Cash App account, ensuring that only authorized users can link and use credit cards. Now that your credit card is verified, you can proceed to the next step to set it as your default payment method.
Step 6: Set the Credit Card as Default
Once you have successfully linked and verified your credit card in Cash App, you have the option to set it as your default payment method. Setting a credit card as the default means that it will be the primary payment method used for transactions within the app unless you manually choose a different payment source.
To set your credit card as the default payment method in Cash App, follow these simple steps:
- Open the Cash App on your mobile device and log in to your account.
- Navigate to the profile or account settings section. This is usually accessed by clicking on the profile icon, often represented by a person’s head and shoulders.
- Scroll or browse through the settings options until you find the “Payment Methods” or “Linked Cards” section.
- Within the payment methods section, locate your linked credit card and click on it to view the card details and options.
- Look for the option or button that allows you to “Set as Default” or “Make Default.” Click on it to designate your credit card as the default payment method.
- Once you have set your credit card as the default, Cash App will automatically use it for transactions unless you choose a different payment method during the checkout process.
It is important to note that you can link and store multiple credit cards in your Cash App account. Setting a credit card as the default simply makes it the primary payment method, but you can always manually select a different card if needed.
By setting your credit card as the default payment method, you can enjoy the convenience of seamless transactions within Cash App. Your default credit card will be automatically selected for various purposes, such as sending money, making purchases, or paying bills through the app.
Now that your credit card is set as the default payment method, you are ready to move forward and confirm the addition of the credit card to your Cash App account in the next step.
Step 7: Confirm the Addition of the Credit Card
After setting your credit card as the default payment method in Cash App, the final step is to confirm the addition of the credit card to your account. This step ensures that the credit card details you have entered are accurate and securely saved for future use.
To confirm the addition of the credit card in Cash App, follow these steps:
- Open the Cash App on your mobile device and log in using your account credentials.
- Navigate to the profile or account settings section within the app. This is typically accessed by tapping on the profile icon, which resembles a person’s head and shoulders.
- Look for the “Payment Methods” or “Linked Cards” section, where you can view and manage your linked payment methods.
- Within the payment methods section, locate your linked credit card and verify that the card details displayed are correct.
- Confirm that the credit card information, such as the card number, expiration date, and name, matches the details of the credit card you intended to add.
- If the displayed card details are accurate, click on the “Confirm” or “Save” button to finalize the addition of the credit card to your Cash App account.
Confirming the addition of the credit card ensures that the card is securely linked to your Cash App account. It also provides you with the assurance that the card information is accurately stored and will be used for future transactions within the app.
By successfully confirming the addition of your credit card, you can now start using it for various purposes, such as sending money, making purchases, or paying bills through Cash App.
Now that you have completed the confirmation process, you are ready to enjoy the convenience of using your credit card for seamless transactions in Cash App. Keep in mind that Cash App prioritizes the security of your financial information, providing a safe and user-friendly platform for managing your finances.
Step 8: Additional Tips and Information
Now that you have successfully added a credit card to your Cash App account, here are some additional tips and information to help you make the most out of using Cash App with your credit card:
- Keep your credit card information secure: It is important to safeguard your credit card details and treat them with the same level of security as you would with any other sensitive financial information. Avoid sharing your credit card information with unauthorized individuals or storing it in unsecured locations.
- Monitor your transactions: Regularly review your transaction history within Cash App to ensure that all charges and payments made using your credit card are accurate and authorized. If you notice any suspicious or unauthorized transactions, report them to Cash App support immediately.
- Take advantage of security features: Enable additional security features offered by Cash App, such as two-factor authentication or biometric verification, to add an extra layer of protection to your account and credit card information.
- Link multiple payment methods: Cash App allows you to link multiple credit cards, debit cards, or bank accounts to your account. This gives you flexibility in choosing the payment method that suits your needs for different transactions.
- Review the Cash App terms and conditions: Familiarize yourself with the terms and conditions of using Cash App, particularly regarding fees, privacy, and dispute resolution. Understanding these terms can help you make informed decisions and avoid any potential issues.
- Update your credit card information if needed: In case your credit card expires, is lost, or you get a new credit card, make sure to update the information in your Cash App account to avoid any interruptions in using your preferred payment method.
By following these additional tips and information, you can make the most out of using your credit card with Cash App. Enjoy the convenience, security, and flexibility that Cash App offers for managing your finances and making seamless transactions.