
Check the Compatibility of the Old Hard Drive
When attempting to access data from an old hard drive, it’s crucial to ensure compatibility with your current system. This step is essential as it determines the method you’ll use to connect the drive and whether it will be supported by your computer.
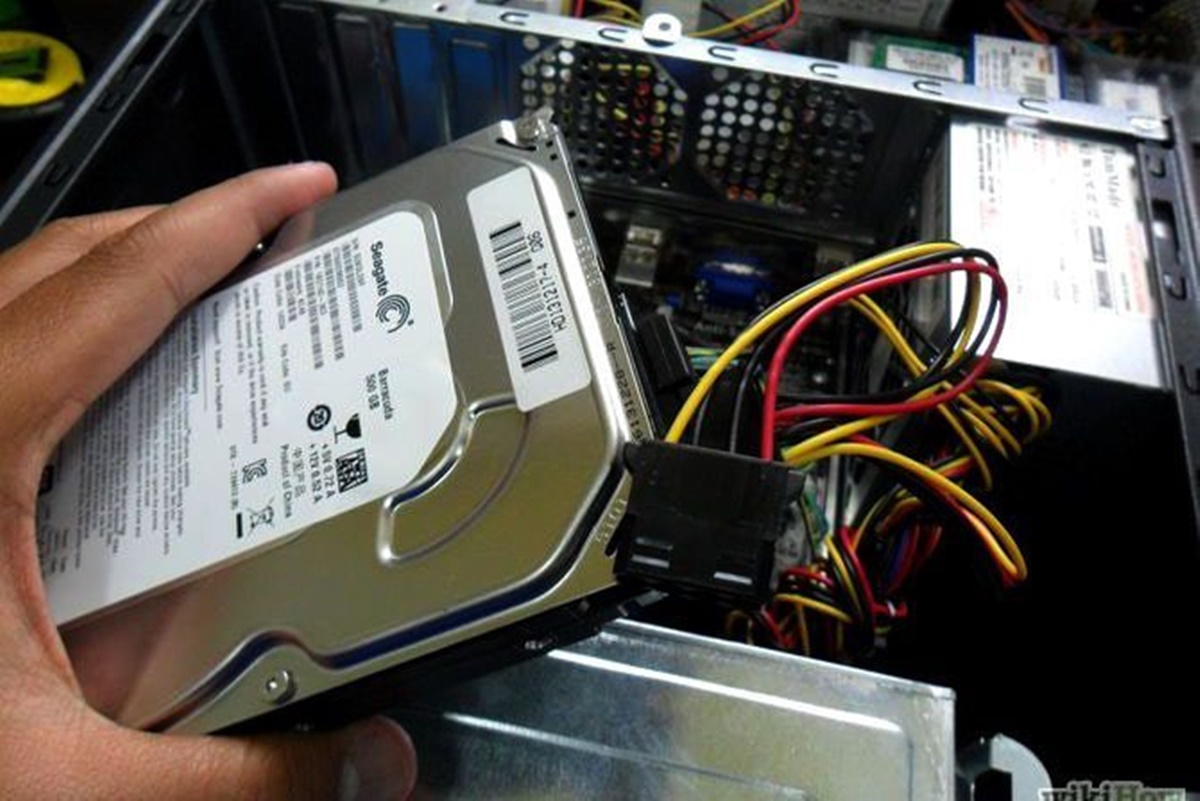
Firstly, determine the type of connection interface that the old hard drive uses. The most common interfaces are IDE (Integrated Drive Electronics) and SATA (Serial ATA). IDE drives typically come with a wide, flat ribbon cable, while SATA drives have smaller, L-shaped connectors. Consult the documentation or research your specific hard drive model to identify its interface.
Next, check the physical size of the hard drive. Older drives tend to have a larger form factor known as 3.5-inch drives, while newer ones are usually 2.5 inches. Ensure that you have the appropriate adapter or enclosure to fit the old hard drive into your current setup.
Consider the storage capacity of the old hard drive as well. If it exceeds the capacity of your current computer or external storage device, you may need to free up space or invest in additional storage.
Additionally, check the compatibility of the file system used by the old hard drive. Windows systems typically use NTFS, while older systems may use FAT32 or even FAT16. Ensure that your current operating system supports the file system of the old drive to avoid any compatibility issues. In cases where compatibility is lacking, you may need to explore alternate methods or undertake additional steps to access the data effectively.
Taking the time to check the compatibility of the old hard drive before proceeding will save you from potential frustration and wasted efforts. It ensures that you have the necessary equipment and knowledge to successfully extract the data and makes the entire process more efficient and effective.
Extract the Old Hard Drive from the Computer
Before you can access the data on your old hard drive, you need to extract it from the computer. This process may vary depending on the type of computer you have, whether it’s a desktop or laptop. Here are the general steps to follow:
For a desktop computer, you’ll usually need to power down the system and unplug it from the power source. Then, remove the side panel or access cover of the computer case. Locate the old hard drive, which is typically mounted inside a drive bay and secured with screws or brackets. Carefully disconnect the cables connected to the drive, including the power and data cables. Take note of which cable goes where, as you’ll need to reconnect them later.
If you’re working with a laptop, the process might be a bit more involved. Check the manufacturer’s documentation or search online for specific instructions on how to remove the hard drive from your particular laptop model. In most cases, you’ll need to remove the battery and any other removable panels on the bottom of the laptop to access the hard drive compartment. Unscrew the screws holding the hard drive in place and gently disconnect the cables. Again, make sure to keep track of the cable connections.
It’s important to handle the hard drive with care during this process. Avoid excessive force or rough handling, as this can cause damage to the drive and potentially result in data loss. If you’re unsure about how to remove the hard drive or don’t feel comfortable doing it yourself, consider seeking professional assistance or consulting the manufacturer’s support team.
Once you have successfully extracted the old hard drive from the computer, you can proceed to the next steps of connecting it to your current system and accessing the data.
Get the Relevant Equipment
To access and retrieve data from an old hard drive, you’ll need the necessary equipment to connect it to your current computer or device. The specific equipment required may vary depending on the type of hard drive and your current setup. Here are a few common options to consider:
1. External Enclosure: An external enclosure is a device that allows you to connect the old hard drive externally via USB or another interface. It typically consists of a case that houses the hard drive and provides the necessary connectors for data transfer. Ensure that the enclosure you choose is compatible with the interface and size of your old hard drive.
2. USB Adapter: Another option is to use a USB adapter, which allows you to connect the old hard drive directly to a USB port on your computer. USB adapters are available for both IDE and SATA drives, so choose the appropriate one based on the interface of your hard drive.
3. Docking Station: A docking station is a convenient device that enables you to connect the old hard drive as if it were a removable storage device. It provides a slot or bay where you can insert the drive, along with the necessary connectors and power supply.
4. SATA-to-USB Adapter: If you are working with a SATA drive, a simpler option is to use a SATA-to-USB adapter. This adapter allows you to directly connect the SATA drive to a USB port on your computer without the need for an enclosure or docking station.
When choosing the equipment, make sure it supports the interface, size, and any other specific requirements of your old hard drive. Refer to the documentation of your hard drive or consult with a professional if you are unsure about the compatibility of the equipment.
By acquiring the relevant equipment, you ensure that you have the necessary tools to connect and access the data stored on your old hard drive. This step sets the stage for the subsequent process of retrieving the data and transferring it to your current system.
Connecting the Old Hard Drive Using an External Enclosure
Using an external enclosure is a popular and straightforward method to connect an old hard drive to your current computer or device. Here’s a step-by-step guide to help you through the process:
1. Choose the Right Enclosure: Ensure that you select an external enclosure that supports the interface (IDE or SATA) and size (2.5-inch or 3.5-inch) of your old hard drive. You can find enclosures at electronics stores or online retailers.
2. Prepare the Enclosure: Open the enclosure by removing any screws or latches on the case. Depending on the enclosure, you may need to insert the old hard drive into a slot or attach it to a mounting bracket within the case.
3. Connect the Hard Drive: Carefully connect the data cable and power cable from the enclosure to the corresponding ports on the old hard drive. Make sure the connections are secure but avoid applying excessive force.
4. Close the Enclosure: Once the hard drive is securely connected, close the enclosure by fastening any screws or latches that hold the case together. Ensure the enclosure is properly sealed to prevent any damage or data loss during operation.
5. Connect the Enclosure to Your Computer: Use the provided USB cable to connect the enclosure to an available USB port on your computer. Ensure the connection is secure and free from any obstructions or loose cables.
6. Power Up the Old Hard Drive: Most enclosures have a separate power source, such as an AC adapter or USB power. Follow the manufacturer’s instructions to power up the enclosure and activate the old hard drive.
7. Access the Data: After the enclosure and old hard drive are connected and powered on, your computer should detect the drive as a removable storage device. You can then access the data on the old hard drive through your file explorer or disk management utility.
Connecting the old hard drive using an external enclosure provides a reliable and convenient method to retrieve data. It allows for easy connectivity and flexibility, making it an ideal choice when dealing with multiple hard drives or when you need to access the data on the go.
Connecting the Old Hard Drive Using a USB Adapter
If you don’t have an external enclosure, you can still connect your old hard drive to your current computer or device using a USB adapter. A USB adapter allows you to directly connect the hard drive to a USB port, providing a quick and convenient method to access your data. Follow these steps to connect your old hard drive using a USB adapter:
1. Select the Right USB Adapter: Ensure that you choose a USB adapter that supports the interface (IDE or SATA) of your old hard drive. USB adapters are readily available online or at computer hardware stores.
2. Prepare the USB Adapter: Connect the USB cable to the USB adapter, and make sure it is securely attached. Some USB adapters may require additional power through an AC adapter or USB power source.
3. Connect the Hard Drive: Carefully connect the data cable and power cable from the USB adapter to the respective ports on your old hard drive. Ensure the connections are secure, but avoid applying excessive force.
4. Connect the USB Adapter to Your Computer: Plug the USB adapter into an available USB port on your computer. Ensure the connection is secure and free from any obstructions or loose cables.
5. Power Up the Old Hard Drive: If the USB adapter requires a separate power source, follow the manufacturer’s instructions to power up the adapter. This will activate the old hard drive and allow your computer to detect it as a removable storage device.
6. Access the Data: Once the USB adapter and old hard drive are connected and powered on, your computer should detect the drive as a removable storage device. You can then access the data on the old hard drive through your file explorer or disk management utility.
Using a USB adapter provides a convenient and versatile way to connect your old hard drive and access the data without the need for an external enclosure. It is especially useful if you only need to retrieve data from the old hard drive occasionally or if you have multiple hard drives that you want to connect one at a time. Remember to handle the old hard drive with care and follow proper procedures to avoid any data loss or damage.
Connecting the Old Hard Drive Using a Docking Station
A docking station provides a practical and efficient way to connect your old hard drive to your current computer or device. It allows you to insert the hard drive into a slot or bay, providing a secure connection and easy access to your data. Follow these steps to connect your old hard drive using a docking station:
1. Choose the Right Docking Station: Select a docking station that is compatible with the interface (IDE or SATA) and size (2.5-inch or 3.5-inch) of your old hard drive. Ensure that it also supports your computer’s connectivity options, such as USB or Thunderbolt.
2. Prepare the Docking Station: Open the docking station by following the manufacturer’s instructions. Some docking stations may require the removal of panels or the insertion of mounting brackets.
3. Insert the Hard Drive: Insert the old hard drive into the appropriate slot or bay in the docking station. Ensure that it aligns with the connectors and fits securely into place.
4. Connect the Docking Station to Your Computer: Use the provided cable (e.g., USB, Thunderbolt) to connect the docking station to an available port on your computer. Make sure the connection is secure and free from any obstructions or loose cables.
5. Power Up the Docking Station: Some docking stations may require a separate power source, such as an AC adapter. Follow the manufacturer’s instructions to power up the docking station and activate the old hard drive.
6. Access the Data: After the docking station and old hard drive are connected and powered on, your computer should detect the drive as a removable storage device. You can then access the data on the old hard drive through your file explorer or disk management utility.
Docking stations provide a convenient way to connect and access your old hard drive without the need for additional adapters or enclosures. They offer a quick and simple solution, especially if you frequently switch between multiple hard drives or if you need to access the data on the old hard drive regularly. Remember to handle the old hard drive with care and follow proper procedures to prevent any data loss or damage during the connection process.
Connecting the Old Hard Drive Using a SATA-to-USB Adapter
A SATA-to-USB adapter is a simple and effective tool for connecting your old hard drive to your current computer or device. This type of adapter allows you to directly connect a SATA hard drive to a USB port, enabling easy data transfer and access. Follow these steps to connect your old hard drive using a SATA-to-USB adapter:
1. Select the Right SATA-to-USB Adapter: Ensure that you choose a SATA-to-USB adapter that is compatible with your old hard drive’s interface (SATA) and the USB port on your computer. You can find these adapters online or at computer hardware stores.
2. Prepare the Adapter: Connect the USB cable to the SATA-to-USB adapter, ensuring it is securely attached. Some adapters may require additional power through an AC adapter or USB power source.
3. Connect the Hard Drive: Carefully connect the SATA data cable and power cable from the SATA-to-USB adapter to the respective ports on your old hard drive. Ensure the connections are secure, but avoid applying excessive force.
4. Connect the Adapter to Your Computer: Plug the USB connector of the adapter into an available USB port on your computer. Ensure the connection is secure and free from any obstructions or loose cables.
5. Power Up the Old Hard Drive: If the SATA-to-USB adapter requires a separate power source, follow the manufacturer’s instructions to power up the adapter. This will activate the old hard drive and allow your computer to detect it as a removable storage device.
6. Access the Data: Once the adapter and old hard drive are connected and powered on, your computer should detect the drive as a removable storage device. You can then access the data on the old hard drive through your file explorer or disk management utility.
Using a SATA-to-USB adapter offers a convenient and straightforward method to connect your old hard drive, especially if you don’t have an external enclosure or docking station. It allows for easy data access and transfer, making it suitable for occasional use or when you have multiple SATA hard drives to connect. Remember to handle the old hard drive with care and follow proper procedures to avoid any data loss or damage during the connection process.
Mounting the Old Hard Drive
Once you have successfully connected your old hard drive to your current computer or device, the next step is to mount the drive. Mounting allows your operating system to recognize and access the data on the drive. The process of mounting may vary depending on your operating system, but here are general steps to help you get started:
Windows:
- Open the “Disk Management” utility by right-clicking on the “Start” button and selecting “Disk Management” from the menu.
- In the Disk Management window, locate the connected old hard drive. It should be listed as a separate disk.
- Right-click on the old hard drive and select “Initialize Disk”. Choose the appropriate partition style (usually MBR or GPT) and click “OK”.
- After initialization, right-click on the unallocated space of the old hard drive and select “New Simple Volume”. Follow the on-screen prompts to create a new partition and assign a drive letter.
- Once the partition is created, it will be assigned a drive letter and be mounted. You can access the data on the old hard drive through the File Explorer.
Mac:
- Open the “Disk Utility” by going to “Applications” > “Utilities” > “Disk Utility”.
- In Disk Utility, locate the connected old hard drive in the sidebar. It should be listed with its drive name.
- Select the drive and click on the “Mount” button at the top of the Disk Utility window.
- Once the drive is mounted, it will appear on your desktop or in the Finder sidebar. You can access the data on the old hard drive through Finder.
Ensure that you properly eject or unmount the old hard drive before disconnecting it to prevent any data loss or corruption. Follow the appropriate steps to safely eject the drive, either by right-clicking and choosing “Eject” or using the eject symbol next to the drive in the file manager.
Mounting the old hard drive successfully gives you access to the data stored on it, allowing you to retrieve your files easily. Remember to follow the necessary precautions during the mounting process and always backup your data to avoid any potential data loss.
Data Recovery Software for Old Hard Drives
If you encounter difficulties accessing the data on your old hard drive, data recovery software can be a valuable tool to help retrieve your files. These software programs are designed to scan, analyze, and recover data from corrupted, damaged, or inaccessible hard drives. Here are some key points to consider when using data recovery software for old hard drives:
Choose the Right Software: There are various data recovery software options available, both free and paid. Research and choose a reputable software program that specifically supports the file system and drive type of your old hard drive. Read reviews and consider the software’s user-friendliness, compatibility, and success rate.
Follow the Instructions: Carefully read and follow the instructions provided by the data recovery software. Most software will guide you through the scanning and recovery process, allowing you to select specific folders or files to recover or performing a thorough scan of the entire drive.
Be Patient: Data recovery can be a time-consuming process, especially if you have a large old hard drive or if the drive is severely damaged. Allow the software to complete its scanning and recovery procedures without interruption. Avoid using the old hard drive for any other activities while the recovery process is ongoing to minimize any further damage.
Save Recovered Files to a Different Drive: When using data recovery software, it’s crucial to save the recovered files to a different drive or storage device. This prevents overwriting any existing data on the old hard drive and ensures that you don’t accidentally delete or lose your recovered files.
Consider Professional Help: If you’re unable to recover the data using data recovery software or if the drive has physical damage, it may be best to seek professional assistance from a data recovery service. These professionals have specialized tools and expertise to recover data from severely damaged or malfunctioning hard drives.
Remember, data recovery software is not a guarantee for successfully recovering all data from an old hard drive. It is always recommended to regularly backup your important files to prevent data loss. When using data recovery software, it’s essential to exercise caution, be patient, and seek professional help if needed.
Copying or Transferring Data from the Old Hard Drive
Once you have successfully accessed the data on your old hard drive, the next step is to copy or transfer the files to your current computer or an external storage device. Here are a few methods you can use to accomplish this task:
1. Manual Copy and Paste: The simplest method is to manually copy and paste the files from the old hard drive to your desired location. Open the old hard drive’s folder in your file explorer and navigate to the specific files or folders you want to copy. Then, open the destination folder on your computer or external storage device and paste the files to complete the transfer.
2. Drag and Drop: Another intuitive method is to use the drag and drop technique. Open the old hard drive’s folder in one window and the destination folder in another. Simply select the files or folders you want to transfer from the old hard drive and drag them to the destination folder. Drop the files to initiate the copying process.
3. Syncing or Backing Up: You can also use syncing or backup software to copy the files from the old hard drive to your computer. Software like Dropbox, Google Drive, or iCloud offers automatic syncing options that constantly update the selected files or folders between devices. Set up the software to include the files from your old hard drive and let it handle the transfer process.
4. Disk Cloning: If you want to transfer all the data from the old hard drive, including the operating system and installed programs, disk cloning software can be used. This software creates an exact replica of the old hard drive onto a new drive or SSD. It’s an ideal choice when you want to migrate everything from the old drive to a new one and continue using the system seamlessly.
Before transferring the data, ensure that you have enough storage space on your current computer or external storage device to accommodate the transferred files. Also, keep in mind any file format compatibility between systems, especially if you are transferring files between different operating systems (e.g., Windows to Mac or vice versa).
Once the data transfer is complete, it’s advisable to verify the copied files to ensure that no data loss or corruption occurred during the process. Take the time to organize and rename the files if needed to maintain a well-organized file system on your current computer.
Remember to properly eject or unmount the old hard drive and safely disconnect it from your computer once the copying or transferring process is finished.
Safely Ejecting the Old Hard Drive
After you have finished accessing and transferring the data from your old hard drive, it is important to safely eject or unmount the drive before disconnecting it from your computer. Safely ejecting the drive ensures that any pending read or write operations are completed, reducing the risk of data loss or corruption. Here are the steps to safely eject the old hard drive:
Windows:
- Locate the icon representing your old hard drive in the “File Explorer” or “This PC” window.
- Right-click on the icon and select “Eject” from the context menu.
- Wait until you see a notification or message indicating that it is safe to remove the drive.
- Once the notification appears, gently disconnect the cables connecting the old hard drive to your computer.
Mac:
- Click on the icon representing your old hard drive on the desktop or in the Finder sidebar.
- Drag the icon to the trash bin in the Dock.
- Wait until the icon disappears from the desktop or Finder sidebar.
- Once the icon disappears, you can safely disconnect the cables connecting the old hard drive to your computer.
Regardless of your operating system, it is important not to abruptly disconnect the old hard drive without properly ejecting it. Doing so can result in data loss, file corruption, or even damage to the drive itself. Take the extra time to follow the proper steps and ensure the safe removal of the old hard drive.
If you encounter any issues while ejecting the old hard drive, such as error messages or the inability to eject, double-check that no files or folders from the drive are currently open or in use. Close any open files or applications associated with the old hard drive and try ejecting again.
By safely ejecting the old hard drive, you protect your data and prevent any potential damage to the drive or your computer. Treat the old hard drive with care and store it in a safe place until the next time you need to access or transfer data from it.
Troubleshooting Common Issues
When accessing data from an old hard drive, you may encounter some common issues along the way. Here are a few troubleshooting tips to help you overcome these challenges:
1. Connection Issues: If your computer or device is not recognizing the old hard drive, double-check the cable connections and make sure they are secure. Try using a different USB port, adapter, or cable to rule out any connectivity problems. If the issue persists, it could indicate a compatibility issue, a faulty cable or adapter, or a damaged hard drive.
2. Drive Not Showing Up: If the old hard drive is not appearing in your file explorer or disk management utility, it might need to be initialized or formatted. Go to the disk management utility on your computer and check if the drive is listed as an unallocated or raw partition. If so, right-click on the drive and select “Initialize” or “Format” to make it accessible. Be cautious as formatting erases all data on the drive, so proceed with caution and ensure you have a backup if necessary.
3. Slow Data Transfer: If you experience slow data transfer speeds when copying or accessing files from the old hard drive, it could be due to various factors. Ensure that there are no other resource-intensive tasks running on your computer that may affect performance. Additionally, check the health and condition of the old hard drive as deteriorating or damaged drives may lead to slower transfer speeds. If the issue persists, consider using a different connection method, such as a different adapter, enclosure, or a direct motherboard connection to improve the transfer speed.
4. Data Corruption or Errors: If you encounter data corruption or errors when accessing files from the old hard drive, it could be an indication of damaged sectors or a failing drive. In such cases, it’s advisable to use data recovery software or seek professional assistance to retrieve your data before the situation worsens. Avoid using the drive extensively to prevent further deterioration.
5. Unintended File Deletions or Modifications: When working with data from an old hard drive, it’s crucial to be cautious to avoid unintentionally deleting or modifying files. Before performing any operations on the drive, ensure that you understand the consequences and take necessary precautions, such as creating backups of important data or working with a duplicate of the drive.
Remember that these are general troubleshooting tips, and the specific issues you encounter may require further investigation or professional assistance. If you are unsure or unable to resolve an issue on your own, it’s advisable to consult with an expert who specializes in data recovery to avoid any further complications or data loss.
By troubleshooting common issues, you can overcome challenges and successfully retrieve your data from the old hard drive. Patience, careful evaluation, and safe practices should guide you through the troubleshooting process.
Final Thoughts on Accessing Data from an Old Hard Drive
Accessing data from an old hard drive can be a rewarding and worthwhile endeavor. It allows you to retrieve valuable files, memories, and information that may otherwise be lost or inaccessible. Here are some key points to consider as you embark on this data recovery journey:
1. Preparation is Key: Before you begin, take the time to research and ensure compatibility between your current system and the old hard drive. This includes checking the interface, size, file system, and storage capacity. Proper preparation sets the foundation for a successful data recovery process.
2. Use the Right Equipment: Choose the appropriate tools for connecting the old hard drive to your computer or device. External enclosures, USB adapters, docking stations, or SATA-to-USB adapters come in handy depending on your specific needs. Using the right equipment ensures a secure and efficient connection.
3. Patience and Persistence: Data recovery can be a time-consuming process, especially if the old hard drive has physical damage or a large amount of data. Be patient and persistent in your attempts to access the data. If one method doesn’t work, try another or consider seeking professional help.
4. Backup Your Data: Regularly backing up your important files is the best preventive measure against data loss. Consider implementing a backup strategy to protect your data and minimize the risk of losing it in the future. This way, you’ll have multiple copies of your files, ensuring their safety and accessibility.
5. Exercise Caution: When dealing with sensitive or important data, it’s crucial to handle the old hard drive with care. Avoid rough handling or exposing it to harmful elements. Take precautions to prevent static electricity discharge and protect the drive from physical damage.
6. Seek Professional Help When Needed: If you encounter significant challenges, are dealing with severely damaged hardware, or are unsure about the right course of action, seeking professional assistance is a wise decision. Data recovery specialists have the expertise and tools necessary to recover data from even the most complex situations.
Overall, accessing data from an old hard drive requires some technical knowledge, patience, and the right equipment. With the proper preparation and persistence, you can successfully retrieve your valuable files and memories. Remember to always prioritize data backup to prevent the need for data recovery in the first place.