
Preparing for the Upgrade
Upgrading the hard drive on your Mac can significantly improve its performance and storage capacity. However, before diving into the upgrade process, there are a few important steps you should take to ensure a smooth and successful transition. By preparing adequately, you will minimize the risk of data loss and maximize the efficiency of the upgrade.
1. Plan and research: Start by determining the specific requirements for your Mac model and operating system. Research the compatible hard drive options and identify the one that best suits your needs and budget. It’s also essential to understand the limitations and potential challenges that may arise during the upgrade process.
2. Backup your data: Before making any changes to your hard drive, it is crucial to back up all your data. This includes files, applications, and any other important information stored on your Mac. You can use an external hard drive, cloud storage services, or Time Machine to create a complete backup. This precautionary measure ensures that you can restore your data in case of any unexpected issues during the upgrade.
3. Consider data transfer methods: Depending on the size of your data and your preferred method, you can either clone your existing hard drive or perform a fresh installation on the new drive. Cloning involves creating an exact replica of your current drive onto the new one, while a fresh installation requires reinstalling the operating system and transferring your data separately. Choose the method that fits your needs and skill level.
4. Gather the necessary tools: Before starting the upgrade, gather all the tools you will need to complete the process. This may include a small screwdriver, a SATA to USB adapter, a cloning software (if applicable), and any additional cables or accessories that are specific to your Mac model. Having these tools on hand will make the installation process more efficient.
5. Create a workspace: Find a clean, well-lit area where you can comfortably work on your Mac. Having a dedicated workspace will help you stay organized and minimize the risk of misplacing or damaging any components during the upgrade process. Ensure that you have ample space to lay out your tools and keep track of small screws and other removable parts.
By following these steps and adequately preparing for the upgrade, you will greatly increase your chances of a successful and trouble-free hard drive replacement. Take the time to gather the necessary tools, back up your data, and carefully plan each step of the process. This way, you will be ready to move on to the next phase of the upgrade: backing up your data.
Backing Up Your Data
Before upgrading your Mac’s hard drive, it is crucial to back up all your important data to prevent potential data loss. The backup process ensures that you can easily restore your files and applications onto the new drive after the upgrade. Follow these steps to create a reliable backup of your data:
Step 1: Assess your data: Take the time to identify and assess the data that you need to back up. This includes files, documents, photos, videos, and any other important information stored on your Mac. Ensure that you have a comprehensive list of what needs to be backed up.
Step 2: Choose a backup method: There are several backup methods you can choose from, depending on your preferences and available resources. You can use external hard drives, cloud storage services, or Apple’s built-in backup solution, Time Machine. Consider the storage capacity, speed, and accessibility of each option to determine the best fit for your needs.
Step 3: External hard drive backup: If you opt for an external hard drive, connect the drive to your Mac using a compatible cable. Then, open the Finder and locate the drive in the sidebar. Create a new folder to store your backup files. You can either manually copy and paste the files into the folder or use backup software to automate the process.
Step 4: Cloud storage backup: Cloud storage services like iCloud, Google Drive, or Dropbox offer convenient backup options. Sign up for a cloud storage account if you don’t have one, and install the corresponding software on your Mac. Select the files and folders you want to back up, and the software will automatically sync and store your data in the cloud.
Step 5: Time Machine backup: Time Machine is Apple’s built-in backup solution, which allows you to create incremental backups of your entire system. Connect an external hard drive to your Mac and open System Preferences. Go to Time Machine and click on “Select Disk” to choose the external drive as your backup destination. Time Machine will start backing up your data periodically.
Step 6: Verify your backup: After completing the backup process, it is crucial to verify its integrity. Double-check that all your important files and applications are safely stored in the backup location. Take the time to browse through different folders and open files to ensure they are intact and accessible.
Step 7: Update your backup regularly: Once you have completed the initial backup, make it a habit to regularly update your backup to include any new files or modifications. Set up automatic backups or create a schedule to remind yourself to perform regular backups. This way, you can have peace of mind knowing that your data is protected.
Backing up your data is an essential step in preparing for a hard drive upgrade. It ensures that all your important files and applications are safely stored and ready to be restored onto the new drive. By following a reliable backup method and regularly updating your backup, you can safeguard your data and minimize the risk of data loss during the upgrade process.
Gathering the Necessary Tools
Before embarking on the upgrade process for your Mac’s hard drive, it is important to gather all the necessary tools. Having the right tools on hand will make the installation process smoother and more efficient. Here are the essential tools you will need:
1. Screwdriver: Most Mac models require a small Phillips screwdriver for removing the screws that secure the bottom cover. It’s important to choose the appropriate size that fits the screws tightly to avoid stripping them.
2. SATA to USB adapter: This adapter allows you to connect the new hard drive externally to clone your existing drive before installing it. It is especially useful if you plan to perform a clone transfer method.
3. Cloning software: If you choose the clone transfer method, you will need cloning software to create an exact copy of your current hard drive onto the new one. Popular options include Carbon Copy Cloner and SuperDuper!, both of which offer user-friendly interfaces and reliable cloning capabilities.
4. External storage: Depending on the amount of data you have, you may need external storage to temporarily store files during the upgrade. This could be an external hard drive or a cloud storage account where you can securely store your important data before transferring it to the new hard drive.
5. Anti-static wrist strap: To prevent static electricity from damaging sensitive components, it is advisable to wear an anti-static wrist strap. This accessory grounds you and dissipates static charges, minimizing the risk of harmful static discharges that can damage your Mac’s internal components.
6. USB drive: Keep a USB drive handy to create a bootable installer for your macOS. This allows you to install the operating system on the new hard drive or perform a fresh installation if you choose not to clone your existing drive.
7. Additional accessories: Depending on your specific Mac model, you may require additional cables or accessories. It is recommended to check the documentation for your Mac or refer to reliable online sources to identify any additional tools needed for the upgrade.
8. Cleaning supplies: While not necessarily a tool, having cleaning supplies such as a microfiber cloth and a can of compressed air can be beneficial. Use the cloth to wipe down your Mac and remove any dust or debris, and the compressed air to clean the inside of your Mac before and after the upgrade.
By gathering all the necessary tools ahead of time, you can ensure a smooth and successful upgrade process for your Mac’s hard drive. Take the time to check your Mac model’s specific requirements, invest in quality tools, and have them readily available. With the right tools at your disposal, you’ll be well-prepared to start the upgrade journey.
Choosing the Right Hard Drive
When upgrading your Mac’s hard drive, it is essential to choose the right one that fits your needs and is compatible with your Mac model. Here are some factors to consider when selecting a new hard drive:
1. Storage capacity: Assess your storage needs and determine how much capacity you require. Consider the size of your current hard drive and whether you need more space to accommodate your files, applications, and media. As a general guideline, aim for a higher capacity than your current drive to allow for future expansion.
2. Drive type: There are two main types of hard drives: traditional hard disk drives (HDD) and solid-state drives (SSD). HDDs provide larger storage capacities at a lower cost, while SSDs offer faster performance and improved durability. SSDs are generally recommended for their faster read and write speeds, which can significantly enhance your Mac’s overall speed and responsiveness.
3. Compatibility: Ensure that the hard drive you choose is compatible with your Mac model. Check the specifications and requirements provided by the manufacturer to avoid any compatibility issues. Pay attention to the connection type (SATA or PCIe), form factor (2.5-inch or 3.5-inch), and any specific limitations or recommendations for your Mac model.
4. Brand and reliability: Opt for reputable brands with a track record of reliability and quality. Well-known brands such as Samsung, Western Digital, Seagate, and Crucial are often trusted options. Additionally, read reviews and user feedback to get an understanding of the reliability and performance of the hard drive you are considering.
5. Performance: Consider the performance characteristics of the hard drive, such as rotational speed (for HDDs) or read and write speeds (for SSDs). Faster speeds generally result in improved performance and quicker file access times. However, keep in mind that faster drives may come at a higher cost.
6. Warranty: Check the warranty provided by the manufacturer. A longer warranty period indicates the manufacturer’s confidence in the product’s quality. Look for warranties that cover a substantial period, such as three to five years.
7. Budget: Determine your budget for the hard drive upgrade. Prices can vary depending on the storage capacity, drive type, and brand. Find a balance between your storage needs and the price range that fits your budget.
By considering these factors and doing thorough research, you can choose the right hard drive that meets your storage requirements and complements your Mac’s performance. Take the time to understand your needs, read reviews, compare specifications, and make an informed decision. With the right hard drive, you can enhance your Mac’s storage and performance capabilities.
Formatting the New Hard Drive
Before you can use your new hard drive in your Mac, it needs to be formatted to be compatible with the macOS. Formatting a hard drive involves preparing it to store files and installing the necessary file system. Follow these steps to format your new hard drive:
1. Connect the new hard drive: If your new hard drive is an internal drive, power down your Mac and install the drive following the manufacturer’s instructions. If it’s an external drive, connect it to your Mac using the appropriate cable.
2. Open Disk Utility: Launch Disk Utility by going to “Applications” > “Utilities” > “Disk Utility”. Disk Utility is a built-in macOS tool that allows you to manage and format storage drives.
3. Select the new hard drive: In Disk Utility, you will see a list of available drives. Select your new hard drive from the sidebar on the left. Be sure to choose the correct one to avoid accidentally formatting the wrong drive.
4. Erase the drive: At the top of the Disk Utility window, click on the “Erase” button. This will open the erase options for the selected drive.
5. Choose a format: In the erase options, you can select the format for your new hard drive. The most common format for macOS is “Mac OS Extended (Journaled)”. However, if you plan to partition the drive or if it will be used with other operating systems, you may need to choose a different format, such as “APFS” or “exFAT”.
6. Rename the drive: Optionally, you can give your new hard drive a name. Enter a descriptive name in the “Name” field, keeping it concise and easy to identify.
7. Start the formatting process: Once you have selected the format and provided a name (if desired), click on the “Erase” button to begin formatting the new hard drive. Disk Utility will display a progress bar indicating the status of the formatting process.
8. Wait for the process to complete: Formatting a hard drive can take some time, depending on the size and speed of the drive. Be patient and allow the process to complete without interruption. Once the formatting is finished, Disk Utility will display a notification.
9. Verify the formatting: After the formatting process is complete, it is a good practice to verify the formatting by selecting the newly formatted drive and clicking on the “First Aid” button in Disk Utility. This will check for any potential issues and ensure that the drive is ready to use.
By following these steps, you can format your new hard drive to make it compatible with your Mac. Formatting prepares the drive for storing files and ensures that it works seamlessly with the macOS. Once the formatting is complete, your new hard drive is ready for the next step: cloning your old hard drive or performing a fresh installation of the macOS.
Cloning Your Old Hard Drive
Cloning your old hard drive onto the new one is an efficient way to transfer all your data, settings, and applications seamlessly. By creating an exact replica of your old hard drive, you can quickly get up and running on the new drive without the need to reinstall software or transfer files manually. Follow these steps to clone your old hard drive:
1. Connect the new hard drive: If your new hard drive is an internal drive, make sure it is properly connected to your Mac. If it’s an external drive, ensure it is connected via USB or Thunderbolt.
2. Open Disk Utility: Launch Disk Utility by going to “Applications” > “Utilities” > “Disk Utility”. This built-in macOS tool will be used to clone the old hard drive.
3. Select the old hard drive: In Disk Utility, select your old hard drive from the list of available drives in the sidebar. Make sure you have selected the correct drive to avoid accidental cloning of the wrong drive.
4. Click on “Restore”: At the top of the Disk Utility window, click on the “Restore” button. This will open the restore options for the selected drive.
5. Configure the restore settings: In the restore options, set the following configurations:
- Source: Select your old hard drive as the source to be cloned.
- Destination: Choose the new hard drive as the destination for the cloned data. Be cautious as this process erases all existing data on the new drive.
- Restore: Ensure that the “Restore” option is selected, indicating that the data from the source drive will be copied to the destination drive.
6. Start the cloning process: Once you have configured the restore settings, click on the “Restore” button to commence the cloning process. Disk Utility will display a progress bar indicating the status of the cloning process.
7. Wait for the cloning to complete: Cloning a hard drive can take some time, depending on the amount of data being transferred. It is important to be patient and let the process complete without interruption. Once the cloning is finished, Disk Utility will display a notification.
8. Verify the cloned drive: After the cloning process is complete, it is recommended to verify the newly cloned drive. Select the cloned drive in Disk Utility and click on the “First Aid” button to run a verification process. This ensures that the cloned drive is error-free and ready for use.
Congratulations! You have successfully cloned your old hard drive onto the new one. The new hard drive is now an exact replica of your old drive, including all your data, applications, and settings. You can proceed to the next step, transferring your data to the new hard drive and completing the upgrade process.
Transferring Your Data to the New Hard Drive
After successfully cloning your old hard drive onto the new one, it is time to transfer your data and complete the upgrade process. Follow these steps to efficiently transfer your data to the new hard drive:
1. Restart your Mac: If you haven’t done so already, restart your Mac to ensure that it recognizes the newly cloned drive as the primary boot drive.
2. Set up the new hard drive as the boot drive: Access your Mac’s startup settings by holding down the Option (⌥) key while your Mac is restarting. This will display a list of available boot drives. Select the new hard drive to set it as the boot drive.
3. Verify the transferred data: Once your Mac has booted from the new hard drive, closely inspect your data and settings to ensure that everything has been successfully transferred. Open files, applications, and folders to confirm that everything is intact and accessible.
4. Compare with the old hard drive: To be absolutely certain that all data has been transferred, you can compare the contents of your old hard drive with the new one. Use Finder to navigate through both drives simultaneously, cross-referencing files and folders to ensure they match.
5. Update file paths (if necessary): In case any file paths or application settings have changed due to the new hard drive, you may need to update them. This typically applies to applications that point to specific locations or external files. Make the necessary adjustments to ensure all applications can function properly.
6. Restore specific settings: If you had any customized settings or preferences on your old hard drive, you may need to reapply them on the new drive. This includes system preferences, software configurations, and user-specific settings in applications.
7. Perform a final backup: After successfully transferring your data to the new hard drive and verifying its integrity, it is important to perform a final backup. This ensures that all recent changes are securely saved and protected. Use an external hard drive, cloud storage service, or Time Machine to create a backup of your new hard drive.
8. Clean up the old hard drive: Once you have completed the data transfer and verified the new hard drive, you can safely disconnect and remove the old hard drive from your Mac. Store it in a safe place or repurpose it for other uses.
By following these steps, you can efficiently transfer your data to the new hard drive and complete the upgrade process. Double-checking the transferred data, updating file paths if necessary, and applying specific settings will help ensure a seamless transition. With your data successfully transferred, you can enjoy the enhanced performance and storage capacity of your upgraded Mac.
Installing the New Hard Drive
Now that you have successfully transferred your data to the new hard drive, it’s time to physically install it into your Mac. Follow these steps to ensure a proper and secure installation:
1. Power off your Mac: Before proceeding with the installation, shut down your Mac completely and disconnect any cables or power sources.
2. Ground yourself: To prevent any static electricity from damaging the internal components of your Mac, it’s important to ground yourself. You can do this by touching a grounded metal object or by wearing an anti-static wrist strap.
3. Locate the hard drive bay: Depending on your Mac model, the hard drive bay may be located on the bottom or the side of your Mac, usually held in place by screws. Refer to the manufacturer’s documentation or online resources to identify the exact location of the hard drive bay for your specific Mac model.
4. Open the hard drive bay: Use the appropriate screwdriver to remove the screws securing the hard drive bay. Set the screws aside in a safe place as you will need them later to secure the new hard drive.
5. Remove the old hard drive: Carefully disconnect any cables or connectors attached to the old hard drive. Gently slide the old hard drive out of the bay, making sure to note its orientation for when you install the new drive.
6. Install the new hard drive: Take the new hard drive and align it properly in the bay, using the orientation you noted from the old hard drive as a guide. Carefully slide the new hard drive into place until it is snugly fitted.
7. Secure the new hard drive: Using the screws you set aside earlier, fasten the new hard drive securely in the bay. Ensure that the screws are tightened but not overtightened, as this could cause damage to the drive or the Mac’s housing.
8. Reconnect cables: Reattach any cables or connectors that were previously disconnected from the old hard drive. Double-check that each cable is securely and properly connected.
9. Close the hard drive bay: Put the hard drive bay cover back in place and firmly fasten the screws to ensure a secure closure.
10. Power on your Mac: Reconnect any cables or power sources and power on your Mac. The system should recognize the new hard drive and boot up as usual.
By following these steps, you can successfully install the new hard drive in your Mac. Taking precautions to ground yourself, handling the components carefully, and securely fastening the new hard drive will help ensure a proper and functioning installation. Once the new hard drive is installed, you can continue the upgrade process by updating your Mac software and testing the new drive’s performance.
Updating Your Mac Software
After installing the new hard drive in your Mac, it’s crucial to update your Mac software to ensure compatibility and performance. Follow these steps to update your Mac software:
1. Connect to the internet: Make sure your Mac is connected to a stable internet connection. This allows your Mac to download and install the latest software updates.
2. Check for software updates: Click on the Apple menu in the top-left corner of your screen and select “System Preferences”. Then, click on “Software Update”. Your Mac will check for available updates.
3. Install software updates: If there are any available software updates, click on the “Update Now” button. Your Mac will download and install the updates. This may take some time depending on the size of the updates and your internet connection speed.
4. Restart your Mac: After the software updates are successfully installed, restart your Mac to ensure that the updates are properly applied.
5. Repeat the process: It’s a good practice to check for software updates regularly, especially after installing a new hard drive. New updates may be released that address compatibility issues or improve performance. Check for updates periodically and install any available updates to keep your Mac up to date.
6. Update applications: In addition to updating your Mac software, it’s important to update your applications as well. Open the App Store and go to the “Updates” tab to see if there are any available updates for your installed applications. Install the updates to ensure that your applications are compatible with the new hard drive and the latest macOS version.
7. Reinstall non-App Store applications: If you have any applications that were not installed from the App Store, make sure to reinstall them from the original source. This ensures that they are properly configured and compatible with the new hard drive.
8. Verify software functionality: After updating your Mac software and applications, take the time to verify their functionality. Test various features, launch applications, and ensure that everything is working as expected. If you encounter any issues or errors, troubleshoot them accordingly.
By updating your Mac software, you ensure that your system is running the latest versions and is optimized for the new hard drive. Regular software updates not only provide bug fixes and security enhancements but also improve overall system performance. By keeping your software up to date, you can maximize the benefits of the new hard drive and enjoy a smooth and efficient user experience.
Testing the New Hard Drive
Once you have installed the new hard drive in your Mac and updated the software, it’s essential to test the functionality and performance of the new drive. Testing ensures that the new hard drive is working properly and meets your expectations. Here are some steps you can take to test the new hard drive:
1. Overall functionality: Start by testing the basic functionality of the new hard drive. Verify that you can access and browse files, create folders, and perform basic file operations without any issues. Open and close applications to ensure they launch and function correctly.
2. Read and write speeds: Use benchmarking tools such as Blackmagic Disk Speed Test or AJA System Test to measure the read and write speeds of the new hard drive. Compare the results with the specifications provided by the manufacturer to make sure the drive is performing as expected.
3. File transfer: Test the speed and efficiency of file transfers between the new hard drive and other storage devices. Copy large files or folders and observe the transfer speed and reliability. If the transfer speeds are significantly slower than expected, there may be an issue that needs further investigation.
4. Application performance: Launch and use resource-intensive applications such as video editing software or virtual machines to assess the performance of the new hard drive. Pay attention to the responsiveness and overall speed of these applications, as they heavily rely on storage performance.
5. System boot time: Measure the time it takes for your Mac to boot up. A faster boot time compared to your previous hard drive can indicate improved performance from the new drive. If you notice any delays or unusually long boot times, investigate further to identify any potential issues.
6. S.M.A.R.T. monitoring: Check the Self-Monitoring, Analysis, and Reporting Technology (S.M.A.R.T.) status of the new hard drive. Various disk utility applications, such as DriveDx or SMART Utility, can provide information about the health and performance of the drive. Monitor the S.M.A.R.T. attributes regularly to detect any potential issues or anomalies.
7. Noise and vibrations: During operation, listen for unusual noises or vibrations coming from the new hard drive. Unexpected sounds or excessive vibrations may indicate a hardware issue. If you notice anything out of the ordinary, consider contacting the manufacturer for further assistance.
8. Stability and reliability: Test the stability and reliability of the new hard drive over an extended period. Leave your Mac running with various applications and files open for a few hours or even a full day. Monitor for any system crashes, freezes, or unexpected errors that may be related to the new drive.
By thoroughly testing the new hard drive, you can ensure that it is functioning properly, delivering the expected performance, and meeting your storage needs. Pay attention to any issues or anomalies that may arise during testing and address them promptly to avoid any potential data loss or hardware complications. Testing the new hard drive provides valuable insights into its performance and reliability, allowing you to make any necessary adjustments or seek further assistance if needed.
Troubleshooting Common Issues
While upgrading your Mac’s hard drive, you may encounter some common issues. Here are a few troubleshooting steps you can take to resolve these issues:
1. Unrecognized or inaccessible drive: If your Mac does not recognize the new hard drive or if it’s inaccessible, start by double-checking the hardware connections. Ensure that all cables and connectors are firmly attached to the drive and the Mac. Try disconnecting and reconnecting the drive to reset the connections.
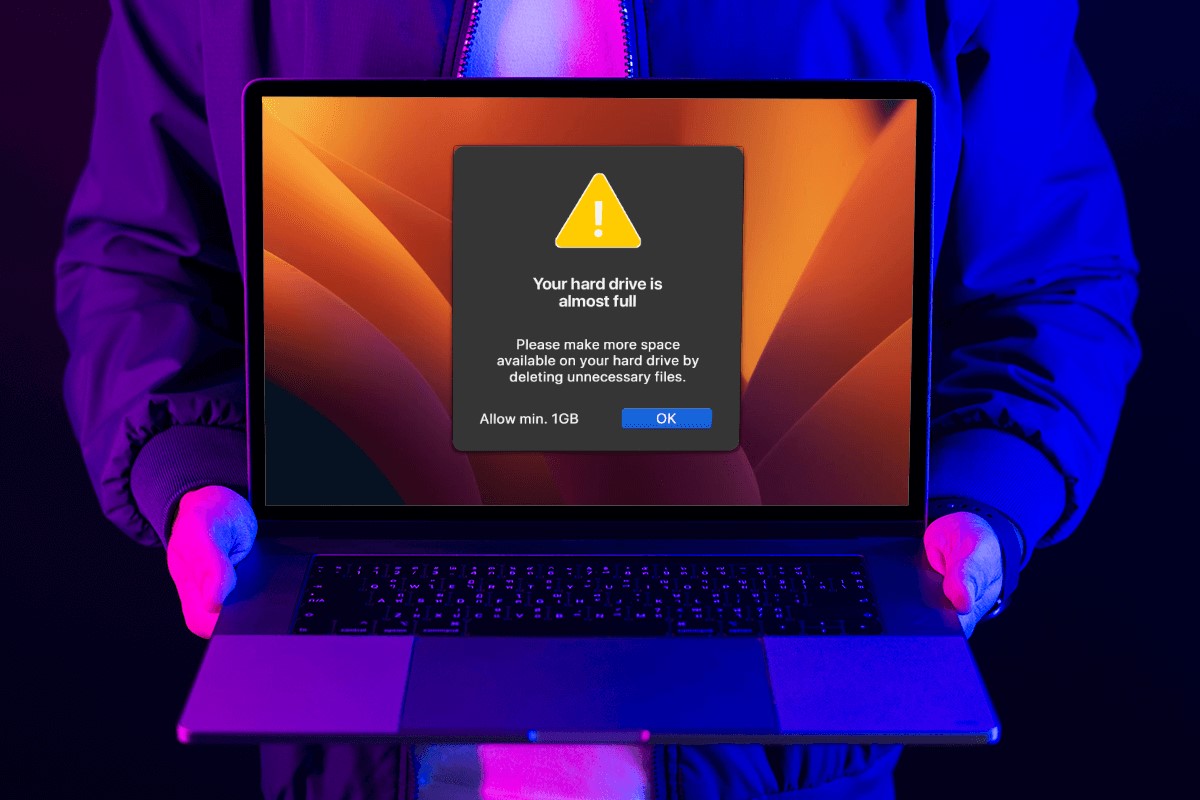
2. Slow performance: If you notice slower than expected performance from the new hard drive, first make sure that the drive is not nearly full. If it is, consider freeing up some space. Additionally, check for any software updates that may improve performance or consult the manufacturer’s documentation for any specific recommended settings or optimizations for the drive.
3. Error messages during boot: If you encounter error messages when booting up your Mac after the hard drive upgrade, it may indicate compatibility issues or hardware conflicts. Try resetting the NVRAM or PRAM on your Mac by restarting it and holding down the Command (⌘), Option (⌥), P, and R keys simultaneously until you hear the startup sound for the second time. If the issue persists, consult Apple support or the hard drive manufacturer for further assistance.
4. Incompatible drive: In some cases, the new hard drive may not be compatible with your Mac model or operating system version. Confirm that the drive meets the specifications outlined by the manufacturer and verify compatibility with your specific Mac model. If the drive is indeed incompatible, you may need to consider alternative options or seek a replacement drive.
5. Data corruption or loss: If you experience data corruption or loss after the upgrade, first ensure that you have a recent backup of your data. You can restore your data from the backup or, if necessary, seek professional data recovery services to attempt to retrieve the lost data. Preventative measures such as creating regular backups and verifying the integrity of the data transfer can help mitigate the risk of data loss.
6. Elevated noise or excessive heat: If you notice unusually loud noise or excessive heat coming from the new hard drive, it may indicate a mechanical or thermal issue. Check that the drive is properly installed and properly ventilated. Excessive heat could potentially damage the drive, so if the problem persists, contact the manufacturer for support or consider replacing the drive.
7. Persistent issues: If you encounter persistent issues or encounter multiple problems even after attempting troubleshooting steps, it is recommended to seek professional assistance. Consult Apple support, contact the hard drive manufacturer’s customer support, or contact a certified professional who can diagnose and resolve the specific issue.
Remember, proper troubleshooting and resolution of issues depend on the specific characteristics and circumstances of the problem. If you encounter any issues during or after the hard drive upgrade, exercise caution, consult reliable resources, and consider seeking professional help when needed. Ensuring the proper functioning and reliability of the new hard drive will enable you to fully enjoy the benefits of the upgrade.