
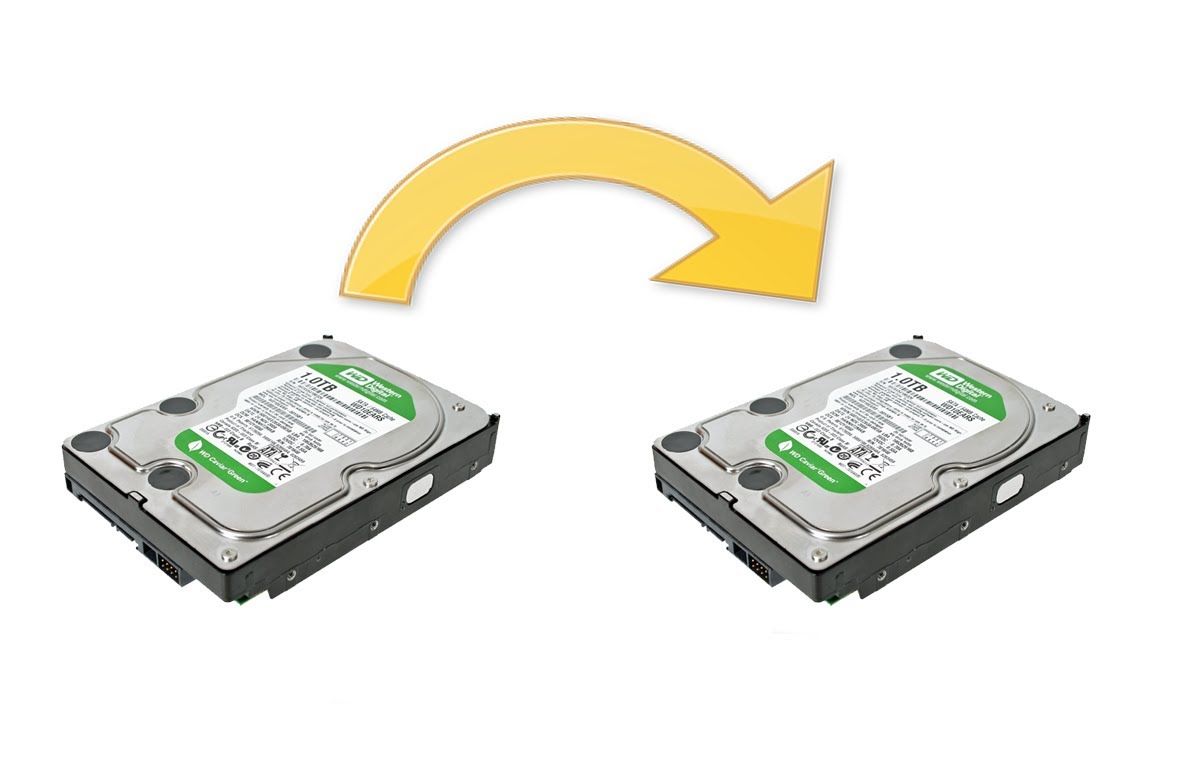
Why You Might Need to Transfer Data and Programs to a New Hard Drive
Transferring data and programs to a new hard drive can be a necessary task for various reasons. Whether you’re upgrading your computer’s storage capacity or replacing a faulty drive, it’s important to transfer your data and programs to ensure easy access and continued functionality. Here are a few situations where transferring data and programs becomes essential:
- Hardware failure: If your current hard drive is failing or has crashed completely, transferring your data and programs to a new drive is vital to avoid data loss and get back up and running with minimal disruption.
- Upgrading storage capacity: As the size and complexity of files and programs increase, you may find yourself running out of storage space on your current hard drive. Upgrading to a larger capacity drive allows you to continue storing your data and installing new programs without worrying about storage limitations.
- Improving performance: If your current hard drive is slow or outdated, transferring your data and programs to a new, faster drive can significantly improve your computer’s speed and overall performance.
- Switching to a new computer: When you purchase a new computer, you’ll need to transfer your data and programs from your old computer to the new one. This ensures that you have all your important files and programs readily accessible on your new device.
- Preserving data during system reinstallation: When reinstalling the operating system on your computer, transferring your data and programs to a new hard drive ensures that you don’t lose any valuable files or programs in the process.
Overall, transferring data and programs to a new hard drive is essential for preserving your valuable files, improving performance, and ensuring seamless continuity in your computing experience. By following the steps and considering the factors outlined in this article, you’ll be able to transfer your data and programs to a new hard drive effectively and efficiently.
Things to Consider Before Transferring Data and Programs
Before you embark on the task of transferring data and programs to a new hard drive, there are a few important factors to consider. Taking these into account will help ensure a smooth and successful transfer process:
- Compatibility: Make sure that the new hard drive is compatible with your computer’s hardware and operating system. Check the specifications and requirements of the new drive to ensure a seamless integration.
- Storage capacity: Assess your storage needs and choose a hard drive with sufficient capacity to accommodate all your data and programs. Consider future requirements as well to avoid running out of storage space in the near future.
- Data backup: Before transferring, it’s crucial to create a backup of your data. This ensures that even if something goes wrong during the transfer process, you’ll still have a copy of your important files. Use an external storage device or cloud backup service to store your data securely.
- Program compatibility: Not all programs may be compatible with the new hard drive or operating system. Check with the software developers or consult the system requirements to ensure that your programs will work properly on the new drive.
- License and activation: Some programs require activation or have license restrictions tied to the hardware. Make sure you have the necessary activation codes and licenses ready to ensure a smooth transition of your programs to the new hard drive.
- Organization and categorization: Take this opportunity to organize your data and programs. Remove any unnecessary files or programs to reduce clutter and optimize storage space. Categorize your data into folders and create a systematic hierarchy for easy access in the future.
- Time and resources: Transferring data and programs can be time-consuming, especially if you have a large amount of data or complex programs. Plan accordingly and allocate enough time and resources to complete the transfer process.
By considering these factors beforehand, you can better prepare yourself for the task of transferring data and programs to a new hard drive. This will ensure a smooth and efficient transition, minimizing the risk of data loss or compatibility issues along the way.
Step 1: Backing Up Your Data
Before transferring your data and programs to a new hard drive, it’s crucial to create a backup of all your important files. This ensures that even if something goes wrong during the transfer process, you’ll still have a copy of your data. Follow these steps to back up your data:
- Identify your important files: Determine which files are important to you and need to be backed up. This includes personal documents, photos, videos, music, and any other files that you cannot afford to lose.
- Choose a backup method: Decide on the backup method that suits your needs. You can use an external hard drive, a USB flash drive, a network-attached storage (NAS) device, or utilize cloud storage services such as Google Drive, Dropbox, or OneDrive.
- Organize your files: Create a logical folder structure to organize your files. This makes it easier to locate specific files during the restore process. Consider categorizing files into folders based on document type, date, or any other meaningful criteria.
- Backup your files: Copy your important files to the chosen backup destination. For external storage devices, simply drag and drop the files to the appropriate location. If using cloud storage, you can upload the files through the respective service’s website or use their desktop sync applications.
- Verify your backup: After the backup process is complete, take a few moments to verify that your files have been successfully backed up. Double-check that all your important files are present and accessible on the backup destination.
- Regularly update your backup: To ensure that your backup is up to date, establish a regular backup schedule. This could be daily, weekly, or monthly, depending on how frequently your files change or the level of importance you assign to your data.
Backing up your data is an essential precautionary step before transferring it to a new hard drive. By following these simple steps and regularly updating your backup, you can confidently proceed with the data transfer process, knowing that your valuable files are securely preserved.
Step 2: Identifying the Programs You Want to Transfer
Once you have backed up your data, the next step in transferring data and programs to a new hard drive is identifying the programs you want to transfer. Follow these steps to determine which programs you need to transfer:
- Create a list: Start by creating a list of the programs you regularly use and rely on. Include both standalone software applications and programs that were pre-installed on your computer.
- Prioritize essential programs: Identify the programs that are essential for your day-to-day tasks or that you cannot easily reinstall. These may include productivity software, specialized applications, or licensed programs that require activation or specific settings.
- Check for installation media: If you have the original installation media (such as CDs, DVDs, or USB drives) for any of the programs on your list, set them aside as they will be needed during the transfer process. If you don’t have the installation media, check if the program can be downloaded from the developer’s website.
- Research program compatibility: Before transferring a program, ensure it is compatible with the new operating system and any hardware requirements of the new hard drive. Visit the developer’s website or consult the program’s documentation to understand if any compatibility issues exist.
- Identify license information: Make a note of the license information for the programs you want to transfer. This includes activation codes, serial numbers, or registration information. This will be necessary for reactivating the programs on the new hard drive.
- Consider alternatives: If you find that some of the programs on your list are outdated, no longer supported, or have compatible alternatives, it may be a good time to explore and consider switching to newer or more optimized programs.
By following these steps and carefully considering your program requirements, you can create a comprehensive identify the programs you want to transfer. This will ensure a smoother transition to your new hard drive and enable you to continue using the essential software applications without any interruptions.
Step 3: Acquiring a New Hard Drive
After backing up your data and identifying the programs you want to transfer, the next step in the process of transferring data and programs to a new hard drive is acquiring the new hard drive. Follow these steps to ensure you acquire the right hard drive for your needs:
- Determine the type and form factor: Determine whether you need an internal or external hard drive. Internal drives are installed inside your computer, while external drives connect externally via USB or other interfaces. Also, consider the form factor, such as 2.5-inch or 3.5-inch drives, depending on the compatibility with your computer’s drive bays.
- Decide on the storage capacity: Assess your storage needs and determine the appropriate storage capacity for your new hard drive. Consider not only the amount of data you currently have but also future storage requirements.
- Consider the transfer speed and technology: Different hard drives offer varying transfer speeds and technologies. Solid State Drives (SSDs) are known for their fast read and write speeds, while traditional Hard Disk Drives (HDDs) provide larger capacities at a lower cost.
- Check compatibility: Ensure that the new hard drive is compatible with your computer’s hardware and operating system. Check specifications and requirements provided by the manufacturer to avoid any compatibility issues.
- Read reviews and compare: Before making a purchase, read reviews from reputable sources and compare different hard drives. Consider factors like reliability, durability, and performance to make an informed decision.
- Purchase the new hard drive: Once you have determined the type, capacity, and compatibility, purchase the new hard drive from a reputable retailer or online store. Ensure you obtain the necessary cables or adapters if required.
By following these steps, you can acquire a new hard drive that meets your storage needs and is compatible with your computer. Choosing the right hard drive is crucial to ensure a successful transfer of your data and programs and provides you with ample storage space for future use.
Step 4: Choosing the Right Transfer Method
Once you have acquired a new hard drive, the next step in transferring data and programs is choosing the right transfer method. There are several options available, and the method you choose will depend on your specific needs and circumstances. Consider the following options:
- Manual Transfer: This method involves manually copying your data and reinstalling your programs to the new hard drive. It is a good option if you have a small amount of data and a limited number of programs. You can use file explorer to copy and paste files from your backup to the new drive, and then reinstall programs using the original installation media or downloaded setup files.
- Using Migration Software: Migration software is designed to simplify the transfer process by automating the copying of your data and programs to the new hard drive. This is a convenient option if you have a large amount of data and numerous programs. Migration software can clone the entire system, including the operating system, settings, and applications, to ensure a seamless transition.
- Cloud-based Transfer: If you have your data stored in the cloud, you can download your files and sync your programs directly from the cloud to the new hard drive. This option requires a stable internet connection and may take some time depending on the size of your data and the speed of your internet connection.
- External Drive Transfer: If you have backed up your data to an external hard drive, you can connect the drive to your new computer and transfer your files and programs directly. This method allows for a swift and efficient transfer, provided the external drive is compatible with your new computer.
Consider your specific requirements and the amount of data and programs you need to transfer when choosing the right method. If in doubt, consult the manufacturer’s documentation or seek assistance from a professional to ensure a smooth transfer process.
Transfer Method 1: Manual Transfer
One of the transfer methods you can use to transfer data and programs to a new hard drive is through manual transfer. This method involves manually copying your data and reinstalling your programs to the new hard drive. While it may require more effort compared to other methods, it is a practical option, especially if you have a small amount of data and a limited number of programs. Follow these steps for a successful manual transfer:
- Copy your data: Using file explorer on your computer, navigate to your backup location or external drive where you have stored your data. Select the files and folders you want to transfer, right-click, and choose “Copy”. Then, navigate to the new hard drive and paste the copied files and folders into the desired location.
- Reinstall your programs: Locate the original installation media or downloaded setup files for your programs. Double-click on the setup file to start the installation process. Follow the prompts and instructions provided by the installation wizard to reinstall the programs on the new hard drive.
- Configure program settings: Once you have reinstalled your programs, you may need to configure settings, preferences, and ensure that any necessary licenses or product keys are entered correctly. This step is crucial, especially for programs that require activation or specific configurations to function properly.
- Verify the transfer: After the transfer is complete, take the time to verify that your data and programs have been successfully transferred. Check that your files are accessible and that your programs are working as expected. Test various functions and features to ensure everything is functioning smoothly.
While manual transfer requires more effort, it provides you with greater control over the data and programs being transferred. It is important to stay organized throughout the process, keeping track of the files you have transferred and the programs you have reinstalled. This way, you can ensure that nothing gets overlooked during the transfer process.
Transfer Method 2: Using Migration Software
Another efficient method to transfer data and programs to a new hard drive is by using migration software. This method is particularly beneficial if you have a large amount of data and numerous programs to transfer. Migration software automates the process, making it convenient and time-saving. Here’s how you can use migration software for a successful transfer:
- Select the appropriate migration software: There are various migration software options available, each with its unique features and capabilities. Research and choose a reputable migration software that is compatible with your operating system and supports the type of hard drive you are transferring to.
- Install and run the migration software: Download and install the chosen migration software on your computer. Launch the software and familiarize yourself with its user interface and instructions.
- Connect your new hard drive: Connect the new hard drive to your computer. Ensure that it is recognized and properly mounted by your operating system before proceeding with the migration process.
- Follow the migration software instructions: The migration software will guide you through the process step by step. Typically, you will be prompted to choose the source drive (existing hard drive) and the destination drive (new hard drive). Confirm the transfer settings and initiate the migration process.
- Wait for the migration to complete: The migration software will begin transferring your data and programs to the new hard drive. Depending on the amount of data being transferred, this process may take some time. Be patient and allow the software to complete the operation.
- Verify the transferred data and programs: Once the migration process is finished, verify that your data and programs have been successfully transferred. Test the functionality of your programs and ensure that your files are accessible. Make any necessary adjustments or configurations, if required.
Migration software simplifies the transfer process, automating the majority of the tasks involved. It ensures a smooth and seamless transfer of your data and programs, along with the operating system and settings. It is important to choose a reliable and trusted migration software to ensure a successful transfer and minimize the risk of data loss or errors during the process.
Step 5: Transferring Data to the New Hard Drive
With your new hard drive ready, it’s time to transfer your data from the backup to the new drive. Follow these steps to ensure a successful transfer of your data:
- Connect the new hard drive: If you’re using an internal hard drive, shut down your computer and open the case. Connect the new hard drive to an available SATA port on your motherboard and power it using the appropriate cables. If you’re using an external hard drive, simply connect it to an available USB port on your computer.
- Power on your computer: After connecting the new hard drive, power on your computer. Ensure that the new hard drive is recognized by your operating system. You may need to check the BIOS settings to ensure the drive is properly detected.
- Copy your data: Open the file explorer or file manager on your computer and navigate to your backup location or external drive where your data is stored. Select the files and folders you want to transfer, right-click, and choose “Copy”. Then, navigate to the new hard drive, right-click in the desired location, and choose “Paste” to begin the data transfer process.
- Monitor the transfer process: Depending on the size and number of files being transferred, the process may take some time. Monitor the transfer progress and ensure that each file is being successfully copied to the new hard drive. Avoid interrupting the transfer process until it is complete.
- Verify the transferred data: Once the transfer is complete, take the time to verify that your data has been successfully transferred to the new hard drive. Access different folders and files to ensure everything is intact and accessible. Open some files to confirm they open without any issues.
By following these steps, you can successfully transfer your data from the backup or external drive to the new hard drive. It’s important to be patient throughout the process and make sure the files are copied accurately. Performing a thorough verification of your transferred data gives you peace of mind and ensures that all your important files are securely stored on the new hard drive.
Step 6: Transferring Programs to the New Hard Drive
Once your data is successfully transferred to the new hard drive, the next step is to transfer your programs. Follow these steps to ensure a smooth transfer of your programs:
- Locate program installation files: Gather the installation files or setup executables for the programs you want to transfer. These files may be in the form of CDs, DVDs, or downloaded setup files from the internet.
- Run the program installation: Double-click on the installation file for each program to run the installation process. Follow the prompts and instructions provided by the installation wizard to install the programs on the new hard drive.
- Choose the installation directory: During the installation process, you’ll be prompted to choose the installation directory for each program. Select the new hard drive as the destination for the installation.
- Configure program settings: After the installation is complete, launch each program and configure the settings and preferences as required. Update any license or activation information, if prompted.
- Verify program functionality: Test each transferred program to ensure that it is working properly. Open different features and functions of the program to ensure everything is functioning as expected.
- Reinstall any missing programs: If you have any programs that were not installed through the traditional installation process, such as portable applications, ensure that you reinstall them on the new hard drive. This ensures that all your programs are accessible from one central location.
By following these steps, you can successfully transfer your programs to the new hard drive. It’s important to have the necessary installation files and ensure the programs are properly installed on the new drive. Verifying the functionality of each program gives you confidence that your programs are ready for use on the new hard drive.
Step 7: Verifying the Transfer
After completing the transfer of your data and programs to the new hard drive, it’s crucial to verify that everything has been successfully transferred and is functioning as expected. Follow these steps to ensure a thorough verification:
- Check your data: Open different folders and files on the new hard drive to make sure that all your important data is present and accessible. Verify that the file sizes and contents match those of your original backup.
- Test your programs: Launch each transferred program and perform various tasks to ensure that they are working smoothly. Verify that all the features and functions are operational and that there are no errors or glitches.
- Access external resources: If your programs rely on external resources such as plugins, libraries, or network connectivity, make sure to test and verify that these resources are accessible and functioning as expected.
- Verify program settings: Check that the settings and preferences for each program have been transferred correctly. Ensure that any customizations or configurations you made on the previous system are still in place on the new hard drive.
- Ensure data integrity: Compare the checksums or use file verification tools to ensure that the data transferred to the new hard drive is complete and has not been corrupted during the transfer process.
- Perform system updates (if necessary): Check for any system updates or patches that need to be installed for your operating system or transferred programs. Install them as required to ensure the latest security patches and bug fixes.
Performing a comprehensive verification guarantees that your data and programs have been successfully transferred to the new hard drive. It allows you to identify and rectify any issues or discrepancies early on, ensuring a seamless transition to the new system. Take the time to thoroughly test and inspect your transferred files and programs for a smooth and error-free experience.
Step 8: Safely Disposing of the Old Hard Drive
Once you have successfully transferred your data and programs to the new hard drive, it’s important to properly dispose of the old hard drive to protect your sensitive information. Follow these steps to ensure the safe disposal of your old hard drive:
- Back up your old hard drive: Before disposing of your old hard drive, make sure to back up any remaining data that you may have missed during the initial backup process. This ensures that you have a copy of any important files or documents.
- Perform a data wipe: To protect your sensitive information, it is recommended to securely erase the data on your old hard drive. Use a reputable data wiping tool that overwrites the entire drive with random data multiple times, making it significantly harder to recover any deleted information.
- Physically destroy the hard drive: For added security, you may choose to physically destroy the old hard drive. This can be done by drilling holes through the drive, using a drive shredder, or taking it to a professional service that specializes in the physical destruction of electronic devices.
- Recycle or dispose of responsibly: Once the hard drive has been rendered unusable, it is important to dispose of it responsibly. Check local regulations or contact a professional electronic waste recycling center to properly recycle or dispose of the old hard drive in an environmentally friendly manner.
- Keep records: It’s a good practice to keep records of the disposal process for your old hard drive. This includes documenting the date of disposal, the method used, and any certifications or records provided by the recycling center.
- Securely manage your backup: Do not forget to securely manage and store your backup. Keep it in a safe place, such as an external hard drive or cloud storage, and ensure that it is password protected or encrypted to prevent unauthorized access.
Safely disposing of your old hard drive is essential to protect your personal and sensitive information from falling into the wrong hands. By following these steps, you can ensure that your old hard drive is properly disposed of and your data remains secure.