
Choosing the Right Hard Drive for Media Storage
When it comes to storing media files, such as photos, videos, and music, having a reliable and spacious hard drive is crucial. With so many options available, it can be overwhelming to choose the right one for your needs. Here are some factors to consider when selecting a hard drive for media storage.
1. Capacity: The first thing to consider is how much storage space you will need. Media files can quickly consume large amounts of disk space, so it’s essential to choose a hard drive with ample capacity. Look for drives with capacities of 1 terabyte (TB) or more to ensure you have enough room for your media collection.
2. Speed: Media files, especially high-definition videos, require fast read and write speeds to ensure smooth playback and editing. Look for hard drives with higher rotational speeds, such as 7200 revolutions per minute (RPM), to ensure quick access to your media files.
3. Interface: The interface of the hard drive determines how it connects to your computer. The most common interfaces for external hard drives are USB, Thunderbolt, and eSATA. Choose an interface that is compatible with your computer and provides fast data transfer speeds.
4. Reliability: It is important to choose a hard drive from a reliable manufacturer known for producing high-quality storage devices. Research different brands and read customer reviews to ensure you select a reliable drive that will protect your valuable media files.
5. Portability: If you plan to use your hard drive to transfer media between different devices or locations, consider its portability. Look for compact, lightweight drives that are easy to carry and have rugged build quality to withstand travel and transportation.
6. Backup Options: Consider hard drives that come with built-in backup software or support automatic backup features. This will help you protect your media files from accidental loss or damage.
7. Budget: Determine your budget before making a decision. Hard drive prices can vary greatly based on capacity, speed, and brand. Set a budget range and look for the best-value options within that range.
By considering these factors, you can choose a hard drive that meets your media storage needs effectively. Remember to prioritize capacity, speed, reliability, and compatibility, and you’ll be on your way to having a secure and convenient storage solution for your media files.
Preparing Your Second Hard Drive for Use
Once you’ve selected the right hard drive for your media storage needs, it’s time to prepare it for use. Follow these steps to get your second hard drive up and running:
1. Backup Your Data: Before you begin, it’s always a good idea to back up any existing data on your second hard drive, especially if it already contains files. This will ensure that you don’t lose any important data during the preparation process.
2. Check Compatibility: Ensure that your computer or any device you plan to connect the second hard drive to is compatible. Check for compatibility by reviewing the specifications of both the hard drive and the device’s interface, such as USB or SATA.
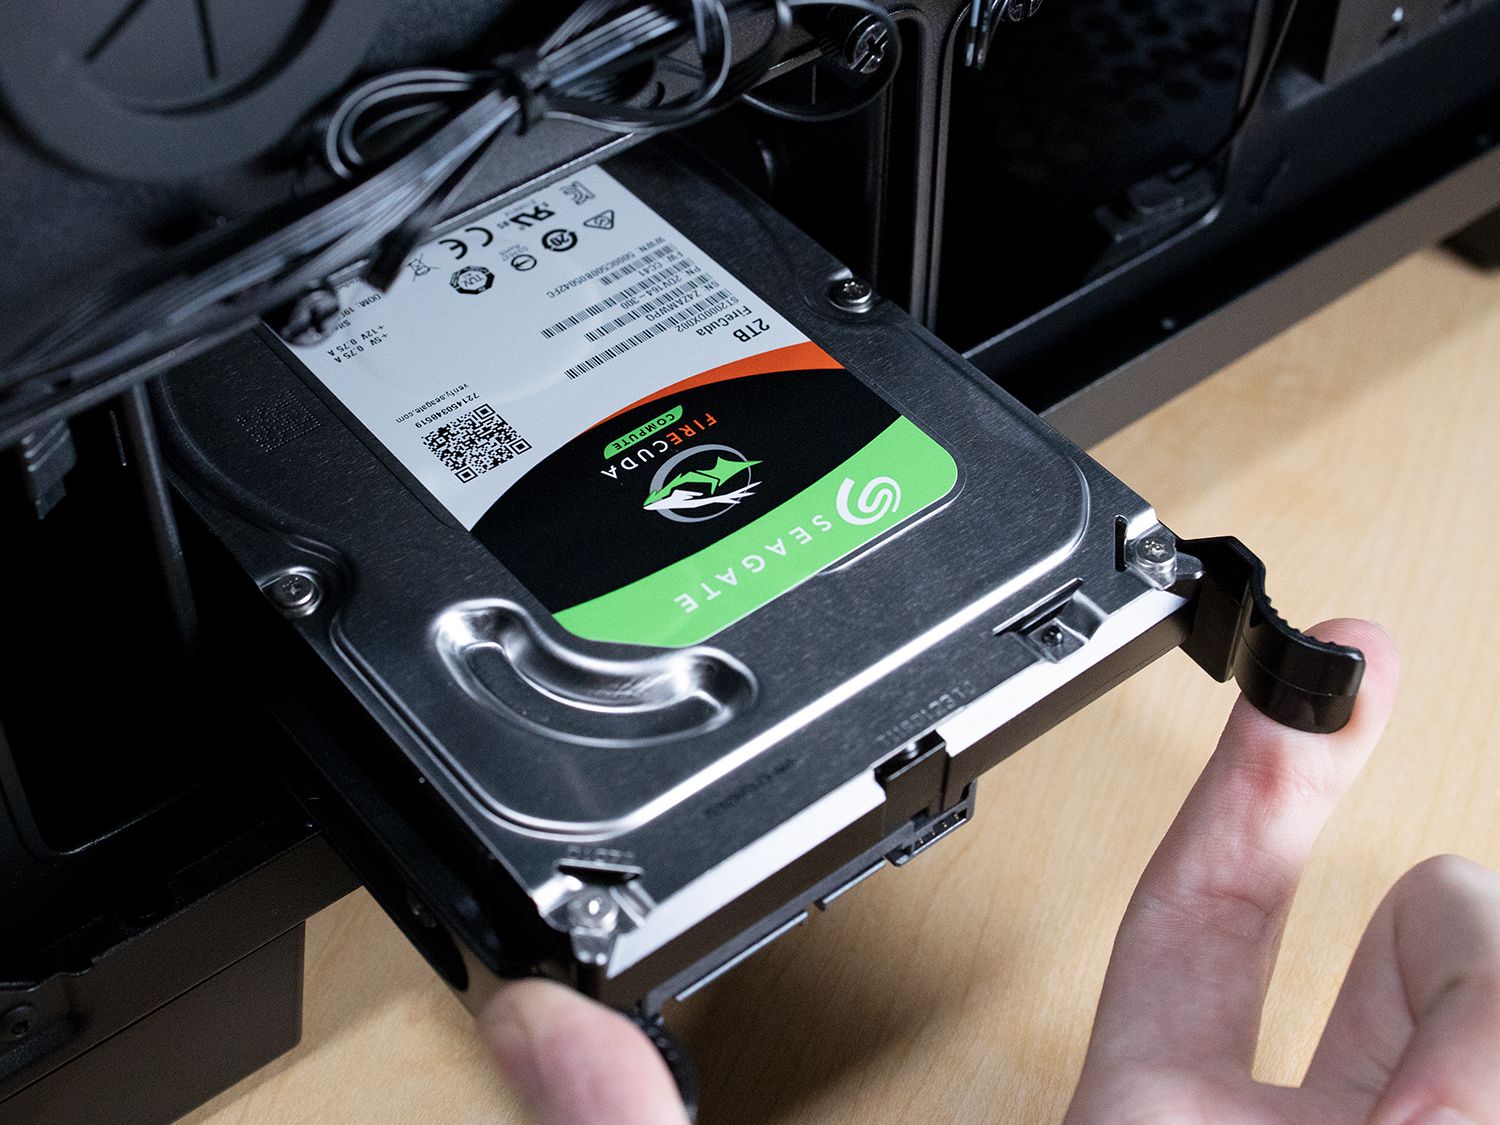
3. Connect the Hard Drive: Depending on the type of hard drive, you will need to connect it to your computer using the appropriate cables. For external hard drives, use a USB or Thunderbolt cable. For internal hard drives, connect the SATA cable to the appropriate port on your motherboard. Don’t forget to connect the power cable as well.
4. Power On the Hard Drive: Once the connections are secure, power on your second hard drive. It will typically start spinning, and you should see a light indicator showing that it is receiving power.
5. Initialize the Drive: If your second hard drive is new or has been formatted previously, you will need to initialize it. To do this, right-click on the “This PC” or “My Computer” icon on your desktop or in the File Explorer, and select “Manage.” In the Computer Management window, go to “Disk Management” and locate your new hard drive. Right-click on it and select “Initialize Disk,” then follow the prompts to complete the process.
6. Format the Drive: After initialization, the next step is to format your second hard drive. Right-click on the unallocated space of the drive, select “New Simple Volume,” and follow the on-screen instructions to format the drive with the desired file system (usually NTFS) and assign it a drive letter.
7. Test the Drive: After formatting, it’s a good idea to run a quick test to ensure that your second hard drive is functioning properly. Copy a few files onto the drive, access them, and see if the transfer and playback are smooth.
8. Label Your Drive: To avoid confusion, give your second hard drive a recognizable label or name. This will make it easier to identify when transferring or accessing media files.
9. Set Up Regular Backups: To protect your valuable media files from loss or damage, establish a regular backup routine. This can be done manually by copying the files to a separate storage device or automatically using backup software.
By following these steps, your second hard drive will be ready to store and organize your media files efficiently. Remember to always handle your hard drive with care and avoid disconnecting it while it is in use to prevent data corruption or loss.
Connecting Your Second Hard Drive to Your Computer
Connecting your second hard drive to your computer is a straightforward process. Whether you’re installing an internal hard drive or connecting an external one, here’s how you can get it up and running:
1. Internal Hard Drive:
If you’re installing an internal hard drive, follow these steps:
- Shut down your computer and unplug the power cable.
- Open your computer case by removing the screws or latches that hold it together.
- Find an empty drive bay in your computer case where you can install the hard drive.
- Connect the SATA cable to the SATA port on the motherboard. Make sure to align the connectors properly.
- Connect the other end of the SATA cable to the hard drive.
- Connect the power cable from the power supply unit to the hard drive.
- Close your computer case and secure it with screws or latches.
- Plug in the power cable and turn on your computer.
- Once your computer is booted up, the operating system should recognize the new hard drive. You may need to format and assign a drive letter to the new drive in the Disk Management utility (Windows) or Disk Utility (macOS).
2. External Hard Drive:
If you’re connecting an external hard drive, follow these steps:
- Ensure that your computer is powered off.
- Connect one end of the USB or Thunderbolt cable to the hard drive.
- Connect the other end of the cable to an available USB or Thunderbolt port on your computer.
- Power on your external hard drive.
- Once your computer is booted up, it should detect the external hard drive and install the necessary drivers.
- You can find the newly connected drive in the File Explorer (Windows) or Finder (macOS).
Note: If your external hard drive requires an external power source, make sure to connect it to a power outlet before attempting to connect it to your computer.
Whether it’s an internal or external hard drive, always handle them with care. Avoid dropping or subjecting them to physical shocks that can damage the drive or cause data loss. Additionally, make sure to follow the manufacturer’s instructions for any specific requirements or recommendations related to connecting the hard drive.
Once connected, your second hard drive is ready to be used for storing and accessing your media files. Now you can transfer your media collection and enjoy the benefits of additional storage space.
Formatting Your Second Hard Drive
Formatting your second hard drive is an essential step to prepare it for use. Whether you’re setting up a new hard drive or reformatting an existing one, formatting ensures compatibility with your operating system and file system. Here’s how you can format your second hard drive:
1. Back Up Your Data:
Before formatting your second hard drive, make sure to back up any important data stored on it. Formatting will erase all existing data on the drive, so it’s crucial to create a backup to prevent permanent data loss.
2. Choose a File System:
Next, you need to choose a file system for your second hard drive. The file system determines how the drive stores and organizes data. The most common file systems for Windows are NTFS, exFAT, and FAT32, while macOS primarily uses APFS or HFS+. Research the advantages and limitations of each file system and select the one that best suits your needs.
3. Formatting on Windows:
If you’re using Windows, follow these steps to format your second hard drive:
- Open the File Explorer by pressing the Windows key + E.
- Locate your second hard drive in the list of drives. Make sure to select the correct drive to avoid formatting the wrong one.
- Right-click on the drive and select “Format” from the context menu.
- Choose the desired file system from the drop-down menu.
- Customize the volume label, allocation unit size (usually leave it as default), and format options, if necessary.
- Click on “Start” to begin the formatting process.
- Wait for the process to complete. Once finished, you’ll have a formatted second hard drive ready to use.
4. Formatting on macOS:
If you’re using macOS, follow these steps to format your second hard drive:
- Open the Finder by clicking on the blue smiley face icon in your dock.
- Go to the “Applications” folder and open “Utilities.”
- Launch the “Disk Utility” application.
- In the Disk Utility sidebar, select your second hard drive.
- Click on the “Erase” tab at the top of the Disk Utility window.
- Choose the desired file system from the “Format” dropdown menu.
- Customize the drive’s name, scheme, and format options, if necessary.
- Click on “Erase” to start the formatting process.
- Wait for the process to complete. Once finished, your second hard drive will be formatted and ready to use.
Note: Formatting will erase all the data on the second hard drive. Make sure you’ve created a backup and have selected the correct drive before proceeding with the formatting process.
Formatting your second hard drive is a crucial step to ensure compatibility and optimize its performance. Once formatted, you can begin transferring your media files and enjoying the additional storage space.
Transferring Media to Your Second Hard Drive
Now that your second hard drive is formatted and ready for use, it’s time to start transferring your media files to it. Whether you’re moving photos, videos, music, or other types of media, here are some methods you can use:
1. Manual Drag and Drop:
One of the simplest ways to transfer media files is by manually dragging and dropping them from your computer’s storage to your second hard drive. Here’s how:
- Open the File Explorer (Windows) or Finder (macOS).
- Navigate to the location where your media files are stored.
- Select the files or folders you want to transfer.
- Drag and drop them onto the second hard drive’s folder or directory.
- Wait for the transfer to complete. The speed will depend on the size of the files and the transfer rate of the hard drive.
2. Copy and Paste:
Similar to manual drag and drop, you can also use the copy and paste method to transfer media files. Here’s how:
- Select the media files or folders you want to transfer.
- Right-click on the selection and choose “Copy” from the context menu.
- Navigate to the location on the second hard drive where you want to transfer the files.
- Right-click and choose “Paste” to transfer the files.
- Wait for the transfer to complete.
3. Using Backup and Sync Software:
If you have a large media collection or want a more automated approach, you can use backup and sync software. These programs allow you to synchronize specific folders or entire drives between your computer and the second hard drive. Some popular options include Google Drive, Dropbox, or Microsoft OneDrive.
After installing the backup and sync software, follow the program’s instructions to set up a sync connection between your computer and the second hard drive. You can customize the sync settings to transfer only specific folders or file types.
4. Importing from Media Management Software:
If you use media management software like iTunes or Adobe Lightroom, you can use their import features to transfer media files to your second hard drive. These tools often provide organizational features to help you manage and arrange your media library.
Open your media management software and locate the importing or library management options. Specify the second hard drive as the destination for your imported files, and follow the software’s prompts to complete the transfer.
Whichever method you choose, ensure that you have enough free space on your second hard drive to accommodate the transferred media files. Regularly check and manage your media library to keep it organized and optimize the use of your storage space.
Transferring your media files to your second hard drive not only frees up space on your computer but also provides a dedicated and efficient storage solution for your growing media collection.
Organizing Media on Your Second Hard Drive
Now that your media files are transferred to your second hard drive, it’s essential to organize them effectively for easy access and management. Keeping your media organized will save you time and ensure a smooth browsing experience. Here are some tips to help you organize your media on your second hard drive:
1. Create Folders:
Start by creating folders to categorize your media files. For example, you can create separate folders for photos, videos, music, or other types of media. Within each main folder, further divide them into subfolders based on themes, dates, or any other relevant criteria.
2. Use Descriptive Naming:
Give your files and folders descriptive names to make them easily recognizable. Use clear and concise names that reflect the content or category of the media files. For example, if you’re organizing your photo collection, name the files based on the event, location, or subject to help you quickly locate them later.
3. Utilize Metadata:
Take advantage of metadata, such as tags, keywords, and descriptions, to enhance the organization of your media files. Most media management software and operating systems allow you to add metadata to your files for easy searching and filtering. For example, you can add tags to your music files based on genre or artist, or add keywords to your photo files based on location or people.
4. Date-Based Organization:
If organizing your media by date makes sense for your collection, consider using a date-based folder structure. Create folders for each year, and within each year folder, create subfolders for each month or specific date. This method can be particularly useful for organizing photos or videos taken at different times.
5. Follow a Consistent Structure:
To maintain consistency and ease of navigation, establish a standardized structure for organizing your media files. Consistently following a structure across your folders and subfolders will make it intuitive to locate specific files or types of media.
6. Delete Duplicates and Unwanted Files:
Regularly review your media files to eliminate duplicate or unwanted files. Duplicates not only consume valuable storage space but can also lead to confusion and clutter. Use duplicate file finders or manual inspection to identify and remove any unnecessary duplicates.
7. Regularly Update and Maintain:
Organizing your media files is an ongoing process. As you add new media or make changes to your collection, ensure that you update and maintain the organization of your files accordingly. Regularly review and reorganize your folders and files to keep everything organized and accessible.
8. Back Up Your Organized Files:
Don’t forget to back up your organized media files regularly. Create backups of your second hard drive’s content to ensure the safety and preservation of your media collection.
By implementing these organization strategies, you’ll be able to easily locate and enjoy your media files on your second hard drive. The time and effort spent organizing your media will be well worth it in the long run.
Accessing Media from Your Second Hard Drive
Now that your media files are organized and stored on your second hard drive, it’s essential to know how to access them efficiently. Here are some methods you can use to access your media files:
1. File Explorer or Finder:
One of the most common ways to access your media files is through the File Explorer on Windows or Finder on macOS. Follow these steps to access your media:
- Open the File Explorer (Windows) or Finder (macOS).
- Locate the drive letter or name associated with your second hard drive.
- Click on the drive to access its contents.
- Navigate through the folder structure to find the specific media files you want to access.
- Double-click on the file to open it with the default application associated with its file type.
2. Media Management Software:
If you have media management software installed, such as iTunes or VLC Media Player, you can use them to access and play your media files. Open the software and import your media library from your second hard drive. From there, you can browse, search, and play your media files directly within the software interface.
3. Media Players:
If you prefer using dedicated media player applications, such as Windows Media Player or VLC, you can access your media files through these players. Open the media player and use the playback controls or the library feature to browse and play your media files stored on your second hard drive.
4. Streaming Devices or Smart TVs:
If you want to access your media files on a different device, such as a streaming device or smart TV, you can connect your second hard drive to the device using USB or other compatible connections. Use the device’s built-in file explorer or media playback app to browse and play the media files stored on the hard drive.
5. Cloud Storage Services:
If you’ve uploaded your media files to a cloud storage service, such as Google Drive or Dropbox, you can access them from any device with internet access. Simply log in to your cloud storage account, navigate to the folder where your media files are stored, and download or stream them directly to your device.
6. Media Server Applications:
If you have a media server application, such as Plex or Kodi, set up on your computer or network, you can use it to access your media files remotely. Connect to your media server using a web browser or the corresponding mobile app, and you’ll be able to browse and stream your media files from your second hard drive.
With these methods, you can easily access and enjoy your media files stored on your second hard drive. Choose the method that suits your preferences and devices, and start enjoying your favorite movies, music, photos, and more.
Backing Up Your Media on Your Second Hard Drive
After investing time and effort into organizing your media files on your second hard drive, it’s crucial to implement a backup strategy to protect your valuable collection. Backing up your media ensures that you have a secure copy in case of data loss due to hardware failure, accidental deletion, or other unforeseen circumstances. Here are some methods to consider for backing up your media:
1. External Hard Drive:
One of the simplest and most cost-effective backup solutions is to use an external hard drive. Connect a separate external hard drive to your computer and regularly copy your entire media collection to it. This way, you’ll have a duplicate copy stored on a separate physical device.
2. Network Attached Storage (NAS):
If you have multiple devices on a network, consider setting up a Network Attached Storage (NAS) device. A NAS device is a dedicated storage solution that allows you to store and access your media files from various devices. NAS devices typically offer built-in backup features and can be configured to automatically synchronize your media files from your second hard drive to redundant storage drives or cloud storage.
3. Cloud Storage Services:
Cloud storage services, such as Google Drive, Dropbox, or OneDrive, provide convenient and secure ways to back up your media files. Upload your media files to the cloud storage service and enable automatic sync or scheduled backups. With cloud storage, you can access your media files from anywhere and enjoy the added peace of mind that your files are protected against physical damage or theft.
4. Incremental Backup Software:
Consider using incremental backup software that allows you to back up only the changes made to your media files since the last backup. This method helps save storage space and reduces backup time. Set up a regular backup schedule to keep your media files continuously protected.
5. Versioning and Snapshot Utilities:
Versioning and snapshot utilities track changes made to your media files over time and allow you to revert to previous versions if needed. This method ensures that you can retrieve specific versions of your files that were backed up at different points in time.
6. Off-Site Backup:
In addition to local backups, consider implementing an off-site backup strategy. This involves storing a copy of your media files in a different physical location, such as a trusted friend’s house or a secure data center. Off-site backups provide an additional layer of protection against natural disasters, theft, or other localized incidents.
7. Test and Restore Backups:
Regularly test and restore your backups to ensure they are working correctly. Verify that your backed-up media files are accessible and intact. Periodically check the integrity of your backups, especially if you’ve made any significant changes to your media collection or backup procedures.
Remember, having a backup strategy is essential for preserving your media collection. Choose a backup method that suits your needs and ensure that you consistently maintain and update your backups to safeguard your hard work and cherished media files.
Optimizing Your Second Hard Drive for Media Playback
To ensure smooth and reliable media playback from your second hard drive, it’s important to optimize its performance. By following these optimization techniques, you can enhance playback quality and minimize any potential issues. Here are some tips to optimize your second hard drive for media playback:
1. Defragment Your Hard Drive:
If you are using a traditional spinning hard drive (HDD), regular defragmentation is crucial. Over time, files can become fragmented, which can slow down access times and affect media playback. Use built-in tools like Disk Defragmenter (Windows) or Disk Utility (macOS) to defragment your hard drive and optimize its performance.
2. Keep Your Hard Drive Healthy:
Maintaining the health of your hard drive is essential for smooth media playback. Regularly check your hard drive’s health using built-in diagnostic tools or third-party software. Look for any warning signs of potential issues, such as excessive read/write errors or overheating, and address them promptly.
3. Disable Background Processes:
To allocate more resources to media playback, close unnecessary applications and disable any background processes or services that might consume system resources. This will help ensure that your media player has sufficient resources to handle playback smoothly.
4. Adjust Power and Sleep Settings:
To avoid interruptions during media playback, configure your power and sleep settings to prevent your hard drive or computer from entering idle or sleep modes. Adjust these settings so that your system remains active and doesn’t cause interruptions or delays during media playback.
5. Ensure Sufficient Buffering:
Buffering is essential for media playback, especially when dealing with large or high-quality files. If you experience buffering issues, consider increasing the buffer size or the amount of preloading time in your media player’s settings. This will help ensure a continuous and uninterrupted playback experience.
6. Use Reliable Media Players:
Choose a reputable media player that is known for its compatibility, stability, and efficient resource utilization. Popular options include VLC Media Player, Windows Media Player, or QuickTime Player. Experiment with different media players to find the one that suits your needs and provides the best playback experience for your media files.
7. Check File Formats:
Ensure that your media files are in supported formats for your chosen media player. Some media players have limitations or specific requirements for file formats, codecs, or file extensions. Convert or re-encode your media files if necessary to make them compatible with your media player and optimize playback performance.
8. Regularly Update Drivers and Software:
Keep your operating system, media player, and graphics card drivers up to date. Updated software and drivers often include bug fixes, performance improvements, and enhanced compatibility, which can contribute to better playback performance on your second hard drive.
By implementing these optimization techniques, you can ensure a smooth and high-quality media playback experience from your second hard drive. Experiment with different settings and configurations to find the setup that works best for your specific hardware, media files, and personal preferences.
Troubleshooting Common Issues with Your Second Hard Drive
While using your second hard drive for media storage, you may encounter common issues that can disrupt your media playback or access. Understanding and troubleshooting these issues can help you resolve them effectively. Here are some common problems you may encounter and their potential solutions:
1. Slow Performance:
If you experience slow performance when accessing or playing media from your second hard drive, consider the following solutions:
- Ensure that your hard drive is not nearly full. A near-full hard drive can lead to slower read/write speeds.
- Check for any background processes or applications that may be consuming system resources and close unnecessary ones.
- Check your hard drive’s health using diagnostic tools and verify if there are any issues, such as bad sectors or drive errors.
- If using a traditional spinning hard drive (HDD), defragment your drive to optimize file placement and improve access times.
- If your hard drive is old or showing signs of failure, consider replacing it with a new one.
2. File Corruption or Inaccessibility:
If you encounter corrupted files or are unable to access certain media files on your second hard drive, try the following troubleshooting steps:
- Ensure that the file format of the media file is supported by your media player or software.
- Check if the file has been accidentally moved, renamed, or deleted. Verify its location and file name.
- Scan your hard drive for errors using built-in disk repair utilities or third-party software.
- If the media files are still inaccessible or corrupted, try using file recovery software to retrieve them from a backup or the original source.
- Consider a disk repair or data recovery service if the files are crucial and cannot be recovered through software.
3. Frequent Disconnections:
If your second hard drive frequently disconnects or disappears from your computer, try the following fixes:
- Check the physical connections of the hard drive and ensure they are secure. Try using a different USB or SATA cable.
- Make sure your power supply is providing adequate power to the hard drive. Consider using a powered USB hub or a dedicated power source for external hard drives.
- Ensure that your computer’s USB or SATA port is functioning correctly. Try connecting the hard drive to a different port.
- Check for any conflicting software or drivers that may be causing the disconnection issue. Update or reinstall the necessary drivers if required.
- If the issue persists, consider seeking professional help or replacing the hard drive.
4. Unresponsive Drive:
If your second hard drive becomes unresponsive or does not appear in your system, try these solutions:
- Restart your computer and reconnect the hard drive. Sometimes, a simple reboot can resolve the issue.
- Check device manager or disk utility to see if the drive is detected but needs to be manually mounted or initialized.
- Test your second hard drive on a different computer or USB port to check if the issue is specific to your system.
- Use data recovery software or professional services to retrieve your data if the drive remains unresponsive.
Remember to safely eject your hard drive after use and avoid disconnecting it while in use to prevent data corruption or loss. If troubleshooting steps do not resolve the issue, it may be necessary to consult technical support or replace the hard drive.
Frequently Asked Questions about Using a Second Hard Drive for Media Storage
1. Can I use any type of hard drive for media storage?
Yes, you can use either internal or external hard drives for media storage. Internal hard drives are installed inside your computer, while external hard drives can be connected via USB or other interfaces.
2. How much storage capacity do I need for my media files?
The required storage capacity depends on the size and quantity of your media files. High-definition videos and RAW photos can take up several gigabytes each, while music files are generally smaller. Assess your media collection’s size and consider future growth to determine the appropriate capacity. A minimum of 1TB is recommended for most media storage needs.
3. Can I transfer my media files from one hard drive to another?
Yes, you can transfer your media files from one hard drive to another by using a computer as an intermediary. Simply connect both hard drives to the computer and use file transfer methods like drag and drop or copy and paste to move the files between the drives.
4. How can I organize my media files on the second hard drive efficiently?
Organize your media files by creating separate folders for different types of media (e.g., photos, videos, music) and further divide them based on themes, dates, or other relevant criteria. Utilize descriptive naming and consider using metadata to enhance searchability.
5. Can I access my media files stored on the second hard drive from multiple devices?
Yes, you can access your media files from multiple devices as long as they have the necessary hardware interfaces or network connectivity. Connect external hard drives to different devices, use file sharing protocols like SMB or NFS, or utilize cloud storage services to access your media files across devices.
6. How do I ensure the security of my media files on the second hard drive?
To ensure the security of your media files, consider implementing a backup strategy by regularly creating copies of your files on separate storage devices or cloud storage services. Additionally, protect your hard drive with strong passwords and consider encrypting sensitive files to prevent unauthorized access.
7. What should I do if the second hard drive fails?
If your second hard drive fails, immediately stop using it to prevent further damage. Consult a professional data recovery service to retrieve your files if necessary. Regularly backing up your media files can minimize the impact of hard drive failures.
8. Can I upgrade the storage capacity of my second hard drive in the future?
Yes, you can upgrade the storage capacity of your second hard drive by replacing it with a higher-capacity drive. Ensure compatibility with your computer or device and transfer your media files from the old hard drive to the new one before replacing it.
9. Do I need to maintain a backup of my media files stored on the second hard drive?
Yes, it is highly recommended to maintain a backup of your media files on a separate storage device or in the cloud. This will protect your files from hardware failures, accidental deletions, or other unforeseen events.
10. Can I reformat the second hard drive if I want to use it for something other than media storage?
Yes, you can reformat the second hard drive if you want to repurpose it for something other than media storage. However, be aware that reformatting will erase all data on the drive, so ensure that you have backups of any important files before proceeding.
Remember, if you have specific questions or concerns about using a second hard drive for media storage, it’s always a good idea to consult the manufacturer’s documentation or seek guidance from technical experts.