
Assessing the Damage
When your iPhone speaker comes into contact with water, it's crucial to assess the extent of the damage before taking any corrective measures. Water damage can vary from minor moisture accumulation to complete submersion, and understanding the severity of the situation will guide your approach to resolving the issue.
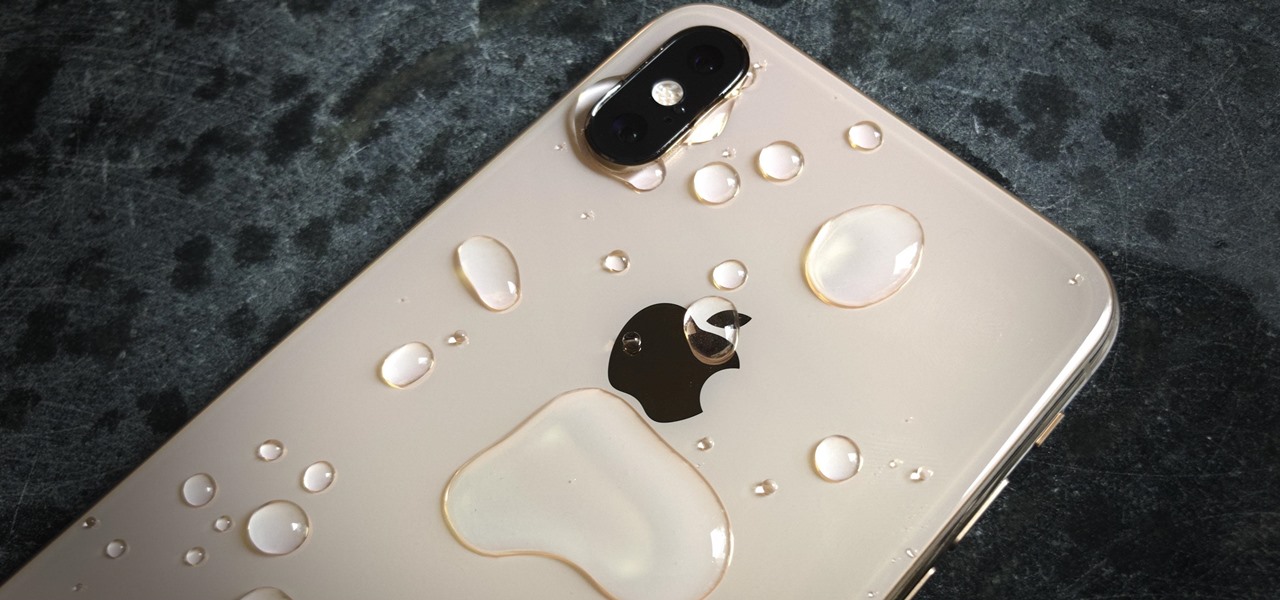
First, visually inspect the iPhone for any signs of water entry. Check for water droplets under the screen, in the charging port, and around the speaker grills. If the phone has been submerged, look for water in the camera lens or under the display. These visual cues can provide valuable insights into the level of exposure.
Next, consider the duration of exposure to water. If the phone was only briefly splashed or exposed to light moisture, the damage may be minimal. However, if the device was submerged or exposed to water for an extended period, the risk of internal damage is significantly higher.
Another crucial factor to consider is the type of water the iPhone came into contact with. Freshwater is less corrosive than saltwater or other liquids, such as soda or coffee. The presence of contaminants in the water can exacerbate the damage and increase the urgency of the remediation process.
Furthermore, take note of any immediate effects on the iPhone's functionality. If the speaker produces distorted sound, no sound at all, or if the phone exhibits any irregular behavior, these are clear indicators of water damage.
It's important to exercise caution when assessing the damage, as attempting to power on the iPhone to test its functionality can potentially cause further harm if water has infiltrated the internal components.
By thoroughly evaluating the visual cues, exposure duration, type of water, and immediate effects on the iPhone, you can gain a comprehensive understanding of the water damage, enabling you to proceed with the appropriate steps to mitigate the issue effectively. Understanding the extent of the damage is the first crucial step in restoring your iPhone's speaker functionality.
Step 1: Power Off the iPhone
Upon discovering water damage to your iPhone speaker, the immediate priority is to power off the device to prevent potential electrical shorts and further damage. Taking swift action can mitigate the risk of permanent harm to the internal components.
To power off the iPhone, press and hold the side button along with either volume button until the “slide to power off” slider appears on the screen. Slide the slider to power off the device completely. If the screen is unresponsive, press and hold the side button and the volume down button simultaneously until the slider appears.
It is crucial to avoid pressing any other buttons or attempting to charge the iPhone, as these actions can exacerbate the damage and compromise the device’s functionality. By promptly powering off the iPhone, you can minimize the potential for electrical issues and corrosion within the speaker and other internal components.
After powering off the device, resist the temptation to power it back on to check for functionality. While it may be concerning to leave the iPhone powered off, doing so is essential to prevent electrical currents from interacting with the water and causing further damage.
By promptly powering off the iPhone and refraining from attempting to use or charge the device, you are taking a crucial first step in mitigating the impact of water damage on the speaker and safeguarding the overall functionality of your iPhone.
Step 2: Drying the Exterior
After powering off the iPhone, the next step in addressing water damage to the speaker involves drying the exterior of the device. Swift and thorough drying can help prevent moisture from seeping deeper into the internal components, potentially minimizing the extent of the damage.
Begin by carefully wiping the exterior of the iPhone with a soft, absorbent cloth to remove any visible moisture. Pay close attention to the speaker grills, charging port, and other openings where water may have entered. Gently shake the device to dislodge any excess water that may be trapped in the crevices.
It’s essential to avoid using heat sources such as hair dryers or placing the iPhone in direct sunlight, as excessive heat can damage the device’s components. Instead, focus on gently blotting and wiping the exterior to remove surface moisture without applying excessive pressure.
For stubborn moisture in hard-to-reach areas, consider using a cotton swab or a soft, lint-free cloth to carefully absorb the water. Take care to avoid pushing the moisture further into the device, as this can exacerbate the damage.
Additionally, ensure that the SIM card tray is removed to assess and dry any moisture that may have entered the compartment. This often-overlooked area can harbor water and contribute to ongoing damage if not addressed promptly.
By diligently drying the exterior of the iPhone, you can minimize the potential for further moisture infiltration and help create a conducive environment for the subsequent drying methods aimed at restoring the functionality of the speaker.
Step 3: Using Rice or Silica Gel
After drying the exterior of the iPhone, the next step involves employing desiccants such as rice or silica gel to aid in the drying process. Desiccants are effective at absorbing moisture and can help extract residual water from the internal components of the device, including the speaker.
To utilize rice as a desiccant, place the iPhone in a sealable plastic bag or container filled with uncooked rice. Ensure that the device is fully submerged in the rice and seal the container to create a closed environment. The rice will gradually draw out the moisture from the iPhone over time.
Alternatively, silica gel packets, often found in packaging for electronic devices and various products, can be used to absorb moisture from the iPhone. Place the iPhone in a sealable bag along with several silica gel packets, ensuring that the device is fully surrounded by the packets. Seal the bag securely to create a moisture-absorbing environment.
It’s important to leave the iPhone in the rice or with the silica gel packets for at least 24 to 48 hours to allow for thorough moisture absorption. During this time, avoid the temptation to power on the device or check its functionality, as this can disrupt the drying process and potentially cause further damage.
Position the container or bag in a dry and warm environment, but avoid exposing it to direct heat sources or sunlight. The goal is to create a controlled environment that encourages the extraction of moisture without subjecting the device to excessive heat or potential damage.
By employing rice or silica gel as desiccants, you can facilitate the extraction of residual moisture from the internal components of the iPhone, including the speaker, thereby contributing to the restoration of its functionality.
Step 4: Using a Vacuum
Utilizing a vacuum can be an effective method for removing residual moisture from the internal components of the iPhone, including the speaker, following water damage. The suction power of a vacuum can help extract trapped moisture and accelerate the drying process.
To begin, ensure that the iPhone is powered off and remove any protective cases or coverings. Next, use a small nozzle attachment on a low-powered vacuum cleaner to gently draw air through the speaker grills and other openings of the device. The aim is to create a suction force that encourages the removal of moisture without causing damage to the internal components.
Exercise caution to maintain a gentle and consistent airflow, avoiding excessive suction that could potentially dislodge delicate components within the device. It’s crucial to approach this method with patience and precision to prevent inadvertently causing harm to the iPhone.
While using the vacuum, pay particular attention to the speaker grills and other openings where water may have entered. Gently maneuver the nozzle to ensure that airflow reaches these areas effectively, aiding in the extraction of trapped moisture.
It’s important to note that this method should be approached with care, and the vacuum cleaner should be set to a low power setting to avoid exerting excessive force on the iPhone’s internal components. Additionally, avoid direct contact between the vacuum nozzle and the device, as this can potentially cause damage.
By utilizing a vacuum to extract residual moisture from the internal components, including the speaker, you can contribute to the comprehensive drying process and potentially expedite the restoration of the iPhone’s functionality following water damage.
Step 5: Using a Hair Dryer on Low Heat
Employing a hair dryer on a low heat setting can aid in the drying process following water damage to the iPhone speaker. The gentle warmth can help evaporate residual moisture from the internal components, contributing to the restoration of functionality.
Before using the hair dryer, ensure that the iPhone is powered off and remove any protective cases or coverings. Set the hair dryer to the lowest heat setting and maintain a moderate distance of at least 6 to 8 inches from the device to prevent overheating or potential damage.
With the low heat setting and a safe distance, carefully direct the airflow over the speaker grills and other openings of the iPhone. Move the hair dryer continuously to ensure even distribution of warmth without focusing on a single area for an extended period.
It’s essential to exercise caution and avoid using high heat settings, as excessive heat can damage the internal components of the iPhone. Additionally, prolonged exposure to heat should be avoided to prevent any adverse effects on the device.
While using the hair dryer, periodically pause to allow the iPhone to cool down, preventing the accumulation of heat within the device. This intermittent approach can help safeguard the iPhone from potential heat-related damage.
It’s important to note that the hair dryer method should be utilized with care and moderation, and it’s crucial to avoid overheating the device or subjecting it to prolonged exposure to warmth. By employing a hair dryer on a low heat setting, you can contribute to the evaporation of residual moisture from the internal components, potentially aiding in the restoration of the iPhone’s speaker functionality following water damage.
Step 6: Testing the Speaker
After allowing the iPhone to undergo the drying process, it’s essential to carefully test the speaker to assess its functionality following water damage. This step is crucial in determining the effectiveness of the drying methods and identifying any residual issues that may require further attention.
Begin by powering on the iPhone and navigating to a media application or playing a sound file to test the speaker’s output. Listen attentively for any distortions, crackling, or irregularities in the sound, as these may indicate lingering moisture or damage within the speaker.
If the speaker produces clear and undistorted sound, it is a positive indication that the drying methods have been effective, and the functionality of the speaker has been restored. However, it’s advisable to continue monitoring the speaker’s performance over the next few days to ensure sustained functionality.
In the event that the speaker exhibits irregularities or does not produce sound at all, it may indicate residual moisture or damage that requires further attention. In such cases, it is advisable to repeat the drying methods, including desiccant usage and gentle warming, to address any remaining moisture within the speaker.
If issues persist after reapplying the drying methods, it may be necessary to seek professional assistance to assess and address the underlying causes of the speaker malfunction. Professional technicians can conduct a thorough inspection and implement advanced drying techniques to restore the speaker’s functionality.
It’s important to approach the testing process with patience and attentiveness, carefully monitoring the speaker’s performance and promptly addressing any irregularities that may arise. By diligently testing the speaker, you can ascertain the effectiveness of the drying methods and take appropriate steps to address any lingering issues following water damage.
Step 7: Seeking Professional Help
When dealing with water damage to an iPhone speaker, seeking professional assistance may become necessary, especially if the speaker fails to function optimally despite employing various drying methods. Professional technicians possess the expertise and specialized equipment to address complex water damage issues effectively.
If the speaker continues to exhibit irregularities or fails to produce sound following the application of drying methods, it is advisable to seek assistance from a certified technician or an authorized service provider. Attempting to disassemble the device or implement advanced repairs without the requisite expertise can potentially exacerbate the damage.
Professional technicians can conduct a comprehensive assessment of the iPhone, including the speaker and internal components, to identify the extent of the water damage. They have access to specialized tools and drying equipment designed to extract residual moisture without causing further harm to the device.
Additionally, professional service providers can offer insights into the best course of action based on the specific circumstances of the water damage. They may recommend advanced drying techniques, component replacements, or other targeted solutions to restore the functionality of the iPhone speaker.
It’s crucial to engage the services of reputable professionals with experience in addressing water damage to electronic devices. Certified technicians can provide a thorough evaluation of the iPhone’s condition and offer tailored solutions to mitigate the effects of water damage on the speaker and other components.
By seeking professional help, you can leverage the expertise of trained technicians to address persistent issues related to water damage, ensuring that the iPhone’s functionality is restored effectively and minimizing the risk of further damage.