
Checking Compatibility
Before diving into the exciting world of screen recording on your iPhone 11, it's crucial to ensure that your device is compatible with this feature. Screen recording is a fantastic tool that allows you to capture and share your device's screen activity, making it an invaluable asset for demonstrating app usage, creating tutorials, or simply sharing memorable moments with friends and family.
The iPhone 11, powered by the robust iOS operating system, offers a seamless screen recording experience. To check if your iPhone 11 is compatible with this feature, follow these simple steps:
-
Device Model: Verify that you are using an iPhone 11. This model was released in 2019 and is equipped with a powerful A13 Bionic chip, ensuring smooth performance for various tasks, including screen recording.
-
Operating System: Ensure that your iPhone 11 is running on iOS 11 or later. Screen recording was introduced in iOS 11, so it's essential to have this version or a later one to access this feature.
-
Storage Space: Check your device's available storage space. Screen recordings can consume a significant amount of storage, especially for longer recordings or those with high resolution. Ensure that you have ample free space to accommodate your recordings without encountering storage issues.
-
Control Center Access: Confirm that you can access the Control Center on your iPhone 11. The screen recording feature is conveniently accessible from the Control Center, so it's essential to ensure that you can easily reach this menu.
By verifying these aspects, you can ensure that your iPhone 11 is fully equipped to embrace the exciting world of screen recording. Once you've confirmed compatibility, you can proceed with enabling and utilizing this feature to capture and share your device's screen with ease.
With compatibility confirmed, you're ready to embark on the journey of enabling screen recording on your iPhone 11. Let's explore the simple steps to unleash this powerful functionality and elevate your screen sharing capabilities.
Enabling Screen Recording
Enabling screen recording on your iPhone 11 is a straightforward process that unlocks a world of possibilities for capturing and sharing your device's screen activity. Whether you want to showcase a new app, create instructional content, or preserve memorable moments, this feature empowers you to do so with ease. To begin this exciting journey, follow the steps below to enable screen recording on your iPhone 11:
-
Open Settings: Start by tapping the "Settings" app on your iPhone 11's home screen. This is the central hub for customizing various aspects of your device's functionality.
-
Select Control Center: Within the Settings menu, scroll down and tap on "Control Center." This section allows you to manage the features and shortcuts accessible from the Control Center, which is a convenient menu for accessing commonly used functions.
-
Customize Controls: Under the Control Center settings, locate and tap "Customize Controls." This option enables you to add or remove features from the Control Center, tailoring it to your preferences.
-
Add Screen Recording: In the Customize Controls menu, find "Screen Recording" in the list of available features. Tap the green plus icon next to "Screen Recording" to add it to the Control Center. This action ensures that the screen recording function will be readily accessible from the Control Center.
With these simple steps, you have successfully enabled screen recording on your iPhone 11. This feature is now integrated into the Control Center, allowing you to effortlessly initiate screen recordings whenever the need arises. By following these steps, you've unlocked a powerful tool for capturing and sharing your device's screen activity, enhancing your ability to communicate, educate, and entertain through visual content.
Now that you've enabled screen recording, the next step is to familiarize yourself with accessing the Control Center and initiating a screen recording. This will allow you to seamlessly capture your device's screen activity and harness the full potential of this feature. Let's delve into the process of accessing the Control Center and commencing a screen recording on your iPhone 11.
Accessing Control Center
Accessing the Control Center on your iPhone 11 is a fundamental step in initiating a screen recording and accessing various essential functions and shortcuts. The Control Center serves as a centralized hub for conveniently managing key features, including screen brightness, volume controls, and quick access to utilities such as the flashlight and camera. To access the Control Center and prepare for initiating a screen recording, follow these simple steps:
-
Unlock Your Device: If your iPhone 11 is locked, begin by unlocking it using Face ID, Touch ID, or your passcode. This ensures that you have full access to the device's functionalities, including the Control Center.
-
Swipe Down from the Top-Right Corner: To access the Control Center, gently swipe down from the top-right corner of the screen. This action triggers the Control Center to slide into view, revealing a collection of essential shortcuts and controls.
-
Familiarize Yourself with the Control Center: Upon accessing the Control Center, take a moment to familiarize yourself with its layout and the array of functions it offers. You'll find various icons representing features such as Wi-Fi, Bluetooth, Airplane Mode, and more. Additionally, the screen recording icon, denoted by a concentric circle within a circle, will be prominently displayed.
-
Prepare for Screen Recording: Before initiating the screen recording, ensure that your device is set up as desired. This may involve navigating to the specific app or content that you intend to capture. By preparing the screen content beforehand, you can seamlessly transition into the recording process without interruptions.
-
Access Additional Controls: Within the Control Center, you can also access additional controls and shortcuts by tapping and holding certain icons. For instance, pressing and holding the connectivity icons allows you to access more detailed settings for Wi-Fi, Bluetooth, and Airplane Mode. This feature provides convenient access to deeper settings without navigating through multiple menus.
By following these steps, you can effortlessly access the Control Center on your iPhone 11, empowering you to initiate a screen recording and leverage the full potential of this feature. The Control Center serves as a versatile platform for managing essential functions and accessing shortcuts, enhancing your overall user experience and productivity. With the Control Center at your fingertips, you're well-equipped to embark on the next phase of your screen recording journey, capturing and sharing your device's screen activity with ease and precision.
Starting the Screen Recording
Initiating a screen recording on your iPhone 11 is a seamless process that empowers you to capture and preserve your device's screen activity with precision and convenience. Whether you're demonstrating a new app feature, creating engaging tutorials, or preserving memorable moments, the screen recording function offers a versatile platform for visually communicating your device's content. To commence the screen recording process, follow these straightforward steps:
-
Access the Control Center: Begin by accessing the Control Center on your iPhone 11. As mentioned earlier, gently swipe down from the top-right corner of the screen to reveal the Control Center. This action provides quick access to essential shortcuts and functions, including the screen recording feature.
-
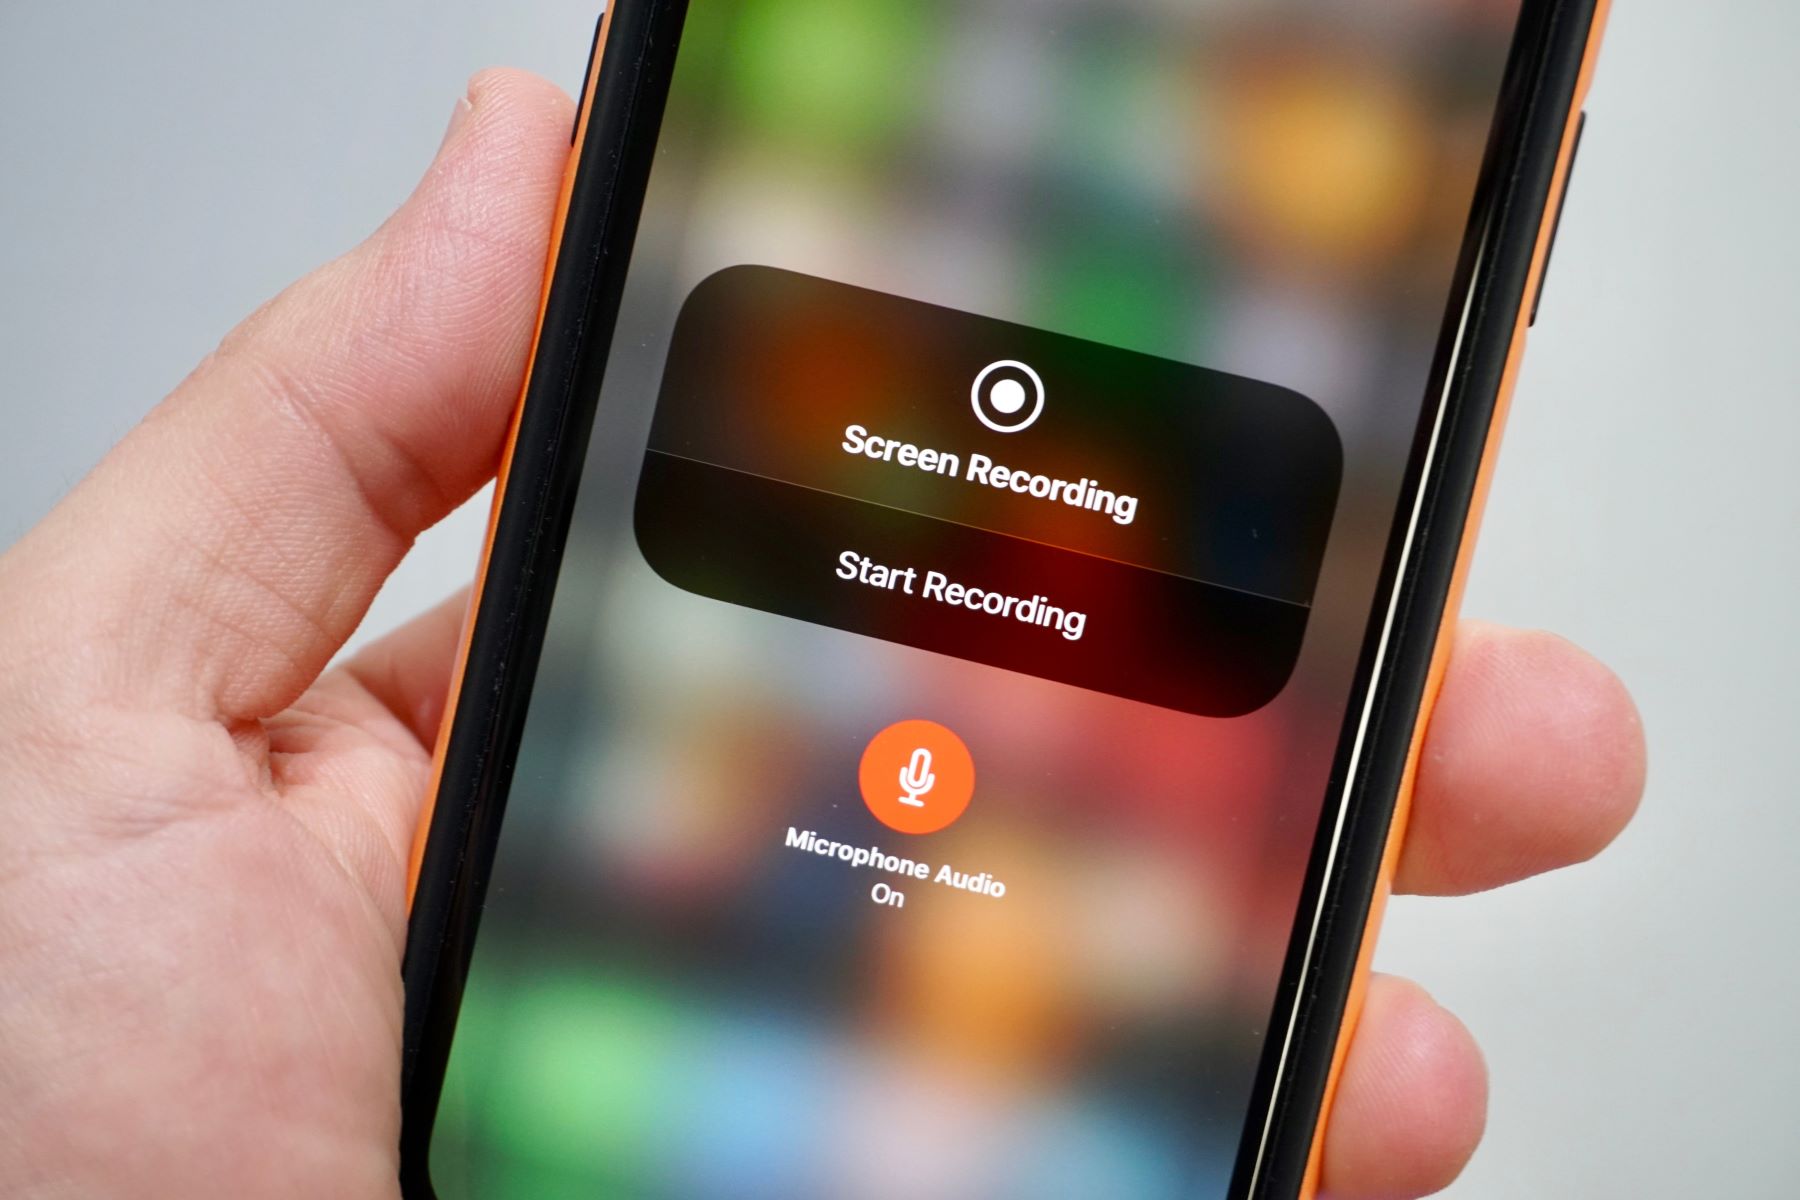
Locate the Screen Recording Icon: Within the Control Center, identify the screen recording icon, represented by a concentric circle within a circle. This icon serves as the gateway to initiating the screen recording process. By tapping this icon, you'll trigger the commencement of the recording.
-
Initiate the Screen Recording: Once you've located the screen recording icon, tap it to initiate the recording process. Upon tapping the icon, a countdown timer may appear, providing a brief moment to prepare for the recording. This countdown ensures that you're ready to capture the desired content without any unexpected interruptions.
-
Verify the Recording Indicator: After tapping the screen recording icon, a red recording indicator will appear at the top of the screen, signaling that the recording is in progress. This indicator serves as a visual cue, ensuring that you're aware of the ongoing recording activity. With the indicator displayed, you can confidently proceed with capturing the desired content.
-
Navigate Through the Recording: Once the recording is underway, navigate through your device's content as needed. Whether you're showcasing app functionality, browsing through a website, or engaging with various features, the screen recording function seamlessly captures your on-screen activity, preserving it for future use.
By following these steps, you can effortlessly initiate a screen recording on your iPhone 11, harnessing the power of visual communication and content preservation. The intuitive nature of this process ensures that you can seamlessly capture and share your device's screen activity, unlocking a myriad of possibilities for education, entertainment, and communication. With the recording in progress, you're well-equipped to capture the essence of your device's content and share it with precision and clarity.
Stopping the Screen Recording
Stopping a screen recording on your iPhone 11 is a straightforward process that allows you to precisely conclude the capture of your device's screen activity. Whether you've completed a demonstration, tutorial, or simply documented a memorable moment, stopping the screen recording ensures that your content is neatly preserved and ready for sharing or future reference. To seamlessly halt the screen recording process, follow these simple steps:
-
Access the Control Center: When you're ready to stop the screen recording, access the Control Center by swiping down from the top-right corner of the screen. This action reveals the Control Center, providing quick access to essential shortcuts and functions, including the screen recording feature.
-
Locate the Recording Indicator: Within the Control Center, you'll find the red recording indicator at the top of the screen, signaling that the recording is in progress. This visual cue ensures that you're aware of the ongoing recording activity, allowing you to promptly conclude the recording when desired.
-
Tap the Recording Indicator: To stop the screen recording, simply tap the red recording indicator at the top of the screen. This action prompts a confirmation dialog, asking if you want to stop the recording. By tapping "Stop," you effectively conclude the screen recording process.
-
Confirm the Stopping of Recording: After tapping "Stop" in the confirmation dialog, the recording indicator will disappear from the top of the screen, indicating that the recording has been successfully halted. Additionally, you may receive a banner notification confirming that the screen recording has been saved to your device's Photos app.
-
Access the Recorded Video: Once the screen recording has been stopped, you can access the recorded video in the Photos app on your iPhone 11. From there, you can review the recording, edit it if necessary, and proceed with sharing it with friends, family, or colleagues.
By following these steps, you can seamlessly stop a screen recording on your iPhone 11, ensuring that your captured content is neatly preserved and ready for further utilization. Whether you've documented an important process, captured a memorable interaction, or created educational content, the ability to effortlessly stop the screen recording process empowers you to precisely manage and share your device's screen activity with clarity and precision.
Accessing the Recorded Video
After successfully stopping the screen recording on your iPhone 11, the next step involves accessing the recorded video for review, editing, and sharing. The seamless integration of the screen recording feature with the Photos app ensures that your captured content is readily available for further utilization. To access the recorded video, follow these simple steps:
-
Navigate to the Photos App: Begin by locating and tapping the "Photos" app on your iPhone 11's home screen. The Photos app serves as a centralized hub for managing and accessing your device's captured photos and videos, including screen recordings.
-
Locate the Screen Recording Album: Within the Photos app, navigate to the "Albums" tab located at the bottom of the screen. Tap on "Albums" to reveal a collection of categorized albums, including "Recents," "Videos," and more. Look for the "Screen Recordings" album, which specifically houses your captured screen recordings.
-
Review the Recorded Video: Upon accessing the "Screen Recordings" album, you'll find your recently captured screen recording displayed as a video thumbnail. Tap on the thumbnail to open and review the recorded video. This allows you to ensure that the captured content meets your expectations and is ready for sharing or further editing.
-
Edit the Recorded Video (Optional): If desired, you can edit the recorded video directly within the Photos app. This may involve trimming the video, adding annotations, or applying filters to enhance the visual presentation. The Photos app offers intuitive editing tools that empower you to refine your captured content with ease.
-
Share the Recorded Video: Once you've reviewed and potentially edited the recorded video, you can proceed with sharing it with others. Tap the "Share" icon within the Photos app to access various sharing options, including messaging, email, social media, and more. This enables you to effortlessly distribute your captured screen recording to friends, family, or colleagues.
By following these steps, you can seamlessly access the recorded video of your screen recording on your iPhone 11, empowering you to review, edit, and share the captured content with precision and convenience. The integration of the screen recording feature with the Photos app streamlines the post-recording process, ensuring that your captured content is easily accessible and ready for further utilization.
Sharing the Recorded Video
Sharing the recorded video from your iPhone 11 allows you to effortlessly distribute your captured screen recording to friends, family, or colleagues. Once you have reviewed and potentially edited the recorded video, the sharing process can be initiated directly from the Photos app. Follow these simple steps to share your screen recording with precision and convenience:
-
Access the Recorded Video: Begin by navigating to the Photos app on your iPhone 11. Within the app, locate the "Screen Recordings" album, which houses your captured screen recordings. Tap on the specific recording that you intend to share to open it for further action.
-
Initiate the Sharing Process: With the recorded video open, tap the "Share" icon, typically represented by a box with an arrow pointing upward. This action triggers the sharing menu, presenting a variety of options for distributing the video to others.
-
Select Sharing Method: Upon accessing the sharing menu, choose the preferred method for sharing the recorded video. Options may include messaging, email, social media platforms, cloud storage services, and more. Select the appropriate sharing method based on your intended recipients and communication preferences.
-
Customize Sharing Settings (Optional): Depending on the selected sharing method, you may have the opportunity to customize sharing settings. This can involve adding a message or caption to accompany the shared video, selecting specific recipients or groups, and adjusting privacy settings as needed.
-
Initiate the Share: Once you've configured the sharing settings, proceed with initiating the share. This action effectively distributes the recorded video to the selected recipients or platforms, making it accessible for viewing and further dissemination.
By following these steps, you can seamlessly share the recorded video of your screen recording from your iPhone 11, ensuring that your captured content reaches its intended audience with clarity and precision. Whether you're showcasing app functionality, sharing educational content, or preserving memorable moments, the ability to effortlessly share your screen recordings enhances your communication capabilities and facilitates seamless collaboration with others.