
Checking Do Not Disturb Settings
Before delving into the intricacies of enabling Do Not Disturb on your iPhone 13, it's crucial to ensure that the settings are configured to your preferences. Checking the Do Not Disturb settings allows you to verify that the feature is set up in a way that aligns with your needs and lifestyle.
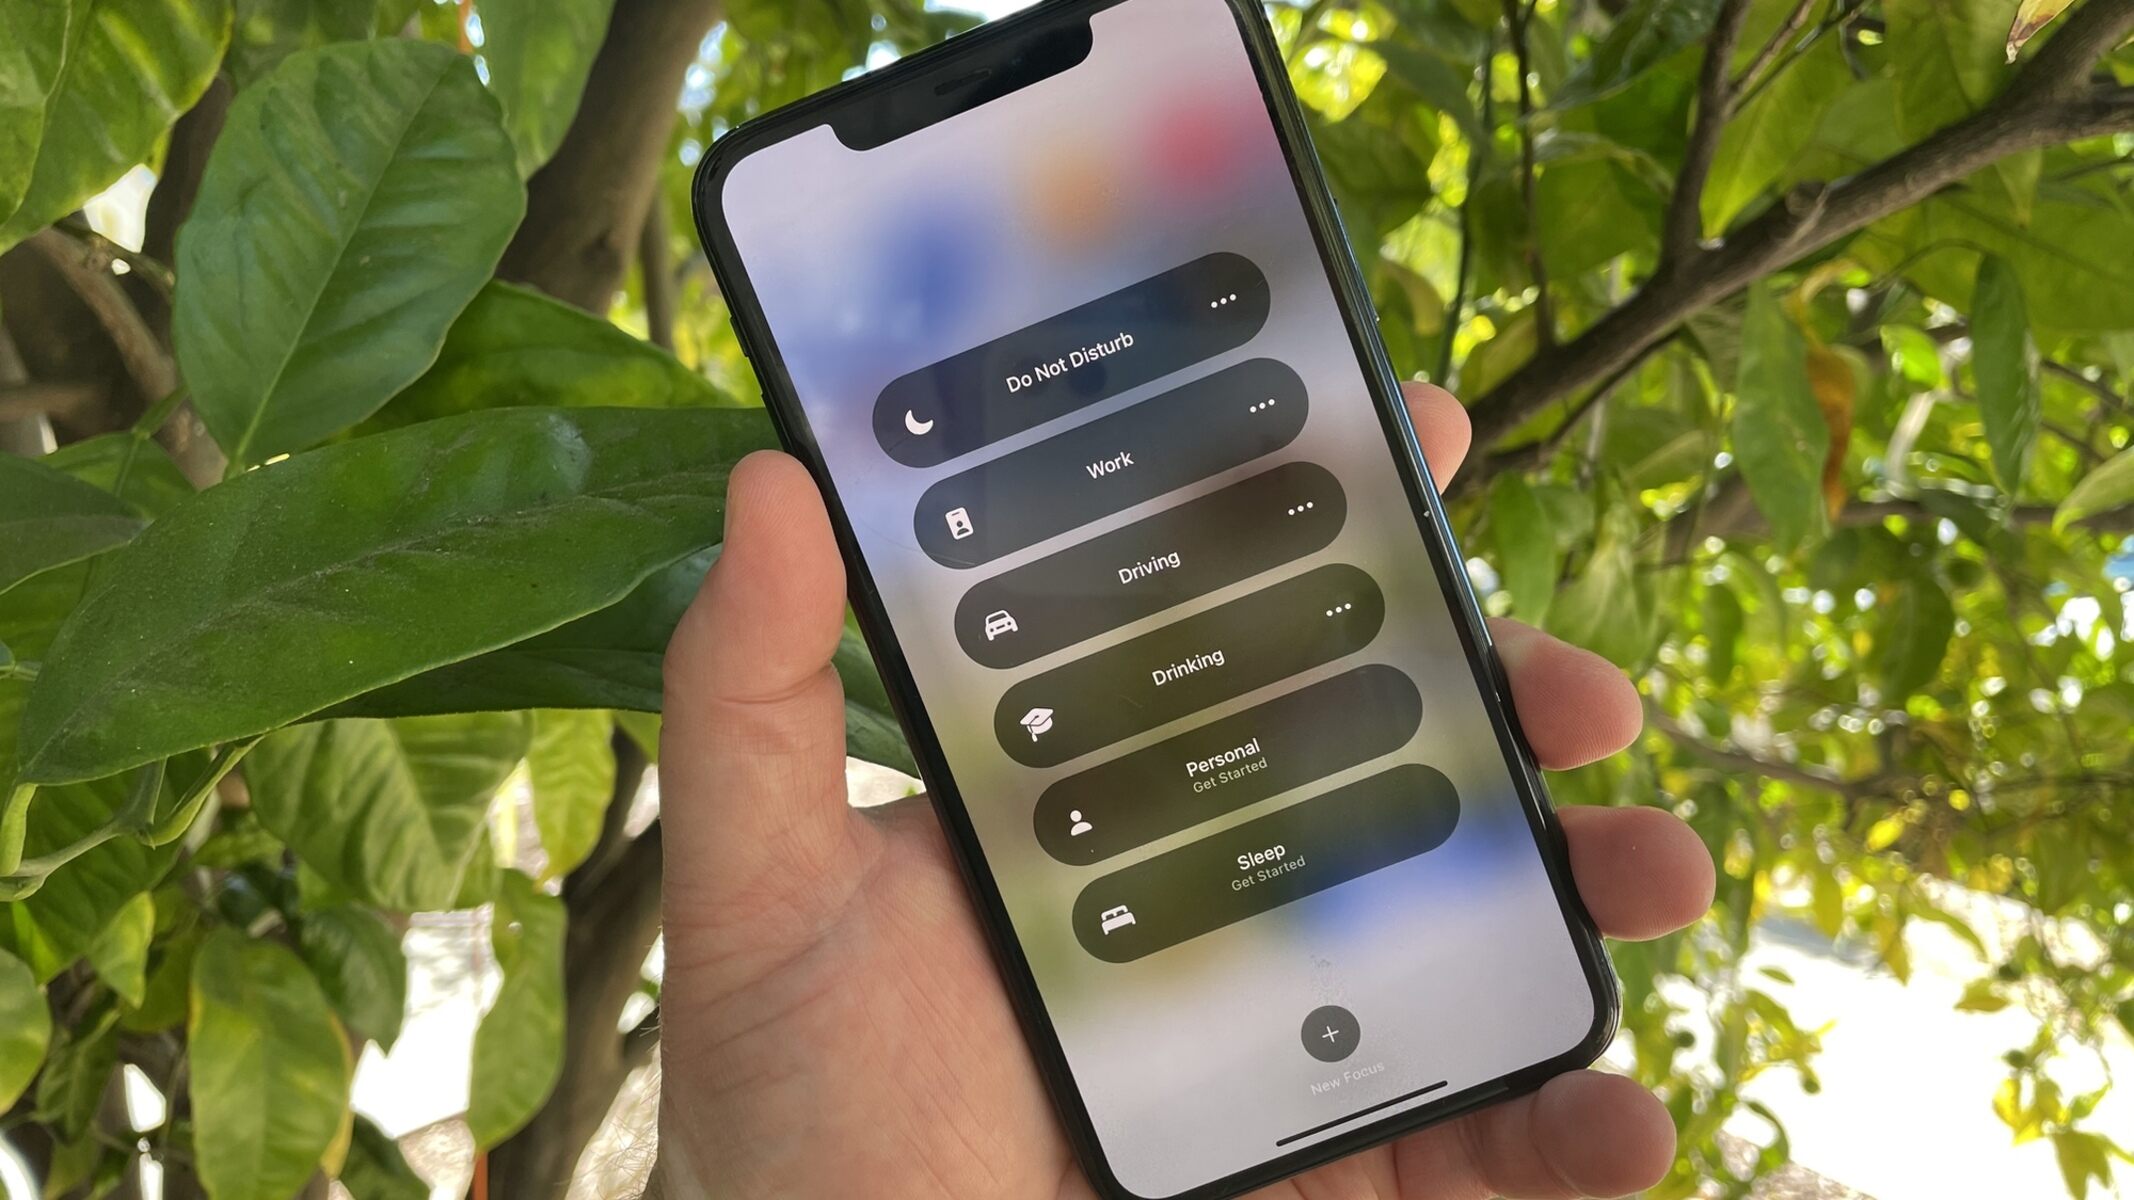
To begin, navigate to the "Settings" app on your iPhone 13 and scroll down to locate the "Do Not Disturb" option. Tapping on this will reveal a range of settings that you can customize to tailor the feature to your specific requirements.
Upon entering the "Do Not Disturb" settings, the first option you'll encounter is the manual activation toggle. This toggle allows you to manually enable or disable Do Not Disturb mode with a simple tap. It's essential to verify that this toggle is easily accessible and functioning as intended, as it serves as the primary method for activating Do Not Disturb mode on demand.
Next, you'll find the "Scheduled" option, which enables you to set specific times for Do Not Disturb mode to automatically activate and deactivate. This feature is particularly useful for ensuring that your device remains undisturbed during designated hours, such as when you're sleeping or in important meetings. Verifying that the scheduled times align with your daily routine is crucial for maximizing the effectiveness of Do Not Disturb mode.
Furthermore, within the Do Not Disturb settings, you'll find the "Allow Calls From" option, which permits calls from specific contacts to bypass the silent mode. This setting is invaluable for ensuring that important calls are not missed while maintaining a peaceful environment during Do Not Disturb mode. It's essential to review and update the list of allowed contacts to guarantee that you can be reached by those who matter most.
Lastly, the "Repeated Calls" setting warrants attention, as it enables calls from the same person within three minutes to bypass Do Not Disturb mode. Verifying that this feature is configured according to your preferences ensures that urgent calls are not inadvertently silenced.
By thoroughly checking the Do Not Disturb settings on your iPhone 13, you can ascertain that the feature is tailored to your individual requirements, providing you with the peace of mind that your device will effectively minimize interruptions when needed.
Enabling Do Not Disturb Manually
Enabling Do Not Disturb mode manually on your iPhone 13 is a straightforward process that empowers you to instantly silence incoming calls, notifications, and alerts. This feature is invaluable in various scenarios, such as when you're in a meeting, attending a movie, or simply seeking uninterrupted moments of tranquility. To activate Do Not Disturb mode manually, follow these simple steps:
-
Access Control Center: Begin by accessing the Control Center on your iPhone 13. To do this, swipe down from the top-right corner of the screen. This action will reveal a range of essential shortcuts and settings, including the Do Not Disturb toggle.
-
Locate Do Not Disturb Toggle: Within the Control Center, locate the Do Not Disturb icon, which is represented by a crescent moon symbol. This icon serves as the manual activation toggle for Do Not Disturb mode.
-
Toggle Do Not Disturb: Once you've located the Do Not Disturb icon, simply tap it to activate Do Not Disturb mode. Upon activation, the crescent moon icon will turn purple, indicating that Do Not Disturb mode is now active.
-
Confirmation: To confirm that Do Not Disturb mode is enabled, check for the crescent moon icon in the status bar at the top of the screen. This visual indicator serves as a quick reference to verify that Do Not Disturb mode is actively suppressing incoming calls and notifications.
By following these steps, you can effortlessly enable Do Not Disturb mode manually on your iPhone 13, ensuring that you have the flexibility to swiftly minimize disruptions whenever the need arises. This feature grants you the freedom to create moments of undisturbed focus and relaxation, enhancing your overall user experience with the device.
In addition to manual activation, the ability to quickly disable Do Not Disturb mode through the Control Center provides a seamless transition back to normal notification settings. This convenience ensures that you can effortlessly return to receiving calls and notifications without any unnecessary delays.
Enabling Do Not Disturb mode manually on your iPhone 13 is a valuable tool for taking control of your device's interruptions, allowing you to curate moments of uninterrupted peace and concentration in a fast-paced digital world.
Scheduling Do Not Disturb
Scheduling Do Not Disturb on your iPhone 13 is a powerful feature that empowers you to proactively manage interruptions during specific times, ensuring that you can focus on important tasks, enjoy uninterrupted rest, or maintain a distraction-free environment. By leveraging the scheduling functionality, you can seamlessly automate the activation and deactivation of Do Not Disturb mode, aligning it with your daily routine and personal preferences.
To schedule Do Not Disturb on your iPhone 13, follow these simple steps:
-
Access Do Not Disturb Settings: Begin by accessing the "Settings" app on your iPhone 13 and scrolling down to locate the "Do Not Disturb" option. Tap on this to enter the Do Not Disturb settings.
-
Enable Scheduled: Within the Do Not Disturb settings, locate the "Scheduled" option. Toggle this setting to enable scheduling, allowing you to set specific times for Do Not Disturb mode to automatically activate and deactivate.
-
Set Activation Time: After enabling scheduling, you can set the time at which you want Do Not Disturb mode to activate. This could be during your regular sleeping hours, work meetings, or any other periods when you prefer minimal interruptions.
-
Set Deactivation Time: Similarly, you can specify the time at which you want Do Not Disturb mode to deactivate, ensuring that your device resumes normal notification settings at the desired moment.
-
Customize Days: Additionally, you have the flexibility to customize the days on which the scheduled Do Not Disturb mode is active. This allows you to tailor the feature to accommodate variations in your weekly schedule.
By scheduling Do Not Disturb on your iPhone 13, you can effectively automate the management of incoming calls and notifications, providing you with the assurance that your device will respect your designated quiet hours and moments of focus. This proactive approach to minimizing disruptions enhances your overall productivity and peace of mind, as you can confidently engage in activities without the fear of being interrupted by unnecessary alerts.
Moreover, the seamless integration of scheduled Do Not Disturb mode into your daily routine streamlines the process of creating a conducive environment for rest, work, or leisure. This feature exemplifies the user-centric design of the iPhone 13, offering a practical solution to the challenges of balancing connectivity with the need for uninterrupted periods of concentration and relaxation.
In essence, scheduling Do Not Disturb on your iPhone 13 is a testament to the device's commitment to empowering users with intuitive and customizable features that cater to diverse lifestyles and preferences. By embracing this functionality, you can harness the full potential of your device to seamlessly adapt to your daily rhythm, ensuring that you remain in control of your digital experience.
Allowing Calls From Certain Contacts
The ability to allow calls from certain contacts while in Do Not Disturb mode on your iPhone 13 provides a valuable layer of customization, ensuring that important calls are not missed while maintaining a peaceful and uninterrupted environment. This feature empowers you to prioritize communication from specific individuals, such as family members, close friends, or work-related contacts, while silencing notifications from other sources.
To configure the "Allow Calls From" setting on your iPhone 13, follow these steps:
-
Access Do Not Disturb Settings: Begin by accessing the "Settings" app on your iPhone 13 and navigating to the "Do Not Disturb" option.
-
Enable "Allow Calls From": Within the Do Not Disturb settings, locate the "Allow Calls From" option. This setting allows you to specify which contacts can bypass the silent mode during Do Not Disturb.
-
Select Contacts: Upon entering the "Allow Calls From" setting, you can choose to allow calls from specific groups, such as favorites, or individual contacts. This level of granularity enables you to tailor the feature to your unique communication needs.
By customizing the "Allow Calls From" setting, you can ensure that critical calls from designated contacts are not silenced, even when your device is in Do Not Disturb mode. This capability is particularly beneficial in situations where you need to maintain focus or rest without being entirely disconnected from essential communication channels.
Moreover, the flexibility to select specific contacts or groups aligns with the diverse nature of modern communication, allowing you to differentiate between personal, professional, and urgent contacts. This level of control over incoming calls during Do Not Disturb mode reflects the user-centric design philosophy of the iPhone 13, prioritizing individual preferences and the need for seamless connectivity management.
In essence, the "Allow Calls From" feature on the iPhone 13 embodies the device's commitment to empowering users with personalized and adaptable communication settings. By leveraging this functionality, you can strike a harmonious balance between staying accessible to important contacts and enjoying uninterrupted periods of focus and relaxation, ultimately enhancing your overall user experience with the device.
Using Bedtime Mode with Do Not Disturb
Utilizing Bedtime Mode in conjunction with Do Not Disturb on your iPhone 13 offers a seamless integration of features designed to enhance your sleep routine and minimize disruptions during designated rest periods. This combination empowers you to create an optimal environment for uninterrupted sleep while ensuring that essential calls and notifications are not overlooked.
When Bedtime Mode is activated, it silences calls and notifications, effectively integrating the functionality of Do Not Disturb to minimize disturbances during your designated sleep schedule. This collaborative approach aligns with the holistic design philosophy of the iPhone 13, catering to the diverse needs of users seeking a comprehensive solution for managing their digital experiences.
To enable Bedtime Mode with Do Not Disturb on your iPhone 13, follow these simple steps:
-
Access Bedtime Mode: Begin by accessing the Clock app on your iPhone 13 and navigating to the "Bedtime" tab. This dedicated section allows you to configure your sleep schedule and preferences.
-
Enable Bedtime Mode: Within the Bedtime settings, toggle the Bedtime Mode switch to activate this feature. By doing so, your device will automatically enter a sleep-friendly state during the specified bedtime hours, seamlessly integrating Do Not Disturb to minimize disruptions.
-
Customize Do Not Disturb: While configuring Bedtime Mode, ensure that the Do Not Disturb settings are aligned with your preferences. This includes verifying the scheduled activation and deactivation times, as well as any specific contacts allowed to bypass the silent mode.
By leveraging Bedtime Mode in tandem with Do Not Disturb, you can cultivate an environment conducive to restful sleep, free from the distractions of incoming calls and notifications. This collaborative functionality exemplifies the user-centric approach of the iPhone 13, acknowledging the importance of holistic well-being and the role of technology in supporting healthy sleep habits.
In essence, the integration of Bedtime Mode with Do Not Disturb on the iPhone 13 underscores the device's commitment to empowering users with a comprehensive suite of features that extend beyond traditional communication and productivity tools. By embracing this combined functionality, you can optimize your sleep environment and embrace a more balanced and mindful approach to utilizing technology in your daily life.