
Materials Needed
Transforming your Neewer tripod into a monopod doesn't have to be a daunting task. With a few simple tools and a dash of creativity, you can repurpose your existing equipment to suit your specific photography needs. Here's a list of materials to get you started on this DIY project:
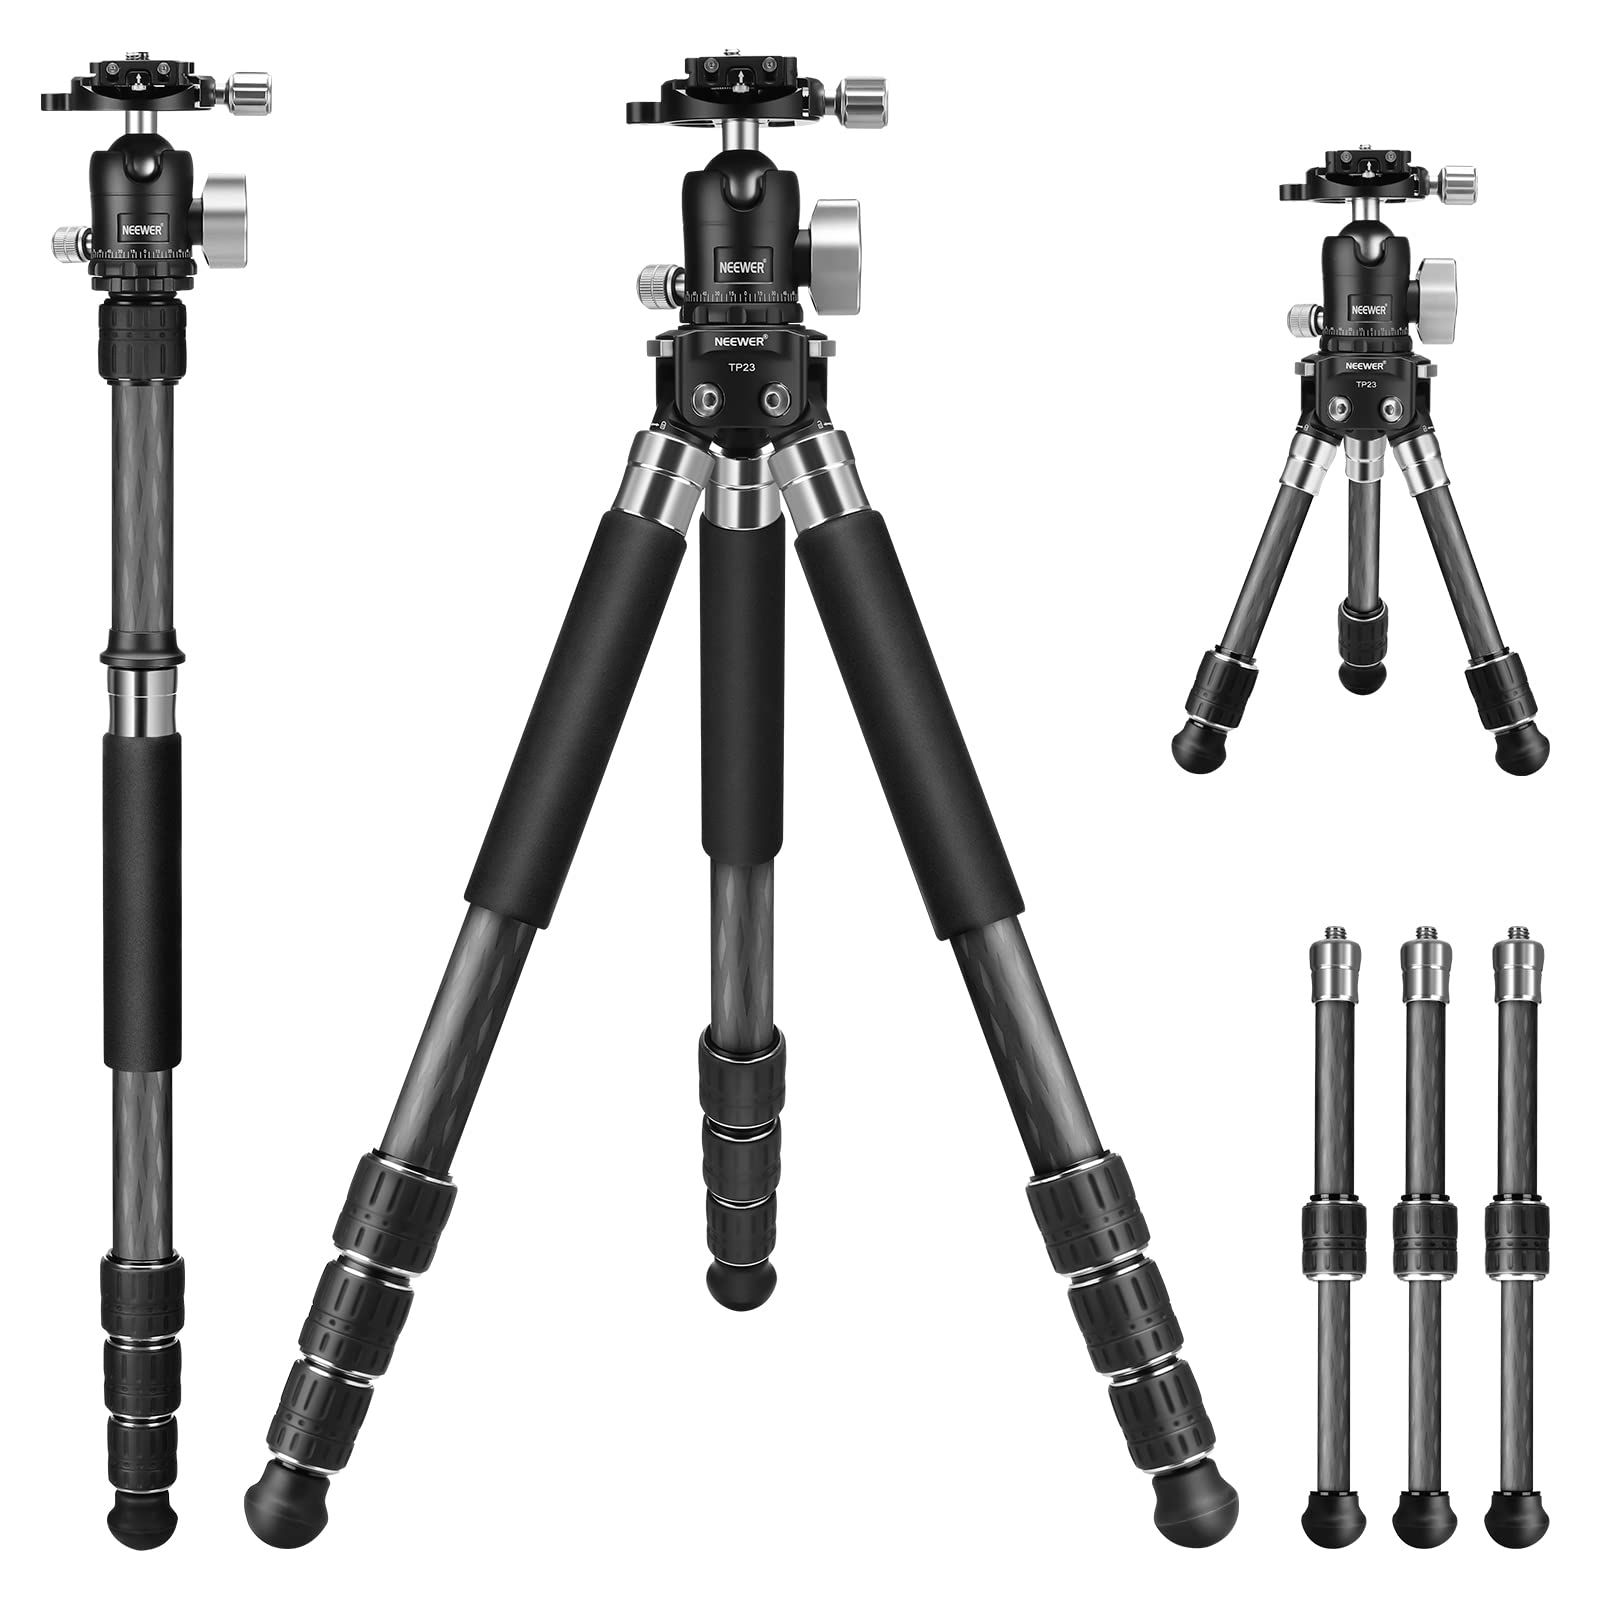
– Neewer tripod
– Allen wrench
– Leg lock (purchased separately or salvaged from an old tripod)
– Optional: rubber or foam grip for the monopod
Before diving into the transformation process, ensure that you have all the necessary materials at your disposal. The Neewer tripod will serve as the foundation for the monopod, while the Allen wrench will aid in disassembling and reassembling the equipment. The leg lock is a crucial component that will enable you to convert the tripod into a monopod seamlessly. Additionally, a rubber or foam grip can be added to enhance the comfort and stability of the monopod, providing a more ergonomic and secure hold during use.
Step 1: Disassembling the Tripod
Before embarking on the transformation of your Neewer tripod into a monopod, the initial step involves disassembling the tripod to prepare for the modification. Follow these simple steps to disassemble the tripod:
– Start by extending the legs of the tripod to their maximum length and laying it on a flat, stable surface. This will provide easy access to the components that need to be removed.
– Locate the screws or bolts that secure the legs to the tripod’s center column. Depending on the model of the Neewer tripod, these fasteners may be Allen screws or traditional bolts.
– Use the appropriate-sized Allen wrench or a suitable tool to loosen and remove the screws/bolts, allowing the legs to be detached from the center column. It’s essential to keep track of the screws/bolts to facilitate the reassembly process later on.
– Carefully set aside the detached legs and any associated components in a safe and organized manner, ensuring that they are easily accessible when needed for the subsequent steps.
Disassembling the tripod is a fundamental stage in the transformation process, as it lays the groundwork for converting it into a monopod. By carefully following these steps, you can effectively disassemble the Neewer tripod and progress to the next phase of the DIY project without encountering any complications. Remember to handle the components with care and maintain a clear workspace to prevent misplacement of any crucial parts.
Step 2: Removing the Legs
Once the Neewer tripod is disassembled, the next step in the transformation process involves removing the legs from the center column. This step is essential to prepare the tripod for the conversion into a monopod. Follow these straightforward instructions to remove the legs:
– Begin by identifying the attachment points where the legs are connected to the center column. Depending on the tripod model, the attachment may be secured by screws, bolts, or a specialized locking mechanism.
– Using the appropriate tool, such as an Allen wrench or screwdriver, carefully loosen and remove the fasteners that secure the legs to the center column. Take care to support the legs as you remove the final fastener to prevent them from falling and getting damaged.
– Once the fasteners are removed, gently detach the legs from the center column. Be mindful of any cables, wires, or internal mechanisms that may be connected to the legs, ensuring that they are not damaged during the removal process.
– Set the detached legs aside in a safe and organized manner, as they may be repurposed or stored for potential future use. Clearing the workspace of any unnecessary components will streamline the subsequent steps of the monopod conversion.
Removing the legs from the center column is a pivotal stage in the transformation of the Neewer tripod into a monopod. By following these instructions with precision, you can effectively separate the legs from the tripod, setting the stage for the upcoming modifications. Ensuring a methodical approach and attention to detail during this step will contribute to a seamless transition to the next phase of the DIY project.
Step 3: Attaching the Leg Lock
As you progress with the transformation of your Neewer tripod into a monopod, the next crucial step involves attaching the leg lock. This component is essential for stabilizing the monopod and ensuring its functionality. Follow these steps to seamlessly incorporate the leg lock into the modified structure:
– Begin by identifying the designated area on the tripod’s center column where the leg lock will be attached. This may involve removing any existing components or fasteners that are no longer necessary for the monopod configuration.
– Position the leg lock at the predetermined location and align it with the center column, ensuring that it is securely affixed for optimal stability. Depending on the design of the leg lock, it may feature adjustable elements to accommodate different leg diameters, providing a versatile fit.
– Utilize the provided fasteners or screws to secure the leg lock to the center column, tightening them sufficiently to prevent any movement or slippage during use. It is essential to verify that the leg lock is firmly in place before proceeding to the next step.
– Test the functionality of the leg lock by extending and retracting the monopod’s leg. Confirm that the lock effectively holds the extended leg in position, providing the necessary support and rigidity for capturing steady shots.
Attaching the leg lock marks a significant milestone in the transformation process, as it enhances the stability and usability of the monopod. By meticulously following these steps, you can seamlessly integrate the leg lock into the modified tripod structure, setting the stage for a reliable and versatile monopod. Attention to detail and precision in securing the leg lock will contribute to the overall effectiveness and performance of the converted equipment.
Step 4: Testing the Monopod
With the leg lock securely in place, the next step in transforming your Neewer tripod into a monopod involves testing the functionality and stability of the modified equipment. Testing the monopod is crucial to ensure that it meets the desired performance standards and provides the necessary support for your photography endeavors. Follow these steps to effectively test the monopod:
– Extend the monopod to its full length, ensuring that the leg lock is engaged to secure the extended leg in place. This initial test will assess the monopod’s ability to maintain stability and support the weight of your camera or equipment.
– Attach your camera or preferred photography gear to the monopod’s mounting plate or head, simulating the actual usage conditions. This step allows you to evaluate the monopod’s handling of the added weight and its capacity to provide steady and controlled positioning for capturing images or footage.
– Adjust the height and angle of the monopod to simulate real-world shooting scenarios, such as capturing dynamic subjects or adjusting for varying terrain. This testing phase enables you to assess the monopod’s versatility and adaptability to different shooting conditions.
– Walk around with the monopod to gauge its portability and maneuverability, mimicking the dynamic nature of photography sessions. This assessment will provide insights into the monopod’s convenience and ease of use during on-location shoots.
Testing the monopod is a critical phase in the transformation process, allowing you to validate the functionality and performance of the modified equipment. By methodically following these steps, you can effectively evaluate the monopod’s stability, versatility, and practicality in real-world photography scenarios. Conducting thorough testing will instill confidence in the reliability of your DIY monopod and ensure that it aligns with your specific photography requirements.
Step 5: Reassembling the Tripod
After successfully testing the monopod and ensuring its functionality, the final step in the transformation process involves reassembling the Neewer tripod. Reassembling the tripod is essential for restoring its original configuration while incorporating any necessary adjustments for the monopod conversion. Follow these steps to effectively reassemble the tripod:
– Retrieve the detached legs and associated components that were set aside during the disassembly process. Ensure that all parts are accounted for and free from any damage or debris that may hinder the reassembly.
– Align the legs with the designated attachment points on the center column, taking care to position them accurately for secure reattachment. Depending on the tripod model, this may involve aligning the legs with corresponding grooves, slots, or fastening mechanisms.
– Utilize the appropriate screws, bolts, or fasteners to reconnect the legs to the center column, tightening them to the manufacturer’s recommended specifications. Confirm that each leg is firmly secured and aligned to maintain the tripod’s stability and structural integrity.
– Conduct a comprehensive inspection of the reassembled tripod, verifying that all components are properly aligned and fastened. This step ensures that the tripod is restored to its original form while accommodating the modifications for the monopod functionality.
Reassembling the tripod marks the culmination of the transformation process, allowing you to seamlessly transition from the DIY monopod back to the versatile tripod configuration. By diligently following these steps, you can effectively restore the Neewer tripod to its original state while integrating the necessary modifications for the monopod conversion. Attention to detail and precision during the reassembly phase will result in a fully functional tripod that retains its adaptability for diverse photography needs.