
Setting up iTunes
When it comes to enjoying your favorite music, movies, and more, iTunes is a popular choice for many users. Whether you’re a new user or upgrading to the latest version, setting up iTunes is a straightforward process. In this section, we’ll guide you through the steps to get started with iTunes on your device.
The first step is to download and install iTunes onto your computer or mobile device. Visit the official Apple website and navigate to the iTunes download page. Click on the appropriate download link for your operating system, such as Windows or macOS. Follow the on-screen instructions to complete the installation process.
Once the installation is complete, launch iTunes. You will be prompted to agree to the iTunes terms and conditions. Take a moment to review the terms and conditions, and if you agree, click “Agree” to proceed. This step ensures that you understand and comply with the terms of using iTunes.
After agreeing to the terms and conditions, you will be prompted to sign in with your Apple ID. If you don’t have an Apple ID, you can create one by clicking on the “Create Apple ID” option. An Apple ID is necessary to access the iTunes Store, make purchases, and sync your devices across multiple platforms.
Once you’ve signed in or created your Apple ID, you’ll then have the option to set up iCloud. iCloud allows you to access your iTunes library, apps, and other content across multiple devices. If you wish to enable iCloud, click “Enable” and follow the prompts to complete the setup process.
Next, it’s time to customize your iTunes preferences. Click on the “Edit” or “Preferences” option in the iTunes menu. Here, you can configure various settings, such as the default media folder location, import settings, and playback preferences. Adjust these settings according to your personal preferences to optimize your iTunes experience.
With your preferences set, you’re now ready to start importing your media into iTunes. Connect your external storage devices, such as an external hard drive or USB, to your computer. In iTunes, click on “File” and then select “Add Folder to Library” or “Add File to Library.” Navigate to the location where your media files are stored and select the desired files or folders to import them into your iTunes library.
Setting up iTunes is a crucial first step in exploring the vast world of digital media. By following these steps, you’ll be able to enjoy your favorite music, movies, and more on various Apple devices seamlessly. Now that you’ve successfully set up iTunes, it’s time to dive into the exciting features and functionalities that it offers.
Navigating the iTunes Interface
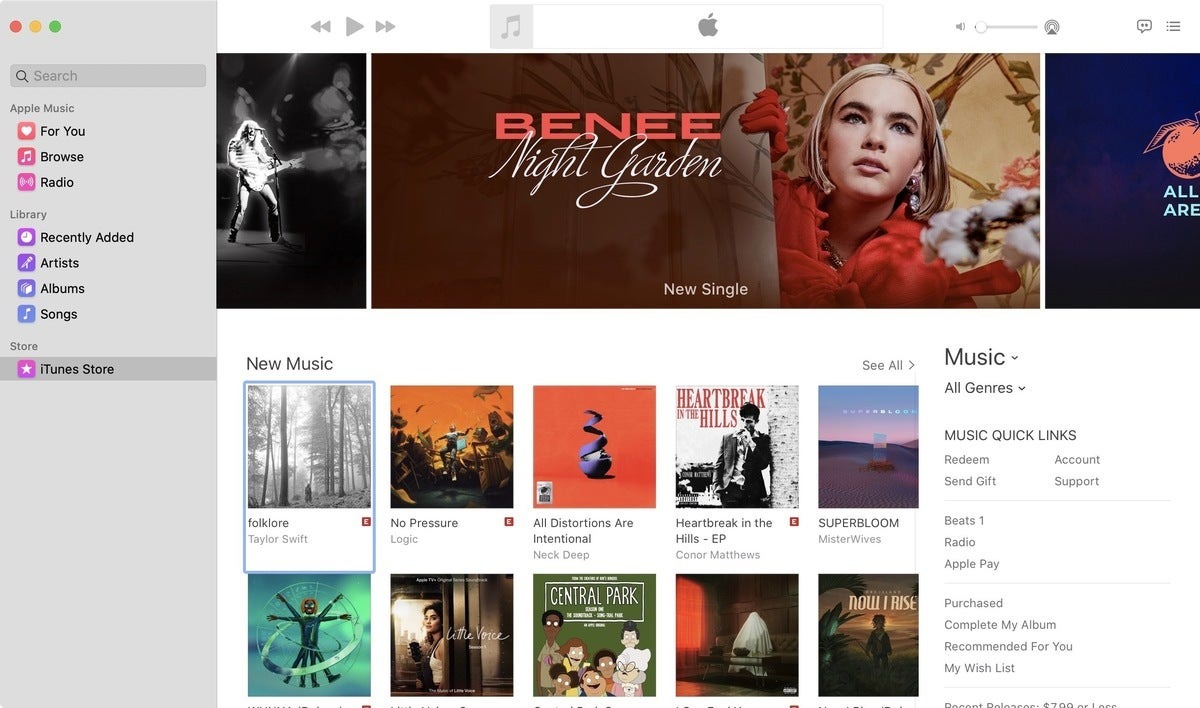
Upon launching iTunes, you’ll be greeted with a user-friendly interface that provides easy access to all the features and functions. Understanding how to navigate the iTunes interface will help you make the most of your media library. In this section, we’ll walk you through the different elements of the iTunes interface.
At the top of the iTunes window, you’ll find the menu bar. It contains various menus, such as File, Edit, View, and Help, allowing you to access different settings and options within iTunes. Use the menu bar to perform tasks like importing media, creating playlists, and managing your iTunes account.
Just below the menu bar, you’ll see the toolbar, which provides quick access to commonly used features. Here, you’ll find buttons for playback controls, including play, pause, skip, and shuffle. Additionally, you can use the toolbar to switch between different views, such as Music, Movies, TV Shows, and more.
The sidebar, located on the left side of the iTunes window, displays various sections, including your library, playlists, devices, and iTunes Store. Navigating through your media library is made easy with the sidebar. Simply click on a specific category, such as Music or Movies, to view the corresponding content in the main window.
The main window is where you’ll spend most of your time in iTunes. It displays the content of the selected category, such as songs, albums, or movies. You can customize the view of your media by choosing options like grid view or list view. Use the search bar located at the top right corner of the main window to quickly find specific media within your library.
Within the main window, you’ll also find additional tabs, such as Recently Added, Top Charts, and Genres, which allow you to explore and discover new content. These tabs make it convenient to browse and find music, movies, TV shows, and more based on your interests and preferences.
When you select a specific item, such as a song or movie, iTunes will display detailed information about that item, including the title, artist, album, and duration. You can also access additional options, such as adding the item to a playlist, rating it, or sharing it with others.
Finally, the bottom toolbar provides playback controls that allow you to adjust the volume, repeat songs, and toggle the shuffle feature. It also displays the current progress of the media being played, including the elapsed and remaining time.
With a clear understanding of the iTunes interface, navigating through your music and media library will become a breeze. Take some time to explore the different sections and features, and soon you’ll be fully immersed in the world of digital entertainment that iTunes offers.
Importing Music and Other Media
iTunes allows you to import and organize your music and other media files with ease. Whether you have a collection of CDs, digital downloads, or other media formats, importing them into iTunes is a simple process. In this section, we’ll guide you on how to import music and other media into iTunes.
To begin, open iTunes on your computer and ensure that your media files are accessible. If you have physical CDs that you want to import, insert them into your computer’s CD drive. iTunes will automatically recognize the CD and display its contents in the main window. Check the checkboxes next to the songs you want to import and click the “Import CD” button.
If you have digital music files stored on your computer or external storage devices, click on “File” in the iTunes menu bar. Select “Add File to Library” or “Add Folder to Library” depending on whether you want to import individual files or an entire folder. Navigate to the location of your music files and select the ones you wish to import. iTunes will then copy the files into your library.
iTunes also supports the import of other media types, such as videos and podcasts. To import videos, follow the same steps mentioned above. Click on “File” and select “Add File to Library” or “Add Folder to Library” to import your video files.
If you want to import podcasts, click on “File” and select “Subscribe to Podcast.” A dialog box will appear where you can enter the URL of the podcast’s feed. After entering the URL, click “OK,” and iTunes will automatically subscribe to the podcast and download the latest episodes.
Note that iTunes supports a variety of media formats, including MP3, AAC, WAV, and more. If you have media files in unsupported formats, you may need to convert them to a compatible format using third-party software before importing them into iTunes.
Once your music and other media files are imported, iTunes will organize them within your library. You can further organize and customize your media by creating playlists, editing metadata, and adding artwork.
Importing music and other media is a crucial step in building your collection within iTunes. By following these simple steps, you’ll be able to easily import and organize your favorite songs, videos, and podcasts, making them readily accessible whenever you want to enjoy them.
Organizing Your Media Library
With the vast amount of music, movies, TV shows, and podcasts available, it’s essential to have an organized media library within iTunes. Having a well-organized library not only makes it easier to find and enjoy your favorite content but also helps keep everything neatly categorized. In this section, we’ll explore various methods to organize your media library in iTunes.
One of the primary ways to organize your media is by creating playlists. Playlists allow you to group multiple songs or media files together based on specific criteria. To create a playlist, click on the “+” button at the bottom left corner of the iTunes window. Give your playlist a name and then drag and drop songs or media files into the playlist. You can also right-click on the desired songs or media files and select “Add to Playlist” to add them to an existing playlist.
Another way to organize your media is by using the built-in “Smart Playlists” feature. Smart Playlists automatically update based on predefined rules or criteria you set. To create a Smart Playlist, go to the “File” menu and choose “New” followed by “Smart Playlist”. Specify the criteria, such as a specific genre, artist, or album, and iTunes will dynamically update the playlist based on the selected criteria.
In addition to playlists, you can also organize your media using the “Categories” feature in iTunes. Categories allow you to sort your content into different genres, such as Rock, Pop, Hip-Hop, or Classical. To assign a category to your music, right-click on a song or album and select “Get Info.” Go to the “Info” tab, and under the “Genre” section, choose the appropriate category for the selected media.
iTunes also offers the option to add artwork to your media. Artwork adds visual appeal to your library and makes it easier to identify albums or movies at a glance. To add artwork to a song or album, right-click on the desired media file, select “Get Info,” and navigate to the “Artwork” tab. Click on “Add Artwork,” locate the image file on your computer, and click “OK” to add it to your media file.
Furthermore, you can organize your media library by editing the metadata or tags associated with your files. Metadata includes information such as the song title, artist, album, and release year. To edit the metadata of a song or media file, right-click on it, select “Get Info,” and navigate to the “Info” tab. Make the necessary changes to the metadata fields and click “OK” to save the changes.
Finally, you can customize the view of your library to suit your preferences. iTunes offers various view options, such as grid view, list view, and column view. Experiment with these views to find the one that best suits your needs and makes navigation through your library more efficient.
Organizing your media library is a continuous process that requires regular updates and maintenance. By following these methods, you can create a well-organized and customized media library in iTunes, making it easier to find, enjoy, and manage your vast collection of music, movies, TV shows, and podcasts.
Creating and Managing Playlists
Playlists are a convenient way to curate your favorite songs, create a personalized mix, or organize your music for different moods or occasions. With iTunes, creating and managing playlists is a breeze. In this section, we’ll guide you through the process of creating and managing playlists in iTunes.
To create a playlist, start by opening iTunes and clicking on the “+” button located at the bottom left corner of the iTunes window. A new playlist will appear in the sidebar, ready for you to name it. Give your playlist a descriptive name that reflects its theme or purpose.
Once you’ve created a playlist, you can start adding songs to it. Simply drag and drop songs from your iTunes library into the playlist, or right-click on a song and select “Add to Playlist” followed by the name of the playlist you want to add it to. You can also use the “File” menu and choose “Add File to Library” or “Add Folder to Library” to import additional songs into your iTunes library, and then add them to your playlist.
In addition to adding individual songs, you can also add entire albums or artists to your playlist. To do this, go to the “Songs” or “Artists” tab in your iTunes library, select the desired album or artist, right-click, and choose “Add to Playlist” followed by the name of the playlist you want to add it to.
Once you have added songs to your playlist, you can rearrange the order by clicking and dragging the songs to your desired position. You can also remove songs from the playlist by selecting them and pressing the “Delete” key or right-clicking and choosing “Remove from Playlist.”
iTunes offers additional features to enhance your playlist management experience. For example, you can create a “Smart Playlist” that dynamically updates based on specific criteria. To create a Smart Playlist, go to the “File” menu, select “New,” and choose “Smart Playlist.” Specify the criteria for your Smart Playlist, such as genre, artist, or rating, and iTunes will automatically update the playlist accordingly.
If you want to share your playlists with others, iTunes offers the option to export playlists as an XML or M3U file. Right-click on the playlist, select “Export,” and choose the desired file format. You can then share the exported file with others, who can import it into their own iTunes library.
Additionally, iTunes provides the option to create playlists specifically for your iOS devices, such as your iPhone or iPad. These playlists can be easily synced to your device, allowing you to enjoy your favorite songs on the go. To create a playlist for your iOS device, connect it to your computer, select your device in iTunes, go to the “Music” tab, enable the “Sync Music” option, and select the desired playlists to sync.
Creating and managing playlists allows you to curate your own customized music collections in iTunes. Whether you’re creating playlists for a workout session, a road trip, or just to enjoy your favorite songs, iTunes provides a simple and efficient way to organize and manage your music library.
Syncing Your Devices with iTunes
One of the key features of iTunes is its ability to sync your music, movies, TV shows, and more with your iOS devices, such as your iPhone, iPad, or iPod. When you sync your devices with iTunes, you can ensure that your media library stays up to date across all your devices. In this section, we’ll guide you through the process of syncing your devices with iTunes.
The first step is to connect your device to your computer using a USB cable. Once connected, iTunes will automatically recognize your device and display it in the top left corner of the iTunes window. Click on the device icon to access its settings.
In the device settings screen, you can choose which types of media you want to sync. For example, if you want to sync your music library, go to the “Music” tab and enable the “Sync Music” option. You can then choose whether to sync your entire library or only selected playlists, albums, artists, or genres.
In addition to music, you can sync other types of media, such as movies, TV shows, audiobooks, and podcasts. Simply click on the respective tabs in the device settings screen and enable the syncing options for the desired media types. You can also choose to sync your photos, contacts, calendars, and other data by navigating to the respective tabs.
Once you have selected the media types you want to sync, click on the “Apply” or “Sync” button to initiate the syncing process. iTunes will start transferring the selected media from your iTunes library to your device. The time it takes to complete the sync depends on the amount of media being transferred and the speed of your connection.
During the syncing process, iTunes may prompt you to confirm any changes or updates that will be made to your device. Review these prompts carefully to ensure that you’re syncing the correct media and preventing any unexpected changes. You can also customize certain syncing preferences, such as whether to automatically fill free space on your device with music or video, in the device settings screen.
Once the syncing process is complete, you can disconnect your device from your computer and enjoy your synced media on the go. Any changes made in your iTunes library, such as adding or deleting songs or creating new playlists, will be reflected in your synced device the next time you perform a sync.
It’s important to note that iTunes uses a two-way syncing process, meaning that any changes made on your device, such as adding songs or creating playlists, will be reflected in your iTunes library during the next sync. This ensures that your media remains consistent across all your devices.
Syncing your devices with iTunes is a convenient way to keep your media library up to date and accessible across all your iOS devices. By following these steps, you can easily sync your music, movies, TV shows, and more with iTunes, providing a seamless and consistent media experience on your devices.
Purchasing Music and Other Media from the iTunes Store
The iTunes Store is a vast marketplace where you can purchase music, movies, TV shows, books, and more, directly from iTunes. With millions of options available, it’s a convenient way to expand your media collection. In this section, we’ll guide you through the process of purchasing music and other media from the iTunes Store.
To begin, open iTunes and navigate to the iTunes Store by clicking on the “Music” or “Store” tab at the top left corner of the iTunes window. You can also access the iTunes Store by clicking on the “iTunes Store” button in the top right corner of the main window.
Once you’re in the iTunes Store, you can browse and search for your desired content. The iTunes Store is organized into various categories, such as Music, Movies, TV Shows, Books, and more. Simply click on a category to explore the available options. You can also use the search bar at the top right corner to search for specific items. Enter the desired keywords and press Enter to view the search results.
When you find an item you want to purchase, click on it to view more details, such as the title, artist, album, or description. You can also listen to a preview of the songs or watch a trailer before making a purchase decision. If you’re satisfied with the content, click on the “Buy” or “Add to Cart” button.
If you clicked on the “Buy” button, iTunes will prompt you to confirm your purchase. Review the price and click on “Buy” to proceed with the purchase. If you clicked on the “Add to Cart” button, you can continue browsing and adding more items to your cart before completing the purchase.
Once you’ve made your purchase, the item will be downloaded and automatically added to your iTunes library. You can access your purchased content by going to the “Purchased” section in the iTunes Store or by navigating to the respective category in your iTunes library, such as Music or Movies.
In addition to purchasing individual items, iTunes also offers convenient options for purchasing entire albums, TV show seasons, or movie bundles. These options often provide a better value and allow you to enjoy a complete collection of your favorite content.
Furthermore, iTunes offers various promotional deals, discounts, and free content, so be sure to check the Sale section and browse through the available offers. You may find great deals or free downloads to enhance your media library.
When making purchases from the iTunes Store, it’s important to have a valid Apple ID and payment method linked to your account. You can manage your account settings, including payment methods and billing information, by clicking on your Apple ID in the top right corner of the iTunes Store.
Purchasing music and other media from the iTunes Store is a seamless and secure process. By following these steps, you can easily expand your media collection with a wide range of music, movies, TV shows, books, and more, all from the comfort of your iTunes platform.
Subscribing to and Managing Podcasts
Podcasts offer a wealth of audio and video content on a wide range of topics, making them a popular source of entertainment and information. iTunes makes it easy to discover, subscribe to, and manage podcasts, allowing you to stay updated with your favorite shows. In this section, we’ll guide you through the process of subscribing to and managing podcasts in iTunes.
To begin, open iTunes and navigate to the iTunes Store by clicking on the “Podcasts” tab in the top left corner of the iTunes window. You can also access the iTunes Store by clicking on the “iTunes Store” button in the top right corner of the main window and selecting the “Podcasts” category.
Once you’re in the iTunes Store, you can explore the wide variety of podcasts available. You can browse through different categories, such as Arts, Business, Education, Technology, and more. Alternatively, you can use the search bar at the top right corner to search for specific podcasts or topics of interest.
When you find a podcast you want to subscribe to, click on its title to view more details, such as the description, episodes, and ratings. To subscribe to the podcast, click on the “Subscribe” button. Subscribing to a podcast ensures that you receive automatic updates whenever a new episode is released.
After subscribing to a podcast, you can access and manage your subscribed podcasts within iTunes. Click on the “Library” tab in the top left corner of the iTunes window and select “Podcasts.” Here, you’ll find a list of all your subscribed podcasts, organized by date with the newest episodes at the top.
To listen to a podcast episode, simply click on its title. iTunes will start playing the episode, and you can control the playback using the built-in controls. You can also download episodes to your device for offline listening by clicking on the download button next to the episode.
If you no longer wish to subscribe to a podcast, you can unsubscribe at any time. To do this, go to your subscribed podcasts list, right-click on the podcast you want to unsubscribe from, and select “Unsubscribe.” By unsubscribing, you’ll no longer receive automatic updates for new episodes. However, you’ll still have access to the previously downloaded episodes.
Additionally, iTunes allows you to customize your podcast preferences. Click on the “Edit” menu in iTunes and select “Preferences.” Go to the “Podcasts” tab, where you can choose where to store downloaded episodes, adjust the frequency of podcast updates, and specify the number of episodes to keep.
Furthermore, if you like a particular episode and want to share it with others, iTunes provides sharing options. Right-click on the episode, select “Share,” and choose the desired sharing method, such as email, Messages, or social media platforms.
Subscribing to and managing podcasts in iTunes is a convenient way to stay connected with your favorite shows and access a wealth of audio and video content. By following these steps, you can easily explore, subscribe to, and manage podcasts to enhance your listening and viewing experience.
Renting or Purchasing Movies and TV Shows
iTunes offers a vast selection of movies and TV shows that you can rent or purchase to watch on your devices. This convenience allows you to enjoy the latest releases, classic films, and popular TV series right from the comfort of your iTunes platform. In this section, we’ll guide you through the process of renting or purchasing movies and TV shows from the iTunes Store.
To begin, open iTunes and navigate to the iTunes Store by clicking on the “Movies” or “TV Shows” tab at the top left corner of the iTunes window. You can also access the iTunes Store by clicking on the “iTunes Store” button in the top right corner of the main window and selecting the “Movies” or “TV Shows” category.
Once you’re in the iTunes Store, you can explore the diverse collection of movies and TV shows available. Browse through different genres, such as Action, Comedy, Drama, or explore the top charts to discover trending content. You can also use the search bar at the top right corner to search for specific titles or actors.
When you find a movie or TV show you want to rent or purchase, click on its title to view more details, such as the synopsis, cast, and customer reviews. If you want to rent the content, click on the “Rent” button and select the desired rental period, such as 24 hours or 48 hours. If you prefer to purchase the content and own it permanently, click on the “Buy” button.
After selecting the rental or purchase option, iTunes will prompt you to confirm your choice and enter your Apple ID password. Review the price and click on “Rent” or “Buy” to proceed with the transaction. iTunes will then process your payment and initiate the download of the content to your iTunes library.
Once the movie or TV show is downloaded, you can access it in your iTunes library. Go to the “Library” tab in the top left corner of the iTunes window and select either “Movies” or “TV Shows.” Here, you’ll find a list of your purchased or rented content, organized by title or series.
To watch a rental, simply click on its title and hit the “Play” button. Remember that rentals have a time limit, such as 24 or 48 hours, from the moment you start watching. After the rental period expires, the content will be automatically removed from your iTunes library.
If you purchase a movie or TV show, it will be available in your library indefinitely. You can watch it as many times as you want without any time restrictions. Simply click on the title to start playing the content.
iTunes also allows you to transfer your rented or purchased movies and TV shows to your iOS devices, such as your iPhone or iPad, for offline viewing. Connect your device to your computer, select your device in iTunes, and go to the “Movies” or “TV Shows” tab. Enable the option to sync your rented or purchased content and click on the “Apply” or “Sync” button to transfer the content to your device.
By renting or purchasing movies and TV shows from the iTunes Store, you can enjoy a vast collection of entertainment on various devices. By following these steps, you can easily explore, rent, or purchase your favorite movies and TV shows, ensuring a fulfilling and immersive viewing experience.
Managing Your iTunes Store Account
Your iTunes Store account is at the center of your iTunes experience, allowing you to make purchases, access your media library, and manage your settings. It’s important to understand how to effectively manage your iTunes Store account to ensure a smooth and personalized user experience. In this section, we’ll guide you through the process of managing your iTunes Store account.
To access your iTunes Store account, open iTunes and click on your Apple ID or account name at the top right corner of the iTunes window. A dropdown menu will appear, providing you with various options and settings related to your account.
One of the primary settings you can manage is your payment method and billing information. Click on “Account Info” in the dropdown menu to view and update your payment details. Here, you can add or remove credit cards, update your billing address, or choose a different default payment method for your purchases.
In addition to payment settings, you can manage your Apple ID and account information. Under “Account Info,” you’ll find options to change your password, manage security questions, or update your email address. Keeping your account information up to date ensures the security and accessibility of your iTunes Store account.
If you have multiple devices or family members using a single iTunes Store account, you can also manage your device settings. Click on “Manage Devices” in the dropdown menu to view a list of devices associated with your account. Here, you can remove devices that you no longer use or authorize new devices to access your purchased content.
Furthermore, iTunes allows you to manage your privacy settings. By clicking on “Privacy Settings” in the dropdown menu, you can control the level of data sharing and personalized advertising you receive through iTunes. Adjust these settings according to your preferences to ensure a personalized and secure experience.
Managing your iTunes Store account also involves keeping track of your purchase history. By clicking on “Purchase History” in the dropdown menu, you can view a detailed list of all your past purchases, including music, movies, TV shows, books, and more. You can also choose to redownload any previously purchased content that might not be currently available in your library.
Finally, if you encounter any issues or have questions related to your iTunes Store account, iTunes provides customer support options. Click on “Contact Apple Support” in the dropdown menu to access various support resources, including FAQs, community forums, and the option to contact Apple Support directly for assistance.
Managing your iTunes Store account is crucial for a personalized and hassle-free experience. By staying on top of your account settings, payment information, and device authorizations, you can ensure a secure and seamless interaction with the iTunes Store and enjoy all the features and benefits it has to offer.
Troubleshooting Common Issues with iTunes
While iTunes is a powerful platform for managing your media library, occasional issues may arise that can disrupt your experience. Knowing how to troubleshoot common issues can help you resolve problems and get back to enjoying your music, movies, and more. In this section, we’ll outline some common issues users encounter with iTunes and offer troubleshooting tips.
1. iTunes not launching or responding: If iTunes fails to launch or becomes unresponsive, try restarting your computer and then relaunching the application. If the issue persists, check for any updates to iTunes and install them. If that still doesn’t resolve the issue, consider uninstalling and reinstalling iTunes.
2. Syncing issues: If you’re having trouble syncing your device with iTunes, ensure that you’re using a compatible cable and that it’s securely connected. Check for any updates to iTunes and your device’s operating system, as outdated software can sometimes cause syncing issues. Additionally, try restarting both your computer and device and then attempt to sync again.
3. Purchases not appearing: If a previously purchased song, movie, or TV show is not showing in your iTunes library, go to the iTunes Store and click on your Apple ID. Select “Purchased” and then choose “Music,” “Movies,” or “TV Shows” to view your purchased content. From there, you can select the item and redownload it directly to your iTunes library.
4. Streaming issues: If you’re experiencing playback issues while streaming music or video, check your internet connection. A slow or unstable internet connection can cause interruptions and buffering. Try restarting your router or connecting to a different network if possible. You can also adjust the streaming quality settings in iTunes to optimize playback performance.
5. Crashing or freezing: If iTunes crashes or freezes frequently, ensure that your computer meets the system requirements for iTunes. Make sure that you have enough available disk space, as a full hard drive can impact performance. If the issue persists, try disabling any unnecessary third-party plugins or extensions in iTunes.
6. Missing artwork or incorrect metadata: If you notice missing artwork or incorrect metadata for songs or albums, right-click on the item and select “Get Info.” From there, you can manually add or update the artwork and metadata. Additionally, you can use the “Get Album Artwork” feature in iTunes to automatically retrieve missing album artwork.
7. Authorization issues: If you’re unable to play your purchased content on a specific device, it may be due to authorization issues. Ensure that you’re signed in with the correct Apple ID and password associated with your purchase. You can manage your authorized devices in your iTunes account settings and remove any devices that you no longer use.
If you’ve tried the above troubleshooting steps and the issue persists, consider searching for specific solutions on the Apple Support website or reaching out to Apple Support directly for further assistance. They can provide expert guidance and help you resolve more complex issues with your iTunes experience.
With these troubleshooting tips, you can address common issues that may arise while using iTunes, ensuring a smoother and more enjoyable media management experience.