
Precautions before Changing SIM Card
Before you embark on the journey of changing the SIM card in your Samsung device, it’s crucial to take a few precautions to ensure a smooth transition. Here are some essential steps to consider:
- Power Off Your Device: Before handling the SIM card, make sure your Samsung device is powered off. This precautionary measure prevents any potential damage to the device or the SIM card itself.
- Use the Right SIM Card: Ensure that the new SIM card you intend to insert is compatible with your Samsung device. Using an incompatible SIM card can lead to connectivity issues and may even damage the SIM card slot.
- Handle the SIM Card with Care: SIM cards are delicate, so handle them with care. Avoid bending or scratching the SIM card, as this can affect its functionality.
- Backup Your Data: While changing the SIM card doesn’t typically erase your data, it’s always wise to back up your important contacts, messages, and other data to avoid any potential loss.
- Ensure Proper Alignment: When inserting the new SIM card, ensure that it is properly aligned with the SIM card tray to prevent any issues with connectivity or recognition.
By adhering to these precautions, you can minimize the risk of encountering issues during the SIM card replacement process and ensure a seamless transition to your new SIM card.
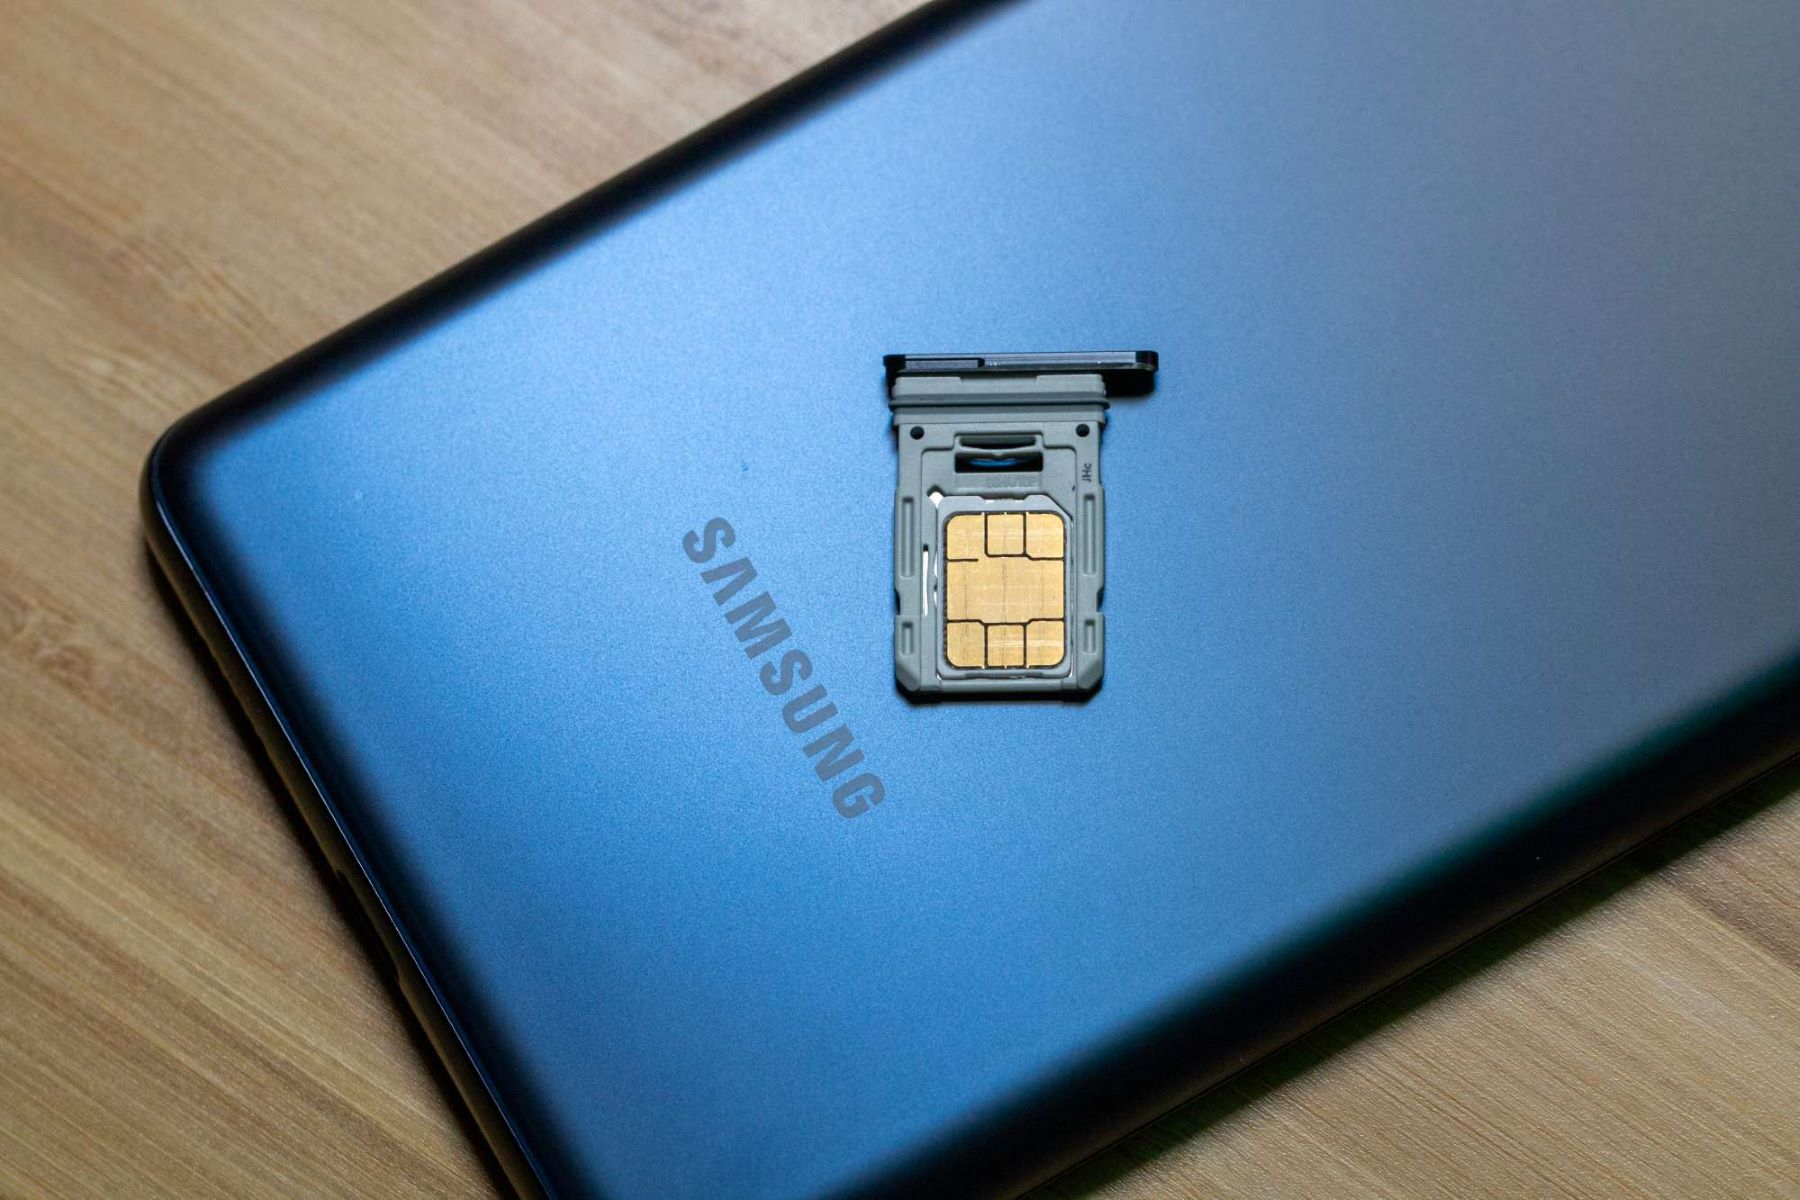
Step 1: Locate the SIM Card Tray
Locating the SIM card tray is the first step in the process of changing your SIM card on a Samsung device. The SIM card tray is typically located on the side of the device. However, the exact placement may vary depending on the model of your Samsung phone. Here are the general steps to locate the SIM card tray:
- Refer to the Device Manual: If you’re unsure about the location of the SIM card tray, refer to the user manual that came with your Samsung device. The manual usually contains detailed instructions and diagrams to help you locate the SIM card tray.
- Inspect the Sides of Your Device: Carefully examine the sides of your Samsung phone. The SIM card tray is often located on the upper or lower edge, and it may have a small pinhole or a small indentation to indicate its presence.
- Use a SIM Ejector Tool: Some Samsung devices come with a SIM ejector tool, a small pin-like tool that can be used to eject the SIM card tray. If your device includes this tool, it may be stored in the device’s packaging or included as part of the device accessories.
Once you’ve successfully located the SIM card tray, you’re ready to proceed to the next step of ejecting the tray in preparation for changing the SIM card.
Step 2: Eject the SIM Card Tray
After locating the SIM card tray, the next step in the process of changing your SIM card on a Samsung device is to eject the SIM card tray. This step is essential for accessing the SIM card slot and replacing the existing SIM card with a new one. Here’s how you can eject the SIM card tray:
- Use the SIM Ejector Tool: If your Samsung device is equipped with a SIM ejector tool, insert the tool into the small pinhole located near the SIM card tray. Apply gentle pressure to push the tool into the hole, and the SIM card tray will start to eject from the device.
- Apply Gentle Pressure: In the absence of a SIM ejector tool, you can use a small, pointed object like a paperclip. Insert the tip of the paperclip into the pinhole and apply gentle pressure to trigger the release of the SIM card tray.
- Remove the SIM Card Tray: Once the SIM card tray partially ejects from the device, carefully pull it out to reveal the SIM card slot. Handle the tray with care to avoid any damage or misalignment.
By successfully ejecting the SIM card tray, you’ve completed a crucial step in the process of changing your Samsung device’s SIM card. The next steps involve removing the old SIM card, inserting the new one, and reinserting the SIM card tray to finalize the process.
Step 3: Remove the Old SIM Card
Now that you’ve successfully ejected the SIM card tray, the next step in the process of changing your Samsung device’s SIM card is to remove the old SIM card. This step requires careful handling to ensure the safe removal of the existing SIM card. Here’s how you can proceed:
- Inspect the Old SIM Card: Before removing the old SIM card, take a moment to inspect it for any signs of damage, such as scratches or bends. This visual check ensures that the old SIM card is in good condition and can be safely replaced.
- Gently Remove the Old SIM Card: Using your fingers, carefully remove the old SIM card from the SIM card tray. Apply gentle pressure to slide the SIM card out of its slot, ensuring that you do not force it or cause any damage to the card or the tray.
- Place the Old SIM Card in a Safe Location: Once the old SIM card is removed, place it in a secure location, such as a SIM card holder or the packaging of the new SIM card. This precaution ensures that the old SIM card is not misplaced or damaged during the replacement process.
By successfully removing the old SIM card from the SIM card tray, you’ve completed a crucial step in the process of changing your Samsung device’s SIM card. The next steps involve inserting the new SIM card and reinserting the SIM card tray to finalize the process.
Step 4: Insert the New SIM Card
With the old SIM card safely removed, the next step in the process of changing your Samsung device’s SIM card is to insert the new SIM card. This step requires precision and care to ensure that the new SIM card is properly installed for seamless functionality. Here’s how you can proceed:
- Inspect the New SIM Card: Before inserting the new SIM card, carefully inspect it for any signs of damage or misalignment. Verify that the new SIM card is compatible with your Samsung device and is free from any physical defects.
- Align the New SIM Card: Hold the new SIM card with the metal contacts facing down and the notched corner oriented as per the SIM card tray’s guidelines. Align the new SIM card with the SIM card tray, ensuring that it fits securely without any forceful pressure.
- Place the New SIM Card in the Tray: Gently place the new SIM card into the designated slot within the SIM card tray. Ensure that the SIM card sits flush and level within the tray, maintaining proper alignment for optimal connectivity.
By successfully inserting the new SIM card into the SIM card tray, you’ve completed a crucial step in the process of changing your Samsung device’s SIM card. The next steps involve reinserting the SIM card tray and powering on your device to finalize the process.
Step 5: Reinsert the SIM Card Tray
After successfully inserting the new SIM card, the next step in the process of changing your Samsung device’s SIM card is to reinsert the SIM card tray. This step is essential for securing the new SIM card within the device and ensuring proper connectivity. Here’s how you can proceed:
- Position the SIM Card Tray: Hold the SIM card tray in a way that aligns with the SIM card slot on your Samsung device. Ensure that the tray is positioned correctly for seamless insertion.
- Gently Insert the SIM Card Tray: Carefully slide the SIM card tray back into the SIM card slot, ensuring that it glides smoothly without resistance. Avoid applying excessive force to prevent any damage to the tray or the device.
- Verify Secure Placement: Once the SIM card tray is fully inserted, gently press down on it to ensure that it is securely in place. The tray should fit flush with the device’s frame, indicating that it is properly reinserted.
By successfully reinserting the SIM card tray, you’ve completed a crucial step in the process of changing your Samsung device’s SIM card. The final step involves powering on your device to activate the new SIM card and ensure seamless connectivity.
Step 6: Power on Your Samsung Device
After reinserting the SIM card tray, the final step in the process of changing your Samsung device’s SIM card is to power on the device. This step is crucial for activating the new SIM card and ensuring that your device recognizes and connects to the network. Here’s how you can proceed:
- Press the Power Button: Locate the power button on your Samsung device and press it to power on the device. Depending on the model, the power button is typically located on the side or the top of the device.
- Wait for the Device to Boot Up: Allow your Samsung device to boot up fully. During this process, the device will recognize the new SIM card and establish connectivity with the network.
- Verify Network Connectivity: Once the device has powered on, check for network signal bars or indicators to confirm that the new SIM card is recognized and providing network connectivity.
By powering on your Samsung device, you’ve completed the final step in the process of changing the SIM card. Your device should now be ready to use with the new SIM card, allowing you to make calls, send messages, and access mobile data with ease.