
Things You'll Need
Things You'll Need
Before you begin the process of removing the SIM card from your Samsung Grand Prime, it’s essential to gather the necessary tools to ensure a smooth and hassle-free experience. Here’s what you’ll need:
1. SIM Ejector Tool
First and foremost, you’ll need the SIM ejector tool that came with your Samsung Grand Prime. This small, metal tool is designed specifically for removing the SIM card from your device without causing any damage. If you no longer have the original ejector tool, a small paperclip can be used as an alternative.
2. A Well-Lit Workspace
Having a well-lit workspace is crucial for this task. Ensure that you have adequate lighting to clearly see the SIM card slot and the surrounding area. This will help you avoid any potential mishaps during the removal process.
3. Patience and Care
Patience and care are invaluable during this procedure. Take your time and handle the SIM card and ejector tool with precision and gentleness. Rushing through the process may lead to accidental damage to the SIM card or the phone itself.
4. Optional: Magnifying Glass
While not mandatory, a magnifying glass can be helpful, especially if you’re dealing with a particularly small or delicate SIM card. It can assist in examining the slot and ensuring that the SIM card is properly seated upon reinsertion.
By having these essential items at your disposal, you’ll be well-prepared to safely and effectively remove and reinsert the SIM card in your Samsung Grand Prime.
Step 1: Power Off Your Phone
Before embarking on the process of removing the SIM card from your Samsung Grand Prime, it’s crucial to power off your phone. This step ensures the safety of both the device and the SIM card during the removal and reinsertion process.
Here’s how to power off your Samsung Grand Prime:
- Locate the Power Button: The power button is typically located on the right-hand side or the top of the device, depending on the model of your Samsung Grand Prime.
- Press and Hold the Power Button: Press and hold the power button until the power-off menu appears on the screen.
- Select “Power Off”: Once the power-off menu is displayed, tap on the “Power Off” or “Turn Off” option to initiate the shutdown process.
- Wait for the Phone to Power Down: Allow the device to completely power off before proceeding to the next step. This typically takes a few seconds.
It’s important to ensure that the phone is fully powered off before moving on to the subsequent steps, as this minimizes the risk of damaging the SIM card or the phone’s internal components. Once your Samsung Grand Prime is powered off, you’re ready to proceed to the next step of removing the SIM card.
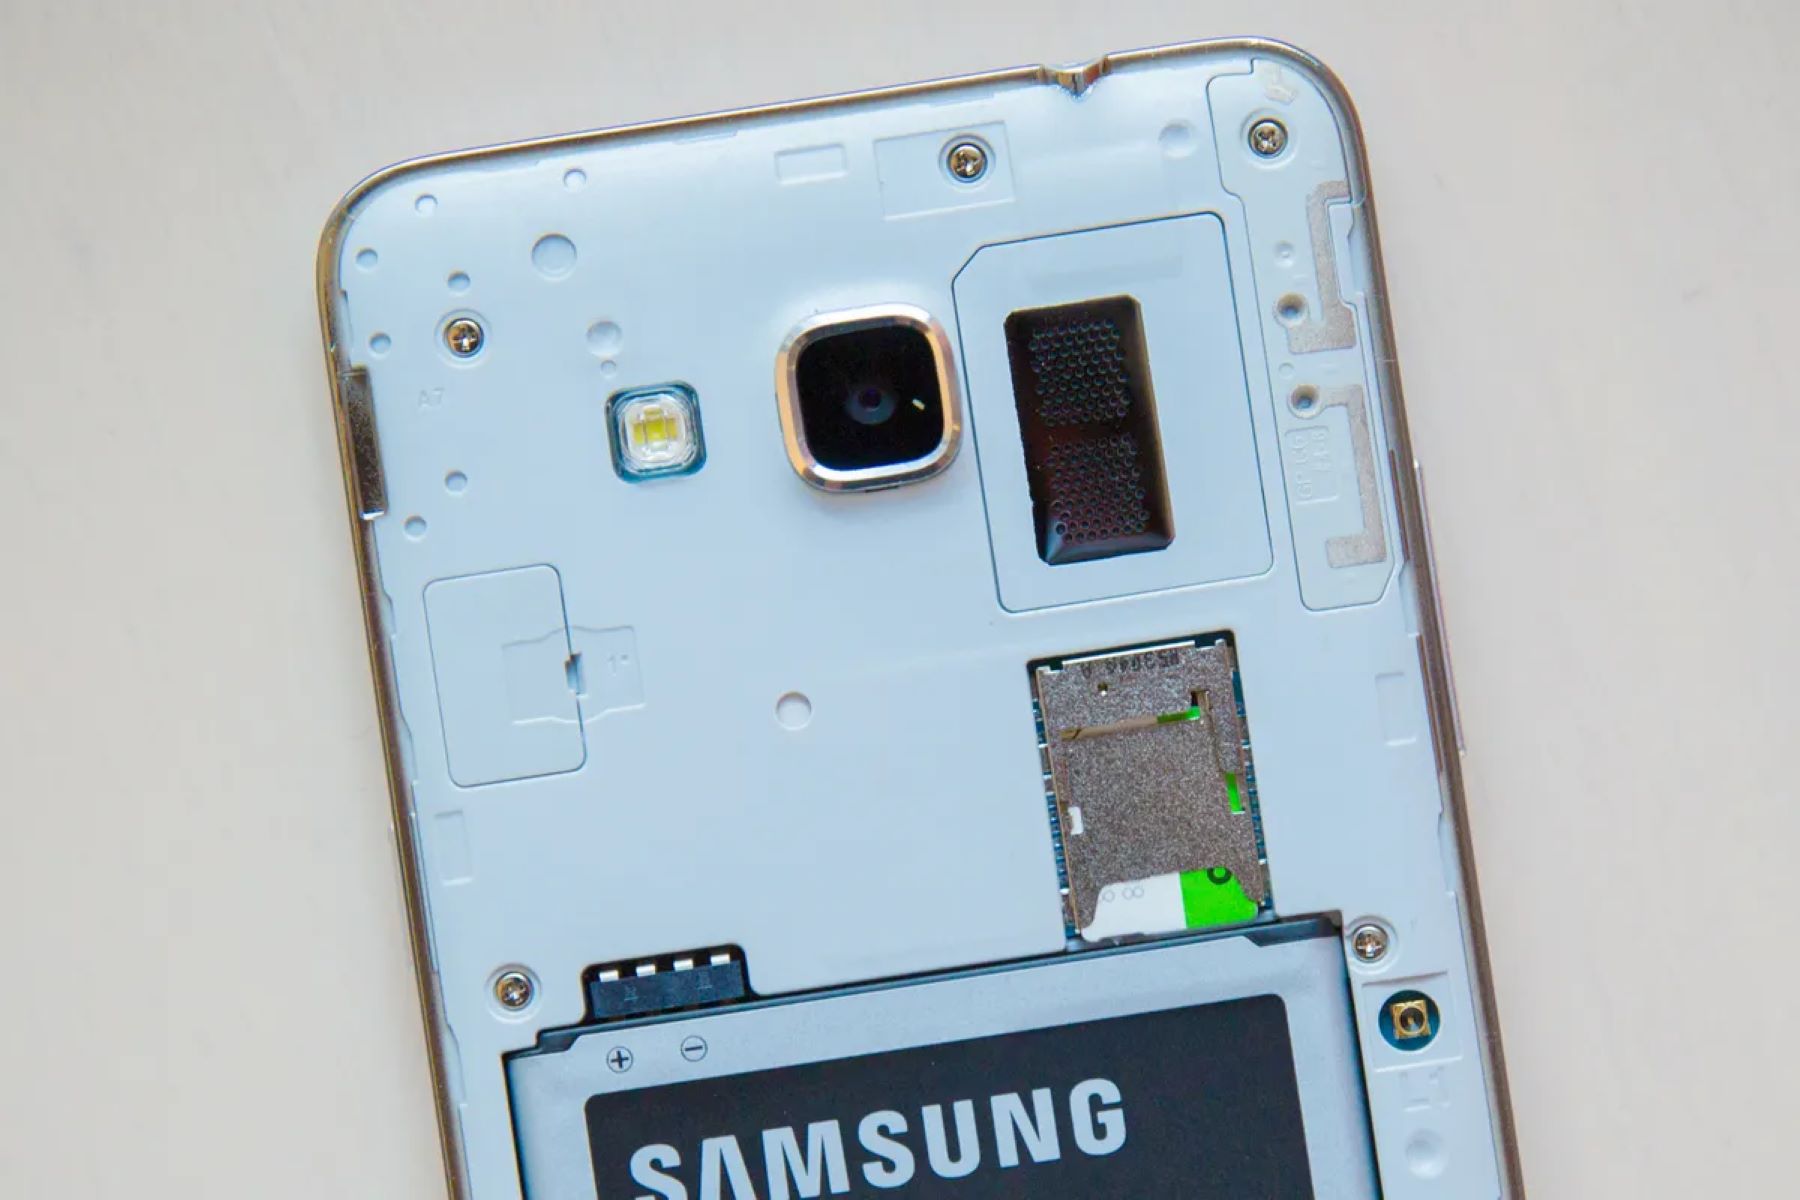
Step 2: Locate the SIM Card Slot
After powering off your Samsung Grand Prime, the next step is to locate the SIM card slot. The SIM card slot is where the SIM card is inserted and is an essential component of your device. Here’s how to locate the SIM card slot:
- Examine the Edges of Your Phone: The SIM card slot is typically located on the sides of the phone. On the Samsung Grand Prime, it is commonly positioned on the left-hand side of the device.
- Look for a Small Tray: The SIM card slot is often accompanied by a small tray with a tiny hole. This tray is designed to hold the SIM card securely in place.
- Check the User Manual: If you’re having trouble locating the SIM card slot, refer to the user manual that came with your Samsung Grand Prime. The manual provides detailed illustrations and instructions for the physical features of the device.
Once you’ve located the SIM card slot, you’re ready to proceed to the next step of using the SIM ejector tool to remove the SIM card from your Samsung Grand Prime.
Step 3: Use the SIM Ejector Tool
With the SIM card slot located, the next step in removing the SIM card from your Samsung Grand Prime involves using the SIM ejector tool. This small, metal tool is specifically designed for safely and easily removing the SIM card from the device. Here’s how to use the SIM ejector tool:
- Retrieve the SIM Ejector Tool: Locate the SIM ejector tool that came with your Samsung Grand Prime. If the original tool is unavailable, a small paperclip can be used as an alternative.
- Insert the Tool into the Hole: Identify the small hole next to the SIM card slot. This is the ejection mechanism for the SIM card tray. Insert the SIM ejector tool or the unfolded paperclip into this hole.
- Apply Gentle Pressure: Gently push the tool into the hole until you feel a slight resistance. This indicates that the SIM card tray is being released.
- Remove the Tray: Once the tray is released, carefully pull it out of the SIM card slot using the ejector tool. Be cautious not to apply excessive force or damage the tray during this process.
By following these steps, you can successfully use the SIM ejector tool to release the SIM card tray from your Samsung Grand Prime, paving the way for the safe removal of the SIM card itself.
Step 4: Remove the SIM Card
With the SIM card tray released from the slot, the next step is to carefully remove the SIM card from your Samsung Grand Prime. Here’s how to proceed:
- Inspect the SIM Card Tray: Once the tray is out, take a moment to inspect it and locate the SIM card. The SIM card is usually positioned within a smaller cutout on the tray.
- Gently Remove the SIM Card: Using your fingers, carefully lift the SIM card from the tray. Handle it with care to avoid bending or damaging the card or its delicate components.
- Examine the SIM Card: Before proceeding, take a moment to examine the SIM card for any signs of damage or wear. If the card appears to be in good condition, you can proceed with the reinsertion process.
- Place the SIM Card in a Safe Location: Set the SIM card aside in a secure location while you prepare to reinsert it. This ensures that it remains free from dust, debris, or accidental damage.
By following these steps, you can safely remove the SIM card from your Samsung Grand Prime, setting the stage for the subsequent reinsertion process.
Step 5: Reinsert the SIM Card
After removing the SIM card from your Samsung Grand Prime, the next crucial step is to reinsert it securely into the SIM card slot. This process ensures that the SIM card is properly seated and functional within your device. Here’s how to reinsert the SIM card:
- Position the SIM Card: Take the SIM card and position it correctly within the designated area on the SIM card tray. Align the notched corner of the SIM card with the corresponding notch on the tray to ensure proper placement.
- Place the Tray Back Into the Slot: Once the SIM card is in position, carefully place the SIM card tray back into the SIM card slot. Ensure that the tray slides in smoothly and aligns with the slot without any resistance.
- Apply Gentle Pressure: Gently press down on the tray once it is fully inserted to ensure that it sits flush within the slot. Avoid using excessive force, as the tray should fit snugly into place without any difficulty.
- Power On Your Phone: With the SIM card securely reinserted, power on your Samsung Grand Prime to initiate the startup process. Once the device is powered on, it will recognize the reinserted SIM card and establish the necessary connections.
By following these steps, you can effectively reinsert the SIM card into your Samsung Grand Prime, ensuring that it is securely positioned and ready for use.
Step 6: Power On Your Phone
After reinserting the SIM card into your Samsung Grand Prime, the final step is to power on your phone. This process ensures that the device recognizes the reinserted SIM card and establishes the necessary connections for cellular service. Here’s how to power on your Samsung Grand Prime:
- Press the Power Button: Locate the power button on your device, typically located on the right-hand side or the top of the phone. Press and hold the power button to initiate the startup process.
- Wait for the Device to Boot Up: Allow the Samsung Grand Prime to boot up fully. This process may take a few moments as the device initializes and establishes the connection with the reinserted SIM card.
- Check for Signal: Once the device has powered on, check for a cellular signal indicator on the screen. This signal confirms that the SIM card has been recognized, and the device is ready for use.
- Test Call and Data: Place a test call or access mobile data to ensure that the SIM card is functioning properly. If you encounter any issues, recheck the SIM card insertion and ensure that it is securely positioned.
By following these steps, you can successfully power on your Samsung Grand Prime and verify that the reinserted SIM card is fully operational, allowing you to resume using your device for calls, messages, and data services.