
Why Centering the Contents of a Layer is Important
In the world of graphic design, precision and attention to detail are paramount. Every element in a design holds significance, and the placement of each element can greatly impact the overall composition. One essential aspect of design is centering the contents of a layer.
Centering the contents of a layer brings balance to the design and creates a visually pleasing composition. When elements are centered, they appear more organized and harmonious. This technique enhances the overall presentation of the design, making it more appealing to the viewer.
Additionally, centering helps draw the viewer’s attention to the focal point of the design. By placing important content in the center, you create a visual hierarchy that guides the viewer’s gaze. This is particularly useful when designing graphics that convey a message or highlight a specific element.
Centering also ensures that your design looks professional. It gives the impression that you have taken the time and care to align your elements precisely, adding a level of polish to your work. This attention to detail can make a significant difference, especially in professional settings where first impressions matter.
Besides aesthetics, centering the contents of a layer can also have practical benefits. For example, when you create a design that will be printed or displayed on different devices, centering ensures that the content remains visually consistent across different mediums. This consistency is important for maintaining the integrity and impact of your design, regardless of how it is viewed.
Lastly, centering can make it easier to add or adjust elements within your design. When the contents of a layer are already centered, it’s simpler to introduce new elements or modify existing ones. You can easily align them with the centerline, maintaining a coherent and organized layout.
Step 1: Open the Photoshop Document
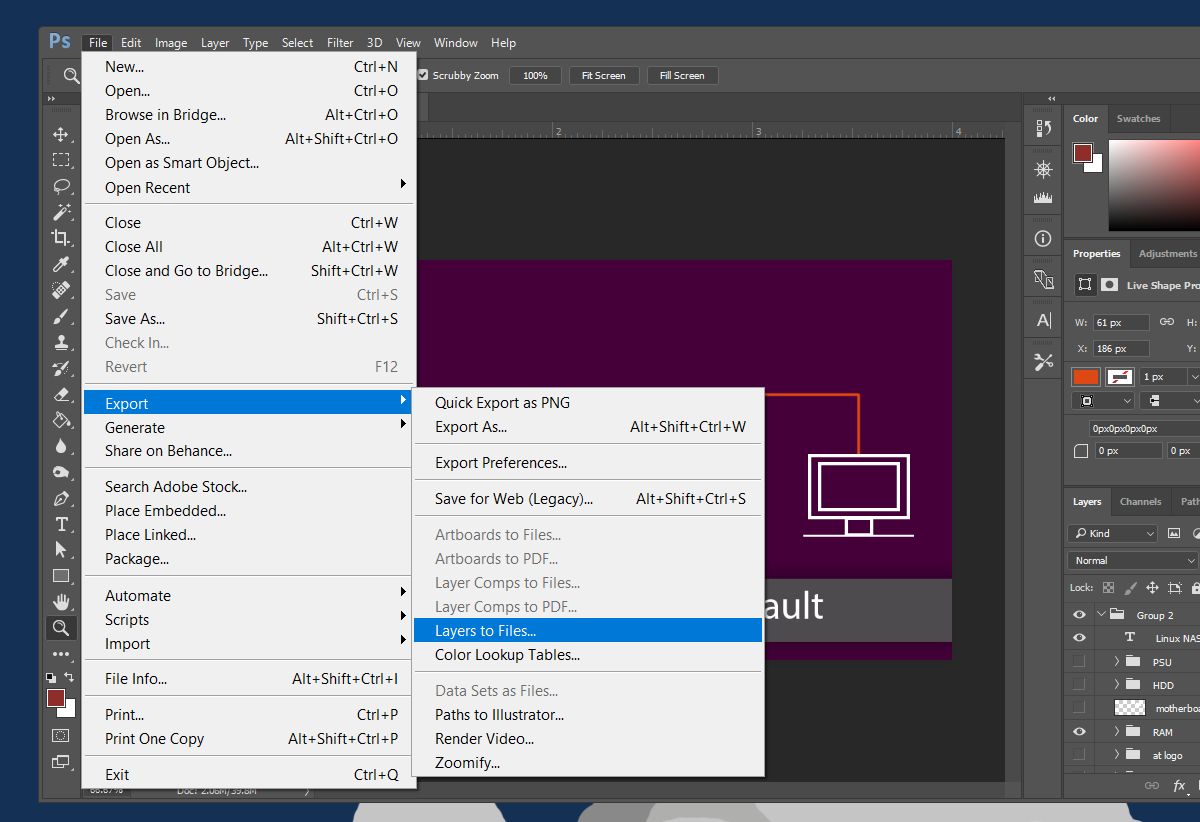
Before you can center the contents of a layer in Photoshop, you need to open the document you wish to work on. Launch Photoshop and navigate to the “File” menu at the top left corner of the screen. Click on “Open” to access your file explorer.
Browse to the location where your Photoshop document is saved and select it. Then, click on the “Open” button to load the document into Photoshop. The document will appear as a new tab in the Photoshop workspace.
If you’re working on an existing project, make sure to open it in Photoshop. If you haven’t created a document yet, you can choose to create a new one by clicking on “New” in the “File” menu or using the keyboard shortcut Ctrl+N (Windows) or Command+N (Mac).
Opening the Photoshop document is the first step in centering the contents of a layer. It provides you with the canvas on which you will arrange and align your elements. With the document loaded, you’re ready to move on to the next step and select the layer you want to center.
Step 2: Select and Unlock the Layer You Want to Center
Once you have opened your Photoshop document, the next step in centering the contents of a layer is to select the specific layer you want to work with. Layers are like transparent sheets stacked on top of each other, and they contain the various elements and elements groups that make up your design.
To select a layer, navigate to the Layers panel, which is typically located on the right side of the Photoshop workspace. If you don’t see the Layers panel, go to the “Window” menu and click on “Layers” to display it.
In the Layers panel, you’ll see a list of all the layers in your document. Identify the layer you want to center and click on it to select it. The selected layer will be highlighted in the Layers panel, indicating that it is active and ready for further editing.
Next, check if the layer you selected is locked. Locked layers have a small padlock icon displayed next to their name in the Layers panel. If the layer is locked, you need to unlock it in order to make changes to its position or alignment.
To unlock a layer, simply click on the padlock icon next to its name in the Layers panel. This will remove the lock and allow you to freely manipulate the contents of the layer.
Selecting and unlocking the layer you want to center is an essential step in the process. It ensures that you have the correct layer selected and gives you the flexibility to adjust its position without any restrictions. With the layer selected and unlocked, you can now proceed to the next step and access the alignment options in Photoshop.
Step 3: Access the “Align” Options
To center the contents of a layer in Photoshop, you need to access the “Align” options. These options allow you to align and distribute layers or selected elements within a layer based on different criteria, such as alignment to the canvas or to other layers.
To access the “Align” options, go to the top menu in Photoshop and click on “Window”. In the drop-down menu that appears, hover over “Align” to display the alignment sub-menu. Click on “Align” to open the “Align” panel or window.
Alternatively, you can use the keyboard shortcut combination of Ctrl+Shift+A (Windows) or Command+Shift+A (Mac) to quickly open the “Align” panel.
Once the “Align” panel is open, you’ll see a set of alignment icons and options. These options are used to specify the alignment properties and behavior. For example, you can choose to align layers horizontally or vertically, distribute layers evenly, or align layers based on their centers, edges, or other reference points.
The “Align” panel provides additional controls and options, such as toggling the visibility of specific alignment options, applying alignments to the entire canvas or only the selected layers, and even saving and loading alignment presets for future use.
Accessing the “Align” options is crucial for centering the contents of a layer in Photoshop. It gives you the necessary tools and functionality to achieve precise alignment and placement of your design elements. With the “Align” options accessible, you can now move on to the next step and choose the appropriate alignment options for your needs.
Step 4: Choose the Correct Alignment Options
Once you have accessed the “Align” options in Photoshop, the next step is to choose the correct alignment option that best suits your needs. The alignment options will determine how the contents of the layer will be centered within the canvas or in relation to other elements.
In the “Align” panel, you’ll find a range of alignment icons representing different alignment options. To center the contents of your layer, you’ll generally want to choose the option that aligns the layer horizontally and vertically to the canvas or to other layers.
For example, if you want to center a layer to the canvas, you can use the “Align Horizontal Centers” and “Align Vertical Centers” icons. These options will automatically move the layer so that its center aligns perfectly with the center of the canvas.
If you want to align the layer to other elements or layers, you can choose options like “Align Left Edges”, “Align Right Edges”, “Align Top Edges”, or “Align Bottom Edges”. These options will align the edges of the selected layer with the corresponding edges of the reference layer.
Remember that the correct alignment option can vary depending on the specific design and composition you are working with. Take into consideration the relationship between different elements and choose the alignment option that achieves the desired centering effect.
In addition to the main alignment options, you may also need to use the “Distribute” options. These options are useful when you have multiple layers or objects that need to be evenly distributed along a particular axis, such as evenly spacing out buttons or icons.
By selecting the correct alignment options, you ensure that the contents of your layer are centered precisely according to your design requirements. Once you have chosen the alignment options, you’re ready to move on to the next step and confirm the alignment of the layer within the document.
Step 5: Confirm the Alignment
After choosing the appropriate alignment options in Photoshop, it’s important to confirm that the contents of the layer are centered correctly. This step ensures that your design elements are aligned precisely as intended, creating a visually balanced composition.
To confirm the alignment, you can take several actions. First, visually inspect the placement of the layer within the canvas. Check if the contents appear centered and balanced, paying attention to the spacing and symmetry of other design elements.
You can also use Photoshop’s alignment guides and grids to assist in confirming the alignment. These guides and grids provide visual cues that help you determine whether the layer is centered accurately. By comparing the positioning of the layer to the guides or grids, you can ensure precise alignment.
Another way to confirm the alignment is by selecting the layer and checking its position values in the toolbar. The X and Y position values represent the coordinates of the layer’s top-left corner. If both values are equal, it indicates that the layer is centered horizontally and vertically.
Moreover, you can use the rulers in Photoshop to measure the distance between the layer’s edges and the edges of the canvas. If these measurements are equal, it confirms that the layer is centered accordingly.
Take a moment to thoroughly review and verify the alignment of the layer. Make any necessary adjustments to ensure precise centering. You may need to repeat the alignment process or fine-tune the position of the layer to achieve the desired outcome.
Remember that confirming alignment is crucial to achieving a polished and professional design. It ensures that your design elements are centered accurately, creating a visually appealing and well-balanced composition.
Once you have confirmed the alignment, you can proceed to the next step to explore optional fine-tuning of the layer’s position for further refinement.
Step 6: Optional: Fine-tune the Position of the Layer
In some cases, after confirming the alignment of the layer, you may find the need to make further adjustments to achieve the perfect positioning. Fine-tuning the position of the layer allows you to make subtle changes to its placement for a more refined and precise result.
To fine-tune the position of the layer, you can utilize Photoshop’s Move Tool (shortcut: V). With the Move Tool selected, you can click and drag the layer within the canvas to adjust its position. As you drag the layer, pay close attention to the position values displayed in the toolbar, which indicate the coordinates of the layer’s top-left corner.
Alternatively, you can use the arrow keys on your keyboard to nudge the layer in small increments. Pressing the arrow keys while the layer is selected will move it by one pixel at a time. This allows for precise adjustments, especially when trying to align the layer with other elements or elements within the design.
Additionally, you can enable Photoshop’s snapping feature to help align the layer more accurately. Snapping allows the layer to automatically align with grid lines, guides, or other nearby elements. To enable snapping, go to “View” in the top menu and ensure that “Snap” is checked. This will make it easier to fine-tune the position of the layer while maintaining precise alignment.
Continue to fine-tune the position of the layer until you are satisfied with its placement. Remember to refer back to the desired alignment and composition in your design to ensure that the adjustments complement the overall aesthetic.
However, keep in mind that excessive adjustments may impact the overall integrity of the design or disrupt the visual balance. Exercise caution when fine-tuning the position and make subtle changes to maintain the overall harmony of the layout.
Once you have fine-tuned the position of the layer to your liking, take a moment to review the design as a whole. Make any final adjustments or refinements as needed to achieve the desired effect. By paying attention to the details and fine-tuning the position of the layer, you can elevate the overall quality and professionalism of your design.