
Why Set Apps to Open in a Specific Desktop Space?
Assigning apps to open in a specific desktop space on your Mac can greatly improve your productivity and workflow. By organizing your applications into different desktop spaces, you can create a more focused and structured work environment. Here are a few reasons why setting apps to open in a specific desktop space can be beneficial:
- Organized Workflow: Having different desktop spaces dedicated to specific tasks or projects can help you stay organized. For example, you can have one space for your email client, another for your design software, and a separate space for your coding environment. This way, you can easily switch between spaces and avoid cluttering your screen with multiple open windows.
- Reduced Distractions: Assigning apps to specific spaces can help minimize distractions. For instance, if you have your messaging apps in a separate space, you can focus on your work without being constantly interrupted by incoming messages. This can increase your concentration and productivity.
- Improved Multitasking: With different desktop spaces for different apps, you can efficiently multitask. Instead of constantly switching between windows or using split-screen mode, you can simply switch between desktop spaces to access the apps you need for each task. This can save time and make multitasking more seamless.
- Customized Work Environment: Setting apps to open in specific desktop spaces allows you to create a customized work environment that suits your preferences and work style. You can arrange your spaces based on priority, frequency of use, or any other criteria that make sense for your workflow.
- Easier App Navigation: By assigning apps to specific spaces, you can quickly locate and access them. This can be particularly helpful when you have numerous applications open at once. Instead of searching through a cluttered desktop or using the application switcher, you can switch directly to the required space to access the desired app.
Overall, assigning apps to open in specific desktop spaces not only enhances your organization and focus, but also streamlines your work process. By segregating your apps into different spaces, you can create a more efficient and tailored workspace that maximizes your productivity and minimizes distractions.
How to Assign Mac Apps to Open in a Specific Desktop Space
If you’re ready to set up your Mac apps to open in a specific desktop space, follow these simple steps:
- Step 1: Open Mission Control: To begin, open Mission Control on your Mac. You can do this by pressing the F3 key on your keyboard, or by using a four-finger swipe upwards on your trackpad.
- Step 2: Create or Navigate to the Desired Desktop Space: Once in Mission Control, you can create a new desktop space by clicking the “+” button in the top right corner of the screen. Alternatively, you can navigate to an existing desktop space by clicking on it.
- Step 3: Open the App you want to Assign: Now, open the application that you want to assign to the current desktop space. You can do this by clicking on the app icon in your dock, using Spotlight search, or locating it in your Applications folder.
- Step 4: Assign the App to the Current Desktop Space: With the application open, right-click on its icon in the dock and hover over the “Options” menu. From the dropdown menu, select “Assign To” and choose “This Desktop” to assign the app to the current desktop space.
That’s it! You have successfully assigned the app to the specific desktop space. Repeat these steps for any other applications you wish to assign to different spaces on your Mac.
By following these simple instructions, you can customize your desktop spaces and ensure that specific apps open in the desired workspace. This allows for a more organized and efficient work environment, saving you time and improving your overall productivity.
Step 1: Open Mission Control
Opening Mission Control is the first step to assigning Mac apps to a specific desktop space. Mission Control is a powerful feature available on macOS that allows you to easily manage and navigate between multiple open windows and desktop spaces. Here’s how you can open Mission Control:
- Option 1: Keyboard Shortcut
- Option 2: Trackpad Gesture
- Option 3: Hot Corner
You can open Mission Control by pressing the F3 key on your keyboard. This key is usually located in the top row of your keyboard, labeled with an icon representing several windows stacked on top of each other. Simply press the F3 key, and Mission Control will open, displaying all the open windows and desktop spaces on your Mac.
If you’re using a MacBook or a Mac with a trackpad, you can also open Mission Control using a trackpad gesture. Place three fingers on the trackpad and swipe upwards. This gesture will open Mission Control, providing you with an overview of all the open windows and desktop spaces on your Mac.
If you prefer a more customized approach, you can set up a hot corner to open Mission Control. Navigate to System Preferences, click on “Mission Control,” and then select the “Hot Corners” button. From there, you can assign one of the corners of your screen to activate Mission Control when you move the cursor to that corner.
Opening Mission Control allows you to see all your open windows and navigate between different desktop spaces. This step is crucial for assigning Mac apps to a specific desktop space, as it provides the necessary foundation for organizing your workspace and enhancing your productivity.
Step 2: Create or Navigate to the Desired Desktop Space
After opening Mission Control, the next step in assigning Mac apps to a specific desktop space is to create a new space or navigate to the desired one. This allows you to designate a dedicated workspace for the app you want to assign. Here’s how you can create or navigate to the desired desktop space:
- Create a New Desktop Space:
- Navigate to an Existing Desktop Space:
To create a new desktop space, look for the “+” button located in the top-right corner of the Mission Control screen. Alternatively, you can use the keyboard shortcut Control + Up Arrow. Clicking the “+” button or using the keyboard shortcut will create a blank desktop space for you to assign apps to.
If you already have multiple desktop spaces set up and want to assign an app to one of them, simply click on the desired desktop space in the Mission Control screen. You can navigate between existing desktop spaces by using the trackpad gesture of swiping left or right with three fingers, or by using the keyboard shortcut Control + Left Arrow or Control + Right Arrow.
Creating a new desktop space or navigating to the desired one allows you to establish a dedicated workspace for the app you want to assign. This separation helps you to stay organized and focused, especially when working with multiple applications simultaneously. By designating specific desktop spaces, you can streamline your workflow and optimize your productivity.
Step 3: Open the App you want to Assign
Once you have created or navigated to the desired desktop space in Mission Control, the next step in assigning Mac apps to a specific desktop space is to open the app that you want to assign. Here is how you can do it:
- Click on the App Icon:
- Use Spotlight Search:
To open the app that you want to assign to the current desktop space, locate its icon either on your dock, in the Applications folder, or through Spotlight search. Once you find the app, simply click on its icon to launch it.
If you have numerous apps installed or if you prefer a quick way to launch the app, you can use Spotlight search. Access Spotlight by clicking on the magnifying glass icon in the top-right corner of your screen or by pressing Command + Space. Start typing the name of the app, and Spotlight will display relevant search results. Use the arrow keys to highlight the app you want to open, then press Enter to launch it.
By opening the app that you want to assign, you ensure that it is currently active and ready to be assigned to the specific desktop space. This step allows you to proceed with the next step of assigning the app to the current desktop space, thus organizing your workspace and enhancing your productivity.
Step 4: Assign the App to the Current Desktop Space
After opening the app that you want to assign to the current desktop space, the final step in assigning Mac apps to a specific desktop space is to make the assignment itself. This step ensures that the app will always open in the designated desktop space. Here’s how you can assign the app:
- Right-click on the App Icon:
- Assign the App to the Current Desktop Space:
With the app open, find its icon in the dock at the bottom of your screen. Right-click (or Control-click) on the app icon to open the contextual menu.
From the contextual menu, hover over the “Options” menu. A sub-menu will appear with various options. Select “Assign To” from the sub-menu, and then choose “This Desktop” to assign the app to the current desktop space. You may also see other options such as “All Desktops” or “None.”
Once you have selected “This Desktop,” the app is now assigned to the current desktop space. Every time you open this app, it will automatically open in the designated desktop space, helping you to maintain an organized and optimized workspace.
Repeat these steps for any other apps that you wish to assign to specific desktop spaces. By assigning apps to their respective spaces, you can stay focused on your tasks, easily switch between applications, and maintain a more streamlined and efficient workflow.
How to Assign Mac Apps to Open in All Spaces
In addition to assigning Mac apps to specific desktop spaces, you may also want certain apps to open in all spaces. This can be useful for apps that you frequently refer to or need quick access to, regardless of the desktop space you are currently working in. Here’s how you can assign apps to open in all spaces:
- Step 1: Open System Preferences:
- Step 2: Click on “Mission Control”:
- Step 3: Check the Box beside “Displays have separate Spaces”:
- Step 4: Open the App you want to Assign:
- Step 5: Assign the App to All Spaces:
To begin, click on the Apple logo in the top-left corner of your screen and select “System Preferences” from the dropdown menu.
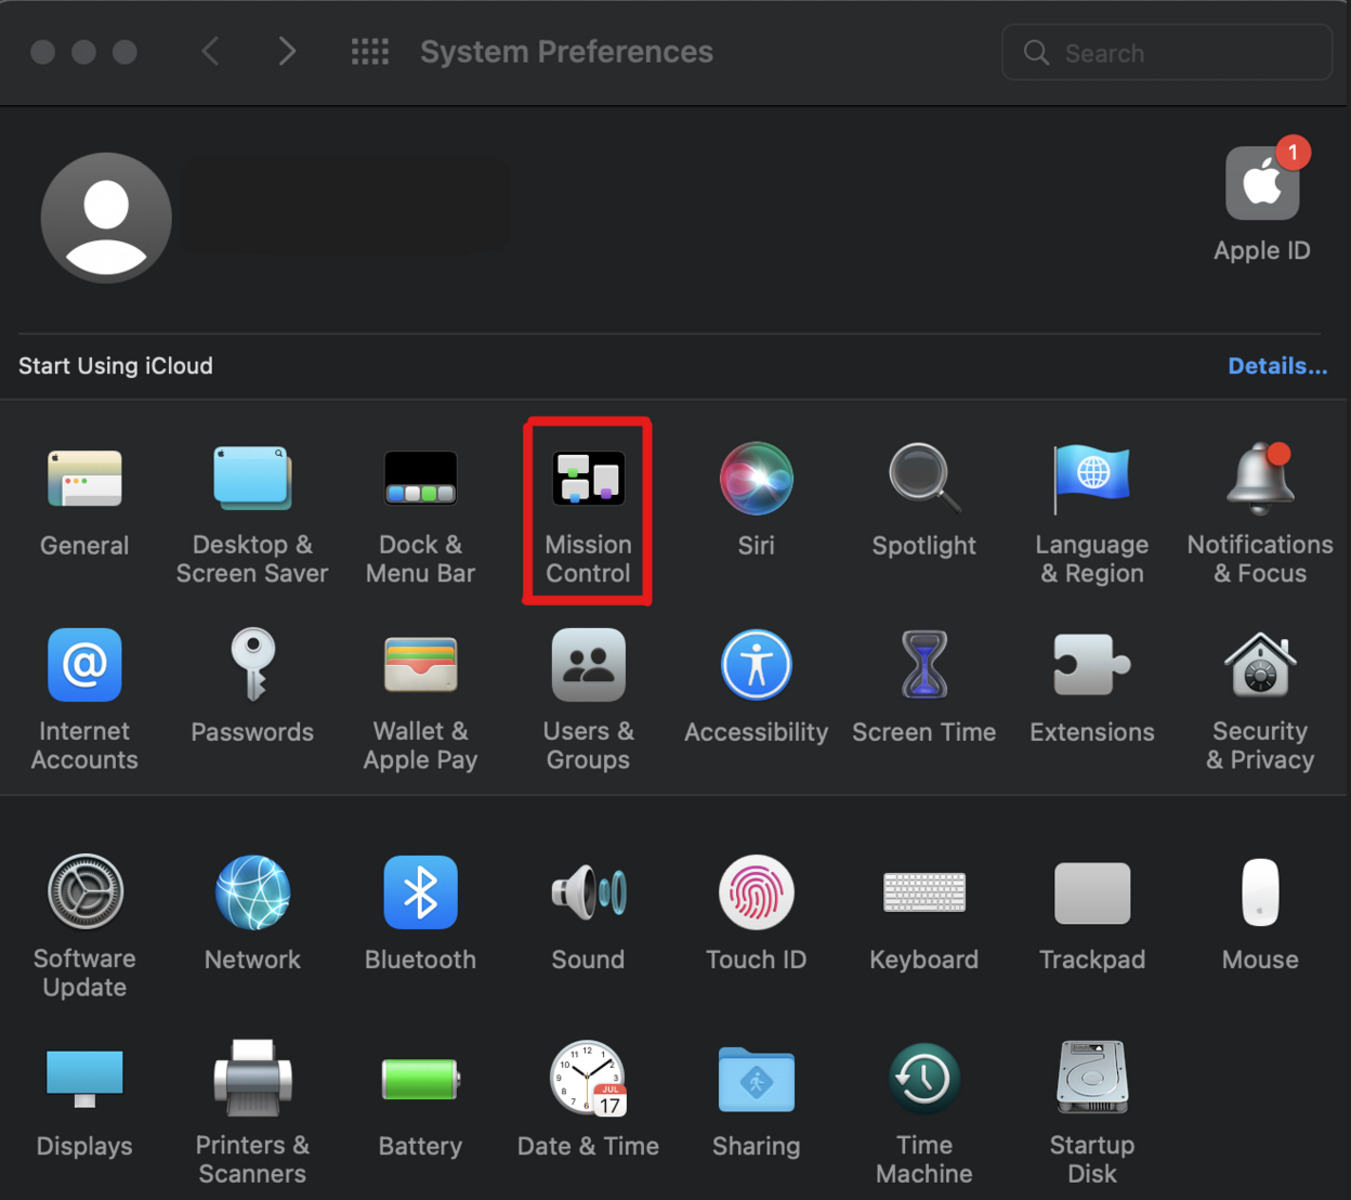
In the System Preferences window, locate and click on the “Mission Control” icon. It is represented by four rectangles arranged in a grid.
In the Mission Control preferences window, you will see an option that says “Displays have separate Spaces.” Make sure to enable this feature by checking the box beside it. This setting allows apps to appear in all spaces, across multiple displays if you have them connected.
Now, open the app that you want to assign to all spaces. You can locate the app icon in the dock, use Spotlight search, or find it in the Applications folder.
With the app open, right-click (or Control-click) on its dock icon. From the contextual menu, hover over the “Options” menu, and then select “Assign To” from the sub-menu. Finally, choose “All Desktops” to assign the app to open in all spaces.
By following these steps, you can designate certain apps to open in all spaces on your Mac. Whether you need constant access to your email client, messaging app, or any other frequently used application, assigning them to all spaces ensures that they are readily available no matter which desktop space you are currently working in.
Step 1: Open System Preferences
To assign Mac apps to open in all spaces, the first step is to open System Preferences on your Mac. System Preferences is where you can customize various settings and preferences to personalize your Mac experience. Here’s how you can access it:
- Click on the Apple logo:
- Select “System Preferences”:
In the top-left corner of your screen, click on the Apple logo. A dropdown menu will appear.
From the dropdown menu, locate and click on the option labeled “System Preferences.” This will open the System Preferences window.
Alternatively, you can use the Spotlight search feature to directly access System Preferences by pressing Command + Spacebar, typing “System Preferences,” and hitting Enter. This allows for a quick way to open System Preferences without navigating through the Apple menu.
Opening System Preferences is the first step towards assigning Mac apps to open in all spaces. It is the central hub where you can access a wide range of settings and preferences to customize your Mac to your liking.
Step 2: Click on “Mission Control”
After opening System Preferences, the next step in assigning Mac apps to open in all spaces is to click on the “Mission Control” icon. Mission Control is where you can manage your desktop spaces, windows, and other multitasking features on your Mac. Here’s how you can access it:
- Locate and Click on “Mission Control”:
- Alternative Method:
In the System Preferences window, you will see a grid of icons representing different settings and preferences. Look for and click on the icon labeled “Mission Control.” It is represented by four rectangles arranged in a grid.
If you prefer a quicker way to access Mission Control, you can use the Spotlight search feature. Simply press Command + Spacebar to open Spotlight, type “Mission Control” in the search bar, and hit Enter. Spotlight will directly take you to the Mission Control settings in System Preferences.
Clicking on the “Mission Control” icon in System Preferences will open a new window where you can configure various settings and options related to multitasking and desktop spaces on your Mac. This step allows you to proceed further with assigning apps to open in all spaces, enhancing your workflow and productivity.
Step 3: Check the Box beside “Displays have separate Spaces”
After accessing the Mission Control settings in System Preferences, the next step in assigning Mac apps to open in all spaces is to check the box beside “Displays have separate Spaces.” This option allows apps to appear in all spaces, even if you have multiple displays connected to your Mac. Here’s how you can do it:
- Locate the “Displays have separate Spaces” Option:
- Check the Box:
In the Mission Control settings window, look for the option labeled “Displays have separate Spaces.” It should be a checkbox located towards the top of the window.
To enable apps to open in all spaces, simply click on the box beside “Displays have separate Spaces” to check it. When the box is checked, it indicates that each connected display will have its own set of desktop spaces, and apps can be assigned to appear across all of them.
By checking the box beside “Displays have separate Spaces,” you allow your apps to appear in all spaces, providing a consistent experience across multiple displays. This step is essential for ensuring that the apps you want to assign to all spaces will be accessible and visible regardless of which desktop space or display you are currently working on.
Step 4: Open the App you want to Assign
After enabling the option to have separate spaces for displays and allowing apps to appear in all spaces, the next step in assigning Mac apps to open in all spaces is to open the app that you want to assign. Here’s how you can do it:
- Locate the App Icon:
- Use Spotlight Search:
To open the app that you want to assign to all spaces, find its icon either on your dock, in the Applications folder, or by using Spotlight search. Navigate to the location where the app is located and click on its icon to launch it.
If you prefer a quicker way to find and open the app, you can use the Spotlight search feature. Press Command + Spacebar to open Spotlight, then type the name of the app in the search bar. Spotlight will show you the search results, and you can directly click on the app icon to launch it.
Once the app is open, it is ready to be assigned to open in all spaces. This step ensures that the app will be accessible and visible across all desktop spaces and displays on your Mac, providing you with easy access no matter where you are working.
Repeat these steps for any other apps that you want to assign to open in all spaces. By doing so, you can create a consistent and uniform workspace where essential apps are always readily available, regardless of the desktop space or display you are currently using.
Step 5: Assign the App to All Spaces
After opening the app you want to assign to open in all spaces, the final step in assigning Mac apps to open in all spaces is to make the assignment itself. This step ensures that the app will always be visible and accessible, regardless of the desktop space or display you are currently using. Here’s how you can assign the app to all spaces:
- Right-click (or Control-click) on the App Icon:
- Select “Options” and “Assign To” in the Contextual Menu:
- Choose “All Desktops”:
Locate the app’s icon in the dock at the bottom of your screen. Right-click (or Control-click) on the app’s icon to open a contextual menu.
From the contextual menu, hover over the “Options” menu. A sub-menu will appear with various assignment options. Select “Assign To” from the sub-menu.
From the “Assign To” sub-menu, select “All Desktops” to assign the app to open in all spaces. This ensures that the app will appear in every desktop space and on every connected display.
By following these steps, you have assigned the app to open in all spaces on your Mac. It will now be accessible and visible across all desktop spaces, providing a consistent and convenient experience. This allows you to easily access and switch between the app without the need to navigate or switch desktop spaces.
Repeat these steps for any other apps that you want to assign to open in all spaces. By doing so, you can have the essential apps always at your fingertips, enabling a seamless workflow across your Mac’s desktop spaces and displays.
Benefits of Assigning Apps to Specific or All Spaces
Assigning Mac apps to specific desktop spaces or allowing them to open in all spaces offers several benefits that can greatly enhance your productivity and workflow. Here are some of the key advantages:
- Organization and Focus: Assigning apps to specific desktop spaces helps keep your workflow organized. By grouping related apps together, you can easily switch between tasks without distractions. Each desktop space can be dedicated to a specific project or type of work, allowing you to maintain focus and stay organized.
- Reduced Distractions: Assigning apps to specific spaces helps reduce distractions. By designating separate spaces for communication tools or entertainment apps, you can create a dedicated workspace for focused work. This separation allows you to maintain productivity and minimize interruptions.
- Efficient Multitasking: With apps assigned to different desktop spaces, multitasking becomes more efficient. You can switch between spaces to access specific apps, eliminating the need to constantly rearrange or resize windows. This streamlined workflow improves productivity and saves time.
- Customized Work Environment: Assigning apps to specific spaces empowers you to create a customized work environment. You can tailor each space with the apps and tools you need for specific tasks or projects. This customization enhances your workflow and creates an environment conducive to optimal productivity.
- Easier App Navigation: Assigning apps to specific spaces simplifies app navigation. Instead of hunting through multiple windows, you can switch directly to the relevant space to access the app you need. This streamlined process increases efficiency and minimizes distractions.
- Consistent Accessibility: Assigning apps to all spaces ensures consistent accessibility. These apps will be visible and accessible regardless of the desktop space or display you are currently using. This feature is especially useful for apps that you frequently refer to, such as communication tools or reference materials.
- Seamless Workflow: Assigning apps to specific or all spaces creates a seamless workflow. With apps readily available in their designated spaces, you can effortlessly navigate between tasks, switch between apps, and maintain a smooth and uninterrupted workflow.
By leveraging the ability to assign apps to specific desktop spaces or allowing them to open in all spaces, you can optimize your work environment, minimize interruptions, and improve your productivity. Experiment with these features to find the setup that works best for your specific tasks and workflow.