
Check Device Compatibility
Before setting up Apple Pay on your iPhone 11, it's crucial to ensure that your device is compatible with this convenient payment method. Apple Pay is supported on various Apple devices, including the iPhone, iPad, Apple Watch, and Mac. However, not all models within these product lines are equipped with the necessary hardware to enable Apple Pay.
To determine if your iPhone 11 is compatible with Apple Pay, follow these steps:
-
Check Device Model: First, confirm that you have an iPhone 11 or iPhone 11 Pro. Apple Pay is supported on these models, as well as on newer devices in the iPhone lineup. If you're unsure about your device model, you can find this information in the "Settings" app under "General" and "About."
-
Verify NFC Capability: Apple Pay relies on Near Field Communication (NFC) technology to facilitate contactless payments. Fortunately, the iPhone 11 is equipped with an NFC antenna, allowing it to interact with compatible payment terminals. This feature is essential for using Apple Pay in stores and other supported locations.
-
Ensure Secure Element: The iPhone 11 contains a dedicated chip called the Secure Element, which stores and encrypts payment information securely. This element is integral to the security of Apple Pay transactions, safeguarding your sensitive data during payment authorization.
By confirming these aspects, you can ascertain whether your iPhone 11 is ready to support Apple Pay. If your device meets these requirements, you're well-positioned to proceed with the setup process and enjoy the convenience of making secure, contactless payments with Apple Pay.
Remember, ensuring device compatibility is the first step toward leveraging the benefits of Apple Pay on your iPhone 11. With a compatible device in hand, you can look forward to a seamless and secure payment experience at participating merchants, both in-store and online.
Update iOS Software
Keeping your iPhone 11's iOS software up to date is essential for ensuring the smooth functioning of Apple Pay and accessing the latest features and security enhancements. Apple regularly releases updates to its iOS operating system, addressing bugs, improving performance, and introducing new functionalities. To update your iOS software and prepare your device for Apple Pay setup, follow these steps:
-
Check for Available Updates: Begin by navigating to the "Settings" app on your iPhone 11. Scroll down and tap on "General," then select "Software Update." Your device will then check for any available iOS updates. If an update is available, you will be prompted to download and install it.
-
Download and Install Update: If an iOS update is available, tap "Download and Install" to initiate the process. Ensure that your iPhone 11 is connected to a stable Wi-Fi network and has sufficient battery life or is connected to a power source. The update may take some time to download and install, depending on its size and your internet connection speed.
-
Enter Passcode: During the update installation, you may be required to enter your device passcode. This is a security measure to authenticate the installation process and protect your data.
-
Agree to Terms and Conditions: Once the update is downloaded, your iPhone 11 will prompt you to agree to the terms and conditions before proceeding with the installation. Review the terms and conditions, then tap "Agree" to continue.
-
Installation Process: The installation process will commence after agreeing to the terms and conditions. Your iPhone 11 will restart as part of the update process, and you may see a progress bar indicating the installation status.
-
Completion and Verification: After the installation is complete, your iPhone 11 will restart, and you will be running the latest version of iOS. To verify the successful update, you can revisit the "Software Update" section in the "Settings" app to ensure that your device is now running the most recent iOS version.
By updating your iPhone 11's iOS software, you are not only ensuring compatibility with Apple Pay but also benefiting from the latest performance improvements and security patches. This proactive approach helps to maintain the overall functionality and security of your device, providing a solid foundation for setting up and using Apple Pay seamlessly.
Add Credit or Debit Card
Adding your credit or debit card to Apple Pay is a straightforward process that empowers you to make secure and convenient transactions using your iPhone 11. By integrating your payment cards with Apple Pay, you can streamline your payment experience, both in-store and online, while benefiting from enhanced security features. Here's a detailed guide on how to add your credit or debit card to Apple Pay:
-
Access Wallet App: Begin by launching the Wallet app on your iPhone 11. This app serves as the central hub for managing your payment cards and passes within Apple Pay.
-
Tap the '+' Icon: Within the Wallet app, locate and tap the '+' icon, typically found in the upper-right corner of the screen. This action initiates the process of adding a new card to Apple Pay.
-
Choose Card Type: You will be prompted to select the type of card you wish to add. This includes options such as credit, debit, or prepaid cards. Select the appropriate category based on the card you intend to add.
-
Capture Card Details: Using your iPhone's camera, you can capture the details of your card, including the card number and expiration date. Alternatively, you can opt to enter the card details manually by selecting the "Enter Card Details Manually" option.
-
Enter Security Code: If capturing the card details via the camera, you will be prompted to enter the security code found on the back of your card. This additional security measure ensures that only the cardholder can add the card to Apple Pay.
-
Agree to Terms and Conditions: After entering the card details, you may be required to agree to the terms and conditions provided by your card issuer and Apple Pay. Review the terms and conditions, then proceed to accept them.
-
Card Verification: Depending on your card issuer, the verification process may vary. Some card issuers may require additional verification steps, such as receiving a one-time passcode via SMS or email to authenticate the card addition.
-
Completion and Confirmation: Once the card details are verified, your credit or debit card will be successfully added to Apple Pay. You will receive a confirmation message indicating that the card is ready for use with Apple Pay.
By following these steps, you can seamlessly add your credit or debit card to Apple Pay, expanding the versatility of your iPhone 11 as a secure payment tool. With your cards integrated into Apple Pay, you are poised to leverage the convenience and security of contactless payments, enhancing your overall transaction experience.
Verify Card with Bank
Verifying your card with the bank is a crucial step in the Apple Pay setup process, ensuring the security and legitimacy of the added payment method. This verification establishes a direct link between your credit or debit card and Apple Pay, enabling seamless and secure transactions. Here's a detailed guide on how to verify your card with the bank:
-
Check Verification Methods: Upon adding your card to Apple Pay, you may receive a prompt to verify the card with the issuing bank. The verification process typically involves confirming your identity as the cardholder and authorizing the card's usage with Apple Pay. Banks employ various verification methods, such as sending a one-time passcode via SMS, email, or through their mobile banking app.
-
Receive Verification Code: Depending on the bank's verification procedure, you will receive a unique verification code through the chosen communication channel. This code serves as a security measure to ensure that you have authorized the addition of the card to Apple Pay.
-
Enter Verification Code: Once you receive the verification code, navigate to the Wallet app on your iPhone 11. Access the card that requires verification and input the received code when prompted. This step validates your ownership of the card and confirms your intention to use it with Apple Pay.
-
Confirmation of Verification: After entering the verification code, the bank will authenticate the provided information and confirm the successful verification of your card with Apple Pay. This confirmation signifies that your card is now ready for secure and convenient transactions through Apple Pay.
-
Additional Verification Steps: In some cases, the bank may require additional verification steps to ensure the security of the card and the Apple Pay setup. This may involve confirming personal details, answering security questions, or using biometric authentication methods, depending on the bank's policies and security protocols.
By completing the card verification process with your bank, you establish a trusted connection between your payment card and Apple Pay, reinforcing the security measures implemented within the platform. This verification not only safeguards your financial information but also enhances the overall reliability and integrity of Apple Pay as a secure payment solution.
With your card successfully verified, you can confidently utilize Apple Pay for contactless transactions, both in physical stores and online, knowing that your added cards have undergone a stringent verification process, bolstering the security of your payment ecosystem.
Set Default Card
Setting a default card within Apple Pay streamlines the payment process, ensuring that your preferred card is automatically selected for transactions, saving you time and effort. By designating a default card, you can seamlessly make payments without the need to manually choose a card from your Wallet app. Here's a comprehensive guide on how to set your default card in Apple Pay on your iPhone 11.
-
Access Wallet App: Begin by opening the Wallet app on your iPhone 11. This app serves as the central hub for managing your payment cards and passes within Apple Pay.
-
Locate Default Card Settings: Within the Wallet app, navigate to the section where your added cards are displayed. Look for an option or setting that allows you to designate a default card for Apple Pay transactions.
-
Select Default Card: Once you've located the default card settings, tap on the option to set a default card. You will be presented with a list of your added cards, allowing you to choose the one you prefer to use as the default payment method.
-
Confirmation and Verification: After selecting your preferred card, the Wallet app may prompt you to confirm your choice. This confirmation step ensures that you have intentionally designated the selected card as your default payment method.
-
Completion and Confirmation: Upon confirming your selection, the chosen card will be set as the default within Apple Pay. You will receive a confirmation message indicating that the default card has been successfully updated.
By designating a default card in Apple Pay, you streamline your payment experience, especially in situations where expediency is paramount. Whether you're making in-store purchases or completing transactions within supported apps and websites, having a default card simplifies the process, allowing for swift and convenient payments.
With your default card set, you can enjoy the seamless functionality of Apple Pay, knowing that your preferred payment method is readily available for use. This feature not only enhances the efficiency of your payment interactions but also reflects Apple Pay's commitment to providing a user-friendly and intuitive payment ecosystem.
By following these steps, you can effortlessly set your default card within Apple Pay, optimizing your payment workflow and ensuring a hassle-free transaction experience on your iPhone 11.
Use Apple Pay in Stores
Utilizing Apple Pay in physical stores offers a seamless and secure payment experience, leveraging the convenience of contactless transactions while prioritizing user privacy and data security. With your iPhone 11 equipped with Apple Pay, you can confidently make purchases at a wide range of retail outlets, restaurants, and other establishments that support this innovative payment method. Here's a comprehensive guide on how to use Apple Pay in stores with your iPhone 11:
Step-by-Step Guide:
-
Access the Wallet App: To initiate a transaction using Apple Pay, unlock your iPhone 11 and open the Wallet app. This app serves as the central hub for managing your payment cards and initiating contactless payments.
-
Authenticate with Face ID or Touch ID: Depending on your iPhone 11 model, you will be prompted to authenticate the transaction using Face ID or Touch ID. This biometric authentication adds an extra layer of security, ensuring that only authorized users can proceed with the payment.
-
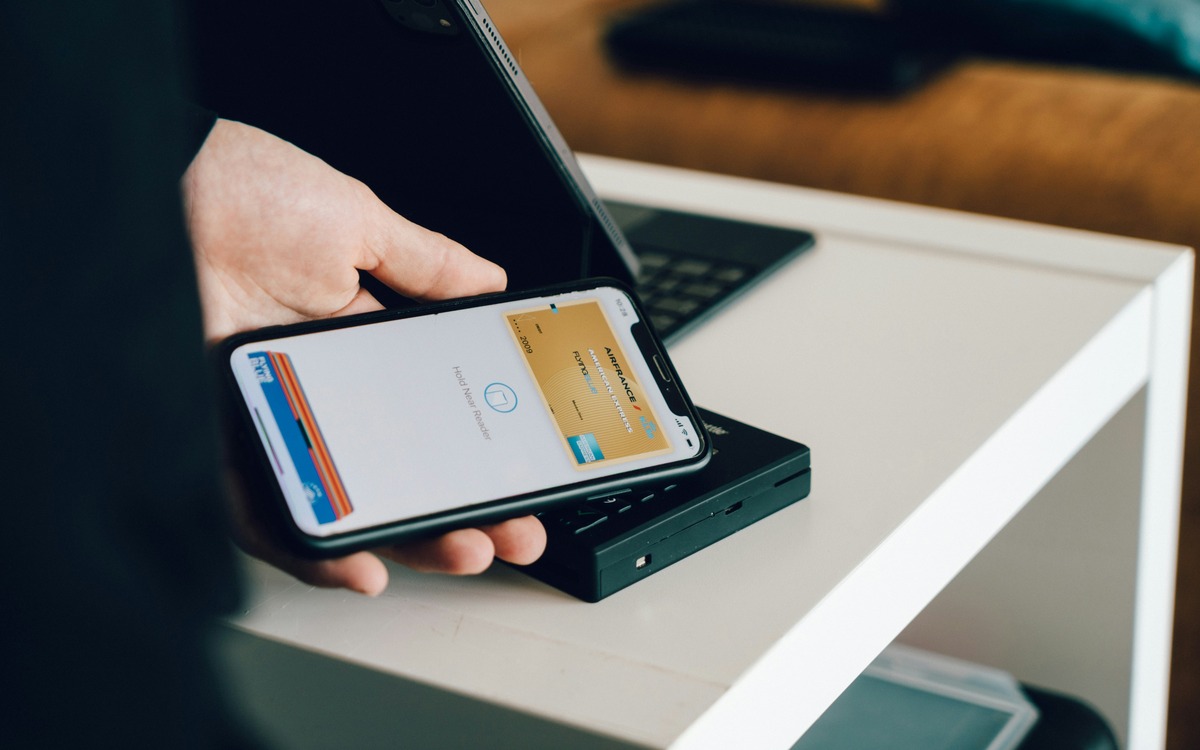
Hold Your Device Near the Contactless Reader: When prompted to pay, hold your iPhone 11 near the contactless reader at the point of sale. The device will detect the payment terminal using its Near Field Communication (NFC) technology, initiating the transaction process.
-
Verify the Transaction: Once your iPhone 11 is in close proximity to the contactless reader, your default card will be selected for the transaction. Verify the transaction details on your device's screen and, if necessary, confirm the payment using Face ID, Touch ID, or your device passcode.
-
Transaction Confirmation: Upon successful verification, your iPhone 11 will confirm the transaction, typically with a subtle vibration and a visual indication on the screen. The payment terminal will also display a confirmation of the completed transaction.
-
Collect Your Receipt: Depending on the store's policies, you may receive a digital receipt on your iPhone 11 for the completed transaction. Alternatively, you may be offered a printed receipt by the merchant.
By following these steps, you can seamlessly utilize Apple Pay for in-store transactions, streamlining the payment process and embracing the convenience of contactless payments. This modern payment method not only enhances the efficiency of your transactions but also prioritizes the security of your financial data, offering a secure and privacy-focused payment solution.
With Apple Pay, your iPhone 11 becomes a versatile and secure payment tool, allowing you to make swift and secure transactions at a myriad of physical retail locations. Embracing the ease and security of contactless payments, Apple Pay transforms the way you interact with merchants, offering a modern and streamlined payment experience.
Use Apple Pay in Apps and Websites
Integrating Apple Pay into apps and websites revolutionizes the online payment experience, offering users a seamless and secure method to complete transactions with unparalleled convenience. With Apple Pay enabled on your iPhone 11, you can effortlessly make purchases within supported apps and on participating websites, streamlining the checkout process and enhancing the overall user experience.
In Supported Apps:
When utilizing Apple Pay within supported apps on your iPhone 11, the payment process is streamlined, allowing for swift and secure transactions without the need to manually enter payment and shipping details. Here's a step-by-step guide on how to use Apple Pay within apps:
-
Select Apple Pay at Checkout: When ready to make a purchase within a supported app, choose the Apple Pay option at the checkout or payment screen.
-
Authenticate the Transaction: Depending on your iPhone 11 model, you will be prompted to authenticate the transaction using Face ID or Touch ID. This biometric authentication adds an extra layer of security, ensuring that only authorized users can proceed with the payment.
-
Verify and Complete the Transaction: After authenticating the transaction, your default card will be selected for the purchase. Verify the transaction details and, if necessary, confirm the payment using Face ID, Touch ID, or your device passcode.
-
Transaction Confirmation: Upon successful verification, the app will confirm the completed transaction, providing you with a seamless and secure payment experience without the hassle of manual data entry.
On Participating Websites:
When making purchases on participating websites using Apple Pay, the process is similarly streamlined, offering a secure and efficient checkout experience. Here's how to use Apple Pay on websites with your iPhone 11:
-
Select Apple Pay at Checkout: When ready to complete a purchase on a participating website, choose the Apple Pay option at the checkout or payment page.
-
Authenticate the Transaction: Similar to using Apple Pay in apps, you will be prompted to authenticate the transaction using Face ID or Touch ID, ensuring the security of the payment process.
-
Verify and Complete the Transaction: After authentication, your default card will be automatically selected for the transaction. Verify the details and, if required, confirm the payment using the provided biometric authentication method or passcode.
-
Transaction Confirmation: Upon successful verification, the website will confirm the completed transaction, providing you with a seamless and secure payment experience without the need to manually input payment and shipping details.
By leveraging Apple Pay in apps and on websites, iPhone 11 users can enjoy a frictionless and secure payment experience, eliminating the need for manual data entry and enhancing the overall convenience of online transactions. This modern payment method not only streamlines the checkout process but also prioritizes the security and privacy of user data, offering a seamless and secure payment solution for the digital age.
Manage Apple Pay Settings
Managing Apple Pay settings on your iPhone 11 allows you to customize and control various aspects of your payment experience, ensuring that Apple Pay aligns with your preferences and security requirements. By accessing and adjusting these settings, you can optimize the functionality and security of Apple Pay, tailoring it to suit your specific needs. Here's a comprehensive overview of the key elements within the Apple Pay settings and how you can manage them effectively.
Add and Remove Cards
Within the Apple Pay settings, you have the flexibility to add new payment cards, such as credit or debit cards, and remove existing ones as needed. This feature enables you to keep your payment options up to date and manage the cards associated with your Apple Pay account seamlessly.
Manage Transaction Preferences
Apple Pay settings allow you to configure transaction preferences, including the use of default cards, transaction notifications, and authentication methods. You can specify your preferred default card for transactions, customize notification settings for transaction alerts, and manage the authentication methods required for payments.
Review Transaction History
By accessing the Apple Pay settings, you can review your transaction history, providing insights into your recent purchases made using Apple Pay. This feature offers transparency and visibility into your payment activity, empowering you to monitor and track your transactions conveniently.
Access Security and Privacy Settings
The Apple Pay settings encompass robust security and privacy features, allowing you to manage settings related to device-specific security, card data protection, and privacy controls. You can configure security options such as device passcode requirements, manage card data encryption, and access privacy settings to safeguard your payment information.
Customize Wallet Display
Apple Pay settings enable you to customize the display of your digital wallet, offering options to organize and prioritize your payment cards and passes. You can arrange the layout of your digital wallet, manage card details, and personalize the visual presentation of your payment instruments.
Manage Contactless Payment Methods
Within the Apple Pay settings, you can manage contactless payment methods, including transit cards and other supported payment solutions. This feature allows you to integrate and manage additional contactless payment options, expanding the versatility of your iPhone 11 as a secure payment tool.
By actively managing the Apple Pay settings on your iPhone 11, you can tailor the payment experience to align with your preferences and security standards, ensuring a seamless and secure payment ecosystem. These settings empower you to customize your payment methods, enhance security measures, and optimize the functionality of Apple Pay, ultimately delivering a personalized and secure payment experience tailored to your needs.